2023 NISSAN SENTRA steering
[x] Cancel search: steeringPage 279 of 556

Intelligent Driver Alertness (I-DA)...............5-121
Intelligent Driver Alertness system
operation .................................. 5-121
How to enable/disable the Intelligent
Driver Alertness (I-DA) system ..............5-122
Intelligent Driver Alertness (I-DA)
system limitations ......................... 5-123
Break-in schedule ............................. 5-125
Fuel efficient driving tips .......................5-125
Increasing fuel economy ......................5-126
Parking/parking on hills .......................5-127
Power steering ................................ 5-128
Brake system ................................. 5-129
Brake precautions .......................... 5-129
Anti-lock Braking System (ABS) .............5-129
Brake Assist ................................ 5-131
Vehicle Dynamic Control (VDC) system ........5-131
Rise-up and build-up ....................... 5-132
Brake force distribution ....................5-132
Chassis Control ............................... 5-133Intelligent Trace Control
....................5-133
Active Ride Control ......................... 5-134
Intelligent Engine Brake ....................5-134
Hill start assist system ........................5-135
Rear Sonar System (RSS) ......................5-135
System operation .......................... 5-136
How to enable/disable the sonar
system ..................................... 5-138
Sonar limitations ........................... 5-140
System temporarily unavailable ............5-140
System maintenance ......................5-140
Cold weather driving .......................... 5-141
Freeing a frozen door lock ..................5-141
Antifreeze .................................. 5-141
Battery..................................... 5-141
Draining of coolant water ..................5-141
Tire equipment ............................. 5-141
Special winter equipment ..................5-142
Driving on snow or ice ......................5-142
Engine
block heater (if so equipped) ........5-142
Page 283 of 556
•If the low tire pressure warning light
illuminates while driving, avoid sud-
den steering maneuvers or abrupt
braking, reduce vehicle speed, pull
off the road to a safe location and
stop the vehicle as soon as possible.
Driving with under-inflated tires may
permanently damage the tires and
increase the likelihood of tire failure.
Serious vehicle damage could occur
and may lead to an accident and
could result in serious personal in-
jury. Check the tire pressure for all
four tires. Adjust the tire pressure to
the recommended COLD tire pres-
sure shown on the Tire and Loading
Information label to turn the low tire
pressure warning light off. If you have
a flat tire, replace it with a spare tire
as soon as possible. For additional
information on changing a flat tire,
see “Flat tire” (P. 6-3). •
When using a wheel without the
TPMS such as the spare tire, when a
spare tire is mounted or a wheel is
replaced, the TPMS will not function
and the low tire pressure warning
light will flash for approximately 1
minute. The light will remain on af ter
1 minute. Have your tires replaced
and/or TPMS reset as soon as pos-
sible. It is recommended that you
visit a NISSAN dealer for this service.
• Replacing tires with those not origi-
nally specified by NISSAN could af-
fect the proper operation of the
TPMS.
• Do not inject any tire liquid or aerosol
tire sealant into the tires, as this may
cause a malfunction of the tire pres-
sure sensors.
CAUTION
Do not place metalized film or any
metal parts (antenna, etc.) on the win-
dows. This may cause poor reception of
the signals from the tire pressure sen-
sors, and the TPMS will not function
properly. Some devices and transmitters may tem-
porarily interfere with the operation of the
TPMS and cause the low tire pressure
warning light to illuminate.
Some examples are:
• Facilities or electric devices using similar
radio frequencies are near the vehicle.
• If a transmitter set to similar frequencies is being used in or near the vehicle.
• If a computer (or similar equipment) or a DC/AC converter is being used in or near
the vehicle.
The low tire pressure warning light may
illuminate in the following cases:
• If the vehicle is equipped with a wheel and tire without TPMS.
• If the TPMS has been replaced and the ID has not been registered.
• If the wheel is not originally specified by NISSAN.
Starting and driving5-7
Page 285 of 556
If the Easy-Fill Tire Alert is not working, use a
tire pressure gauge.
AVOIDING COLLISION AND
ROLLOVER
WARNING
Failure to operate this vehicle in a safe
and prudent manner may result in loss
of control or an accident.
Be alert and drive defensively at all times.
Obey all traffic regulations. Avoid excessive
speed, high speed cornering, or sudden
steering maneuvers, because these driving
practices could cause you to lose control of
your vehicle.
As with any vehicle, loss of control could
result in a collision with other vehicles or
objects or cause the vehicle to roll over,
particularly if the loss of control causes
the vehicle to slide sideways.
Be attentive at all times, and avoid driving
when tired. Never drive when under the in-
fluence of alcohol or drugs (including pre-
scription or over-the-counter drugs which
may cause drowsiness). Always wear your
seat belt as outlined in the “Safety – Seats,
seat belts and supplemental restraint sys- tem” section of this manual, and also in-
struct your passengers to do so.
Seat belts help reduce the risk of injury in
collisions and rollovers.
In a rollover crash, an unbelted person is
significantly more likely to die than a
person wearing a seat belt.
OFF-ROAD RECOVERY
While driving, the right side or lef t side
wheels may unintentionally leave the road
surface. If this occurs, maintain control of
the vehicle by following the procedure be-
low. Please note that this procedure is only
a general guide. The vehicle must be driven
as appropriate based on the conditions of
the vehicle, road and traffic.
1. Remain calm and do not overreact.
2. Do not apply the brakes.
3. Maintain a firm grip on the steering
wheel with both hands and try to hold a
straight course.
4. When appropriate, slowly release the ac- celerator pedal to gradually slow the
vehicle. 5. If there is nothing in the way, steer the
vehicle to follow the road while vehicle
speed is reduced. Do not attempt to
drive the vehicle back onto the road sur-
face until vehicle speed is reduced.
6. When it is safe to do so, gradually turn the steering wheel until both tires return
to the road surface. When all tires are on
the road surface, steer the vehicle to
stay in the appropriate driving lane.
• If you decide that it is not safe to return the vehicle to the road surface based
on vehicle, road or traffic conditions,
gradually slow the vehicle to a stop in
a safe place off the road.
RAPID AIR PRESSURE LOSS
Rapid air pressure loss or a “blow-out” can
occur if the tire is punctured or is damaged
due to hitting a curb or pothole. Rapid air
pressure loss can also be caused by driving
on under-inflated tires.
Rapid air pressure loss can affect the han-
dling and stability of the vehicle, especially
at highway speeds.
Help prevent rapid air pressure loss by
maintaining the correct air pressure and
visually inspecting the tires for wear and
damage. For additional information, see
Starting and driving5-9
Page 286 of 556
“Wheels and tires” (P. 6-3). If a tire rapidly
loses air pressure or “blows-out” while driv-
ing, maintain control of the vehicle by fol-
lowing the procedure below. Please note
that this procedure is only a general guide.
The vehicle must be driven as appropriate
based on the conditions of the vehicle, road
and traffic.
WARNING
If there is a sudden loss of tire air pres-
sure, the vehicle will generally move or
pull in the direction of the flat tire. In
this situation, losing control of the ve-
hicle may cause a collision and result in
personal injury.
To help avoid loss of control:
• Do not rapidly apply the brakes.
• Do not rapidly release the accelerator
pedal.
• Do not rapidly turn the steering
wheel.
1. Remain calm and do not overreact.
2. Maintain a firm grip on the steering wheel with both hands and try to hold a
straight course. 3. When appropriate, slowly release the ac-
celerator pedal to gradually slow the
vehicle.
4. Gradually steer the vehicle to a safe lo- cation off the road and away from traffic
if possible.
5. Lightly apply the brake pedal to gradu- ally stop the vehicle.
6. Turn on the hazard warning flashers and contact a roadside emergency service
to change the tire. For additional infor-
mation, see “Changing a flat tire” (P. 6-3 ).
DRINKING ALCOHOL/DRUGS AND
DRIVING
WARNING
Never drive under the influence of alco-
hol or drugs. Alcohol in the blood-
stream reduces coordination, delays
reaction time and impairs judgement.
Driving af ter drinking alcohol increases
the likelihood of being involved in an
accident injuring yourself and others.
Additionally, if you are injured in an ac-
cident, alcohol can increase the sever-
ity of the injury. NISSAN is committed to safe driving. How-
ever, you must choose not to drive under
the influence of alcohol. Every year thou-
sands of people are injured or killed in
alcohol-related collisions. Although the lo-
cal laws vary on what is considered to be
legally intoxicated, the fact is that alcohol
affects all people differently and most
people underestimate the effects of
alcohol.
Remember, drinking and driving don't mix!
That is true for drugs (over-the-counter,
prescription) and illegal drugs, too. Don't
drive if your ability to operate your vehicle is
impaired by alcohol, drugs, or some other
physical condition.
5-10Starting and driving
Page 295 of 556

Shif t lock release
If the battery charge is low or discharged,
the shif t lever may not be moved from the
P (Park) position even with the brake pedal
depressed and the shif t lever button
pressed.
It will be necessary to jump start or have
your battery charged. For additional infor-
mation, see “Jump starting” (P. 6-9). It is rec-
ommended that you contact a NISSAN
dealer or a professional towing service.To move the shif t lever, complete the fol-
lowing procedure:
1. Push the ignition switch to the LOCK
position.
2. Apply the parking brake.
3. Using a protective cloth on the tip of a 3 mm screwdriver, remove the shif t lock
release cover.
• If available, a plastic trim tool can also be used.
4. Insert the small screwdriver in the shif t lock release slot and push down.
5. Move the shif t lever to the N (Neutral) position while holding down the shif t
lock release.
6. Push the ignition switch to the ON posi- tion to unlock the steering wheel. Now
the vehicle may be moved to the desired
location.
If the shif t lever cannot be moved out of P
(Park), have the transmission checked as
soon as possible. It is recommended that
you visit a NISSAN dealer for this service.
WARNING
If the shif t lever cannot be moved from
the P (Park) position while the engine is
running and the brake pedal is de-
pressed, the stop lights may not work.
Malfunctioning stop lights could cause
an accident injuring yourself and
others.
LSD3739
Starting and driving5-19
Page 305 of 556
WARNING
Failure to follow the warnings and in-
structions for proper use of the LDW
system could result in serious injury or
death.
• This system is only a warning device
to inform the driver of a potential un-
intended lane departure. It will not
steer the vehicle or prevent loss of
control. It is the driver’s responsibility
to stay alert, drive safely, keep the
vehicle in the traveling lane, and be in
control of the vehicle at all times. The LDW system will operate when the ve-
hicle is driven at speeds of approximately
37 mph (60 km/h) and above, and only
when the lane markings are clearly visible
on the road.
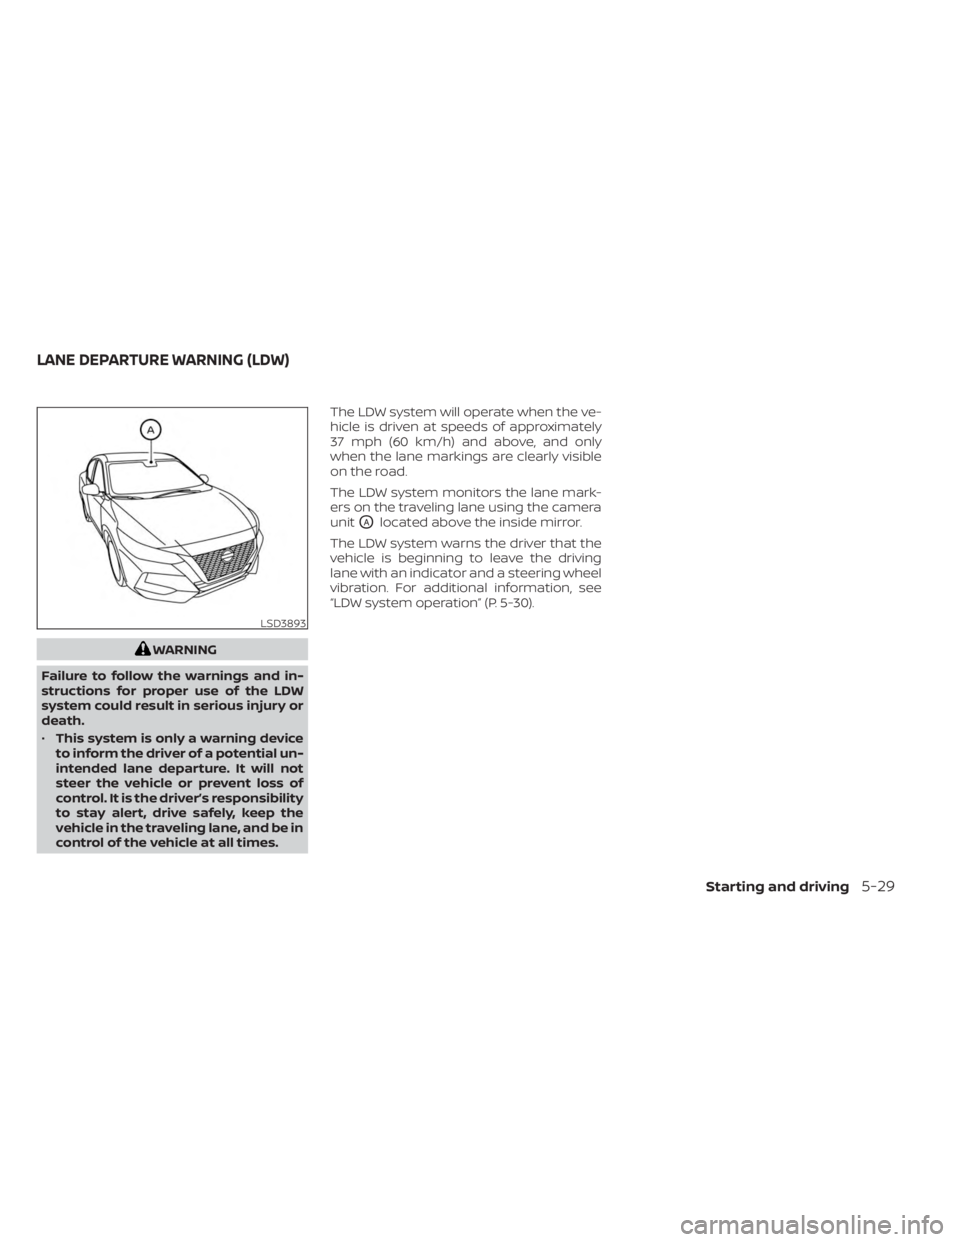
The LDW system monitors the lane mark-
ers on the traveling lane using the camera
unit
OAlocated above the inside mirror.
The LDW system warns the driver that the
vehicle is beginning to leave the driving
lane with an indicator and a steering wheel
vibration. For additional information, see
“LDW system operation” (P. 5-30).
LSD3893
LANE DEPARTURE WARNING (LDW)
Starting and driving5-29
Page 307 of 556
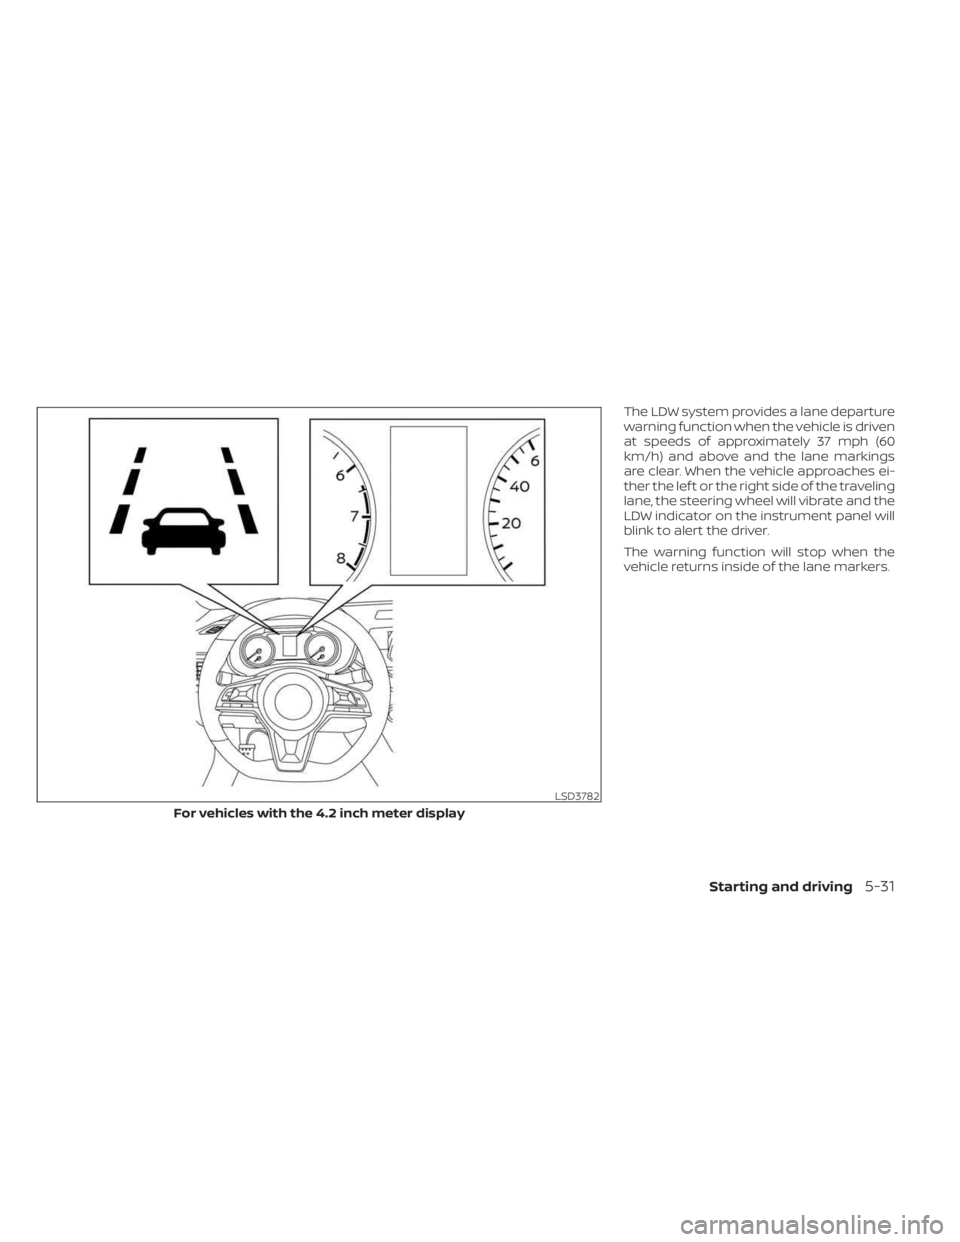
The LDW system provides a lane departure
warning function when the vehicle is driven
at speeds of approximately 37 mph (60
km/h) and above and the lane markings
are clear. When the vehicle approaches ei-
ther the lef t or the right side of the traveling
lane, the steering wheel will vibrate and the
LDW indicator on the instrument panel will
blink to alert the driver.
The warning function will stop when the
vehicle returns inside of the lane markers.
LSD3782
For vehicles with the 4.2 inch meter display
Starting and driving5-31
Page 342 of 556
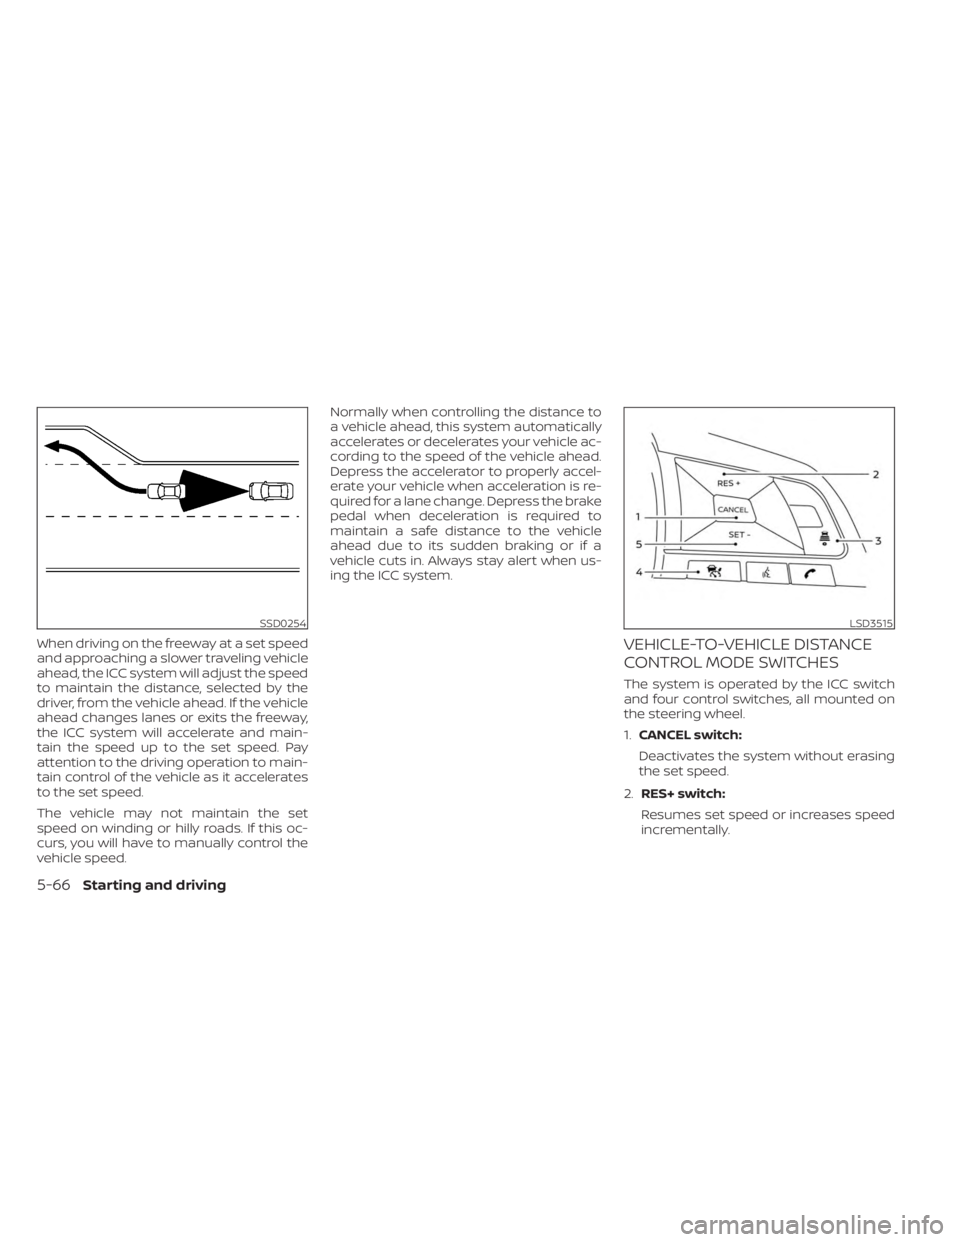
When driving on the freeway at a set speed
and approaching a slower traveling vehicle
ahead, the ICC system will adjust the speed
to maintain the distance, selected by the
driver, from the vehicle ahead. If the vehicle
ahead changes lanes or exits the freeway,
the ICC system will accelerate and main-
tain the speed up to the set speed. Pay
attention to the driving operation to main-
tain control of the vehicle as it accelerates
to the set speed.
The vehicle may not maintain the set
speed on winding or hilly roads. If this oc-
curs, you will have to manually control the
vehicle speed.Normally when controlling the distance to
a vehicle ahead, this system automatically
accelerates or decelerates your vehicle ac-
cording to the speed of the vehicle ahead.
Depress the accelerator to properly accel-
erate your vehicle when acceleration is re-
quired for a lane change. Depress the brake
pedal when deceleration is required to
maintain a safe distance to the vehicle
ahead due to its sudden braking or if a
vehicle cuts in. Always stay alert when us-
ing the ICC system.VEHICLE-TO-VEHICLE DISTANCE
CONTROL MODE SWITCHES
The system is operated by the ICC switch
and four control switches, all mounted on
the steering wheel.
1.
CANCEL switch:
Deactivates the system without erasing
the set speed.
2. RES+ switch:
Resumes set speed or increases speed
incrementally.
SSD0254LSD3515
5-66Starting and driving