2023 NISSAN SENTRA manual transmission
[x] Cancel search: manual transmissionPage 115 of 556
Rear seat belt reminder
This warning appears for 35 seconds af ter
the ignition is placed in the ON position and
the engine is started.
This warning message shows the status of
the three rear seat belts. When one of the
rear seat belts are buckled, the corre-
sponding rear seat belt indicator will ap-
pear grey. When one of the rear seat belts
are unbuckled, the corresponding rear seat
belt indicator will appear red.
Af ter a change in buckle status, a chime will
sound and the warning will appear for an-
other 35 seconds.
Release Parking Brake
This warning appears when the parking
brake is set and the vehicle is driven.
Reminder: Turn OFF
Headlights
This warning appears when the headlights
are lef t in the ON position when exiting the
vehicle. Place the headlight switch in the
OFF or AUTO position. For additional infor-
mation, see “Headlight and turn signal
switch” (P. 2-52).
Shif t to Park
This warning appears when the ignition
switch is in the AUTO ACC or OFF position
and the shif t lever is not in the P (Park)
position. Also, a chime sounds when the
ignition switch is in the AUTO ACC or OFF
position.
If this warning appears, move the shif t lever
to the P (Park) position and start the engine.
Shipping Mode On Push Storage Fuse
This warning may appear if the extended
storage switch is not pushed in. When this
warning appears, push in the extended
storage switch to turn off the warning. For
additional information, see “Extended stor-
age switch” (P. 2-65), and/or “Fuses” (P. 8-20).
Tire Pressure Low - Add Air
This warning appears when the low tire
pressure warning light in the meter illumi-
nates and low tire pressure is detected. The
warning appears each time the ignition
switch is placed in the ON position as long
as the low tire pressure warning light re-
mains illuminated. If this warning appears,
stop the vehicle and adjust the tire pres-
sures of all four tires to the recommended
COLD tire pressure shown on the Tire andLoading Information label. For additional
information, see “Low tire pressure warning
light” (P. 2-13) and “Tire Pressure Monitoring
System (TPMS)” (P. 5-5).
TPMS Error: See Owner’s Manual
This warning appears when there is an er-
ror with your TPMS. If this warning comes
on, have the system checked. It is recom-
mended that you visit a NISSAN dealer for
this service.
Transmission Shif t Position
indicator
This indicator shows the transmission shif t
position.
CVT (AT) hot Power reduced
This transmission has a high fluid tem-
perature protection mode. If the fluid tem-
perature becomes too high (for example,
climbing steep grades in high tempera-
tures with heavy loads, such as when tow-
ing a trailer), engine power and, under
some conditions, vehicle speed will be de-
creased automatically to reduce the
chance of transmission damage. Vehicle
speed can be controlled with the accelera-
tor pedal, but the engine and vehicle speed
may be reduced.
Instruments and controls2-29
Page 116 of 556
WARNING
When the high fluid temperature pro-
tection mode operation occurs, vehicle
speed may be gradually reduced. The
reduced speed may be lower than
other traffic, which could increase the
chance of a collision. Be especially
careful when driving. If necessary, pull
to the side of the road at a safe place
and allow the transmission to return to
normal operation; or have it repaired if
necessary.
CVT (AT) Malfunction
Service now
This warning appears when there is a
problem with the CVT system. If this
warning comes on, have the system
checked. It is recommended that you visit a
NISSAN dealer for this service.
Engine Oil Service due in – –
–km
This distance to oil change is displayed if
the distance to oil change is less than 100
km (62 miles).
Automatic Emergency
Braking with Pedestrian
Detection warning
indicator
This indicator appears along, with an au-
dible warning, when the system detects
the possibility of a forward collision.
For additional information, see “Automatic
Emergency Braking (AEB) with Pedestrian
Detection” (P. 5-92) and “Intelligent Forward
Collision Warning (I-FCW)” (P. 5-106).
BSW/RCTA indicator
This indicator appears when the BSW sys-
tem is engaged.
For additional information, see “Blind Spot
Warning (BSW)” (P. 5-36).
BSW/RCTA System
Malfunction: See Owner’s
Manual
This warning appears when the Blind Spot
Warning/Rear Cross Traffic Alert systems
are not functioning properly. For additional
information, see “Blind Spot Warning (BSW)”
(P. 5-36) and “Rear Cross Traffic Alert (RCTA)”
(P. 5-48).
Cruise control indicator
This indicator shows the cruise control sys-
tem status.
When cruise control is activated, a green
circle will appear to indicate it is set. The
vehicle information display will also display
the speed the cruise control was set at. If
you accelerate past the set speed, the
speed will blink until you either cancel
cruise control or go back to the set speed. If
cruise control is on and canceled, the
speed will be displayed to show the speed
the vehicle will return to if the resume but-
ton is activated.
Currently not available
This message may appear when the Intel-
ligent Cruise Control (ICC) system is
engaged.
Under the following conditions, the ICC sys-
tem is automatically canceled:
• When the VDC operates
• When a wheel slips
• When the VDC system is turned off
The above system cannot be used in some
situations (VDC operates, wheel slip and
VDC system is off.)
2-30Instruments and controls
Page 163 of 556
3 Pre-driving checks and adjustments
Keys.............................................3-2NISSAN Intelligent Key® .......................3-2
NISSAN Vehicle Immobilizer System
keys..........................................3-3
Doors ...........................................3-4
Locking with key .............................3-5
Locking with inside lock knob ................3-5
Locking with power door lock switch .........3-6
Automatic door locks ........................3-6
Child safety rear door lock .................... 3-7
NISSAN Intelligent Key® .......................... 3-7
Operating range .............................3-9
Door locks/unlocks precaution ...............3-9
NISSAN Intelligent Key® Operation ...........3-10
How to use the remote keyless entry
function ..................................... 3-13
Warning signals ............................. 3-15
Troubleshooting guide (Continuously
Variable Transmission only) .................3-16
Troubleshooting guide (Manual
Transmission only) .......................... 3-17
Remote Engine Start (if so equipped) ...........3-18
Remote Engine Start operating range .......3-18
Remote starting the vehicle .................3-19
Extending engine run time ..................3-19Canceling a Remote Engine Start
...........3-19
Conditions the Remote Engine Start will
notwork .................................... 3-20
Hood ........................................... 3-21
Trunk lid ........................................ 3-22
Trunk lid release switch .....................3-22
Interior trunk lid release .....................3-22
Interior trunk access ........................ 3-23
Fuel-filler door .................................. 3-23
Opener operation ........................... 3-23
Fuel-filler cap ................................ 3-24
Steering wheel ................................. 3-26
Tilt operation ................................ 3-26
Telescopic operation ........................ 3-26
Sun visors ...................................... 3-26
Vanity mirrors ............................... 3-27
Card holder ................................. 3-27
Mirrors ......................................... 3-28
Manual anti-glare rearview mirror
(if so equipped) ..............................
3-28
Automatic
anti-glare rearview mirror
(if so equipped) .............................. 3-28
Outside mirrors ............................. 3-29
Page 168 of 556
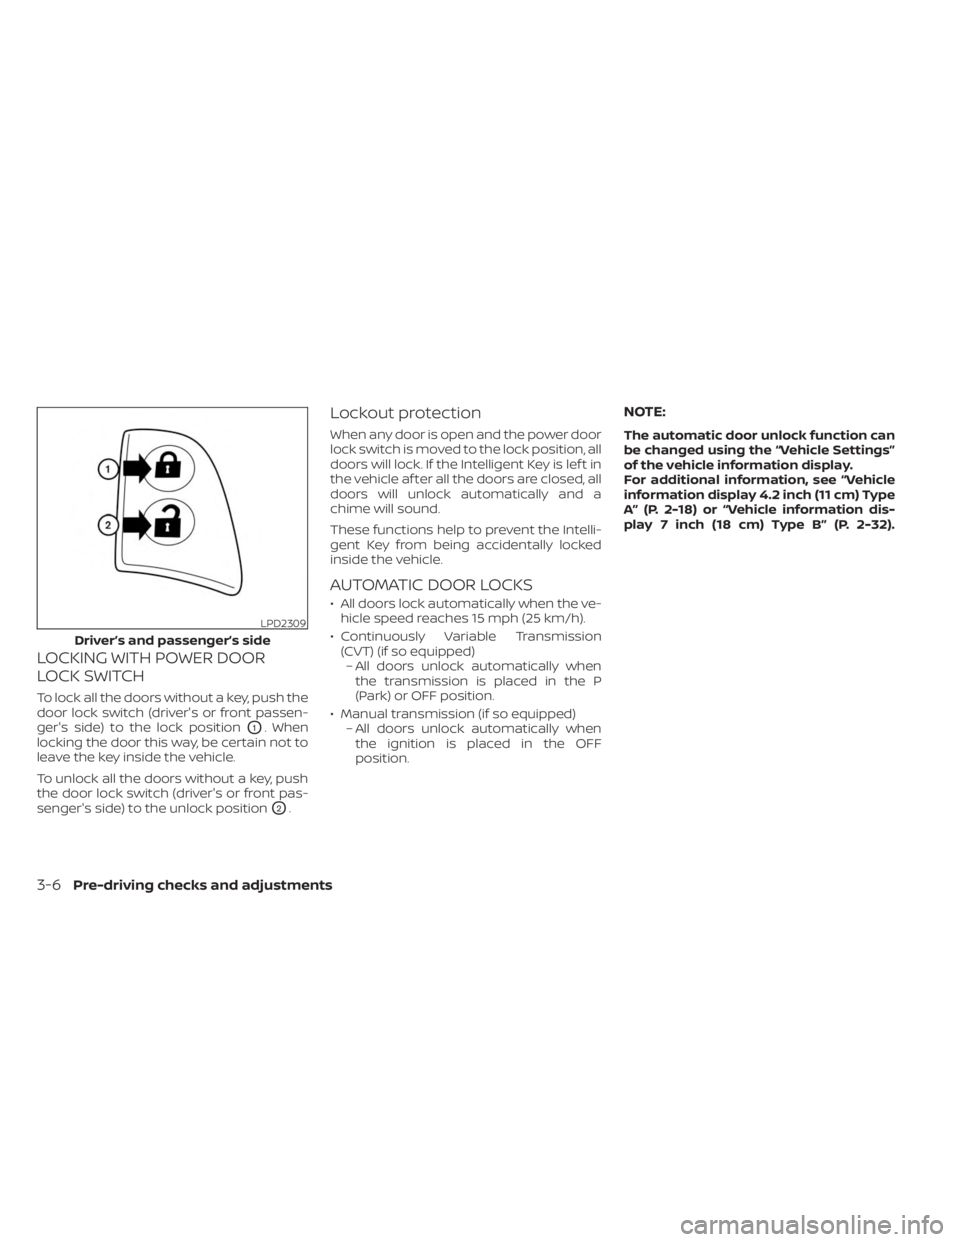
LOCKING WITH POWER DOOR
LOCK SWITCH
To lock all the doors without a key, push the
door lock switch (driver's or front passen-
ger's side) to the lock position
O1. When
locking the door this way, be certain not to
leave the key inside the vehicle.
To unlock all the doors without a key, push
the door lock switch (driver's or front pas-
senger's side) to the unlock position
O2.
Lockout protection
When any door is open and the power door
lock switch is moved to the lock position, all
doors will lock. If the Intelligent Key is lef t in
the vehicle af ter all the doors are closed, all
doors will unlock automatically and a
chime will sound.
These functions help to prevent the Intelli-
gent Key from being accidentally locked
inside the vehicle.
AUTOMATIC DOOR LOCKS
• All doors lock automatically when the ve- hicle speed reaches 15 mph (25 km/h).
• Continuously Variable Transmission (CVT) (if so equipped)– All doors unlock automatically when the transmission is placed in the P
(Park) or OFF position.
• Manual transmission (if so equipped) – All doors unlock automatically whenthe ignition is placed in the OFF
position.
NOTE:
The automatic door unlock function can
be changed using the “Vehicle Settings”
of the vehicle information display.
For additional information, see “Vehicle
information display 4.2 inch (11 cm) Type
A” (P. 2-18) or “Vehicle information dis-
play 7 inch (18 cm) Type B” (P. 2-32).
LPD2309
Driver’s and passenger’s side
3-6Pre-driving checks and adjustments
Page 179 of 556
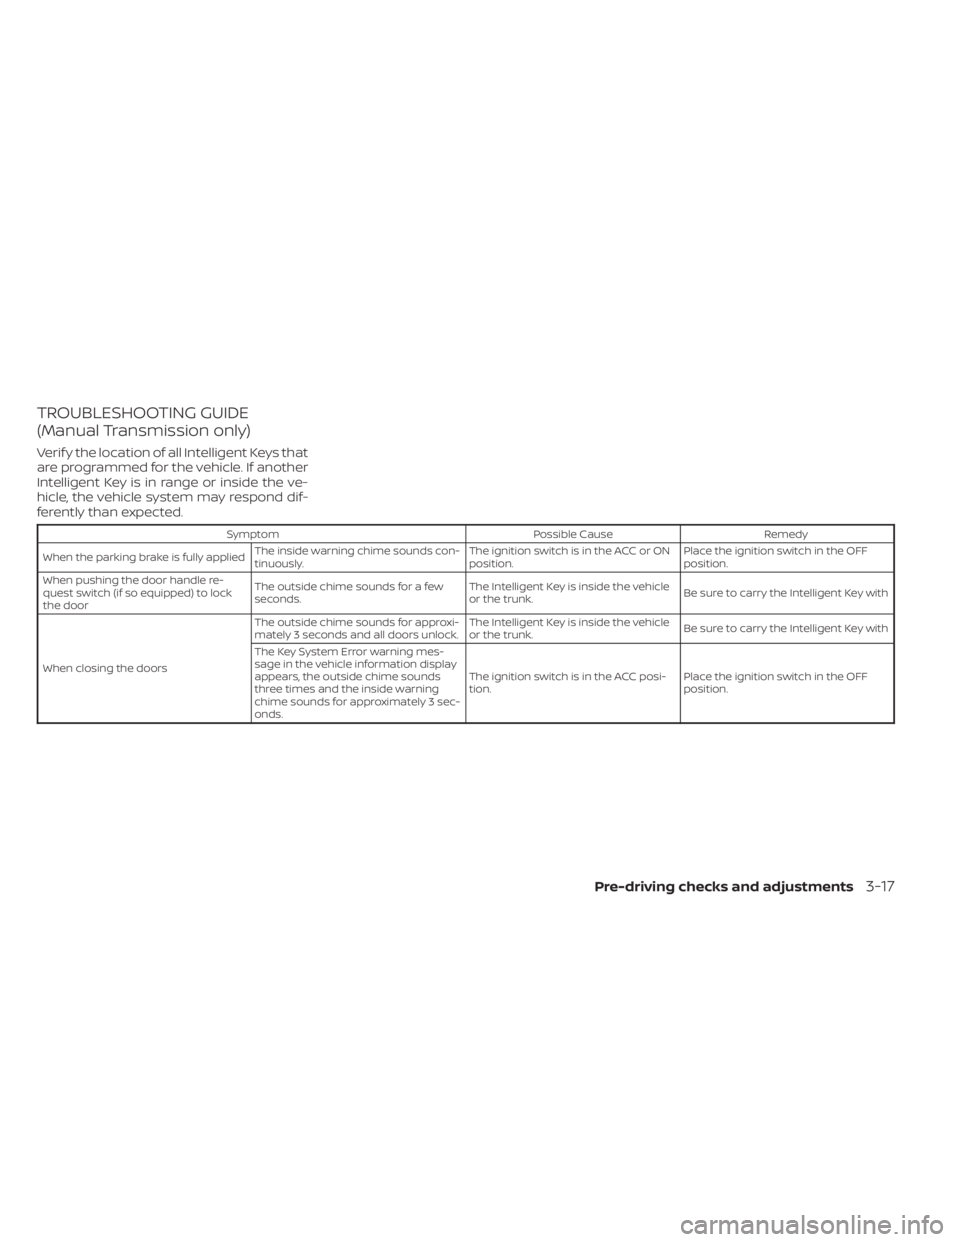
TROUBLESHOOTING GUIDE
(Manual Transmission only)
Verif y the location of all Intelligent Keys that
are programmed for the vehicle. If another
Intelligent Key is in range or inside the ve-
hicle, the vehicle system may respond dif-
ferently than expected.
SymptomPossible CauseRemedy
When the parking brake is fully applied The inside warning chime sounds con-
tinuously. The ignition switch is in the ACC or ON
position.Place the ignition switch in the OFF
position.
When pushing the door handle re-
quest switch (if so equipped) to lock
the door The outside chime sounds for a few
seconds.
The Intelligent Key is inside the vehicle
or the trunk.
Be sure to carry the Intelligent Key with
When closing the doors The outside chime sounds for approxi-
mately 3 seconds and all doors unlock.
The Intelligent Key is inside the vehicle
or the trunk.
Be sure to carry the Intelligent Key with
The Key System Error warning mes-
sage in the vehicle information display
appears, the outside chime sounds
three times and the inside warning
chime sounds for approximately 3 sec-
onds. The ignition switch is in the ACC posi-
tion.
Place the ignition switch in the OFF
position.
Pre-driving checks and adjustments3-17
Page 277 of 556
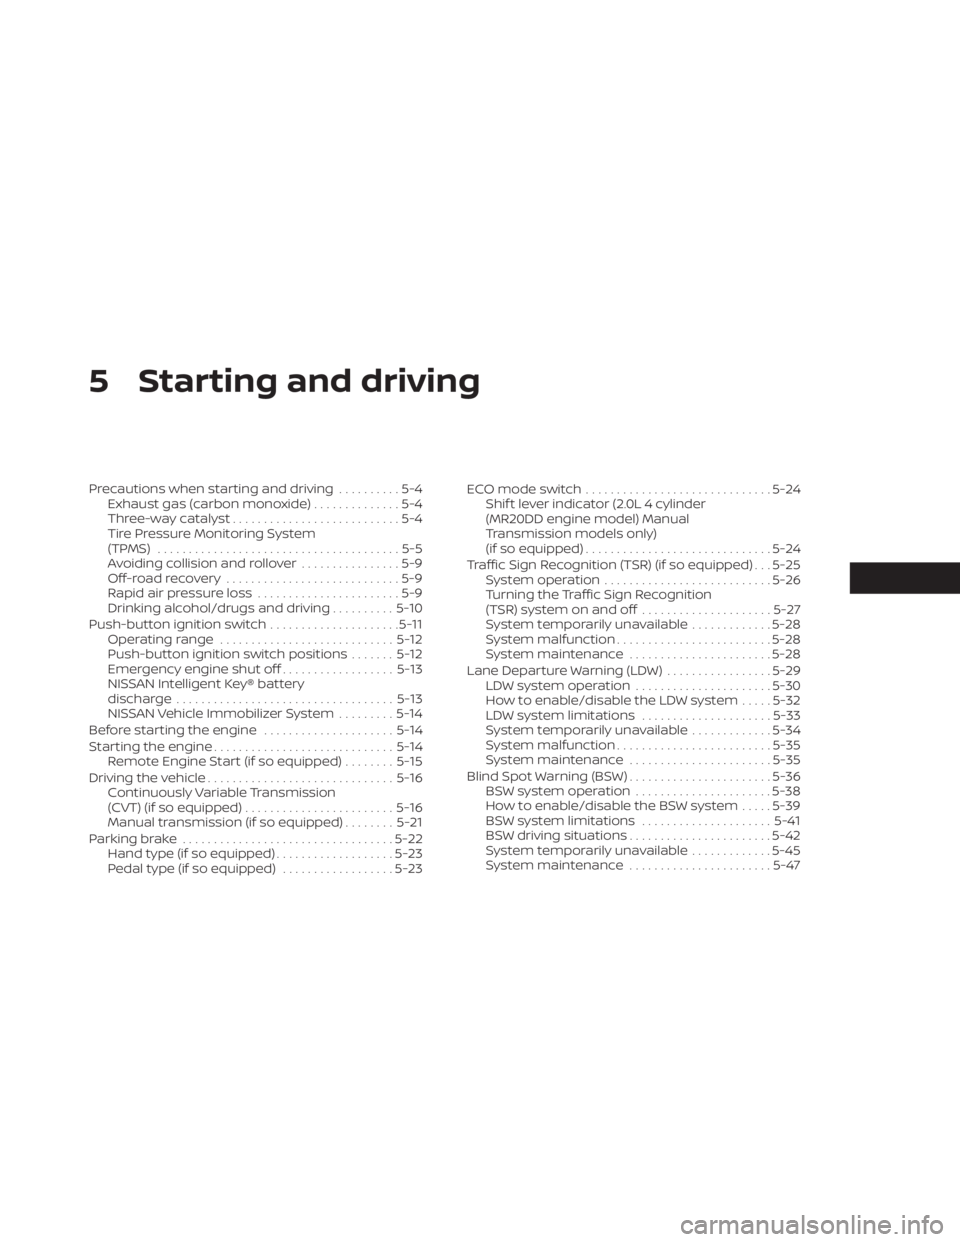
5 Starting and driving
Precautions when starting and driving..........5-4
Exhaust gas (carbon monoxide) ..............5-4
Three-way catalyst ...........................5-4
Tire Pressure Monitoring System
(TPMS) .......................................5-5
Avoiding collision and rollover ................5-9
Off-roadrecovery ............................5-9
Rapid air pressure loss .......................5-9
Drinking alcohol/drugs and driving ..........5-10
Push-button ignition switch .....................5-11
Operating range ............................ 5-12
Push-button ignition switch positions .......5-12
Emergency engine shut off ..................5-13
NISSAN Intelligent Key® battery
discharge ................................... 5-13
NISSAN Vehicle Immobilizer System .........5-14
Before starting the engine .....................5-14
Starting the engine ............................. 5-14
Remote Engine Start (if so equipped) ........5-15
Driving the vehicle .............................. 5-16
Continuously Variable Transmission
(CVT) (if so equipped) ........................ 5-16
Manual transmission (if so equipped) ........5-21
Parking brake .................................. 5-22
Hand type (if so equipped) ...................5-23
Pedal type (if so equipped) ..................5-23ECO mode switch
.............................. 5-24
Shif t lever indicator (2.0L 4 cylinder
(MR20DD engine model) Manual
Transmission models only)
(if so equipped) .............................. 5-24
Traffic Sign Recognition (TSR) (if so equipped) . . . 5-25 System operation ........................... 5-26
Turning the Traffic Sign Recognition
(TSR) system on and off .....................5-27
System temporarily unavailable .............5-28
System malfunction ......................... 5-28
System maintenance .......................5-28
Lane Departure Warning (LDW) .................5-29
LDW system operation ......................5-30
How to enable/disable the LDW system .....5-32
LDW system limitations .....................5-33
System temporarily unavailable .............5-34
System malfunction ......................... 5-35
System maintenance .......................5-35
Blind Spot Warning (BSW) .......................5-36
BS
W system operation ...................... 5-38
How to enable/disable the BSW system .....5-39
BSW system limitations .....................5-41
BSW driving situations .......................5-42
System temporarily unavailable .............5-45
System maintenance .......................5-47
Page 290 of 556
NISSAN VEHICLE IMMOBILIZER
SYSTEM
The NISSAN Vehicle Immobilizer System
will not allow the engine to start without
the use of the registered key.
If the engine fails to start using a registered
key (for example, when interference is
caused by another registered key, an auto-
mated toll road device or automatic pay-
ment device on the key ring), restart the
engine using the following procedure:
1. Leave the ignition switch in the ON posi-tion for approximately 5 seconds.
2. Place the ignition switch in the OFF or LOCK position, and wait approximately
10 seconds.
3. Repeat steps 1 and 2.
4. Restart the engine while holding the de- vice (which may have caused the inter-
ference) separate from the registered
key.
If the no start condition re-occurs, NISSAN
recommends placing the registered key on
a separate key ring to avoid interference
from other devices. • Make sure the area around the vehicle is
clear.
• Check fluid levels such as engine oil, cool- ant, brake and clutch fluid (if so equipped),
and windshield-washer fluid as fre-
quently as possible, or at least whenever
you refuel.
• Check that all windows and lights are clean.
• Visually inspect tires for their appearance and condition. Also check tires for proper
inflation.
• Lock all doors.
• Position seat and adjust head restraints/headrests.
• Adjust inside and outside mirrors.
• Fasten seat belts and ask all passengers to do likewise.
• Check the operation of warning lights when the ignition switch is placed in the
ON position. For additional information,
see “Warning lights, indicator lights and
audible reminders” (P. 2-9). 1. Apply the parking brake.
2.
Continuously Variable Transmission
model:
Move the shif t lever to P (Park) or N (Neu-
tral). P (Park) is recommended.
The starter is designed not to operate
if the shif t lever is in any of the driving
positions.
Manual Transmission (M/T) model:
Move the shif t lever to N (Neutral). De-
press the clutch pedal to the floor.
The starter is designed not to operate
unless the clutch pedal is fully
depressed.
3. Push the ignition switch to the ON posi- tion. Depress the brake pedal and the
clutch pedal (if so equipped) and push
the ignition switch to start the engine.
To start the engine immediately, push
and release the ignition switch while de-
pressing the brake pedal with the igni-
tion switch in any position.
BEFORE STARTING THE ENGINE STARTING THE ENGINE
5-14Starting and driving
Page 297 of 556
WARNING
When the high fluid temperature pro-
tection mode or fail-safe operation oc-
curs, vehicle speed may be gradually
reduced. The reduced speed may be
lower than other traffic, which could in-
crease the chance of a collision. Be es-
pecially careful when driving. If neces-
sary, pull to the side of the road at a safe
place and allow the transmission to re-
turn to normal operation, or have it re-
paired if necessary.
MANUAL TRANSMISSION (if so
equipped)
WARNING
• Do not downshif t abruptly on slip-
pery roads. This may cause a loss of
control.
• Do not over-rev the engine when
shif ting to a lower gear. This may
cause a loss of control or engine
damage.
• Do not shif t to the N (Neutral) posi-
tion while driving. Doing so may re-
sult in an accident due to loss of en-
gine braking.
CAUTION
• Do not rest your foot on the clutch
pedal while driving. This may cause
clutch damage.
• Fully depress the clutch pedal before
shif ting to help prevent transmission
damage.
• Stop your vehicle completely before
shif ting into R (Reverse).
• When the vehicle is stopped with the
engine running (for example, at a
stop light), shif t to N (Neutral) and re-
lease the clutch pedal with the foot
brake applied.
• Do not shif t to the N (Neutral) posi-
tion while driving. Doing so may re-
sult in an accident due to loss of en-
gine braking.
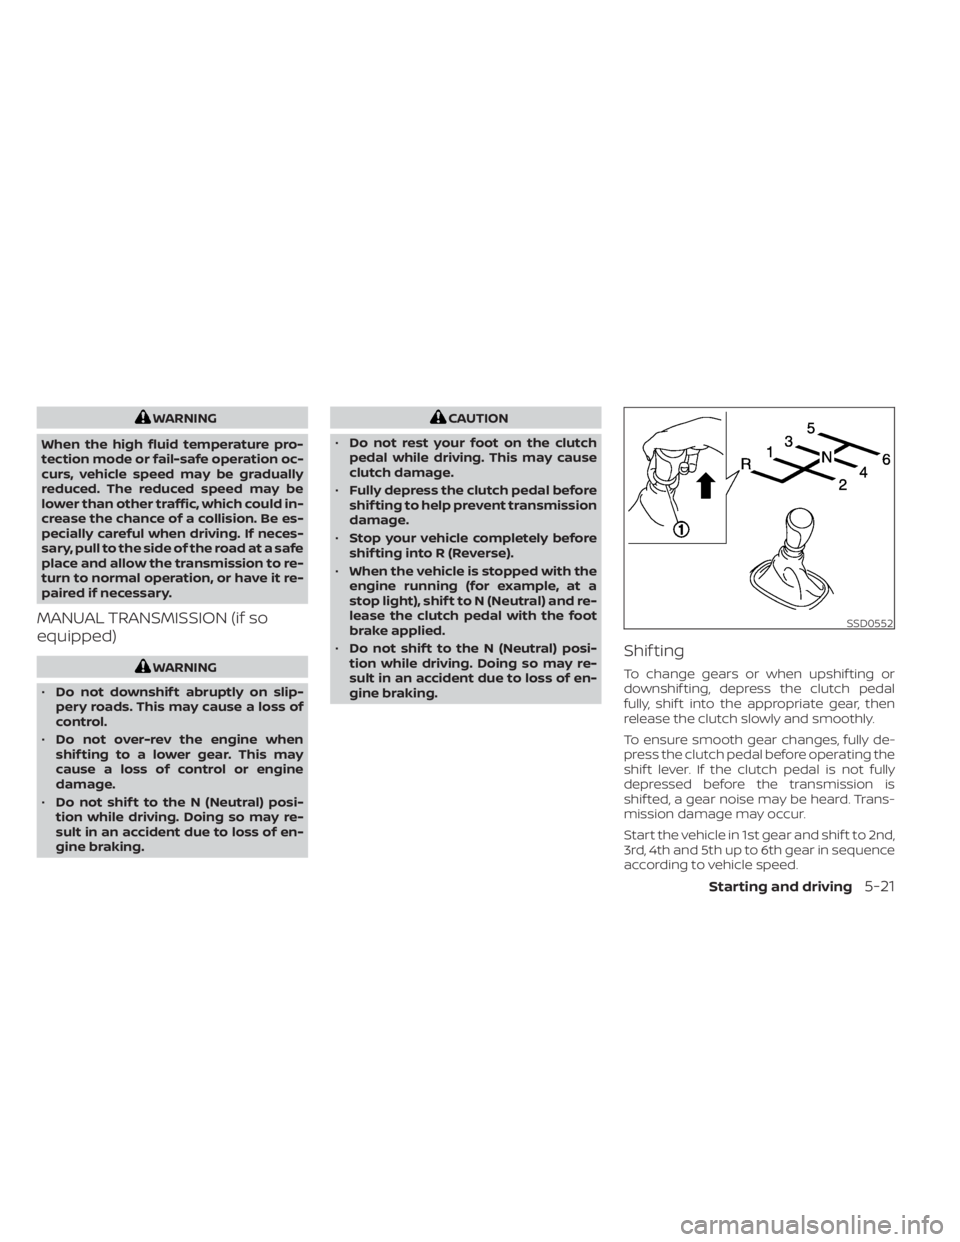
Shif ting
To change gears or when upshif ting or
downshif ting, depress the clutch pedal
fully, shif t into the appropriate gear, then
release the clutch slowly and smoothly.
To ensure smooth gear changes, fully de-
press the clutch pedal before operating the
shif t lever. If the clutch pedal is not fully
depressed before the transmission is
shif ted, a gear noise may be heard. Trans-
mission damage may occur.
Start the vehicle in 1st gear and shif t to 2nd,
3rd, 4th and 5th up to 6th gear in sequence
according to vehicle speed.
SSD0552
Starting and driving5-21