2023 NISSAN SENTRA ECU
[x] Cancel search: ECUPage 455 of 556

CAUTION
Be careful not to burn yourself, as the
engine oil is hot.
WARNING
• Prolonged and repeated contact
with used engine oil may cause skin
cancer.
• Try to avoid direct skin contact with
used oil. If skin contact is made, wash
thoroughly with soap or hand
cleaner as soon as possible.
• Keep used engine oil out of reach of
children.
4. Loosen the oil filter with an oil filter wrench by turning it counterclockwise.
Remove the oil filter by turning it by
hand.
5. Wipe the engine oil filter mounting sur- face with a clean rag.
CAUTION
Be sure to remove any old gasket ma-
terial remaining on the sealing surface
of the engine. Failure to do so could
lead to an oil leak and engine damage. •
The dipstick must be inserted in
place to prevent oil spillage from the
dipstick hole when filling the engine
with oil.
6. Coat the gasket on the new filter with clean engine oil.
7. Screw in the oil filter clockwise until a slight resistance is felt, then tighten addi-
tionally more than 2/3 turn.
Oil filter tightening torque: 11 to 15 f t-lb (14.7 to 20.6 N·m)
8. Clean and re-install the drain plug with a new washer. Securely tighten the drain
plug with a wrench. Do not use exces-
sive force.
Drain plug tightening torque: 22 to 29 f t-lb (29.4 to 39.2 N·m)
9. Refill the engine with the recommended oil through the oil filler opening, and in-
stall the oil filler cap securely.
For additional information about drain and
refill capacity, see “Recommended fluids/
lubricants and capacities” (P. 10-2). The
drain and refill capacity depends on the oil
temperature and drain time. Use these
specifications for reference only. Always use the dipstick to determine the proper
amount of oil in the engine.
10. Start the engine and check for leakage
around the drain plug and the oil filter.
Correct as required. Turn the engine off
and wait more than 15 minutes. Check
the oil level with the dipstick. Add en-
gine oil if necessary.
Af ter the operation
1. Reinstall under engine protector in re-verse order.
2. Lower the vehicle carefully to the ground.
3. Reset oil and oil filter maintenance re- minder and oil control system. For addi-
tional information, see “Vehicle informa-
tion display 4.2 inch (11 cm) Type A”
(P. 2-18) or “Vehicle information display 7
inch (18 cm) Type B” (P. 2-32).
• Dispose of waste oil and filter properly.
• Check your local regulations.
Do-it-yourself8-9
Page 460 of 556
• If the battery is labeled “do not open” it ismaintenance free and battery fluid
should not be checked. It is recom-
mended that you visit a NISSAN dealer or
a qualified specialist workshop to con-
firm the battery’s performance.
• Keep the battery surface clean and dry. Clean the battery with a solution of bak-
ing soda and water.
• Make certain the terminal connections are clean and securely tightened.
• If the vehicle is not to be used for 30 days or longer, disconnect the negative (-) bat-
tery terminal cable to prevent discharge.
NOTE:
Care should be taken to avoid situations
that can lead to potential battery dis-
charge and potential no-start conditions
such as:
1. Installation or extended use of elec- tronic accessories that consume bat-
tery power when the engine is not
running (Phone chargers, GPS, DVD
players, etc.)
2. Vehicle is not driven regularly and/or only driven short distances.
In these cases, the battery may need to
be charged to maintain battery health.
WARNING
• Do not expose the battery to flames,
an electrical spark or a cigarette. Hy-
drogen gas generated by the battery
is explosive. Explosive gases can
cause blindness or injury. Do not al-
low battery fluid to contact your skin,
eyes, fabrics or painted surfaces. Sul-
furic acid can cause blindness or in-
jury. Af ter touching a battery or bat-
tery cap, do not touch or rub your
eyes. Thoroughly wash your hands. If
the acid contacts your eyes, skin or
clothing, immediately flush with wa-
ter for at least 15 minutes and seek
medical attention.
• When working on or near a battery,
always wear suitable eye protection
and remove all jewelry.
• Battery posts, terminals and related
accessories contain lead and lead
compounds. Wash hands af ter
handling.
• Keep battery out of the reach of
children.
• Do not tip the battery.
NOTE:
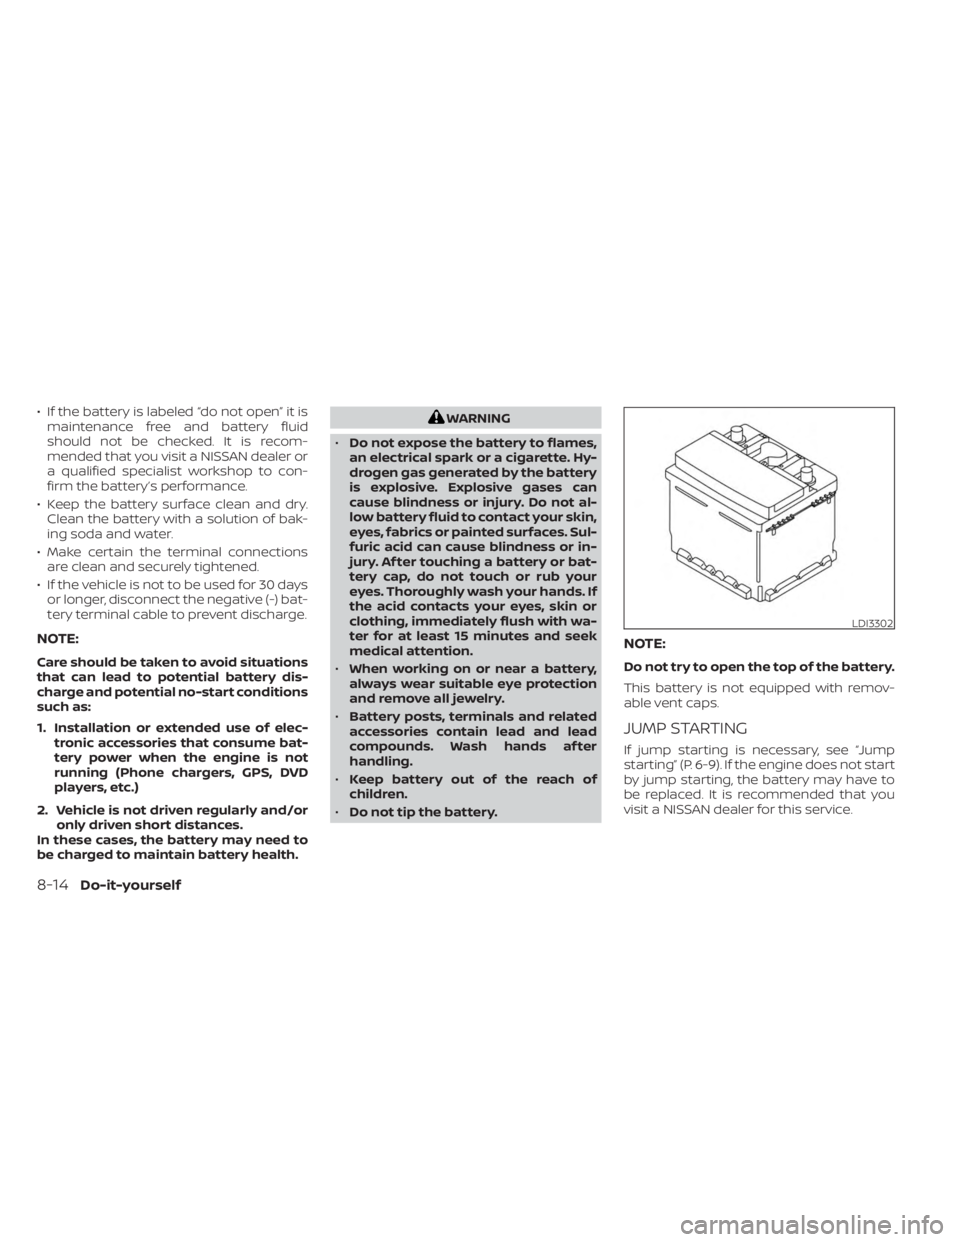
Do not try to open the top of the battery.
This battery is not equipped with remov-
able vent caps.
JUMP STARTING
If jump starting is necessary, see “Jump
starting” (P. 6-9). If the engine does not start
by jump starting, the battery may have to
be replaced. It is recommended that you
visit a NISSAN dealer for this service.
LDI3302
8-14Do-it-yourself
Page 462 of 556

1. Visually inspect the belt for signs of un-usual wear, cuts, or fraying. If the belt is in
poor condition, have it replaced or ad-
justed. It is recommended that you visit a
NISSAN dealer for this service.
2. Have the belt checked regularly for condition.
REPLACING SPARK PLUGS
WARNING
Be sure the engine and ignition switch
are off and that the parking brake is
engaged securely.
CAUTION
Be sure to use the correct socket to re-
move the spark plugs. An incorrect
socket can damage the spark plugs.
Iridium-tipped spark plugs
It is not necessary to replace iridium-
tipped
OAspark plugs as frequently as con-
ventional type spark plugs because they
last much longer. Follow the maintenance
log shown in the “Maintenance and sched-
ules” section of this manual. Do not service
platinum-tipped spark plugs by cleaning or
regapping.
• Always replace spark plugs with rec-
ommended or equivalent ones.
If replacement is required, it is recom-
mended that you visit a NISSAN dealer for
this service.
SDI1895
SPARK PLUGS
8-16Do-it-yourself
Page 470 of 556
3. Replace the battery with a new one.Recommended battery: CR2032 or
equivalent.• Do not touch the internal circuit and electric terminals as doing so could
cause a malfunction.
• Hold the battery by the edges. Holding the battery across the contact points
will seriously deplete the storage
capacity.
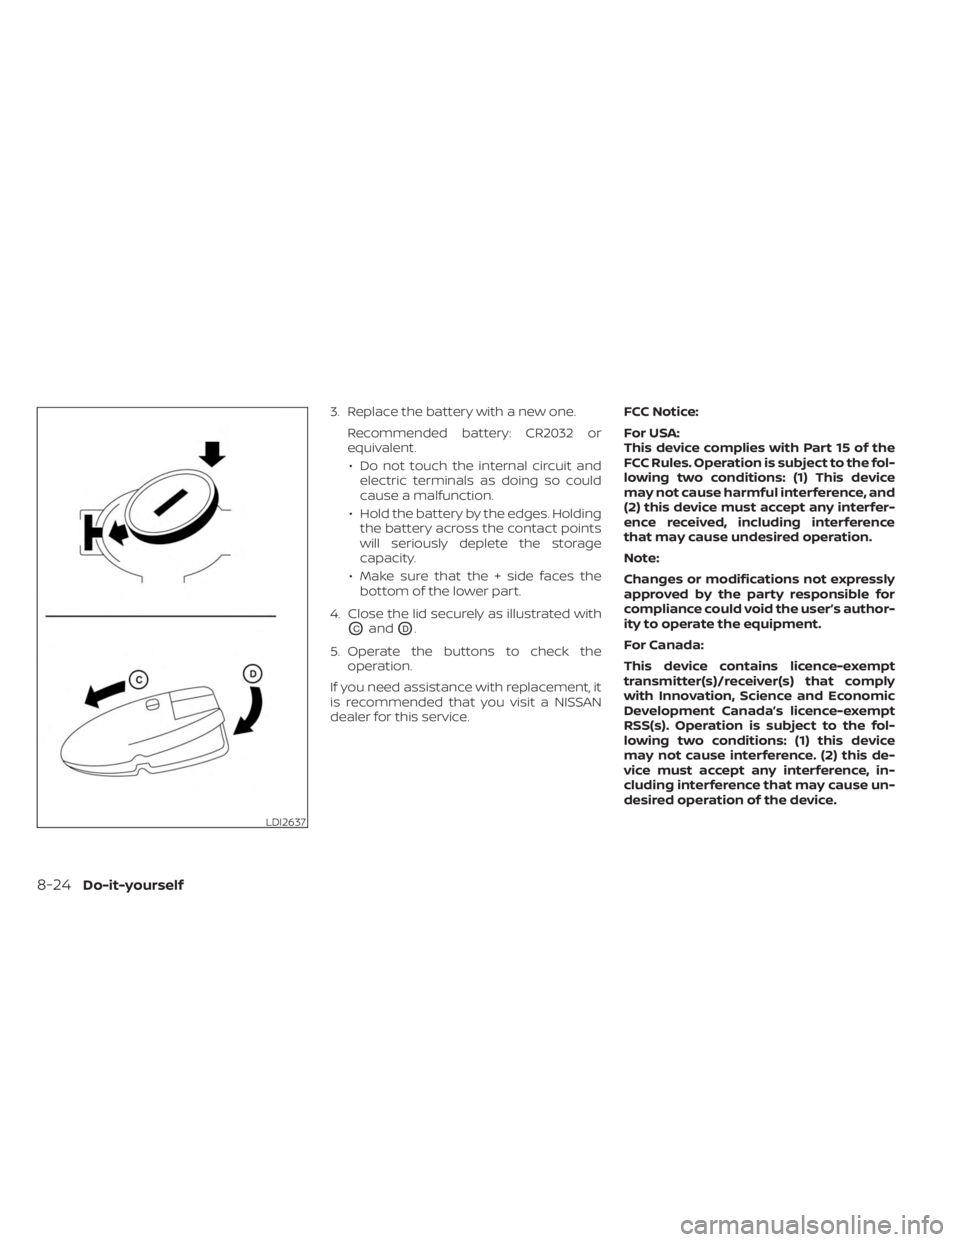
• Make sure that the + side faces the bottom of the lower part.
4. Close the lid securely as illustrated with
OCandOD.
5. Operate the buttons to check the operation.
If you need assistance with replacement, it
is recommended that you visit a NISSAN
dealer for this service. FCC Notice:
For USA:
This device complies with Part 15 of the
FCC Rules. Operation is subject to the fol-
lowing two conditions: (1) This device
may not cause harmful interference, and
(2) this device must accept any interfer-
ence received, including interference
that may cause undesired operation.
Note:
Changes or modifications not expressly
approved by the party responsible for
compliance could void the user’s author-
ity to operate the equipment.
For Canada:
This device contains licence-exempt
transmitter(s)/receiver(s) that comply
with Innovation, Science and Economic
Development Canada’s licence-exempt
RSS(s). Operation is subject to the fol-
lowing two conditions: (1) this device
may not cause interference. (2) this de-
vice must accept any interference, in-
cluding interference that may cause un-
desired operation of the device.
LDI2637
8-24Do-it-yourself
Page 483 of 556
Summer tires
NISSAN specifies summer tires on some
models to provide superior performance
on dry roads. Summer tire performance is
substantially reduced in snow and ice.
Summer tires do not have the tire traction
rating “M&S” on the tire sidewall.
If you plan to operate your vehicle in snowy
or icy conditions, NISSAN recommends the
use of SNOW tires or ALL SEASON tires on all
four wheels.
Snow tires
If snow tires are needed, it is necessary to
select tires equivalent in size and load rat-
ing to the original equipment tires. If you do
not, it can adversely affect the safety and
handling of your vehicle.
Generally, snow tires have lower speed rat-
ings than factory equipped tires and may
not match the potential maximum vehicle
speed. Never exceed the maximum speed
rating of the tire.
If you install snow tires, they must be the
same size, brand, construction and tread
pattern on all four wheels.
For additional traction on icy roads, stud-
ded tires may be used. However, some U.S.states and Canadian provinces prohibit
their use. Check local, state and provincial
laws before installing studded tires. Skid
and traction capabilities of studded snow
tires on wet or dry surfaces may be poorer
than that of non-studded snow tires.
TIRE CHAINS
Use of tire chains may be prohibited ac-
cording to location. Check the local laws
before installing tire chains. When installing
tire chains, make sure they are the proper
size for the tires on your vehicle and are
installed according to the chain manufac-
turer's suggestions.
Use only SAE class “S”
chains. Class “S” chains are used on ve-
hicles with restricted tire to vehicle clear-
ance. Vehicles that can use Class “S” chains
are designed to meet the minimum clear-
ances between the tire and the closest ve-
hicle suspension or body component re-
quired to accommodate the use of a
winter traction device (tire chains or
cables). The minimum clearances are de-
termined using the factory equipped tires.
Other types may damage your vehicle. Use
chain tensioners when recommended by
the tire chain manufacturer to ensure a
tight fit. Loose end links of the tire chain
must be secured or removed to prevent
the possibility of whipping action damage to the fenders or underbody. If possible,
avoid fully loading your vehicle when using
tire chains. In addition, drive at a reduced
speed. Otherwise, your vehicle may be
damaged and/or vehicle handling and
performance may be adversely affected.
Tire chains must be installed only on the
front wheels and not on the rear wheels.
Never install tire chains on a TEMPORARY
USE ONLY spare tire.
Do not use tire chains on dry roads. Driving
with chains in such conditions can cause
damage to the various mechanisms of the
vehicle due to some overstress.
Do-it-yourself8-37
Page 491 of 556
Doors and engine hood:Check that the
doors and engine hood operate properly.
Also ensure that all latches lock securely.
Lubricate hinges, latches, latch pins, rollers
and links if necessary. Make sure that the
secondary latch keeps the hood from
opening when the primary latch is
released.
When driving in areas using road salt or
other corrosive materials, check lubrica-
tion frequently.
Check that the gas stays or struts properly
and securely hold the hood, trunk, or rear
hatch fully open. If the hood, trunk, or rear
hatch is not held open, have the gas stays
or struts replaced.
Lights*: Clean the headlights on a regular
basis. Make sure that the headlights, stop
lights, tail lights, turn signal lights, and other
lights are all operating properly and in-
stalled securely. Also check headlight aim.
Road wheel nuts (lug nuts)*: When check-
ing the tires, make sure no wheel nuts are
missing, and check for any loose wheel
nuts. Tighten if necessary.
Tire rotation*: Rotate tires at the specified
interval shown in the maintenance
schedule. Tires*:
Check the pressure with a gauge
of ten and always prior to long distance
trips. If necessary, adjust the pressure in all
tires, including the spare, to the pressure
specified. Check carefully for damage, cuts
or excessive wear.
Tire Pressure Monitoring System (TPMS)
tire pressure sensor: It is recommended
that you replace the tire pressure sensor
assembly when the tires are replaced due
to wear or age.
Wheel alignment and balance: If the ve-
hicle should pull to either side while driving
on a straight and level road, or if you detect
uneven or abnormal tire wear, there may
be a need for wheel alignment. If the steer-
ing wheel or seat vibrates at normal high-
way speeds, wheel balancing may be
needed.
For additional information regarding tires,
refer to “Important Tire Safety Information”
(US) or “Tire Safety Information” (Canada) in
the Warranty Information Booklet.
Windshield: Clean the windshield on a
regular basis. Check the windshield at least
every six months for cracks or other dam-
age. Have a damaged windshield repaired
by a qualified repair facility. It is recom-
mended that you have a damaged wind- shield repaired by a NISSAN dealer, or a
NISSAN Certified Collision Center. To locate
a collision center in your area, refer to
http://collision.nissanusa.com.
Windshield wiper blades*:
Check for
cracks or wear if they do not wipe properly.
Inside the vehicle
The maintenance items listed here should
be checked on a regular basis, such as
when performing scheduled maintenance,
cleaning the vehicle, etc.
Accelerator pedal: Check the pedal for
smooth operation and make sure the
pedal does not catch or require uneven
effort. Keep the floor mat away from the
pedal.
Brake pedal: Check the pedal for smooth
operation. If the brake pedal suddenly goes
down further than normal, the pedal feels
spongy or the vehicle seems to take longer
to stop, have your vehicle checked imme-
diately. It is recommended that you visit a
NISSAN dealer for this service. Keep the
floor mat away from the pedal.
Brakes: Check that the brakes do not pull
the vehicle to one side when applied.
Maintenance and schedules9-3
Page 492 of 556
Continuously Variable Transmission
(CVT) P (Park) position mechanism (if so
equipped):On a fairly steep hill check that
the vehicle is held securely with the shif t
lever in the P (Park) position without apply-
ing any brakes.
Parking brake: Check the parking brake
operation regularly. The vehicle should be
securely held on a fairly steep hill with only
the parking brake applied. If the parking
brake needs adjustment, it is recom-
mended that you visit a NISSAN dealer for
this service.
Seats: Check seat position controls such
as seat adjusters, seatback recliner, etc., to
ensure they operate smoothly and all
latches lock securely in every position.
Check that the head restraints/headrests
move up and down smoothly and the locks
(if so equipped) hold securely in all latched
positions.
Seat belts: Check that all parts of the seat
belt system (for example, buckles, anchors,
adjusters and retractors) operate properly
and smoothly, and are installed securely.
Check the belt webbing for cuts, fraying,
wear or damage. Steering wheel:
Check for changes in the
steering system, such as excessive free
play, hard steering or strange noises.
Warning lights and chimes: Make sure all
warning lights and chimes are operating
properly.
Windshield defroster: Check that the air
comes out of the defroster outlets properly
and in sufficient quantity when operating
the heater or air conditioner.
Windshield wiper and washer*: Check
that the wipers and washer operate prop-
erly and that the wipers do not streak.
Under the hood and vehicle
The maintenance items listed here should
be checked periodically (for example, each
time you check the engine oil or refuel).
Battery*: This vehicle is equipped with a
sealed maintenance free battery. It is rec-
ommended that you visit a NISSAN dealer
for service.
NOTE:
Care should be taken to avoid situations
that can lead to potential battery dis-
charge and potential no-start conditions
such as:
1. Installation or extended use of elec- tronic accessories that consume bat-
tery power when the engine is not
running (Phone chargers, GPS, DVD
players, etc.).
2. Vehicle is not driven regularly and/or only driven short distances.
In these cases, the battery may need to
be charged to maintain battery health.
Brake and clutch (if so equipped) fluid
level*: Make sure that the brake and clutch
fluid levels are between the MIN and MAX
lines on the reservoir.
Engine coolant level*: Check the coolant
level when the engine is cold.
Engine drive belt*: Make sure the drive belt
is not frayed, worn, cracked or oily.
Engine oil level*: Check the level af ter
parking the vehicle on a level surface with
the engine off. Wait more than 15 minutes
for the oil to drain back into the oil pan.
9-4Maintenance and schedules
Page 531 of 556
5. Determine the combined weightof luggage and cargo being
loaded on the vehicle. That weight
may not safely exceed the avail-
able cargo and luggage load ca-
pacity calculated in step 4.
6. If your vehicle will be towing a trailer, load from your trailer will be
transferred to your vehicle. Con-
sult this manual to determine
how this reduces the available
cargo and luggage load capacity
of your vehicle.
Towing a trailer with a vehicle that is
not intended for towing may result in
an accident involving injury or death.
WARNING
Do not tow a trailer with your ve-
hicle. Towing a trailer may result
in an accident involving injury or
death. Before driving a loaded vehicle, con-
firm that you do not exceed the
(GVWR) or the (GAWR) for your ve-
hicle. For additional information, see
“Measurement of weights” (P. 10-20).
Also check tires for proper inflation
pressures. For additional informa-
tion, see “Tire and Loading Informa-
tion label” (P. 8-31).
LOADING TIPS
• The GVW must not exceed GVWR or
GAWR as specified on the F.M.V.S.S./
C.M.V.S.S. certification label.
• Do not load the front and rear axle to the GAWR. Doing so will exceed
the GVWR.
WARNING
• Properly secure all cargo with
ropes or straps to help prevent
it from sliding or shif ting. Do
not place cargo higher than the
seatbacks. In a sudden stop or
collision, unsecured cargo
could cause personal injury.
• Do not load your vehicle any
heavier than the GVWR or the
maximum front and rear
GAWRs. If you do, parts of your
vehicle can break, tire damage
could occur, or it can change
the way your vehicle handles.
This could result in loss of con-
trol and cause personal injury.
Technical and consumer information10-19