2023 NISSAN PATHFINDER charging
[x] Cancel search: chargingPage 109 of 665

Horn........................................... 2-89
Climate controlled seat switches
(if so equipped) ................................. 2-90
Heated seat switches (if so equipped) ..........2-91
Heated 2nd row seat switches
(if so equipped) ................................. 2-92
Heated steering wheel switch (if so equipped) . . 2-93
Hill descent control switch (if so equipped) .....2-94
Steering Assist switch (for vehicles with
ProPILOT Assist) (if so equipped) ................2-95
Head Up Display (HUD) (if so equipped) .........2-95
HowtousetheHUD......................... 2-96
Driver Assistance/Navigation linking ........2-97
Emergency call (SOS) button (if so equipped) . . . 2-98 Emergency support ......................... 2-98
Rear Door Alert ................................ 2-100
Power outlets ................................. 2-101
12v outlets ................................. 2-101
120v outlet (if so equipped) .................2-102
USB/iPod® charging ports .....................2-103
Wireless charger (if so equipped) ..............2-104
Wireless charger indicator ..................2-105Wireless charger operation
.................2-105
Extended storage switch ......................2-106
Storage ....................................... 2-107
Front-door pockets ........................ 2-107
Lower console storage tray ................2-108
Seatback pockets (if so equipped) ..........2-108
Storagetrays............................... 2-109
Glovebox .................................. 2-110
Console box ................................ 2-110
2nd row console (if so equipped) ...........2-110
Overhead sunglasses storage ...............2-111
Cup holders ................................ 2-112
Cargo area storage bin .....................2-114
Luggage hooks ............................ 2-115
Roof rack (if so equipped) ..................2-116
Windows ....................................... 2-117
Power windows .............................
2-117
R
ear door sunshade (if so equipped) .......2-120
Power moonroof (if so equipped) ..............2-120
Automatic moonroof and sunshade .......2-121
Interior lights .................................. 2-123
Map lights .................................. 2-123
Page 122 of 665

Charge warning light
If this light comes on while the engine is
running, it may indicate the charging sys-
tem is not functioning properly. Turn the
engine off and check the generator belt. If
the belt is loose, broken, or missing, or if the
light remains on, have the system checked.
It is recommended that you visit a NISSAN
dealer for this service.
CAUTION
Do not continue driving if the generator
belt is loose, broken or missing.
Electric shif t control system
warning light (if so
equipped)
This light illuminates when a malfunction
occurs in the electric shif t control system.
When the master warning light illuminates,
the chime sounds and the following mes-
sage is displayed in the vehicle information
display: “When parked apply parking brake”.
When the ignition is placed in the OFF posi-
tion, the chime sounds continuously. En-
sure the parking brake is applied Have the system checked. It is recom-
mended that you visit a NISSAN dealer for
this service.
orElectronic parking
brake indicator
light (if so
equipped)
This light illuminates when the electronic
parking brake system is operating.
When the ignition switch is placed in the ON
position, the electronic parking brake indi-
cator light illuminates. When the engine is
started and the parking brake is released,
the indicator light turns off.
If the parking brake is not released, the
electronic parking brake indicator light re-
mains illuminated. Ensure the electronic
parking brake indicator light has turned off
before driving.
If the electronic parking brake indicator
light illuminates or flashes while the elec-
tronic parking brake warning light
(yellow) illuminates, it may indicate that the
electronic parking brake system is not
functioning properly. Have the system
checked. It is recommended that you visit a
NISSAN dealer for this service.For additional information, see “Electronic
parking brake (switch type)” (P. 5-26).
Engine oil pressure
warning light (if so
equipped)
This light warns of low engine oil pressure. If
the light flickers or comes on during nor-
mal driving, pull off the road in a safe area,
stop the engine
immediatelyand call a
NISSAN dealer or other authorized repair
shop.
The engine oil pressure warning light is
not designed to indicate a low oil level.
Use the dipstick to check the oil level. For
additional information, see “Engine oil”
(P. 8-6 ).
CAUTION
• Running the engine with the engine
oil pressure warning light on could
cause serious damage to the engine
almost immediately. Such damage is
not covered by warranty. Turn off the
engine as soon as it is safe to do so.
Instruments and controls2-15
Page 190 of 665

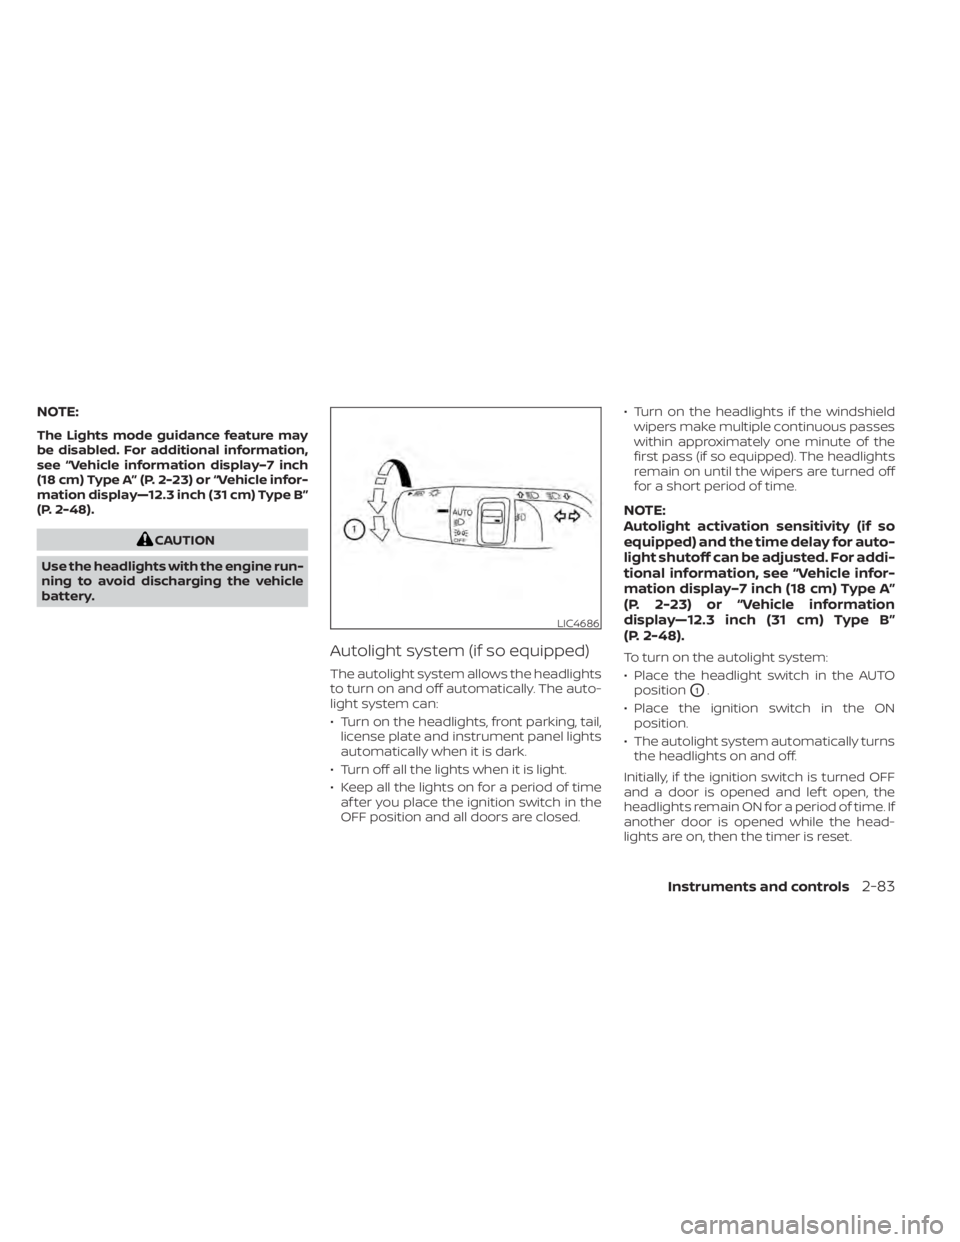
NOTE:
The Lights mode guidance feature may
be disabled. For additional information,
see “Vehicle information display–7 inch
(18 cm) Type A” (P. 2-23) or “Vehicle infor-
mation display—12.3 inch (31 cm) Type B”
(P. 2-48).
CAUTION
Use the headlights with the engine run-
ning to avoid discharging the vehicle
battery.
Autolight system (if so equipped)
The autolight system allows the headlights
to turn on and off automatically. The auto-
light system can:
• Turn on the headlights, front parking, tail, license plate and instrument panel lights
automatically when it is dark.
• Turn off all the lights when it is light.
• Keep all the lights on for a period of time af ter you place the ignition switch in the
OFF position and all doors are closed. • Turn on the headlights if the windshield
wipers make multiple continuous passes
within approximately one minute of the
first pass (if so equipped). The headlights
remain on until the wipers are turned off
for a short period of time.
NOTE:
Autolight activation sensitivity (if so
equipped) and the time delay for auto-
light shutoff can be adjusted. For addi-
tional information, see “Vehicle infor-
mation display–7 inch (18 cm) Type A”
(P. 2-23) or “Vehicle information
display—12.3 inch (31 cm) Type B”
(P. 2-48).
To turn on the autolight system:
• Place the headlight switch in the AUTOposition
O1.
• Place the ignition switch in the ON position.
• The autolight system automatically turns the headlights on and off.
Initially, if the ignition switch is turned OFF
and a door is opened and lef t open, the
headlights remain ON for a period of time. If
another door is opened while the head-
lights are on, then the timer is reset.
LIC4686
Instruments and controls2-83
Page 194 of 665

Ambient image sensor maintenance
The ambient image sensorOAfor the High
Beam Assist system is located in front of
the inside mirror. To maintain the proper
operation of the high beam assist system
and prevent a system malfunction, be sure
to observe the following:
• Always keep the windshield clean.
• Do not attach a sticker (including trans- parent material) or install an accessory
near the ambient image sensor.
• Do not strike or damage the areas around the ambient image sensor. Do
not touch the sensor lens that is located
on the ambient image sensor. If the ambient image sensor is damaged
due to an accident, it is recommended that
you visit a NISSAN dealer.
Battery saver system
If the ignition switch is placed in the OFF
position while the headlight switch is in the
orposition, the headlights will
turn off af ter a period of time.
CAUTION
Even though the battery saver feature
automatically turns off the headlights
af ter a period of time, you should turn
the headlight switch to the OFF posi-
tion when the engine is not running to
avoid discharging the vehicle battery.
LED DAYTIME RUNNING LIGHTS
(DRL) SYSTEM
The LED portion of the headlights auto-
matically illuminate at 100% intensity when
the engine is started and the parking brake
is released. The LED Daytime Running
Lights (DRL) operate with the headlight
switch in the OFF position. When you turn
the headlight switch to the
position
for full illumination, the LED lights switch
from LED DRL to the park function. If the parking brake is applied before the
engine is started, the LED DRL do not illumi-
nate. The LED DRL illuminate when the
parking brake is released. The LED DRL re-
main on until the ignition is placed in the
OFF position.
It is necessary at dusk to turn the headlight
switch on for interior controls and switches
to illuminate, as those remain off while the
switch is in the OFF position.
WARNING
When the LED DRL system is active, tail
lights on your vehicle are not on. It is
necessary at dusk to turn on your
headlights. Failure to do so could cause
an accident injuring yourself and
others.
LIC4690
Instruments and controls2-87
Page 209 of 665

CAUTION
• The outlet and plug may be hot dur-
ing or immediately af ter use.
• Only certain power outlets are de-
signed for use with a cigarette lighter
unit. Do not use any other power out-
let for an accessory lighter. It is rec-
ommended that you visit a NISSAN
dealer for additional information.
• Do not use with accessories that ex-
ceed a 12 volt, 120W (10A) power draw. •
Do not use double adapters or more
than one electrical accessory.
• Use power outlets with the engine
running to avoid discharging the ve-
hicle battery.
• Avoid using power outlets when the
air conditioner, headlights, or rear
window defroster is on.
• Before inserting or disconnecting a
plug, be sure the electrical accessory
being used is turned off.
• Push the plug in as far as it will go. If
good contact is not made, the plug
may overheat or the internal tem-
perature fuse may open.
• When not in use, be sure to close the
cap. Do not allow water or any other
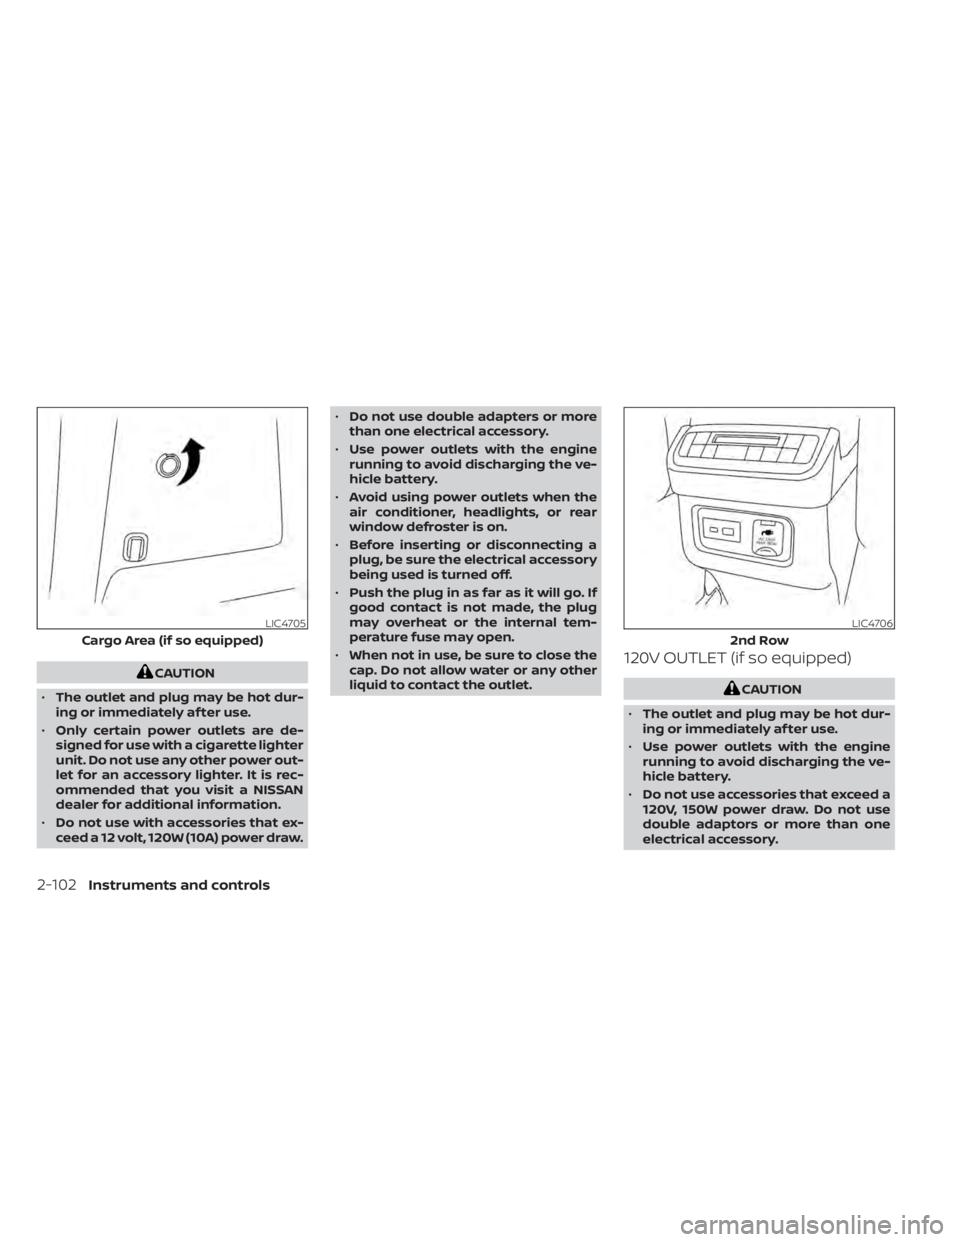
liquid to contact the outlet.120V OUTLET (if so equipped)
CAUTION
• The outlet and plug may be hot dur-
ing or immediately af ter use.
• Use power outlets with the engine
running to avoid discharging the ve-
hicle battery.
• Do not use accessories that exceed a
120V, 150W power draw. Do not use
double adaptors or more than one
electrical accessory.
LIC4705
Cargo Area (if so equipped)
LIC4706
2nd Row
2-102Instruments and controls
Page 210 of 665

•Avoid using power outlets when the
air conditioner, headlights or rear
window defroster is on.
• Before inserting or disconnecting a
plug, be sure the electrical accessory
being used is turned OFF.
• Push the plug in as far as it will go. If
good contact is not made, the plug
may overheat or the internal tem-
perature fuse may open.
• When not in use, be sure to close the
cap. Do not allow water or any other
liquid to contact the outlet.
LIC5029
1st row
LIC5031
2nd row
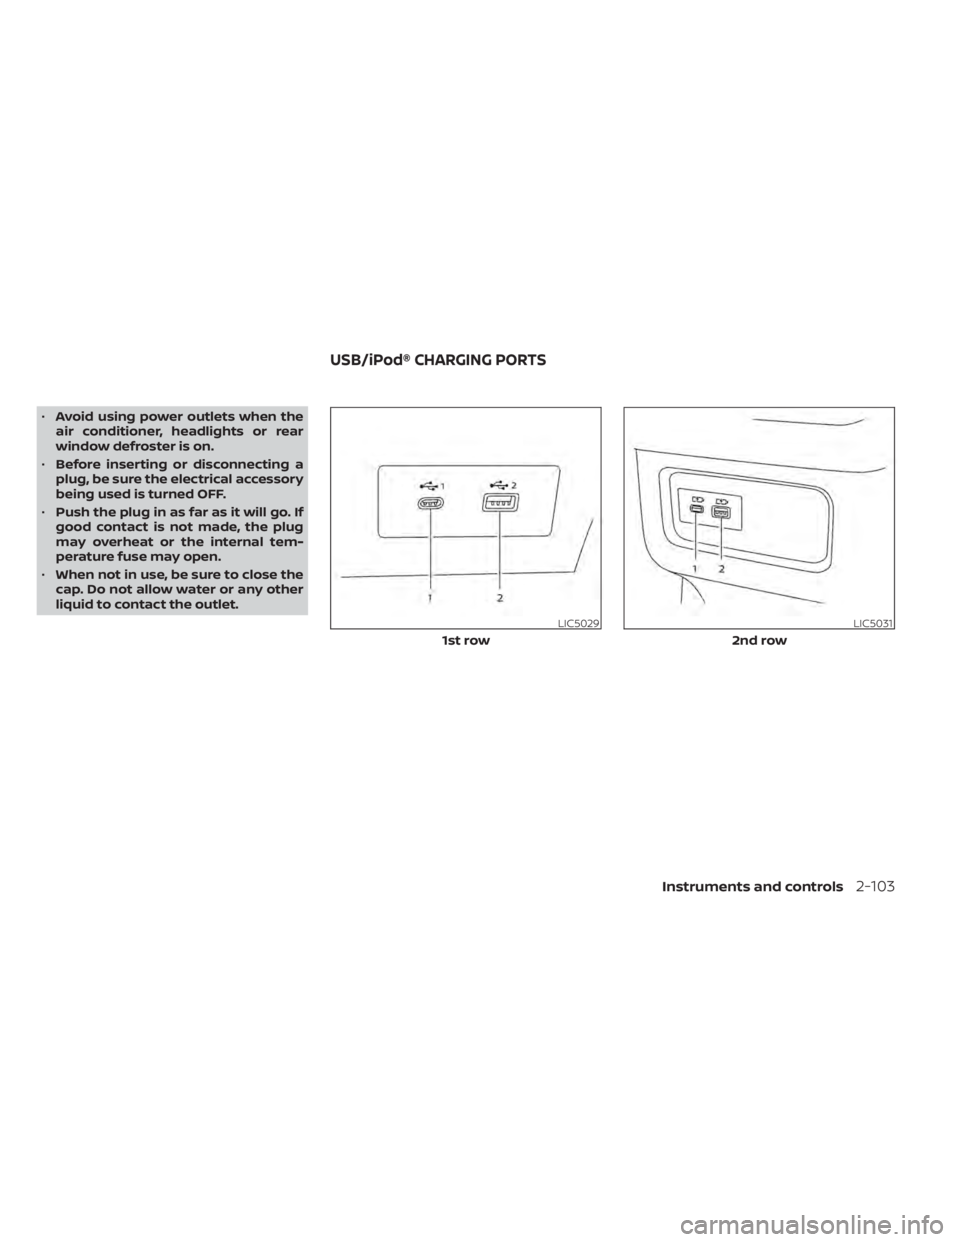
USB/iPod® CHARGING PORTS
Instruments and controls2-103
Page 211 of 665

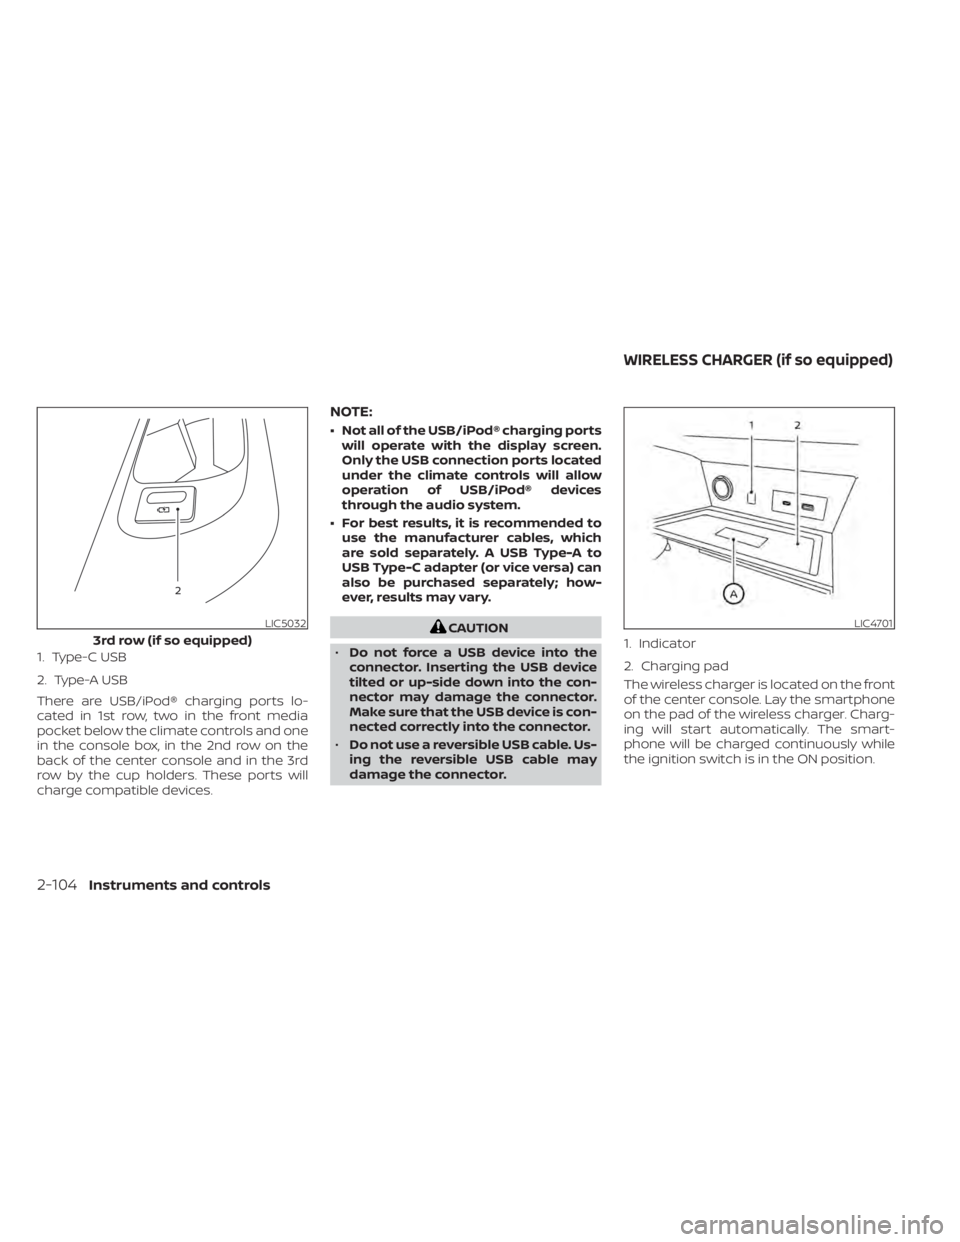
1. Type-C USB
2. Type-A USB
There are USB/iPod® charging ports lo-
cated in 1st row, two in the front media
pocket below the climate controls and one
in the console box, in the 2nd row on the
back of the center console and in the 3rd
row by the cup holders. These ports will
charge compatible devices.
NOTE:
• Not all of the USB/iPod® charging portswill operate with the display screen.
Only the USB connection ports located
under the climate controls will allow
operation of USB/iPod® devices
through the audio system.
• For best results, it is recommended to use the manufacturer cables, which
are sold separately. A USB Type-A to
USB Type-C adapter (or vice versa) can
also be purchased separately; how-
ever, results may vary.
CAUTION
• Do not force a USB device into the
connector. Inserting the USB device
tilted or up-side down into the con-
nector may damage the connector.
Make sure that the USB device is con-
nected correctly into the connector.
• Do not use a reversible USB cable. Us-
ing the reversible USB cable may
damage the connector. The wireless charger is located on the front
of the center console. Lay the smartphone
on the pad of the wireless charger. Charg-
ing will start automatically. The smart-
phone will be charged continuously while
the ignition switch is in the ON position.LIC5032
3rd row (if so equipped)
LIC4701
1. Indicator
2. Charging pad
WIRELESS CHARGER (if so equipped)
2-104Instruments and controls
Page 212 of 665

WARNING
• Never put metallic materials be-
tween the wireless charger and a
smartphone.
• Those who use a pacemaker or other
medical equipment should contact
the electric medical equipment
manufacturer for the possible influ-
ences before use.
• Never put cloth over the smartphone
during charging process.
• Never charge a smartphone when it
is wet.
• Never put metallic materials or small
goods such as a cigarette lighter, In-
telligent Key or memory drive.
CAUTION
• Do not put an RFID/NFC/credit card
between the wireless charger and a
smartphone. This could cause data
corruption in the card.
• Do not use the wireless charger with
dust accumulated or dirt on the pad.
• Do not hit the surface of the wireless
charger. •
Do not spill liquid (water, drinks, etc.)
on the charging pad.
• Do not use grease, oil or alcohol for
cleaning charging pad.
WIRELESS CHARGER INDICATOR
The indicator(1)willil luminate in orange
when the charging process is started.
When the charging has completed, the in-
dicator illuminates in green.
If a malfunction occurs or the charging
process has stopped, the indicator will
blink in orange for 8 seconds then turn off.
WIRELESS CHARGER OPERATION
To use the wireless charger, it is necessary
to seat the smartphone well within the
charging pad. To maximize charging per-
formance, ensure the smartphone is fully
seated on the center of the charging pad
over the "Qi" logo
OA. Because the location
of the power receiver may vary depending
on the smartphone, you will need to try and
find the area that suits your smartphone.
Because some smartphone cases or ac-
cessories may adversely affect charging,
remove them before wireless charging.
Turn off the vibration function of the smart-
phone before wireless charging.
NOTE:
• Only a Qi compatible smartphone can
be used.
• The smartphone may be warmed dur-
ing charging process and the charging
may stop by the protection function of
the wireless charger. This is not a mal-
function. If this occurs, restart charging
af ter the smartphone cooled down.
The indicator will blink in orange then
turn off.
• The wireless charging process may be
stopped by the status of the smart-
phone (battery temperature, etc.).
• If a radio noise interference occurs dur-
ing charging process, put the smart-
phone onto the center (“Qi” logo) posi-
tion of the wireless charger.
• The wireless charging process will stop
during process of searching the Intelli-
gent Key.
• The wireless charging process will not
be started when a USB (Universal Serial
Bus) cable is connected to the smart-
phone. The indicator may illuminate in
orange or blink if the smartphone is
put on the wireless charger with a USB
cable connected. However, charging is
not performed.
Instruments and controls2-105