2023 NISSAN ARMADA air condition
[x] Cancel search: air conditionPage 108 of 604
2-14Instruments and controls
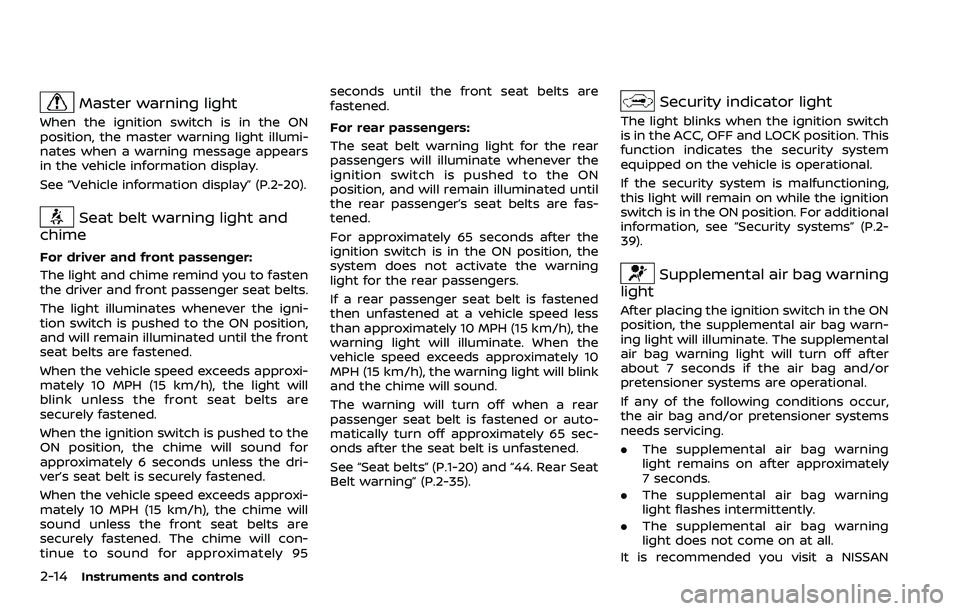
Master warning light
When the ignition switch is in the ON
position, the master warning light illumi-
nates when a warning message appears
in the vehicle information display.
See “Vehicle information display” (P.2-20).
Seat belt warning light and
chime
For driver and front passenger:
The light and chime remind you to fasten
the driver and front passenger seat belts.
The light illuminates whenever the igni-
tion switch is pushed to the ON position,
and will remain illuminated until the front
seat belts are fastened.
When the vehicle speed exceeds approxi-
mately 10 MPH (15 km/h), the light will
blink unless the front seat belts are
securely fastened.
When the ignition switch is pushed to the
ON position, the chime will sound for
approximately 6 seconds unless the dri-
ver’s seat belt is securely fastened.
When the vehicle speed exceeds approxi-
mately 10 MPH (15 km/h), the chime will
sound unless the front seat belts are
securely fastened. The chime will con-
tinue to sound for approximately 95 seconds until the front seat belts are
fastened.
For rear passengers:
The seat belt warning light for the rear
passengers will illuminate whenever the
ignition switch is pushed to the ON
position, and will remain illuminated until
the rear passenger’s seat belts are fas-
tened.
For approximately 65 seconds after the
ignition switch is in the ON position, the
system does not activate the warning
light for the rear passengers.
If a rear passenger seat belt is fastened
then unfastened at a vehicle speed less
than approximately 10 MPH (15 km/h), the
warning light will illuminate. When the
vehicle speed exceeds approximately 10
MPH (15 km/h), the warning light will blink
and the chime will sound.
The warning will turn off when a rear
passenger seat belt is fastened or auto-
matically turn off approximately 65 sec-
onds after the seat belt is unfastened.
See “Seat belts” (P.1-20) and “44. Rear Seat
Belt warning” (P.2-35).
Security indicator light
The light blinks when the ignition switch
is in the ACC, OFF and LOCK position. This
function indicates the security system
equipped on the vehicle is operational.
If the security system is malfunctioning,
this light will remain on while the ignition
switch is in the ON position. For additional
information, see “Security systems” (P.2-
39).
Supplemental air bag warning
light
After placing the ignition switch in the ON
position, the supplemental air bag warn-
ing light will illuminate. The supplemental
air bag warning light will turn off after
about 7 seconds if the air bag and/or
pretensioner systems are operational.
If any of the following conditions occur,
the air bag and/or pretensioner systems
needs servicing.
. The supplemental air bag warning
light remains on after approximately
7 seconds.
. The supplemental air bag warning
light flashes intermittently.
. The supplemental air bag warning
light does not come on at all.
It is recommended you visit a NISSAN
Page 120 of 604
2-26Instruments and controls
15).)
Maintenance
The maintenance mode allows user to set
alerts for the reminding of maintenance
intervals. To change an item:
Select “Maintenance” using the
but-
tonsand press the OKbutton.
. Oil and Filter
. Tire
. Other
Oil and Filter:
This indicator appears when user set
distance comes for changing the engine
oil and filter. You can set or reset the
distance for checking or replacing these
items. For scheduled maintenance items
and intervals, refer to the “9. Maintenance
and schedules” section.
Tire:
This indicator appears when the user set
distance comes for replacing tires. You
can set or reset the distance for replacing
tires.
WARNING
The tire replacement indicator is not
a substitute for regular tire checks,
including tire pressure checks. (See “Changing wheels and tires” (P.8-
36).) Many factors including tire in-
flation, alignment, driving habits and
road conditions affect tire wear and
when tires should be replaced.
Setting the tire replacement indica-
tor for a certain driving distance
does not mean your tires will last
that long. Use the tire replacement
indicator as a guide only and always
perform regular tire checks. Failure
to perform regular tire checks, in-
cluding tire pressure checks could
result in tire failure. Serious vehicle
damage could occur and may lead to
a collision, which could result in
serious personal injury or death.
Other:
This indicator appears when the user set
distance comes for checking or replacing
maintenance items other than the engine
oil, oil filter and tires. Other maintenance
items can include such things as air filter
or tire rotation. You can set or reset the
distance for checking or replacing the
items.
Customize Display
The display settings allows user to
choose from the various meter selections.
The display settings can be changed
using the
buttons.
Main Menu Selection:
Displays available screens that can be
shown in the vehicle information display.
Route Guidance (if so equipped):
To change the setting, use the
buttonsand press the OKbutton.
. Alerts
The “Alerts” allows user to turn the Route
Guidance alerts on or off.
Welcome Effect:
The “Welcome Effect” displays the avail-
able welcome effect settings.
. gauges (if so equipped)
. Animation
Page 132 of 604
2-38Instruments and controls
button for longer than 1 second.
The display is updated every 30 seconds.
At about the first 1/3 mile (500 m) after a
reset, the display shows “——”.
8. Intelligent Cruise Control (ICC)
system
This mode shows the operating condition
for the Intelligent Cruise Control (ICC)
system. (See “Intelligent Cruise Control
(ICC)” (P.5-74).)
NOTE:
If the ICC system is in a standby state,
this screen is automatically displayed.
9. Driving aids (if so equipped)
The driving aids mode shows the operat-
ing condition for the following systems, if
the vehicle is equipped with them.
. Automatic Emergency Braking (AEB)
with pedestrian detection system
. Intelligent Forward Collision Warning
(I-FCW)
. Lane Departure Warning (LDW)
. Intelligent Lane Intervention (I-LI)
. Blind Spot Warning (BSW)
. Intelligent Blind Spot Intervention (I-
BSI)
For more details, see “Automatic Emer-
gency Braking (AEB) with pedestrian de-
tection system” (P.5-96), “Intelligent Forward Collision Warning (I-FCW)” (P.5-
106), “Lane Departure Warning (LDW)” (P.5-
26), “Intelligent Lane Intervention (I-LI)”
(P.5-31), “Blind Spot Warning (BSW)” (P.5-
38) or “Intelligent Blind Spot Intervention
(I-BSI)” (P.5-46).
10. Tire pressures
The tire pressure mode shows the pres-
sure of all four tires while the vehicle is
driven.
When the “Tire Pressure Low Add Air”
warning appears, the display can be
switched to the tire pressure mode by
pushing the left or right side of the
button.
The tire pressure unit can be changed
using the “TPMS Setting” menu displayed
in the vehicle information display. (See
“TPMS Setting” (P.2-23).)
NOTE:
After the ignition switch is placed in the
ON position, it may take a period of time
for the tire pressure to be displayed
while the vehicle is driven. Depending
on the radio wave circumstance, tire
pressure may not correctly be dis-
played.WAC0225X
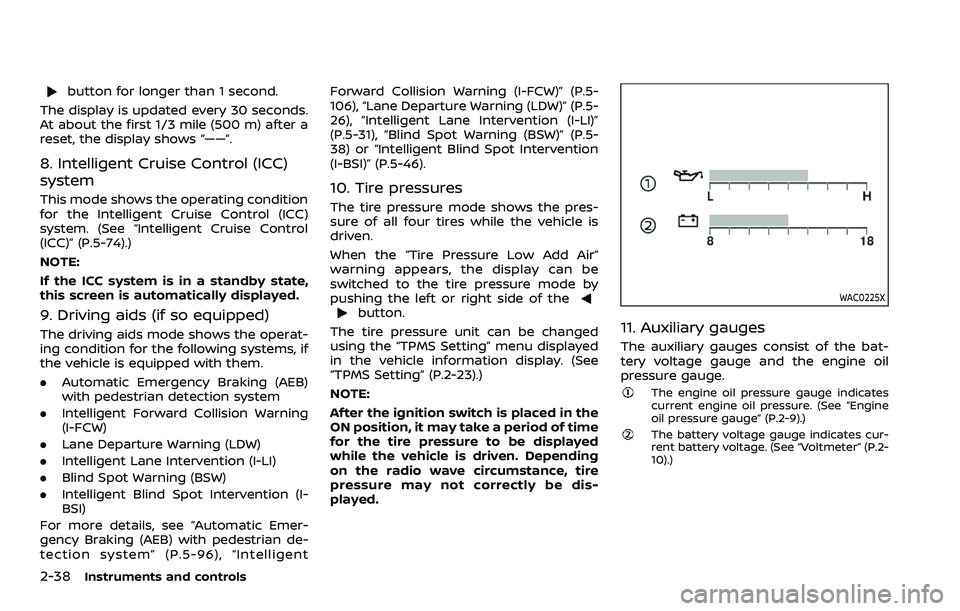
11. Auxiliary gauges
The auxiliary gauges consist of the bat-
tery voltage gauge and the engine oil
pressure gauge.
The engine oil pressure gauge indicates
current engine oil pressure. (See “Engine
oil pressure gauge” (P.2-9).)
The battery voltage gauge indicates cur-
rent battery voltage. (See “Voltmeter” (P.2-
10).)
Page 133 of 604

WAC0226X
CLOCK AND OUTSIDE AIR TEM-
PERATURE
The clockand outside air temperatureare displayed on the upper side of the
vehicle information display.
Clock
For clock adjustment, see “Clock” (P.2-24)
or the separate NissanConnect® Owner’s
Manual.
Outside air temperature (°F or °C)
The outside air temperature is displayed
in °F or °C in the range of −40 to 140°F (−40
to 60°C).
The outside temperature sensor is lo-
cated in front of the radiator. The sensor
may be affected by road or engine heat,
wind directions and other driving condi-
tions. The display may differ from the
actual outside temperature or the tem-
perature displayed on various signs or
billboards.
SIC2133
Your vehicle has two types of security
systems, as follows:
. Vehicle security system
. NISSAN Vehicle Immobilizer System
The security condition will be shown by
the security indicator light.
VEHICLE SECURITY SYSTEM
The vehicle security system provides
visual and audio alarm signals if someone
opens the doors, hood, or liftgate when
the system is armed. It is not, however, a
motion detection type system that acti-
vates when a vehicle is moved or when a
vibration occurs.
The system helps deter vehicle theft but
Instruments and controls2-39
SECURITY SYSTEMS
Page 156 of 604
2-62Instruments and controls
(See “42. Rear Door Alert is activated” (P.2-
34).)
CAUTION
.Use power outlet with the engine
running to avoid discharging the
vehicle battery.
. Avoid using power outlet when
the air conditioner, headlights or
rear window defroster is on.
. Before inserting or disconnecting
a plug, be sure the electrical
accessory being used is turned
OFF.
. When not in use, be sure to close
the cap. Do not allow water or any
liquid to contact the outlet.
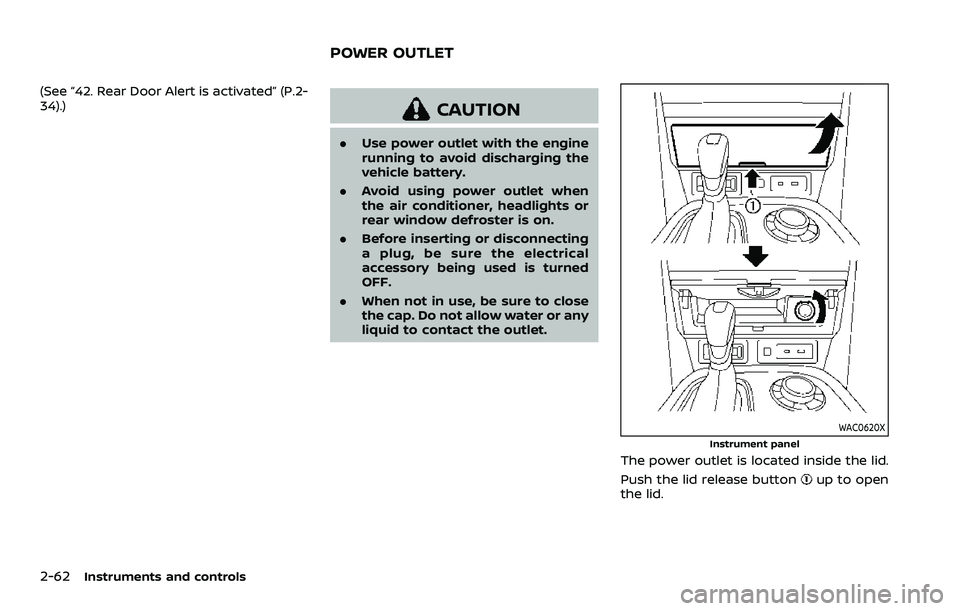
WAC0620XInstrument panel
The power outlet is located inside the lid.
Push the lid release button
up to open
the lid.
POWER OUTLET
Page 174 of 604
2-80Instruments and controls
matically when the auto reverse function
activates due to a malfunction, push and
hold the switch to the CLOSE
position.
Depending on the environment or driv-
ing conditions, the auto reverse func-
tion may be activated if an impact or
load similar to something being caught
in the moonroof occurs.
If the moonroof does not operate
If the moonroof does not operate prop-
erly, perform the following procedure to
initialize the moonroof operation system.
1. If the moonroof is open, close it fully by repeatedly pushing the moonroof
switch to the CLOSE
position.
2. Push and hold the switch to the CLOSE
position.
3. Release the moonroof switch after the moonroof moves slightly up and
down.
4. Push and hold the switch to the OPEN
position to fully tilt the moonroof
down.
5. Check if the moonroof switch oper- ates normally.
If the moonroof does not operate prop-
erly after performing the procedure
above, have your moonroof checked and
repaired. It is recommended you visit a
NISSAN dealer for this service.
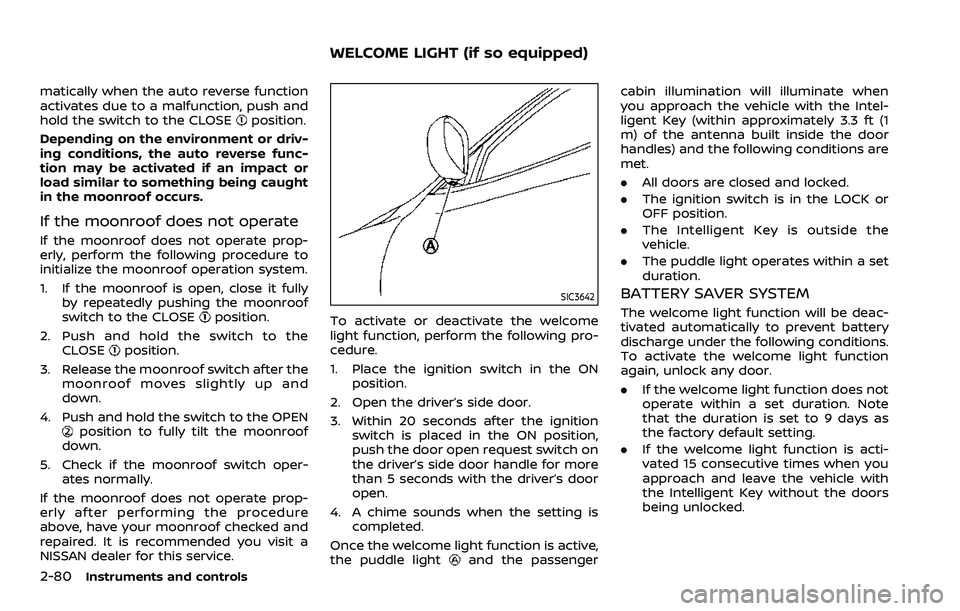
SIC3642
To activate or deactivate the welcome
light function, perform the following pro-
cedure.
1. Place the ignition switch in the ON position.
2. Open the driver’s side door.
3. Within 20 seconds after the ignition switch is placed in the ON position,
push the door open request switch on
the driver’s side door handle for more
than 5 seconds with the driver’s door
open.
4. A chime sounds when the setting is completed.
Once the welcome light function is active,
the puddle light
and the passenger cabin illumination will illuminate when
you approach the vehicle with the Intel-
ligent Key (within approximately 3.3 ft (1
m) of the antenna built inside the door
handles) and the following conditions are
met.
.
All doors are closed and locked.
. The ignition switch is in the LOCK or
OFF position.
. The Intelligent Key is outside the
vehicle.
. The puddle light operates within a set
duration.
BATTERY SAVER SYSTEM
The welcome light function will be deac-
tivated automatically to prevent battery
discharge under the following conditions.
To activate the welcome light function
again, unlock any door.
.If the welcome light function does not
operate within a set duration. Note
that the duration is set to 9 days as
the factory default setting.
. If the welcome light function is acti-
vated 15 consecutive times when you
approach and leave the vehicle with
the Intelligent Key without the doors
being unlocked.
WELCOME LIGHT (if so equipped)
Page 195 of 604

WARNING
.Radio waves could adversely af-
fect electric medical equipment.
Those who use a pacemaker
should contact the electric med-
ical equipment manufacturer for
the possible influences before
use.
. The Intelligent Key transmits
radio waves when the buttons
are pushed. The FAA advises that
the radio waves may affect air-
craft navigation and communica-
tion systems. Do not operate the
Intelligent Key while on an air-
plane. Make sure the buttons are
not operated unintentionally
when the unit is stored during a
flight.
The Intelligent Key system can operate all
the door locks using the remote control-
ler function or pushing the request switch
on the vehicle without taking the key out
from a pocket or purse. The operating
environment and/or conditions may af-
fect the Intelligent Key system operation.
Be sure to read the following before using
the Intelligent Key system.
CAUTION
. Be sure to carry the Intelligent
Key with you when operating the
vehicle.
. Never leave the Intelligent Key in
the vehicle when you leave the
vehicle.
The Intelligent Key is always communi-
cating with the vehicle as it receives radio
waves. The Intelligent Key system trans-
mits weak radio waves. Environmental
conditions may interfere with the opera-
tion of the Intelligent Key system under
the following operating conditions.
. When operating near a location where
strong radio waves are transmitted,
such as a TV tower, power station and
broadcasting station.
. When in possession of wireless equip-
ment, such as a cellular telephone,
transceiver, and CB radio.
. When the Intelligent Key is in contact
with or covered by metallic materials.
. When any type of radio wave remote
control is used nearby.
. When the Intelligent Key is placed near
an electric appliance such as a perso-
nal computer. .
When the vehicle is parked near a
parking meter.
In such cases, correct the operating
conditions before using the Intelligent
Key function or use the mechanical key.
Although the life of the battery varies
depending on the operating conditions,
the battery’s life is approximately 2 years.
If the battery is discharged, replace it with
a new one.
Since the Intelligent Key is continuously
receiving radio waves, if the key is left
near equipment which transmits strong
radio waves, such as signals from a TV
and personal computer, the battery life
may become shorter.
For information regarding replacement of
a battery, see “Intelligent Key battery
replacement” (P.8-21).
As many as 4 Intelligent Keys can be
registered and used with one vehicle. For
information about the purchase and use
of additional Intelligent Keys, contact a
NISSAN dealer.
CAUTION
. Do not allow the Intelligent Key,
which contains electrical compo-
nents, to come into contact with
water or salt water. This could
Pre-driving checks and adjustments3-7
INTELLIGENT KEY SYSTEM
Page 203 of 604

WARNING
The Intelligent Key transmits radio
waves when the buttons are pushed.
The FAA advises that radio waves
may affect aircraft navigation and
communication systems. Do not op-
erate the Intelligent Key while on an
airplane. Make sure the buttons are
not operated unintentionally when
the unit is stored for a flight.
It is possible to lock/unlock all doors, fuel-
filler door, activate the panic alarm and
open the windows by pushing the but-
tons on the Intelligent Key from outside
the vehicle.
Before locking the doors, make sure the
Intelligent Key is not left in the vehicle.
The LOCK/UNLOCK button on the Intelli-
gent Key can operate at a distance of
approximately 33 ft (10 m) from the
vehicle. (The effective distance depends
upon the conditions around the vehicle.)
As many as 4 Intelligent Keys can be used
with one vehicle. For information con-
cerning the purchase and use of addi-
tional Intelligent Keys, contact a NISSAN
dealer.
The lock and unlock buttons on the Intelligent Key will not operate when:
.
the distance between the Intelligent
Key and the vehicle is over 33 ft (10 m).
. the Intelligent Key battery runs down.
After locking with the remote keyless
entry function, pull the door handle to
make sure the doors are securely locked.
The LOCK/UNLOCK operating range var-
ies depending on the environment. To
securely operate the lock and unlock
buttons, approach the vehicle to about 3
ft (1 m) from the door.
JVP0156X
Type A (if so equipped)
SPA2718Type B (if so equipped)
Pre-driving checks and adjustments3-15
REMOTE KEYLESS ENTRY SYSTEM