2023 NISSAN ARMADA ignition
[x] Cancel search: ignitionPage 506 of 604

8-14Do-it-yourself
loose, have it replaced or adjusted. It is
recommended you visit a NISSAN
dealer for this service.
2. Have the belts checked regularly for condition and tension in accordance
with the maintenance schedule
shown in the “9. Maintenance and
schedules” section.
WARNING
Be sure the engine and the ignition
switch are off and that the parking
brake is engaged securely.
CAUTION
Be sure to use the correct socket to
remove the spark plugs. An incorrect
socket can damage the spark plugs.
SDI2020
REPLACING SPARK PLUGS
If replacement is required, it is recom-
mended you visit a NISSAN dealer for this
service.
Iridium-tipped spark plugs
It is not necessary to replace the iridium-
tipped spark plugs as frequently as the
conventional type spark plugs since they
will last much longer. Follow the main-
tenance schedule shown in the “9. Main-
tenance and schedules” section, but do
not reuse them by cleaning or regapping.
Always replace spark plugs with recom-
mended or equivalent ones.
SPARK PLUGS
Page 510 of 604

8-18Do-it-yourself
each depression as the hydraulic
pressure decreases.
If the brakes do not operate properly,
have the brakes checked. It is recom-
mended that you visit a NISSAN dealer for
repair.
SDI2518
SDI2532
ENGINE COMPARTMENT
WARNING
Never use a fuse of a higher or lower
amperage rating than that specified
on the fuse box cover. This could
damage the electrical system or
electronic control units or cause a
fire.
If any electrical equipment does not
operate, check for an open fuse.
1. Be sure the ignition switch is pushed to the OFF or LOCK position and the
headlights are off.
2. Open the engine hood and remove the cover on the battery.
3. Remove the fuse/fusible link holder cover
,or.
4. Remove the fuse with the fuse puller.
FUSES
Page 512 of 604

8-20Do-it-yourself
JVM0200X
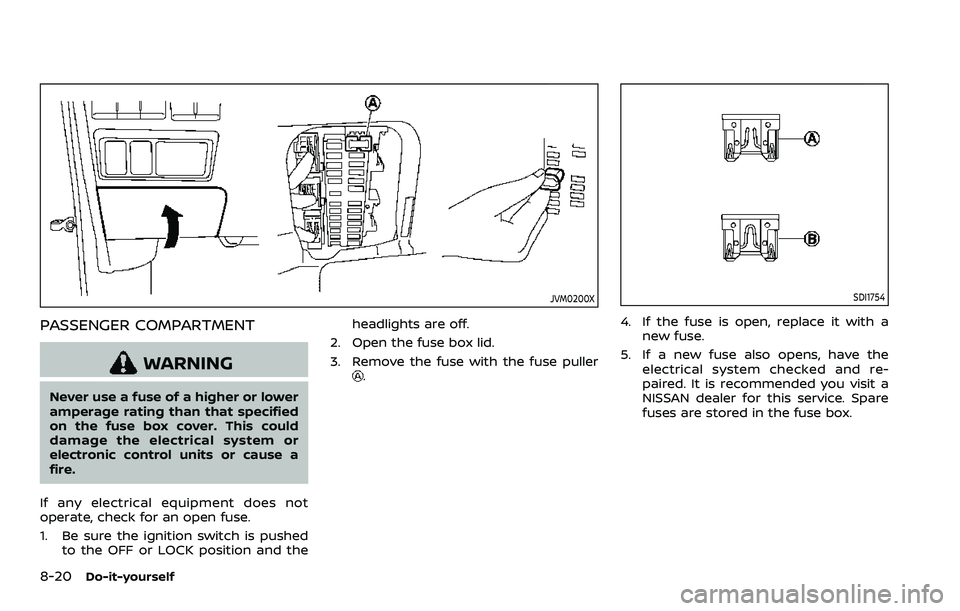
PASSENGER COMPARTMENT
WARNING
Never use a fuse of a higher or lower
amperage rating than that specified
on the fuse box cover. This could
damage the electrical system or
electronic control units or cause a
fire.
If any electrical equipment does not
operate, check for an open fuse.
1. Be sure the ignition switch is pushed to the OFF or LOCK position and the headlights are off.
2. Open the fuse box lid.
3. Remove the fuse with the fuse puller
.
SDI1754
4. If the fuse is open, replace it with a new fuse.
5. If a new fuse also opens, have the electrical system checked and re-
paired. It is recommended you visit a
NISSAN dealer for this service. Spare
fuses are stored in the fuse box.
Page 513 of 604

SDI2704
Extended storage fuse switch (if so
equipped)
To reduce battery drain, the extended
storage fuse switch comes from the
factory switched off. Prior to delivery of
your vehicle, the switch is pushed in
(switched on) and should always remain
on.
If the extended storage fuse switch is not
pushed in (switched on), the “Shipping
Mode On, Push Storage Fuse” warning
may appear on the vehicle information
display (if so equipped). See “Vehicle
information display” (P.2-20).
If any electrical equipment does not
operate, remove the extended storagefuse switch and check for an open fuse.
NOTE:
If the extended storage fuse switch
malfunctions or if the fuse is open, it is
not necessary to replace the switch. In
this case, remove the extended storage
fuse switch and replace it with a new
fuse of the same rating.
How to remove the extended storage
fuse switch:
1. To remove the extended storage fuse
switch, be sure the ignition switch is in
the OFF or LOCK position.
2. Be sure the headlights are off. (See “Headlight switch” (P.2-47), “Intelligent
Auto Headlight system (Type A)” (P.2-
47), or “Autolight system (Type B)” (P.2-
48).)
3. Remove the fuse box cover.
4. Pinch the locking tabs
found on
each side of the storage fuse switch.
5. Pull the storage fuse switch straight out from the fuse box
.
CAUTION
Be careful not to allow children to
swallow the battery and removed
parts.
Do-it-yourself8-21
INTELLIGENT KEY BATTERY REPLACEMENT
Page 560 of 604

10-6Technical and consumer information
Octane rating tips
Using unleaded gasoline with an octane
rating lower than recommended above
can cause persistent, heavy spark
knock. (Spark knock is a metallic rap-
ping noise.) If severe, this can lead to
engine damage. If you detect a persis-
tent heavy spark knock even when
using gasoline of the stated octane
rating, or if you hear steady spark knock
while holding a steady speed on level
roads, it is recommended you have a
NISSAN dealer correct the condition.
Failure to correct the condition is mis-
use of the vehicle, for which NISSAN is
not responsible.
Incorrect ignition timing will result in
knocking, after-run or overheating. This
in turn may cause excessive fuel con-
sumption or damage to the engine. If any
of the above symptoms are encountered,
have your vehicle checked. It is recom-
mended you visit a NISSAN dealer for
servicing.
However, now and then you may notice
light spark knock for a short time while
accelerating or driving up hills. This is
no cause for concern, because you get
the greatest fuel benefit when there is
light spark knock for a short time under
heavy engine load.
JVT0342X
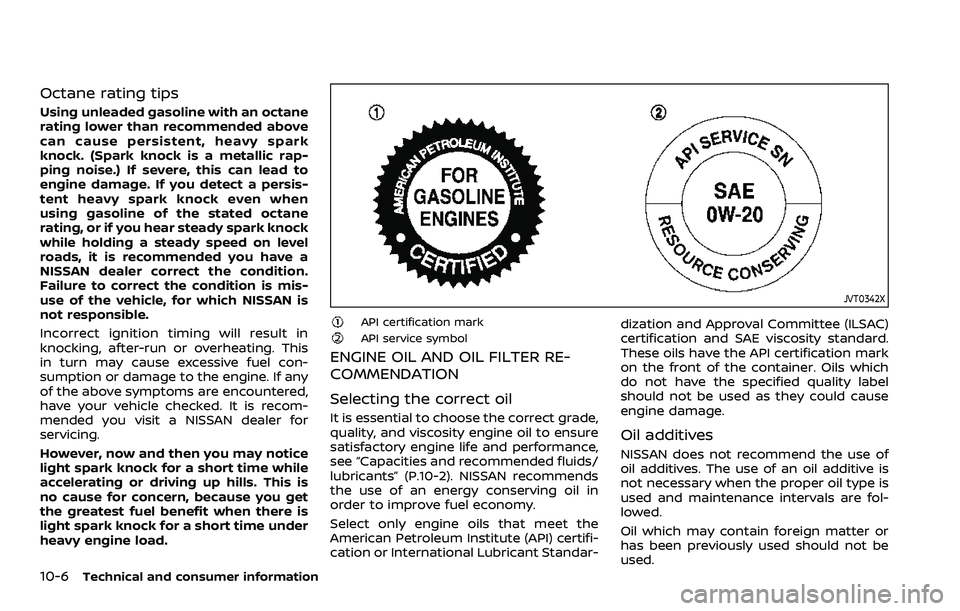
API certification markAPI service symbol
ENGINE OIL AND OIL FILTER RE-
COMMENDATION
Selecting the correct oil
It is essential to choose the correct grade,
quality, and viscosity engine oil to ensure
satisfactory engine life and performance,
see “Capacities and recommended fluids/
lubricants” (P.10-2). NISSAN recommends
the use of an energy conserving oil in
order to improve fuel economy.
Select only engine oils that meet the
American Petroleum Institute (API) certifi-
cation or International Lubricant Standar-dization and Approval Committee (ILSAC)
certification and SAE viscosity standard.
These oils have the API certification mark
on the front of the container. Oils which
do not have the specified quality label
should not be used as they could cause
engine damage.
Oil additives
NISSAN does not recommend the use of
oil additives. The use of an oil additive is
not necessary when the proper oil type is
used and maintenance intervals are fol-
lowed.
Oil which may contain foreign matter or
has been previously used should not be
used.
Page 562 of 604

10-8Technical and consumer information
ENGINE
ModelVK56VD
Type Gasoline, 4-cycle
Cylinder arrangement 8-cylinder, V-slanted at 90°
Bore × Stroke in (mm)3.858 × 3.622 (98 × 92)
Displacement cu in (cm
3)338.78 (5,552)
Firing order 1-8-7-3-6-5-4-2
Idle speed rpm
See the emission control information
label on the underside of the hood.
Ignition timing (B.T.D.C.) degree/rpm
Spark plug StandardDILKAR7B11
Spark plug gap (Normal) in (mm)0.043 (1.1)
Camshaft operation Timing chain
This spark ignition system complies with the Canadian standard ICES-002.
STI0397B
SPECIFICATIONS
Page 580 of 604

10-26Technical and consumer information
with the surge brake, hitch or trailer
manufacturer to determine if and how
this can be done.
Follow the instructions provided by the
manufacturer for installing and using the
weight-distributing hitch system.
General set-up instructions are as follows:
1. Park unloaded vehicle on a level sur-face. With the ignition switch in the ON
position and the doors closed, allow
the vehicle to stand for several min-
utes so that it can level.
2. Measure the height of a reference point on the front and rear bumpers
at the center of the vehicle.
3. Attach the trailer to the vehicle and adjust the hitch equalizers so that the
front bumper height is within 0 - .5
inches (0 - 13 mm) of the reference
height measured in step 2. The rear
bumper should be no higher than the
reference height measured in step 2.
WARNING
Properly adjust the weight distribut-
ing hitch so the rear of the bumper is
no higher than the measured refer-
ence height when the trailer is at-
tached. If the rear bumper is higher than the measured reference height
when loaded, the vehicle may handle
unpredictably which could cause a
loss of vehicle control and cause
serious personal injury or property
damage.
Sway control device
Sudden maneuvers, wind gusts and buf-
feting caused by other vehicles can affect
trailer handling. Sway control devices
may be used to help control these affects.
If you choose to use one, contact a
reputable trailer hitch supplier to make
sure the sway control device will work
with the vehicle, hitch, trailer and the
trailer’s brake system. Follow the instruc-
tions provided by the manufacturer for
installing and using the sway control
device.
Class I hitch
Class I trailer hitch equipment (receiver,
ball mount and hitch ball) can be used to
tow trailers of a maximum weight of
2,000 lb (907 kg).
Class II hitch
Class II trailer hitch equipment (receiver,
ball mount and hitch ball) can be used to
tow trailers of a maximum weight of
3,500 lb (1,588 kg).
Class III hitch
Class III trailer hitch equipment (receiver,
ball mount and hitch ball) can be used to
tow trailers of a maximum weight of
5,000 lb (2,267 kg).
Class IV hitch
Class IV trailer hitch equipment (receiver,
ball mount and hitch ball) can be used to
tow trailers of a maximum weight of
10,000 lb (4,545 kg). A weight distributing
hitch should be used to tow trailers that
weigh over 5,000 lb (2,267 kg).
Your vehicle may be equipped with Class
IV trailer hitch equipment that has a
10,000 lb (4,545 kg) maximum weight
rating, but your vehicle is only capable of
towing the maximum trailer weights
shown in the “Towing Load/Specification”
chart earlier in this section.
CAUTION
.
Do not use axle-mounted hitches.
Page 588 of 604

10-34Technical and consumer information
— the Blind Spot Warning (BSW) sys-tem
(See “How to enable/disable the I-
BSI system” (P.5-48).)
— the Intelligent Blind Spot Interven- tion (I-BSI) system
(See “How to enable/disable the I-
BSI system” (P.5-48).)
— the Intelligent Back-up Intervention (I-BI) system
(See “I-BI system operation” (P.5-
65).)
— the Intelligent Cruise Control (ICC) system
(See “Intelligent Cruise Control
(ICC)” (P.5-74).)
— the Rear Automatic Braking (RAB) system
(See “RAB system operation” (P.5-
118).)
— the Rear Cross Traffic Alert (RCTA) system
(See “How to enable/disable the
RCTA system” (P.5-59).)
. Some states or provinces have speci-
fic regulations and speed limits for
vehicles that are towing trailers. Obey
the local speed limits.
. Check your hitch, trailer wiring har-
ness connections, and trailer wheel
lug nuts after 50 miles (80 km) of travel and at every break.
. When launching a boat, do not allow
the water level to go over the exhaust
tail pipe or rear bumper.
. Make sure you disconnect the trailer
lights (if so equipped) before backing
the trailer into the water or the trailer
lights may burn out.
When towing a trailer, the transmission
fluid should be changed more fre-
quently. For additional information,
see the "9. Maintenance and schedules"
section.
TOW mode
Using TOW mode is recommended when
pulling a heavy trailer or hauling a heavy
load. Push the TOW MODE switch to
activate tow mode. The TOW MODE
indicator light in the meter illuminates
when TOW mode is selected. Push the
TOW MODE switch again to turn TOW
mode off. TOW mode is automatically
cancelled when the ignition switch is
placed in the OFF position.
TOW mode includes the following fea-
tures:
. Grade logic — Adjusts transmission
shifts when pulling a trailer or hauling
a load up a grade. .
Downhill Speed Control (DSC) — auto-
matically downshifts when driving
down a grade with a trailer or heavy
load to help control vehicle speed.
Driving the vehicle in the TOW mode with
no trailer/load or light trailer/light load
will not cause any damage. However, fuel
economy may be reduced and the trans-
mission/engine driving characteristics
may feel unusual.
When towing a trailer, the transmission
fluid should be changed more fre-
quently. For additional information,
see the "9. Maintenance and schedules"
section.Trailer Sway Control
To minimize trailer sway, your vehicle may
apply braking to individual wheels based
on input from your vehicle sensors and
vehicle speed. Trailer Sway Control is a
function of the Vehicle Dynamic Control
(VDC) system and is active when the VDC
function is enabled.
CAUTION
If the VDC OFF switch is on (meaning
VDC system OFF), the Trailer Sway
Control is also disabled.