2023 NISSAN ALTIMA ECO mode
[x] Cancel search: ECO modePage 418 of 644

Automatic standby:
In the following cases, a warning message
is displayed along with the chime, and the
Steering Assist is placed in a temporary
standby mode. (The Steering Assist re-
starts automatically when the operating
conditions are met again.)
• When lane markers on both sides are nolonger detected
• When a vehicle ahead is no longer de- tected under approximately 37 mph (60
km/h)
Steering Assist cancel
Under the following conditions, the Steer-
ing Assist cancels, and the Steering Assist
status indicator and the Steering Assist in-
dicator turn off:
• When unusual lane markers appear inthe traveling lane or when the lane
marker cannot be correctly detected for
some time due to certain conditions (for
example, a snow rut, the reflection of light
on a rainy day, the presence of several
unclear lane markers) • When the windshield wiper operates in
the high (HI) speed operation (the Steer-
ing Assist is disabled when the wiper op-
erates for more than approximately 10
seconds)
Action to take:
Turn the ICC system off using the CANCEL
switch. When the conditions listed above
are no longer present, turn the ICC system
on again.
Steering Assist malfunction
When the system malfunctions, it turns off
automatically. The Steering Assist status
warning illuminates (orange). A chime may
sound depending on the situation.
Action to take:
Stop the vehicle in a safe location, place the
vehicle in the P (Park) position, turn the en-
gine off, restart the engine, resume driving,
and set the Intelligent Cruise Control sys-
tem again. If the warning (orange) contin-
ues to illuminate, the Steering Assist is mal-
functioning. Although the vehicle is still
drivable under normal conditions, have the
system checked. It is recommended that
you visit a NISSAN dealer for this service.
Steering Assist maintenance
The camera sensor is located above the
inside mirror.
To keep the proper operation of the system
and prevent a system malfunction, be sure
to observe the following:
• Always keep the windshield clean.
• Do not attach a sticker (including trans- parent material) or install an accessory
near the camera unit.
• Do not place reflective materials, such as white paper or a mirror, on the instru-
ment panel. The reflection of sunlight
may adversely affect the camera unit’s
capability of detecting the lane markers.
• Do not strike or damage the areas around the camera unit. Do not touch the
camera lens or remove the screw located
on the camera unit.
If the camera unit is damaged due to an
accident, it is recommended that you visit a
NISSAN dealer.
5-122Starting and driving
Page 421 of 644
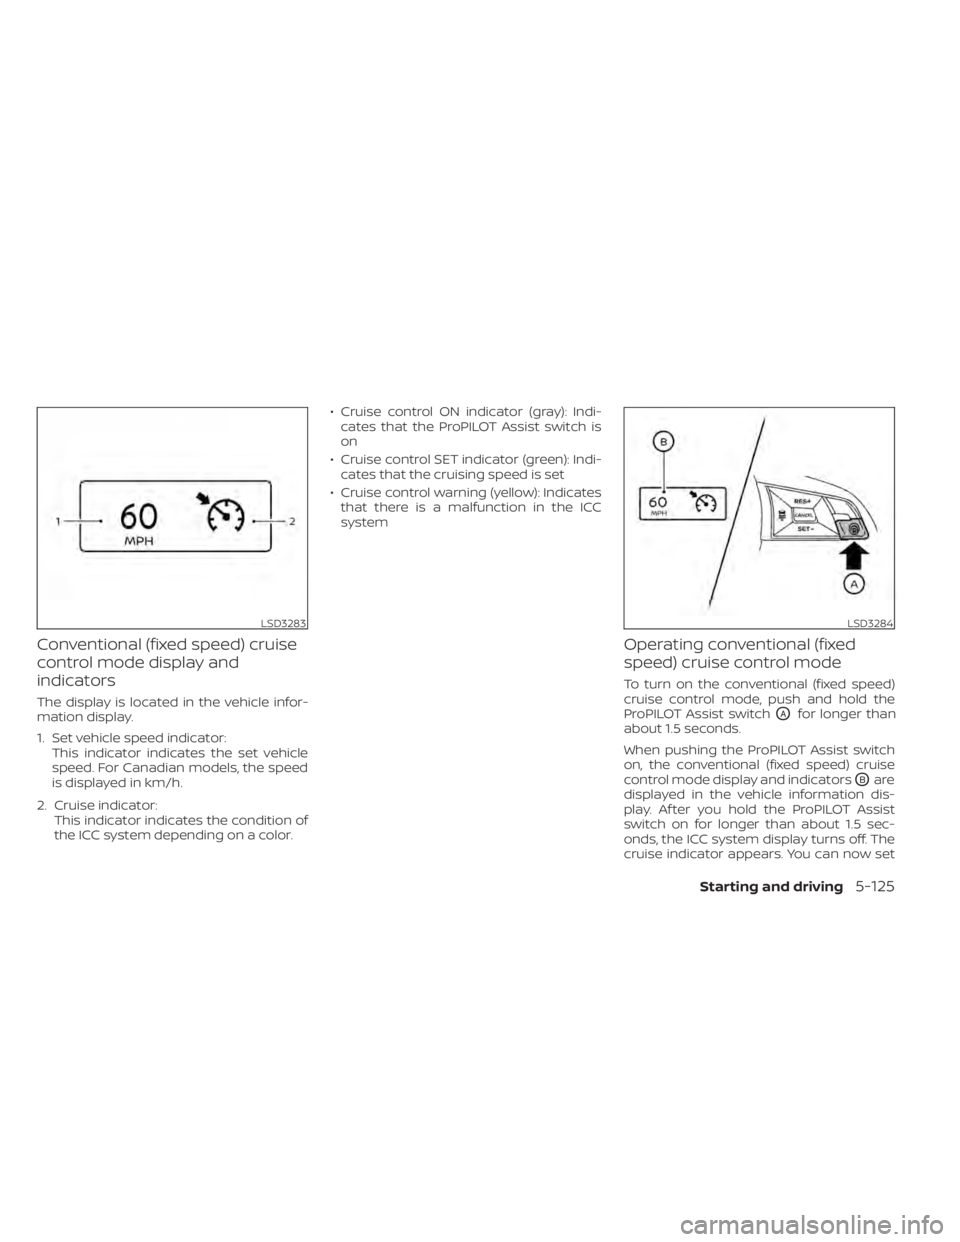
Conventional (fixed speed) cruise
control mode display and
indicators
The display is located in the vehicle infor-
mation display.
1. Set vehicle speed indicator:This indicator indicates the set vehicle
speed. For Canadian models, the speed
is displayed in km/h.
2. Cruise indicator: This indicator indicates the condition of
the ICC system depending on a color. • Cruise control ON indicator (gray): Indi-
cates that the ProPILOT Assist switch is
on
• Cruise control SET indicator (green): Indi- cates that the cruising speed is set
• Cruise control warning (yellow): Indicates that there is a malfunction in the ICC
system
Operating conventional (fixed
speed) cruise control mode
To turn on the conventional (fixed speed)
cruise control mode, push and hold the
ProPILOT Assist switch
OAfor longer than
about 1.5 seconds.
When pushing the ProPILOT Assist switch
on, the conventional (fixed speed) cruise
control mode display and indicators
OBare
displayed in the vehicle information dis-
play. Af ter you hold the ProPILOT Assist
switch on for longer than about 1.5 sec-
onds, the ICC system display turns off. The
cruise indicator appears. You can now set
LSD3283LSD3284
Starting and driving5-125
Page 442 of 644
SYSTEM MAINTENANCE
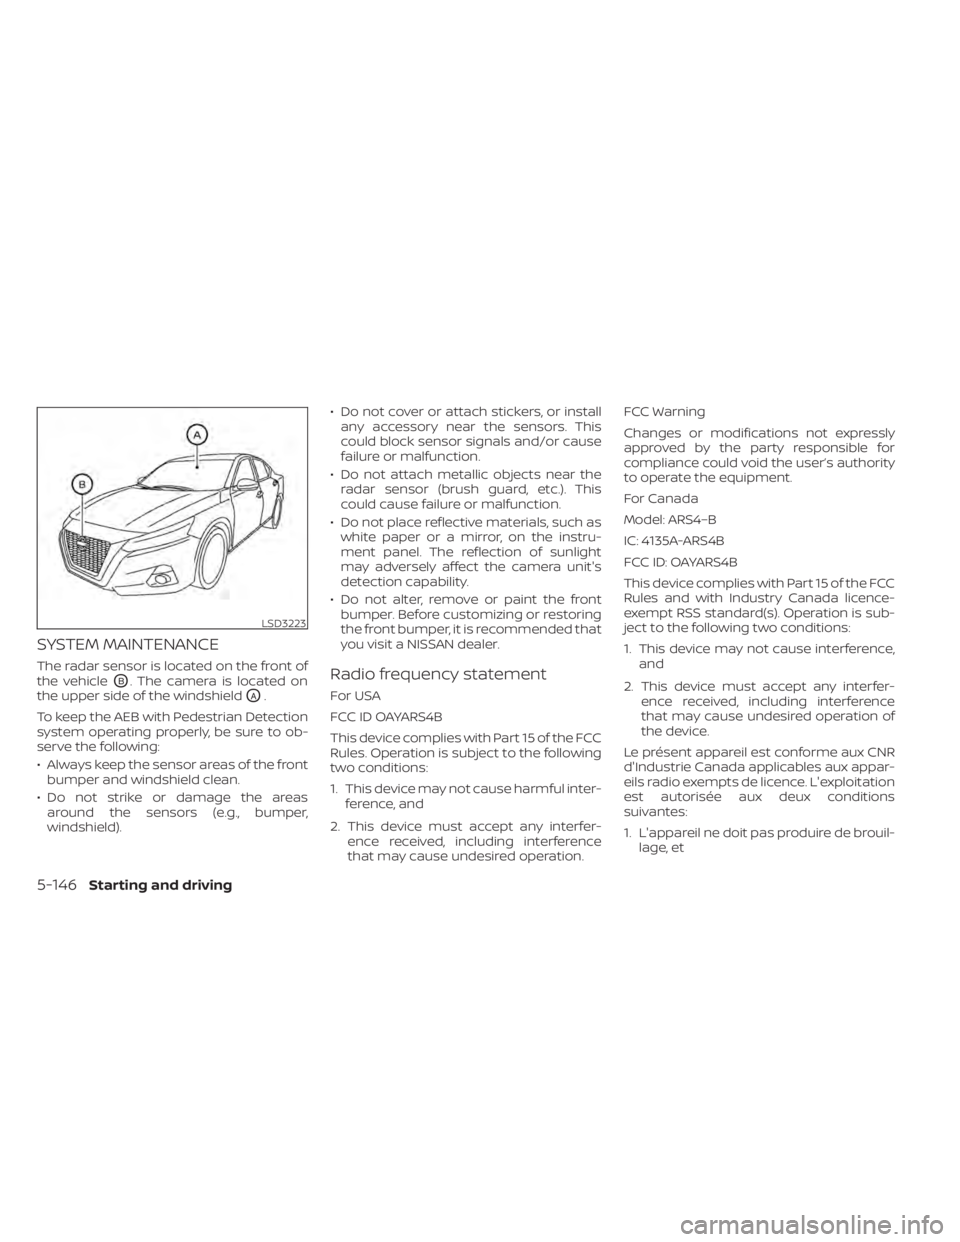
The radar sensor is located on the front of
the vehicle
OB. The camera is located on
the upper side of the windshield
OA.
To keep the AEB with Pedestrian Detection
system operating properly, be sure to ob-
serve the following:
• Always keep the sensor areas of the front bumper and windshield clean.
• Do not strike or damage the areas around the sensors (e.g., bumper,
windshield). • Do not cover or attach stickers, or install
any accessory near the sensors. This
could block sensor signals and/or cause
failure or malfunction.
• Do not attach metallic objects near the radar sensor (brush guard, etc.). This
could cause failure or malfunction.
• Do not place reflective materials, such as white paper or a mirror, on the instru-
ment panel. The reflection of sunlight
may adversely affect the camera unit's
detection capability.
• Do not alter, remove or paint the front bumper. Before customizing or restoring
the front bumper, it is recommended that
you visit a NISSAN dealer.
Radio frequency statement
For USA
FCC ID OAYARS4B
This device complies with Part 15 of the FCC
Rules. Operation is subject to the following
two conditions:
1. This device may not cause harmful inter- ference, and
2. This device must accept any interfer- ence received, including interference
that may cause undesired operation. FCC Warning
Changes or modifications not expressly
approved by the party responsible for
compliance could void the user’s authority
to operate the equipment.
For Canada
Model: ARS4–B
IC: 4135A-ARS4B
FCC ID: OAYARS4B
This device complies with Part 15 of the FCC
Rules and with Industry Canada licence-
exempt RSS standard(s). Operation is sub-
ject to the following two conditions:
1. This device may not cause interference,
and
2. This device must accept any interfer- ence received, including interference
that may cause undesired operation of
the device.
Le présent appareil est conforme aux CNR
d'Industrie Canada applicables aux appar-
eils radio exempts de licence. L'exploitation
est autorisée aux deux conditions
suivantes:
1. L'appareil ne doit pas produire de brouil- lage, et
LSD3223
5-146Starting and driving
Page 465 of 644
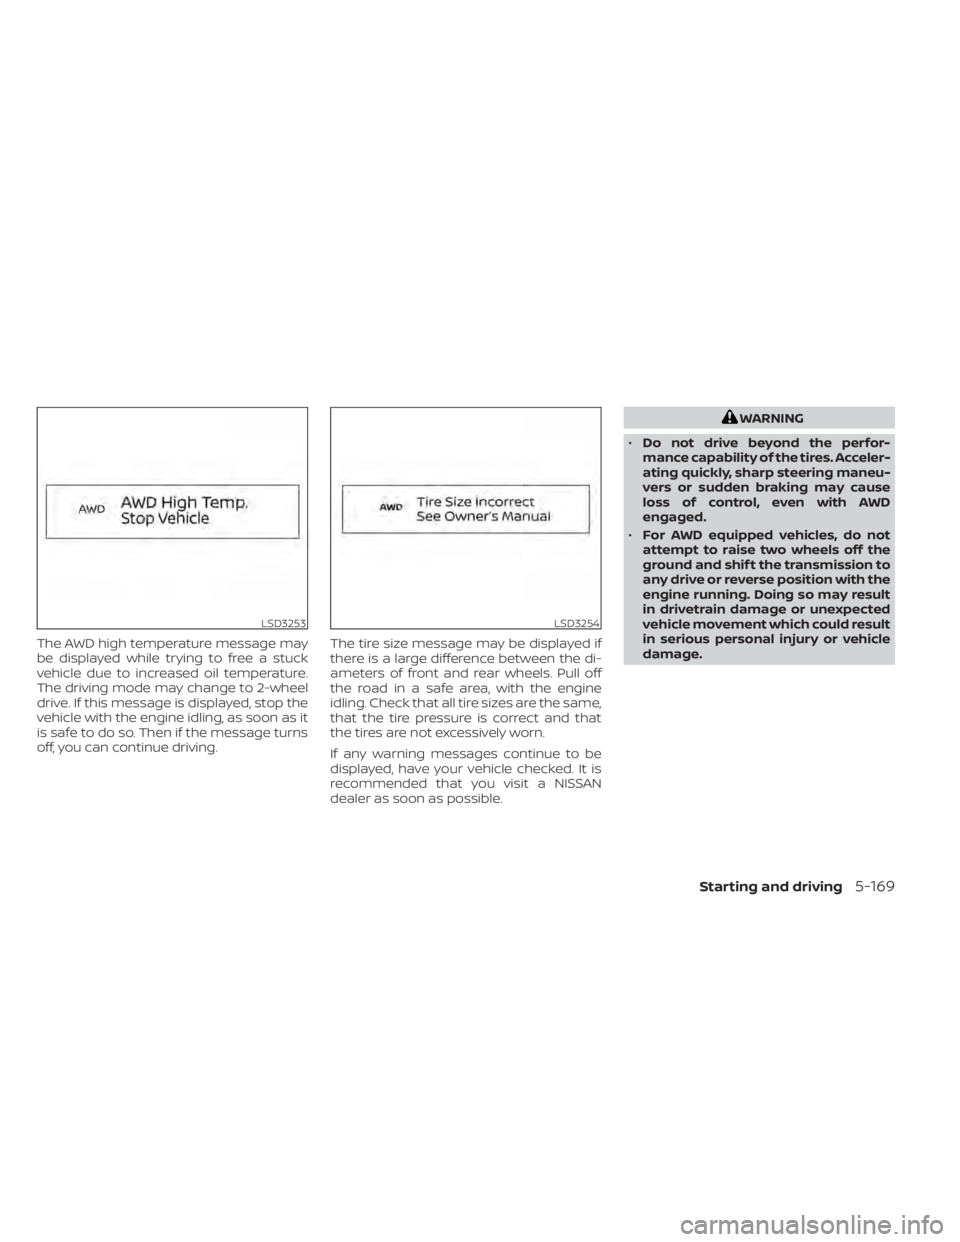
The AWD high temperature message may
be displayed while trying to free a stuck
vehicle due to increased oil temperature.
The driving mode may change to 2-wheel
drive. If this message is displayed, stop the
vehicle with the engine idling, as soon as it
is safe to do so. Then if the message turns
off, you can continue driving.The tire size message may be displayed if
there is a large difference between the di-
ameters of front and rear wheels. Pull off
the road in a safe area, with the engine
idling. Check that all tire sizes are the same,
that the tire pressure is correct and that
the tires are not excessively worn.
If any warning messages continue to be
displayed, have your vehicle checked. It is
recommended that you visit a NISSAN
dealer as soon as possible.
WARNING
• Do not drive beyond the perfor-
mance capability of the tires. Acceler-
ating quickly, sharp steering maneu-
vers or sudden braking may cause
loss of control, even with AWD
engaged.
• For AWD equipped vehicles, do not
attempt to raise two wheels off the
ground and shif t the transmission to
any drive or reverse position with the
engine running. Doing so may result
in drivetrain damage or unexpected
vehicle movement which could result
in serious personal injury or vehicle
damage.
LSD3253LSD3254
Starting and driving5-169
Page 466 of 644
•Do not attempt to test an AWD
equipped vehicle on a 2-wheel dyna-
mometer (such as the dynamom-
eters used by some states for emis-
sions testing) or similar equipment
even if the other two wheels are
raised off the ground. Make sure that
you inform the test facility personnel
that your vehicle is equipped with
AWD before it is placed on a dyna-
mometer. Using the wrong test
equipment may result in drivetrain
damage or unexpected vehicle
movement which could result in seri-
ous personal injury or vehicle
damage.
CAUTION
• Do not operate the engine on a free
roller when any of the wheels are
raised.
• If you use the free roller, rotate four
wheels with the same speed without
raising any wheels. •
If an AWD warning message is dis-
played while driving there may be a
malfunction in the AWD system. Re-
duce the vehicle speed immediately
and have your vehicle checked. It is
recommended that you visit a
NISSAN dealer as soon as possible.
• The powertrain may be damaged if
you continue driving when the AWD
temperature or tire size incorrect
messages are displayed
• If the AWD high temperature mes-
sage is displayed while you are driv-
ing, pull off the road in a safe area,
and idle the engine. The driving
mode will change to 2WD to prevent
the AWD system from malfunction-
ing. If the warning message turns off,
you can drive again.
• If the tire size incorrect message is
displayed while you are driving, pull
off the road in a safe area with the
engine idling. Check that all tire sizes
are the same, that the tire pressure is
correct and that the tires are not ex-
cessively worn. •
If a warning message continues to be
displayed af ter the above opera-
tions, have your vehicle checked as
soon as possible. It is recommended
that you visit a NISSAN dealer for this
service.
5-170Starting and driving
Page 485 of 644
6 In case of emergency
Hazard warning flasher switch..................6-2
Emergency engine shut off ......................6-2
Flat tire ..........................................6-3
Tire Pressure Monitoring System
(TPMS) .......................................6-3
Changing a flat tire
(for models with spare tire) ...................6-4
Repairing flat tire (for models with
emergency tire puncture repair kit) ...........6-11 Jump starting
.................................. 6-17
Push starting ................................... 6-19
If your vehicle overheats ........................6-19
Towing your vehicle ............................ 6-20
Towing recommended by NISSAN ...........6-20
Vehicle recovery
(freeing a stuck vehicle) .....................6-22
Page 493 of 644
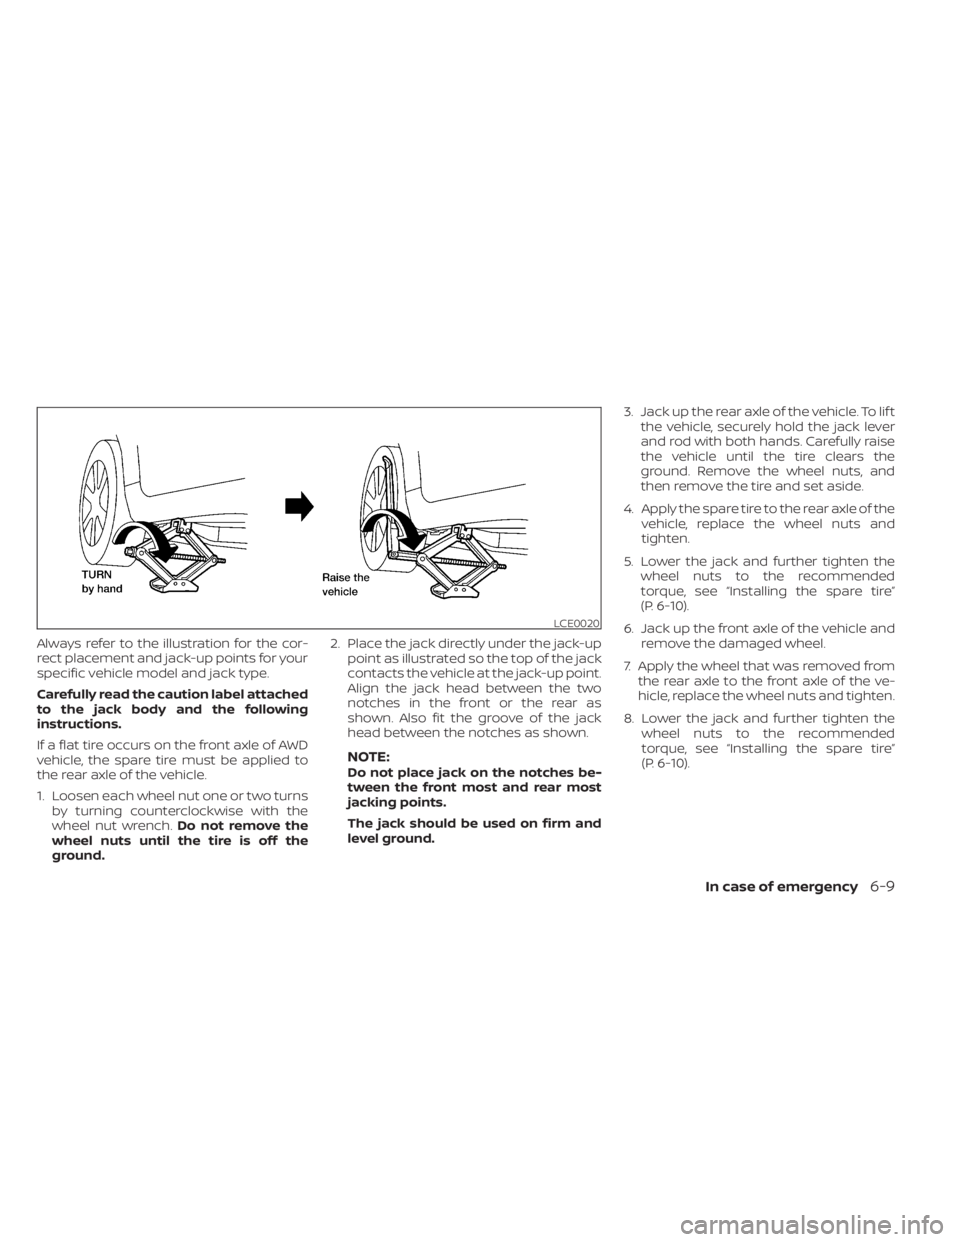
Always refer to the illustration for the cor-
rect placement and jack-up points for your
specific vehicle model and jack type.
Carefully read the caution label attached
to the jack body and the following
instructions.
If a flat tire occurs on the front axle of AWD
vehicle, the spare tire must be applied to
the rear axle of the vehicle.
1. Loosen each wheel nut one or two turnsby turning counterclockwise with the
wheel nut wrench. Do not remove the
wheel nuts until the tire is off the
ground. 2. Place the jack directly under the jack-up
point as illustrated so the top of the jack
contacts the vehicle at the jack-up point.
Align the jack head between the two
notches in the front or the rear as
shown. Also fit the groove of the jack
head between the notches as shown.
NOTE:Do not place jack on the notches be-
tween the front most and rear most
jacking points.
The jack should be used on firm and
level ground. 3. Jack up the rear axle of the vehicle. To lif t
the vehicle, securely hold the jack lever
and rod with both hands. Carefully raise
the vehicle until the tire clears the
ground. Remove the wheel nuts, and
then remove the tire and set aside.
4. Apply the spare tire to the rear axle of the vehicle, replace the wheel nuts and
tighten.
5. Lower the jack and further tighten the wheel nuts to the recommended
torque, see “Installing the spare tire”
(P. 6-10).
6. Jack up the front axle of the vehicle and remove the damaged wheel.
7. Apply the wheel that was removed from the rear axle to the front axle of the ve-
hicle, replace the wheel nuts and tighten.
8. Lower the jack and further tighten the wheel nuts to the recommended
torque, see “Installing the spare tire”
(P. 6-10).
LCE0020
In case of emergency6-9
Page 495 of 644
5. Securely store the flat tire in the tire welland jacking equipment in the vehicle.
NOTE:Remove the center wheel cap before
storing the flat tire.
6. Place the spare tire cover and the trunk floor carpeting over the damaged tire.
7. Close the trunk.
WARNING
• Always make sure that the spare tire
and jacking equipment are properly
secured af ter use. Such items can be-
come dangerous projectiles in an ac-
cident or sudden stop.
• The spare tire is designed for emer-
gency use. For additional informa-
tion, see “Wheels and tires” (P. 8-29).
REPAIRING FLAT TIRE (for models
with emergency tire puncture
repair kit)
WARNING
• Af ter using Genuine NISSAN Emer-
gency Tire Sealant to repair a minor
tire puncture, do not drive the vehicle
at speeds faster than 50 mph (80
km/h).
• Immediately af ter using the Genuine
NISSAN Emergency Tire Sealant to
repair a minor tire puncture, it is rec-
ommended that you visit a NISSAN
dealer. The Genuine NISSAN Emer-
gency Tire Sealant cannot perma-
nently seal a punctured tire. Continu-
ing operation of the vehicle without a
permanent tire repair can lead to a
crash.
• If you used the Genuine NISSAN
Emergency Tire Sealant to repair a
minor tire puncture, it is recom-
mended that you visit a NISSAN
dealer to replace the TPMS sensor in
addition to repairing or replacing the
tire. •
NISSAN recommends using only
Genuine NISSAN Emergency Tire
Sealant provided with your vehicle.
Other tire sealants may damage the
valve stem seal which can cause the
tire to lose air pressure.
This vehicle does not have a spare tire. The
emergency tire puncture repair kit
(Genuine NISSAN Emergency Tire Sealant)
is supplied with the vehicle instead of a
spare tire. It can be used to temporarily
repair minor tire punctures.
If possible, have the vehicle towed to a fa-
cility that can repair or replace the flat tire.
Using the emergency tire puncture repair
kit may cause a malfunction of the tire
pressure sensor and cause the low tire
pressure warning light to illuminate.
CAUTION
• To avoid the emergency tire puncture
kit being damaged during storage or
use:
– Only use the emergency tire punc-
ture repair kit on your vehicle. Do
not use it on other vehicles.
In case of emergency6-11