2023 NISSAN ALTIMA light
[x] Cancel search: lightPage 511 of 644
WAXING
Regular waxing protects the paint surface
and helps retain new vehicle appearance.
Polishing is recommended to remove
built-up wax residue and to avoid a weath-
ered appearance before re-applying wax.
It is recommended that you visit a NISSAN
dealer to assist you in choosing the proper
product.
• Wax your vehicle only af ter a thoroughwashing. Follow the instructions supplied
with the wax.
• Do not use a wax containing any abra- sives, cutting compounds or cleaners
that may damage the vehicle finish.
Machine compounding or aggressive pol-
ishing on a base coat/clear coat paint fin-
ish may dull the finish or leave swirl marks.
REMOVING SPOTS
Remove tar and oil spots, industrial dust,
insects, and tree sap as quickly as possible
from the surface of the paint to avoid last-
ing damage or staining. Special cleaning
products are available at a NISSAN dealer
or any automotive accessory store. It is
recommended that you visit a NISSAN
dealer for these products.
UNDERBODY
In areas where road salt is used in winter, it
is necessary to clean the underbody regu-
larly in order to prevent dirt and salt from
building up and causing the acceleration of
corrosion on the underbody and suspen-
sion. Before the winter period and again in
the spring, the underseal must be checked
and, if necessary, re-treated.
GLASS
When cleaning the rear window, it may be
easier to clean if the high-mounted stop
light is removed first.
Be careful when removing the high-
mounted stop light to reduce the risk of
damaging the high-mounted stop light
wires.
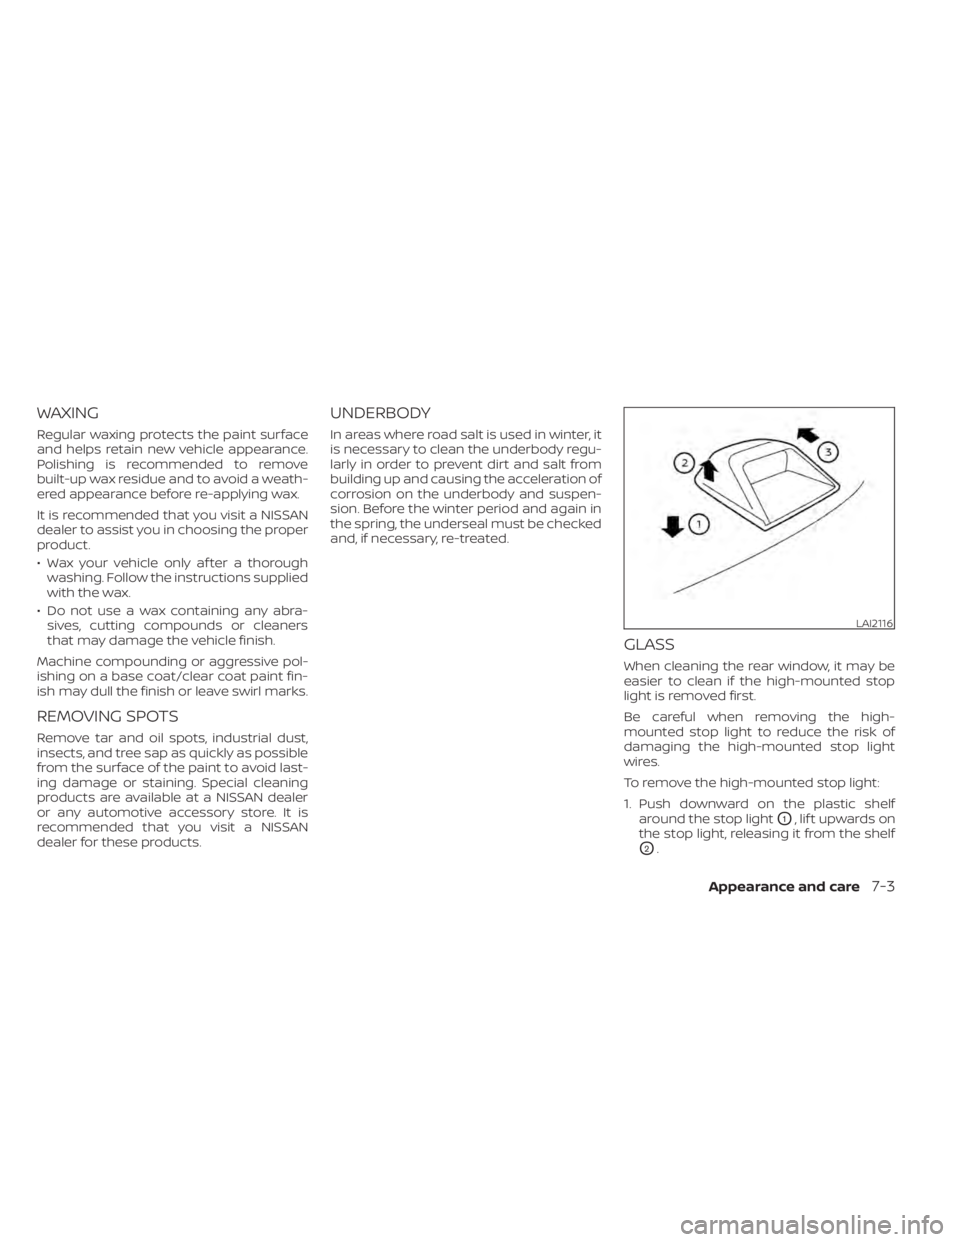
To remove the high-mounted stop light:
1. Push downward on the plastic shelf around the stop light
O1,liftupwardson
the stop light, releasing it from the shelf
O2.
LAI2116
Appearance and care7-3
Page 512 of 644
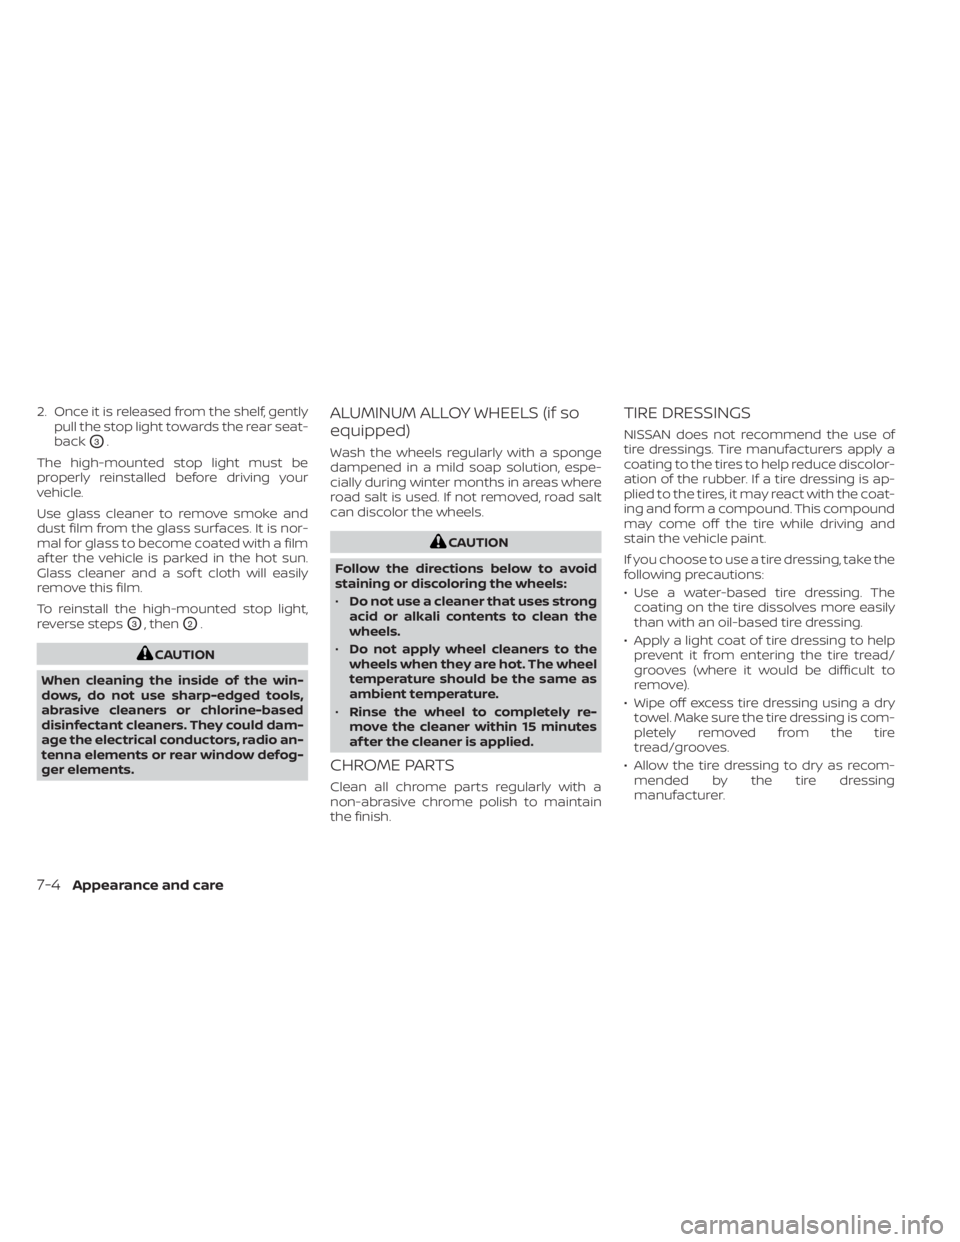
2. Once it is released from the shelf, gentlypull the stop light towards the rear seat-
back
O3.
The high-mounted stop light must be
properly reinstalled before driving your
vehicle.
Use glass cleaner to remove smoke and
dust film from the glass surfaces. It is nor-
mal for glass to become coated with a film
af ter the vehicle is parked in the hot sun.
Glass cleaner and a sof t cloth will easily
remove this film.
To reinstall the high-mounted stop light,
reverse steps
O3, thenO2.
CAUTION
When cleaning the inside of the win-
dows, do not use sharp-edged tools,
abrasive cleaners or chlorine-based
disinfectant cleaners. They could dam-
age the electrical conductors, radio an-
tenna elements or rear window defog-
ger elements.
ALUMINUM ALLOY WHEELS (if so
equipped)
Wash the wheels regularly with a sponge
dampened in a mild soap solution, espe-
cially during winter months in areas where
road salt is used. If not removed, road salt
can discolor the wheels.
CAUTION
Follow the directions below to avoid
staining or discoloring the wheels:
• Do not use a cleaner that uses strong
acid or alkali contents to clean the
wheels.
• Do not apply wheel cleaners to the
wheels when they are hot. The wheel
temperature should be the same as
ambient temperature.
• Rinse the wheel to completely re-
move the cleaner within 15 minutes
af ter the cleaner is applied.
CHROME PARTS
Clean all chrome parts regularly with a
non-abrasive chrome polish to maintain
the finish.
TIRE DRESSINGS
NISSAN does not recommend the use of
tire dressings. Tire manufacturers apply a
coating to the tires to help reduce discolor-
ation of the rubber. If a tire dressing is ap-
plied to the tires, it may react with the coat-
ing and form a compound. This compound
may come off the tire while driving and
stain the vehicle paint.
If you choose to use a tire dressing, take the
following precautions:
• Use a water-based tire dressing. The coating on the tire dissolves more easily
than with an oil-based tire dressing.
• Apply a light coat of tire dressing to help prevent it from entering the tire tread/
grooves (where it would be difficult to
remove).
• Wipe off excess tire dressing using a dry towel. Make sure the tire dressing is com-
pletely removed from the tire
tread/grooves.
• Allow the tire dressing to dry as recom- mended by the tire dressing
manufacturer.
7-4Appearance and care
Page 517 of 644

8 Do-it-yourself
Maintenance precautions.......................8-2
Engine compartment check locations ...........8-3
Engine cooling system ..........................8-5
Checking engine coolant level ................8-6
Changing engine coolant ....................8-6
Engine oil .......................................8-7
Checking engine oil level .....................8-7
Changing engine oil and oil filter ..............8-8
Continuously Variable Transmission (CVT)
fluid ............................................ 8-12
Brake fluid ...................................... 8-12
Windshield-washer fluid ........................8-13
Windshield-washer fluid reservoir ...........8-13
Battery......................................... 8-14
Jump starting ............................... 8-15
Variable voltage control system ................8-16
Drive belt ....................................... 8-16
Spark plugs .................................... 8-17
Replacing spark plugs ....................... 8-17
Air cleaner ..................................... 8-18In-cabin microfilter
.......................... 8-18
Windshield wiper blades ........................8-19
Cleaning .................................... 8-19
Replacing ................................... 8-19
Brakes ......................................... 8-20
Fuses .......................................... 8-21
Engine compartment ....................... 8-21
Passenger compartment ...................8-22
Battery replacement ........................... 8-23
NISSAN Intelligent Key® ......................8-24
Lights .......................................... 8-25
Headlights .................................. 8-25
Fog lights (if so equipped) ...................8-26
Exterior and interior lights ...................8-26
Wheels and tires ............................... 8-29
Tire pressure ................................ 8-29
Tire labeling ................................. 8-33
Types of tires ................................
8-36
Tir
e chains .................................. 8-37
Changing wheels and tires ..................8-39
Page 527 of 644
CAUTION
Be careful not to burn yourself, as the
engine oil is hot.
WARNING
• Prolonged and repeated contact
with used engine oil may cause skin
cancer.
• Try to avoid direct skin contact with
used oil. If skin contact is made, wash
thoroughly with soap or hand
cleaner as soon as possible.
• Keep used engine oil out of reach of
children.
4. Loosen the oil filter with an oil filter wrench by turning it counterclockwise.
Remove the oil filter by turning it by
hand.
5. Wipe the engine oil filter mounting sur- face with a clean rag.
CAUTION
Be sure to remove any old gasket ma-
terial remaining on the sealing surface
of the engine. Failure to do so could
lead to an oil leak and engine damage. •
The dipstick must be inserted in
place to prevent oil spillage from the
dipstick hole when filling the engine
with oil.
6. Coat the gasket on the new filter with clean engine oil.
7. Screw in the oil filter clockwise until a slight resistance is felt, then tighten addi-
tionally more than 2/3 turn.
Oil filter tightening torque: 11 to 15 f t-lb (14.7 to 20.6 N·m)
8. Clean and re-install the drain plug with a new washer. Securely tighten the drain
plug with a wrench. Do not use exces-
sive force.
Drain plug tightening torque: 22 to 29 f t-lb (29.4 to 39.2 N·m)
9. Refill the engine with the recommended oil through the oil filler opening, and in-
stall the oil filler cap securely.
For additional information about drain and
refill capacity, see “Recommended fluids/
lubricants and capacities” (P. 10-2). The
drain and refill capacity depends on the oil
temperature and drain time. Use these
specifications for reference only. Always use the dipstick to determine the proper
amount of oil in the engine.
10. Start the engine and check for leakage
around the drain plug and the oil filter.
Correct as required. Turn the engine off
and wait more than 15 minutes. Check
the oil level with the dipstick. Add en-
gine oil if necessary.
Af ter the operation
1. Reinstall undercover in reverse order ofremoval.
2. Lower the vehicle carefully to the ground.
3. Reset the oil control system (if so equipped) and oil and filter maintenance
reminder. For additional information,
see “Vehicle information display – 5 inch
(13 cm) Type A” (P. 2-18) or “Vehicle infor-
mation display – 7 inch (18 cm) Type B”
(P. 2-34)
• Dispose of waste oil and filter properly.
• Check your local regulations.
Do-it-yourself8-11
Page 528 of 644
CAUTION
• NISSAN recommends using Genuine
NISSAN CVT Fluid NS-3 (or equiva-
lent) ONLY in NISSAN CVTs. Do not mix
with other fluids.
• Do not use Automatic Transmission
Fluid (ATF) or manual transmission
fluid in a NISSAN CVT, as it may dam-
age the CVT. Damage caused by the
use of fluids other than as recom-
mended is not covered under
NISSAN's New Vehicle Limited War-
ranty outlined in your Warranty Infor-
mation Booklet.
• Using fluids that are not equivalent
to Genuine NISSAN CVT Fluid NS-3
may also damage the CVT. Damage
caused by the use of fluids other than
as recommended is not covered un-
der NISSAN's New Vehicle Limited
Warranty outlined in your Warranty
Information Booklet.
When checking or replacement of CVT fluid
is required, it is recommended that you visit
a NISSAN dealer for this service. For additional information on brake fluid
specification, see “Recommended fluids/
lubricants and capacities” (P. 10-2).
WARNING
• Use only new fluid from a sealed con-
tainer. Old, inferior or contaminated
fluid may damage the brake system.
The use of improper fluids can dam-
age the brake system and affect the
vehicle's stopping ability.
• Clean the filler cap before removing. •
Brake fluid is poisonous and should
be stored carefully in marked con-
tainers out of reach of children.
CAUTION
Do not spill the fluid on any painted sur-
faces. This will damage the paint. If fluid
is spilled, immediately wash the sur-
face with water.
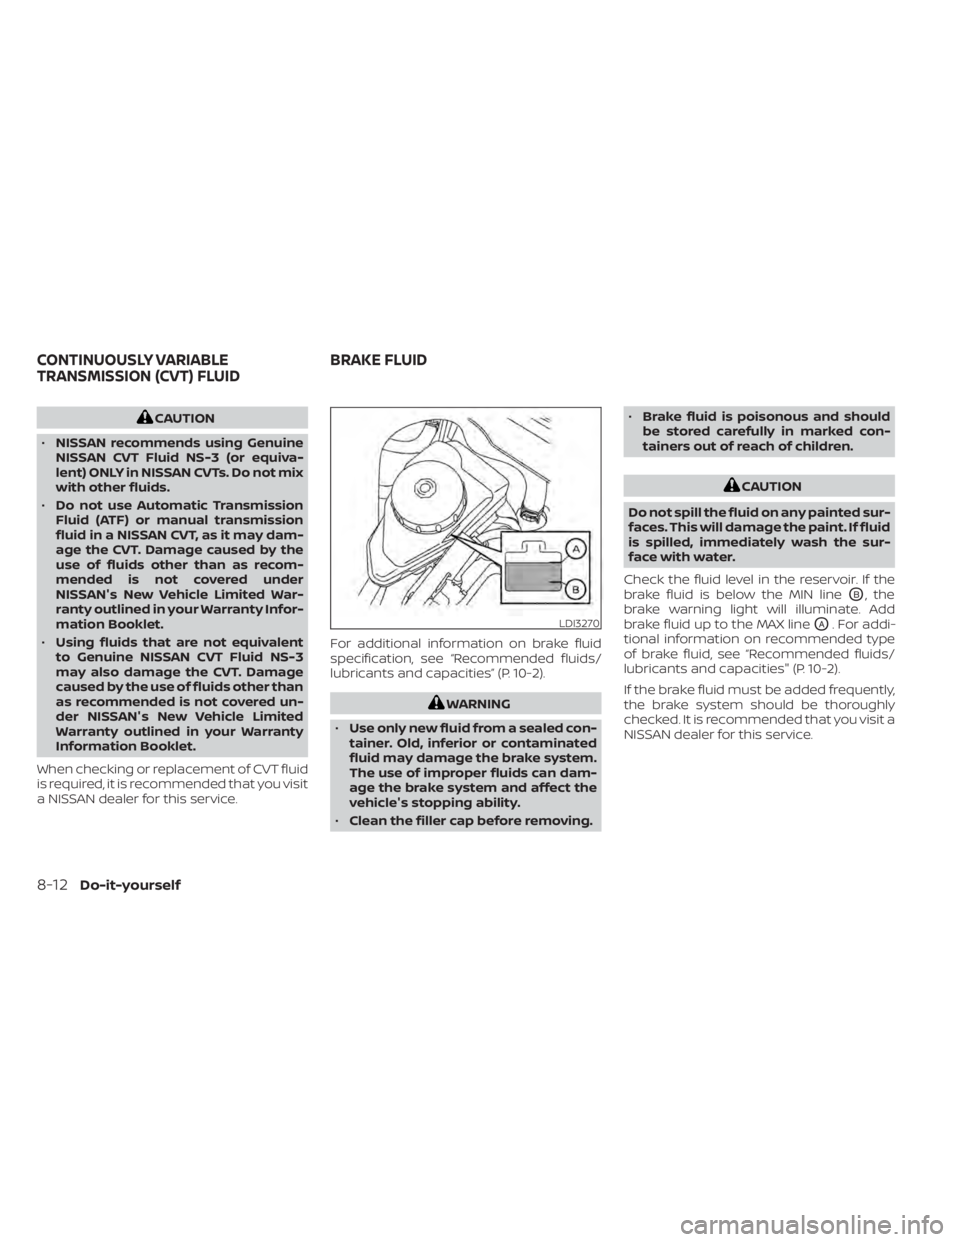
Check the fluid level in the reservoir. If the
brake fluid is below the MIN line
OB, the
brake warning light will illuminate. Add
brake fluid up to the MAX line
OA. For addi-
tional information on recommended type
of brake fluid, see “Recommended fluids/
lubricants and capacities" (P. 10-2).
If the brake fluid must be added frequently,
the brake system should be thoroughly
checked. It is recommended that you visit a
NISSAN dealer for this service.LDI3270
CONTINUOUSLY VARIABLE
TRANSMISSION (CVT) FLUID BRAKE FLUID
8-12Do-it-yourself
Page 536 of 644
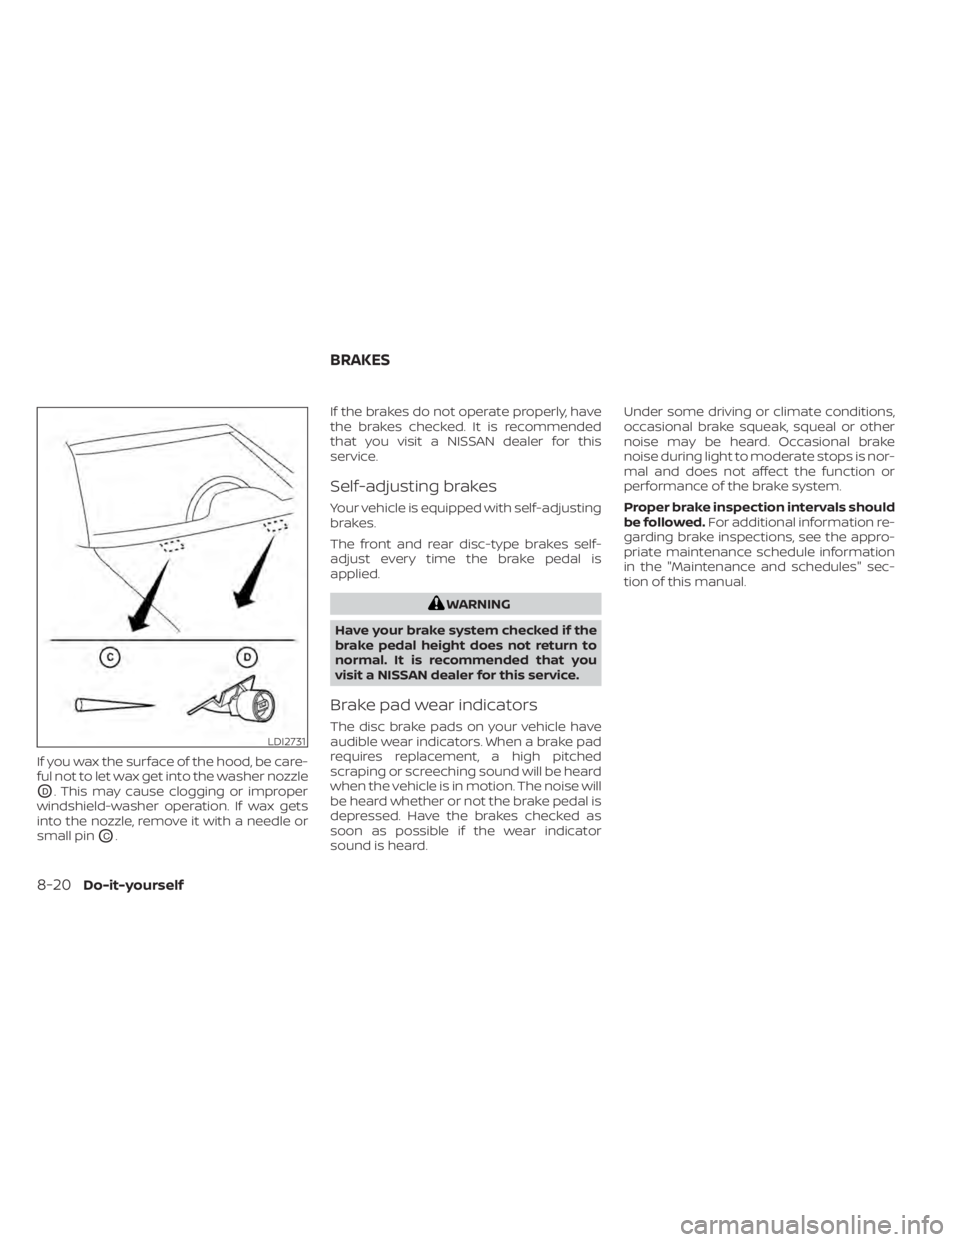
If you wax the surface of the hood, be care-
ful not to let wax get into the washer nozzle
OD. This may cause clogging or improper
windshield-washer operation. If wax gets
into the nozzle, remove it with a needle or
small pin
OC. If the brakes do not operate properly, have
the brakes checked. It is recommended
that you visit a NISSAN dealer for this
service.
Self-adjusting brakes
Your vehicle is equipped with self-adjusting
brakes.
The front and rear disc-type brakes self-
adjust every time the brake pedal is
applied.
WARNING
Have your brake system checked if the
brake pedal height does not return to
normal. It is recommended that you
visit a NISSAN dealer for this service.
Brake pad wear indicators
The disc brake pads on your vehicle have
audible wear indicators. When a brake pad
requires replacement, a high pitched
scraping or screeching sound will be heard
when the vehicle is in motion. The noise will
be heard whether or not the brake pedal is
depressed. Have the brakes checked as
soon as possible if the wear indicator
sound is heard. Under some driving or climate conditions,
occasional brake squeak, squeal or other
noise may be heard. Occasional brake
noise during light to moderate stops is nor-
mal and does not affect the function or
performance of the brake system.
Proper brake inspection intervals should
be followed.
For additional information re-
garding brake inspections, see the appro-
priate maintenance schedule information
in the "Maintenance and schedules" sec-
tion of this manual.LDI2731
BRAKES
8-20Do-it-yourself
Page 537 of 644
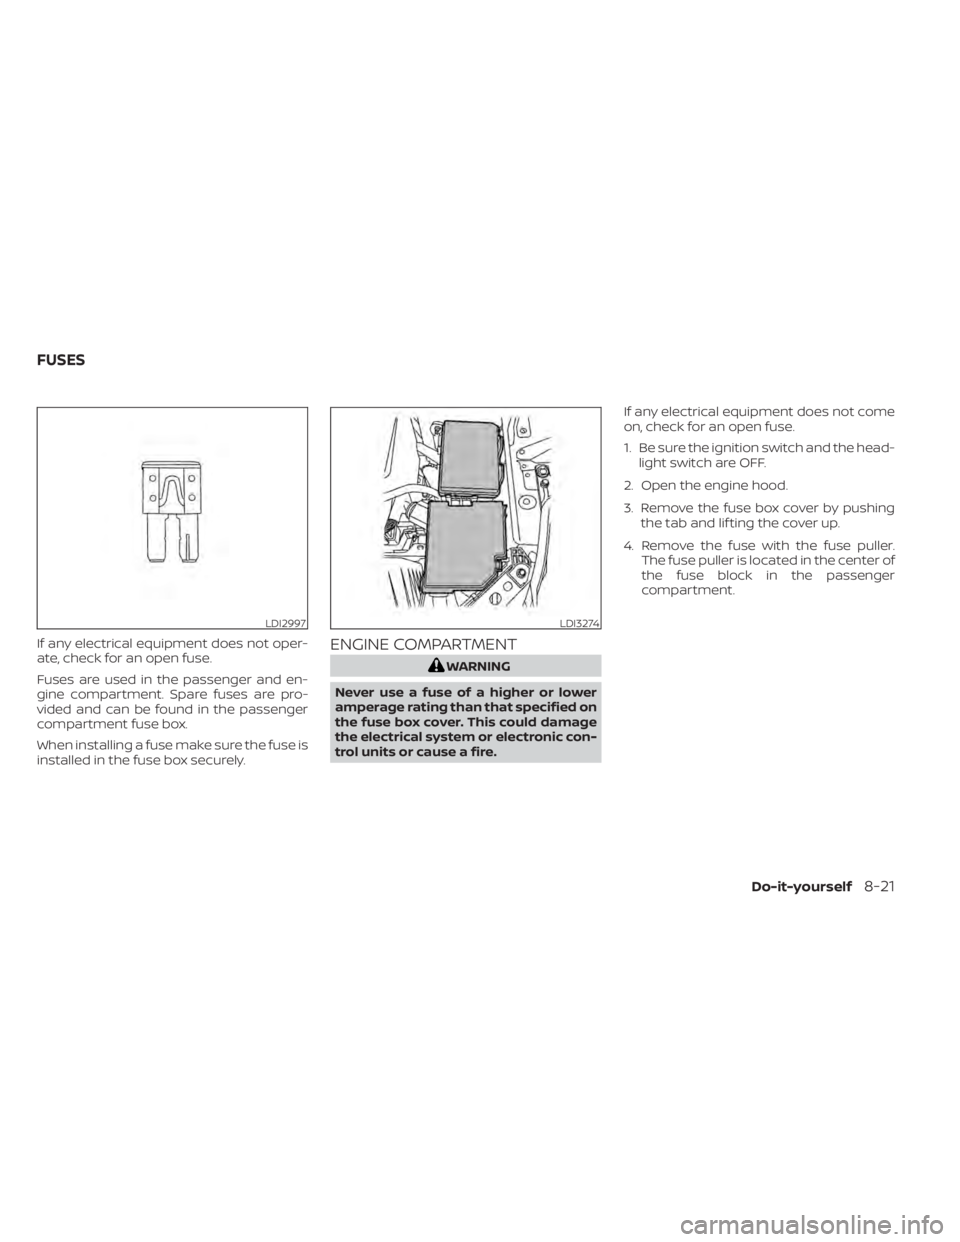
If any electrical equipment does not oper-
ate, check for an open fuse.
Fuses are used in the passenger and en-
gine compartment. Spare fuses are pro-
vided and can be found in the passenger
compartment fuse box.
When installing a fuse make sure the fuse is
installed in the fuse box securely.ENGINE COMPARTMENT
WARNING
Never use a fuse of a higher or lower
amperage rating than that specified on
the fuse box cover. This could damage
the electrical system or electronic con-
trol units or cause a fire. If any electrical equipment does not come
on, check for an open fuse.
1. Be sure the ignition switch and the head-
light switch are OFF.
2. Open the engine hood.
3. Remove the fuse box cover by pushing the tab and lif ting the cover up.
4. Remove the fuse with the fuse puller. The fuse puller is located in the center of
the fuse block in the passenger
compartment.
LDI2997LDI3274
FUSES
Do-it-yourself8-21
Page 538 of 644
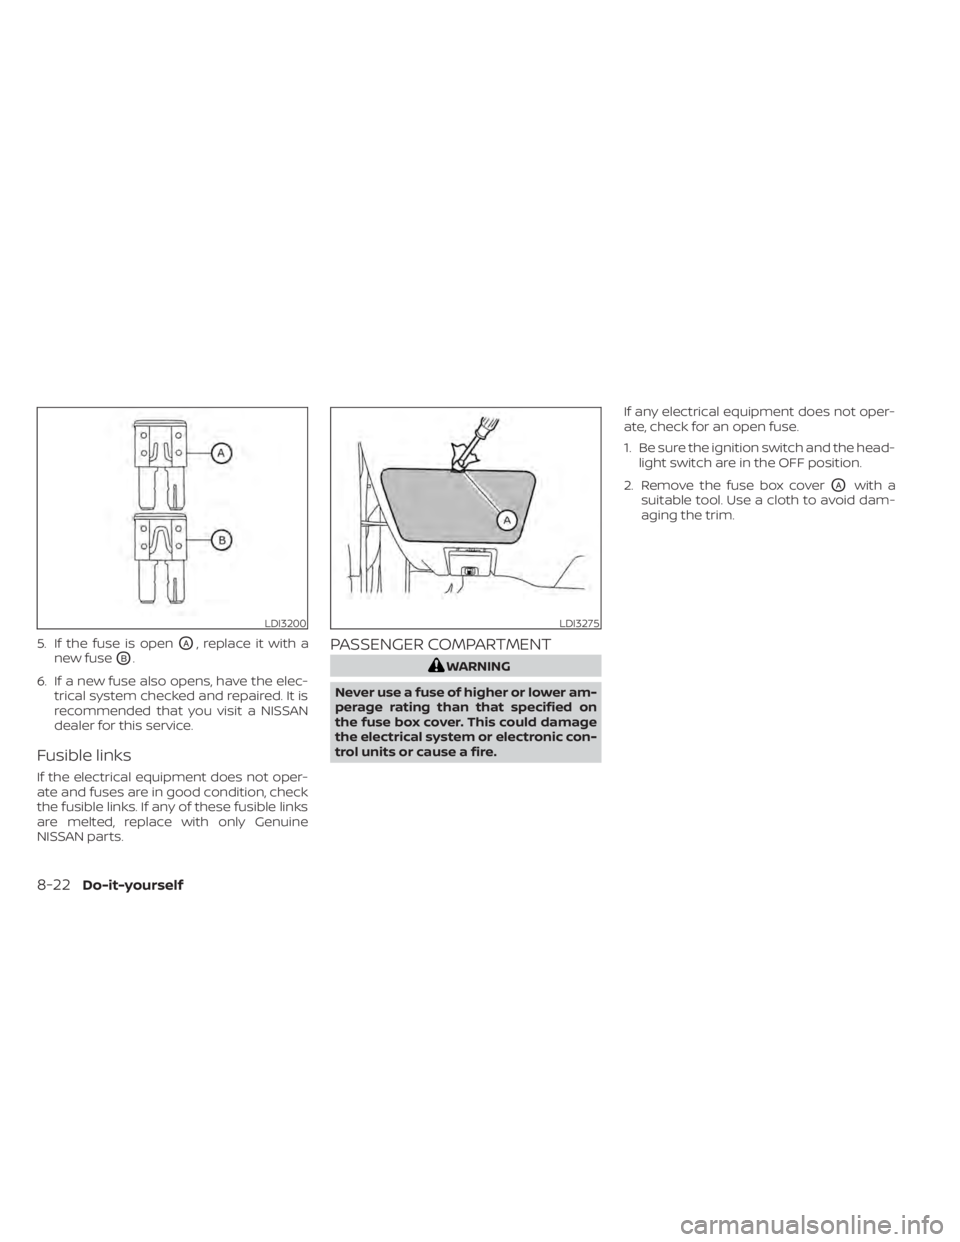
5. If the fuse is openOA, replace it with a
new fuse
OB.
6. If a new fuse also opens, have the elec- trical system checked and repaired. It is
recommended that you visit a NISSAN
dealer for this service.
Fusible links
If the electrical equipment does not oper-
ate and fuses are in good condition, check
the fusible links. If any of these fusible links
are melted, replace with only Genuine
NISSAN parts.
PASSENGER COMPARTMENT
WARNING
Never use a fuse of higher or lower am-
perage rating than that specified on
the fuse box cover. This could damage
the electrical system or electronic con-
trol units or cause a fire. If any electrical equipment does not oper-
ate, check for an open fuse.
1. Be sure the ignition switch and the head-
light switch are in the OFF position.
2. Remove the fuse box cover
OAwith a
suitable tool. Use a cloth to avoid dam-
aging the trim.
LDI3200LDI3275
8-22Do-it-yourself