2023 NISSAN ALTIMA seats
[x] Cancel search: seatsPage 161 of 644
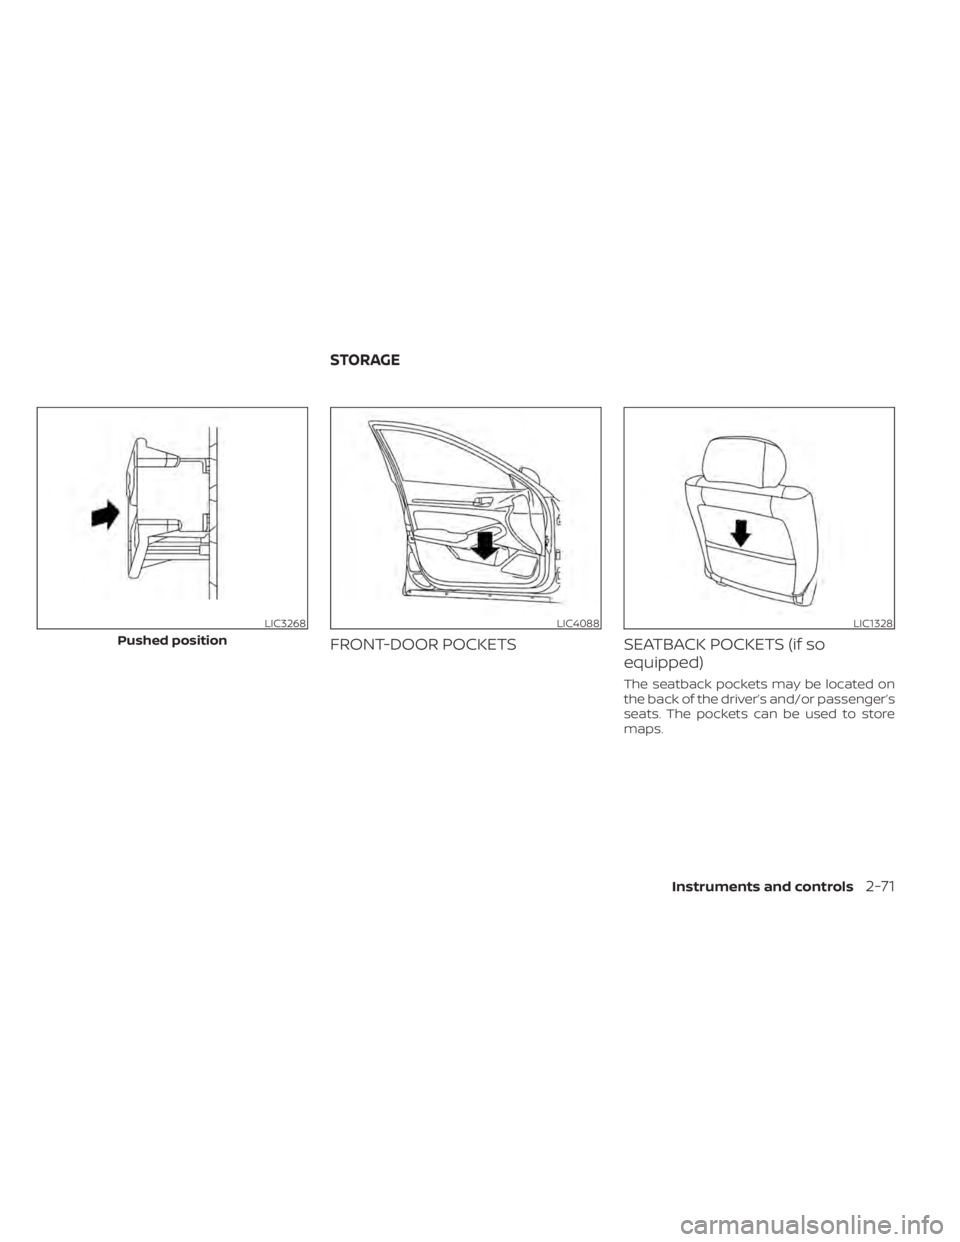
FRONT-DOOR POCKETSSEATBACK POCKETS (if so
equipped)
The seatback pockets may be located on
the back of the driver’s and/or passenger’s
seats. The pockets can be used to store
maps.
LIC3268
Pushed position
LIC4088LIC1328
STORAGE
Instruments and controls2-71
Page 252 of 644
mode when Remote Engine Start is acti-
vated depending on outside and cabin
temperatures. During this period, the cli-
mate control display and buttons will be
inoperable until the ignition switch is
turned on. In Remote Engine Start defrost-
ing mode, the rear window defroster,
heated seats (if so equipped) and heated
steering wheel (if so equipped) may be ac-
tivated automatically.
MANUAL OPERATION
Fan speed control buttons
Press thefan speed control buttons
to manually control the fan speed.
Press the AUTO button to return to auto-
matic control of the fan speed.
Temperature control dial
The temperature control dial allows you to
adjust the temperature of the outlet air. To
lower the temperature, turn the dial to the
lef t. To increase the temperature, turn the
dial to the right. Temperature can be ad-
justed on the driver’s and passenger’s side.
Air recirculation
Press theair recirculation button to
recirculate interior air inside the vehicle.
The
indicator light on the button will
come on.
The air recirculation cannot be activated
when the air conditioner is in the
front
defrosting mode.
When the outside temperature exceeds
70°F (21°C), the air conditioning system may
default to air recirculation mode automati-
cally to reduce overall power consumption.
To exit air recirculation mode, deselect the
air recirculation button (indicator light will
turn off ) to enter fresh air mode.
Automatic intake air control
In the AUTO mode, the intake air will be
controlled automatically. To manually con-
trol the intake air, press the
air recir-
culation button. To return to the automatic
control mode, press and hold the
air
recirculation button for about 2 seconds.
The indicator light will flash twice, and then
the intake air will be controlled
automatically.
A/C (air conditioner) button
Start the engine, press thefan speed
control buttons to the desired position and
press the
button to turn on the air
conditioner. To turn off the air conditioner,
press the
button again.
The air conditioner cooling function op-
erates only when the engine is running.
Air flow control
Pressing thebutton manually con-
trols air flow and selects the air outlet:
— Air flows from center and side
vents.
— Air flows from center and sidevents and foot outlets.
— Air flows mainly from the footoutlets.
— Air flows from defroster and footoutlets.
4-42Monitor, climate, audio, phone and voice recognition systems
Page 257 of 644
The vehicle is not equipped with a USB de-
vice. USB devices should be purchased
separately as necessary.
This system cannot be used to format USB
devices. To format a USB device, use a per-
sonal computer.
In some jurisdictions, the USB device for the
front seats plays only sound without im-
ages for regulatory reasons, even when the
vehicle is parked.
This system supports various USB
memory devices, USB hard drives and
iPod® players. Some USB devices may not
be supported by this system.
• Partitioned USB devices may not playcorrectly.
• Some characters used in other lan- guages (Chinese, Japanese, etc.) may not
appear properly in the display. Using Eng-
lish language characters with a USB de-
vice is recommended.
General notes for USB use:
• For additional information, refer to your device manufacturer’s owner informa-
tion regarding the proper use and care of
the device. Notes for iPod® use:
iPod® is a trademark of Apple Inc., regis-
tered in the U.S. and other countries.
• Improperly plugging in the iPod® may
cause a checkmark to be displayed on
and off (flickering). Always make sure that
the iPod® is connected properly.
• An iPod® nano (1st Generation) may re- main in fast forward or rewind mode if it is
connected during a seek operation. In
this case, please manually reset the
iPod®.
• An iPod® nano (2nd Generation) will con- tinue to fast-forward or rewind if it is dis-
connected during a seek operation.
• An incorrect song title may appear when the Play Mode is changed while using an
iPod® nano (2nd Generation).
• Audiobooks may not play in the same order as they appear on an iPod®.
• Large video files cause slow responses in an iPod®. The vehicle center display may
momentarily black out, but will soon
recover.
• If an iPod® automatically selects large video files while in the shuffle mode, the
vehicle center display may momentarily
black out, but will soon recover.iPod®* player
• Some characters used in other lan-guages (Chinese, Japanese, etc.) are not
displayed properly on the vehicle center
screen. We recommend using English or
Spanish language characters with an
iPod®.
• Large video podcast files cause slow re- sponses in the iPod®. The vehicle center
display may momentarily black out, but it
will soon recover.
• If the iPod® automatically selects large video podcast files while in the shuffle
mode, the vehicle center display may
momentarily black out, but it will soon
recover.
• Improperly plugging in the iPod® may cause a checkmark to be displayed on
and off (flickering). Always make sure that
the iPod® is connected properly.
• The iPod® nano (2nd Generation) will con- tinue to fast forward or rewind if it is dis-
connected during a seek operation.
• An incorrect song title may appear when the Play Mode is changed while using the
iPod® nano (2nd Generation).
• Audiobooks may not play in the same order as they appear on the iPod®.
Monitor, climate, audio, phone and voice recognition systems4-47
Page 305 of 644
AVOIDING COLLISION AND
ROLLOVER
WARNING
Failure to operate this vehicle in a safe
and prudent manner may result in loss
of control or an accident.
Be alert and drive defensively at all times.
Obey all traffic regulations. Avoid excessive
speed, high speed cornering, or sudden
steering maneuvers, because these driving
practices could cause you to lose control of
your vehicle.
As with any vehicle, loss of control could
result in a collision with other vehicles or
objects or cause the vehicle to roll over,
particularly if the loss of control causes
the vehicle to slide sideways.
Be attentive at all times, and avoid driving
when tired. Never drive when under the in-
fluence of alcohol or drugs (including pre-
scription or over-the-counter drugs which
may cause drowsiness). Always wear your
seat belt as outlined in the “Safety – Seats,
seat belts and supplemental restraint sys-
tem” section of this manual, and also in-
struct your passengers to do so. Seat belts help reduce the risk of injury in
collisions and rollovers.
In a rollover crash, an unbelted person is
significantly more likely to die than a
person wearing a seat belt.
OFF-ROAD RECOVERY
While driving, the right side or lef t side
wheels may unintentionally leave the road
surface. If this occurs, maintain control of
the vehicle by following the procedure be-
low. Please note that this procedure is only
a general guide. The vehicle must be driven
as appropriate based on the conditions of
the vehicle, road and traffic.
1. Remain calm and do not overreact.
2. Do not apply the brakes.
3. Maintain a firm grip on the steering
wheel with both hands and try to hold a
straight course.
4. When appropriate, slowly release the ac- celerator pedal to gradually slow the
vehicle.
5. If there is nothing in the way, steer the vehicle to follow the road while vehicle
speed is reduced. Do not attempt to
drive the vehicle back onto the road sur-
face until vehicle speed is reduced. 6. When it is safe to do so, gradually turn
the steering wheel until both tires return
to the road surface. When all tires are on
the road surface, steer the vehicle to
stay in the appropriate driving lane.
• If you decide that it is not safe to return the vehicle to the road surface based
on vehicle, road or traffic conditions,
gradually slow the vehicle to a stop in
a safe place off the road.
RAPID AIR PRESSURE LOSS
Rapid air pressure loss or a “blow-out” can
occur if the tire is punctured or is damaged
due to hitting a curb or pothole. Rapid air
pressure loss can also be caused by driving
on under-inflated tires.
Rapid air pressure loss can affect the han-
dling and stability of the vehicle, especially
at highway speeds.
Help prevent rapid air pressure loss by
maintaining the correct air pressure and
visually inspecting the tires for wear and
damage. For additional information, see
“Wheels and tires” (P. 8-29). If a tire rapidly
loses air pressure or “blows-out” while driv-
ing, maintain control of the vehicle by fol-
lowing the procedure below. Please note
that this procedure is only a general guide.
Starting and driving5-9
Page 513 of 644
Occasionally remove loose dust from the
interior trim, plastic parts and seats using a
vacuum cleaner or sof t bristled brush. Wipe
the vinyl and leather (if so equipped) sur-
faces with a clean, sof t cloth dampened in
mild soap solution, then wipe clean with a
dry, sof t cloth.
Regular care and cleaning is required in
order to maintain the appearance of the
leather (if so equipped).
Before using any fabric protector, read the
manufacturer's recommendations. Some
fabric protectors contain chemicals that
may stain or bleach the seat material.
Use a cloth dampened only with water to
clean the meter and gauge lens.
WARNING
Do not use water or acidic cleaners (hot
steam cleaners) on the seat. This can
damage the seat or occupant classifi-
cation sensor. This can also affect the
operation of the air bag system and re-
sult in serious personal injury.
CAUTION
• Never use benzine, thinner or any
similar material.
• Small dirt particles can be abrasive
and damaging to leather surfaces
and should be removed promptly. Do
not use saddle soap, car waxes, pol-
ishes, oils, cleaning fluids, solvents,
detergents or ammonia-based
cleaners as they may damage the
leather's natural finish.
• Never use fabric protectors unless
recommended by the manufacturer.
• Do not use glass or plastic cleaner on
meter or gauge lens covers. It may
damage the lens cover.
• Never use chloride solutions for
cleaning aluminum decoratives (if so
equipped), damage may occur.AIR FRESHENERS
Most air fresheners use a solvent that
could affect the vehicle interior. If you use
an air freshener, take the following
precautions:
• Hanging-type air fresheners can cause permanent discoloration when they con-
tact vehicle interior surfaces. Place the air
freshener in a location that allows it to
hang free and not contact an interior
surface.
• Liquid-type air fresheners typically clip on the vents. These products can cause im-
mediate damage and discoloration
when spilled on interior surfaces.
Carefully read and follow the manufactur-
er's instructions before using the air
fresheners.
CLEANING INTERIOR
Appearance and care7-5
Page 564 of 644
Brakes:Check that the brakes do not pull
the vehicle to one side when applied.
Continuously Variable Transmission
(CVT) P (Park) position mechanism: On a
fairly steep hill check that the vehicle is held
securely with the shif t lever in the P (Park)
position without applying any brakes.
Parking brake: Check the parking brake
operation regularly. The vehicle should be
securely held on a fairly steep hill with only
the parking brake applied. If the parking
brake needs adjustment, it is recom-
mended that you visit a NISSAN dealer for
this service.
Seats: Check seat position controls such
as seat adjusters, seatback recliner, etc., to
ensure they operate smoothly and all
latches lock securely in every position.
Check that the head restraints/headrests
move up and down smoothly and the locks
(if so equipped) hold securely in all latched
positions.
Seat belts: Check that all parts of the seat
belt system (for example, buckles, anchors,
adjusters and retractors) operate properly
and smoothly, and are installed securely.
Check the belt webbing for cuts, fraying,
wear or damage. Steering wheel:
Check for changes in the
steering system, such as excessive free
play, hard steering or strange noises.
Warning lights and chimes: Make sure all
warning lights and chimes are operating
properly.
Windshield defroster: Check that the air
comes out of the defroster outlets properly
and in sufficient quantity when operating
the heater or air conditioner.
Windshield wiper and washer*: Check
that the wipers and washer operate prop-
erly and that the wipers do not streak.
Under the hood and vehicle
The maintenance items listed here should
be checked periodically (for example, each
time you check the engine oil or refuel).
Battery*: This vehicle is equipped with a
sealed maintenance free battery. It is rec-
ommended that you visit a NISSAN dealer
for service.
NOTE:
Care should be taken to avoid situations
that can lead to potential battery dis-
charge and potential no-start conditions
such as:
1. Installation or extended use of elec- tronic accessories that consume bat-
tery power when the engine is not
running (Phone chargers, GPS, DVD
players, etc.).
2. Vehicle is not driven regularly and/or only driven short distances.
In these cases, the battery may need to
be charged to maintain battery health.
Brake fluid level*: Make sure that the brake
fluid level is between the MAX and MIN lines
on the reservoir.
Engine coolant level*: Check the coolant
level when the engine is cold.
Engine drive belts*: Make sure the drive
belts are not frayed, worn, cracked or oily.
Engine oil level*: Check the level af ter
parking the vehicle on a level spot and
turning off the engine. Wait more than 15
minutes for the oil to drain back into the oil
pan.
9-4Maintenance and schedules
Page 616 of 644
WARNING
• It is extremely dangerous to
ride in a cargo area inside a ve-
hicle. In a collision, people rid-
ing in these areas are more
likely to be seriously injured or
killed.
• Do not allow people to ride in
any area of your vehicle that is
not equipped with seats and
seat belts.
• Be sure everyone in your ve-
hicle is in a seat and using a
seat belt properly.
TERMS
It is important to familiarize yourself
with the following terms before
loading your vehicle: • Curb Weight (actual weight of your
vehicle) - vehicle weight including:
standard and optional equipment,
fluids, emergency tools, and spare
tire assembly. This weight does
not include passengers and cargo.
• GVW (Gross Vehicle Weight) - curb weight plus the combined weight
of passengers and cargo.
• GVWR (Gross Vehicle Weight Rat- ing) - maximum total combined
weight of the unloaded vehicle,
passengers, cargo, hitch, trailer
tongue load and any other op-
tional equipment. This information
is located on the F.M.V.S.S./
C.M.V.S.S. certification label.
• GAWR (Gross Axle Weight Rating) - maximum weight (load) limit
specified for the front or rear axle.
This information is located on the
F.M.V.S.S./C.M.V.S.S. certification
label. • GCWR (Gross Combined Weight
Rating) - The maximum total
weight rating of the vehicle, pas-
sengers, cargo, and trailer.
• Vehicle Capacity Weight, Load limit, Total load capacity - maximum to-
tal weight limit specified of the load
(passengers and cargo) for the ve-
hicle. This is the maximum com-
bined weight of occupants and
cargo that can be loaded into the
vehicle. If the vehicle is used to tow
a trailer, the trailer tongue weight
must be included as part of the
cargo load. This information is lo-
cated on the Tire and Loading In-
formation label.
• Cargo capacity - permissible weight of cargo, the subtracted
weight of occupants from the load
limit.
VEHICLE LOADING INFORMATION
10-16Technical and consumer information
Page 627 of 644
11 Index
A
Active noise cancellationActive sound enhancement......5-187Active Ride Control (ARC).........5-178Air bag (See supplemental restraint
system).................... .1-47Air bag system
Front (See supplemental front impact air
bag system)
................1-54Air bag warning light.........1-67, 2-12Air bag warning light,
supplemental..............1-67, 2-12Air cleaner housing filter..........8-18Air conditionerAir conditioner operation.....4-35, 4-41Air conditioner specification label. .10-14Air conditioner system refrigerant
recommendations............10-8Air conditioner system refrigerant and oil
recommendations............10-8Heater and air conditioner
controls...............4-33, 4-41Servicing air conditioner........4-44Air flow charts................4-36Alarm system (See vehicle security
system)................... .2-52All-Wheel Drive................5-168Anchor point locations...........1-28Antenna....................4-64Anti-lock Braking System (ABS).....5-173
Antifreeze...................5-185Armrests.....................1-7Audio system.................4-45AM radio operation............4-51AM radio reception............4-45AM/FM radio............4-49, 4-51Auxiliary (AUX) devices operation. . .4-52Bluetooth® audio.............4-60FM radio operation............4-52FM radio reception............4-45iPod® Player................4-57iPod® player operation..........4-57Radio................... .4-45USB (Universal Serial Bus) Connection
Port.................... .4-54USB Connections.............4-55USB interface...............4-54Autolight switch...............2-58Automatic
Automatic power window switch. . .2-76Automatic anti-glare inside mirror. . . .3-29Automatic brake hold............5-27Automatic door locks.............3-6Automatic Emergency Braking
(AEB)...................2-13,2-16Automatic Emergency Braking (AEB) with
Pedestrian Detection............5-135AWD......................5-168
B
Battery.................5- 185, 8-14Charge warning light...........2-11Battery replacement............8-23Key fob...................8-23NISSAN Intelligent Key®.........8-24Before starting the engine.........5-16Belt (See drive belt)..............8-16Blind Spot Warning (BSW).........5-46Bluetooth® audio..............4-60Bluetooth® hands-free phone system. .4-67Bluetooth® connections.........4-81Connecting procedure..........4-72Phone indicators.............4-71Text messaging..............4-77Voice commands.............4-73Booster seats.................1-43Brake
Anti-lock Braking System (ABS). . . .5-173Brake fluid.................8-12Brake light (See stop light).......8-26Brake system...............5-173Brake warning light............2-10Brake wear indicators.......2-18,8-20Self-adjusting brakes..........8-20Brake Assist.................5-175Brake fluid...................8-12Brake system................5-173Brakes.....................8-20Break-in schedule..............5-167