2023 HYUNDAI TUCSON Speed
[x] Cancel search: SpeedPage 142 of 638
Instrument cluster
4-44
• Manual reset
To clear the average fuel economy
manually, press the OK switch on the
steering wheel for more than 1 second
when the Average Fuel Economy is
displayed.
• Automatic reset
To automatically reset the average
fuel economy, select between ‘After
Ignition’ or ‘After Refueling’ from
the Settings menu in the instrument
cluster.
-After Ignition: When the engine has
been OFF for 3 minutes or longer
the average fuel economy will reset
automatically.
-After Refueling: The average fuel
economy will reset automatically
after adding 6 liters (1.6 gallons) of
fuel or more and after driving speed
exceeds 1 mph (1 km/h).
à For 10.25-inch instrument cluster, you
can check the fuel economy in the
center bottom of the cluster.
„„Type A„„Type B
OTMA040012OTMA040013
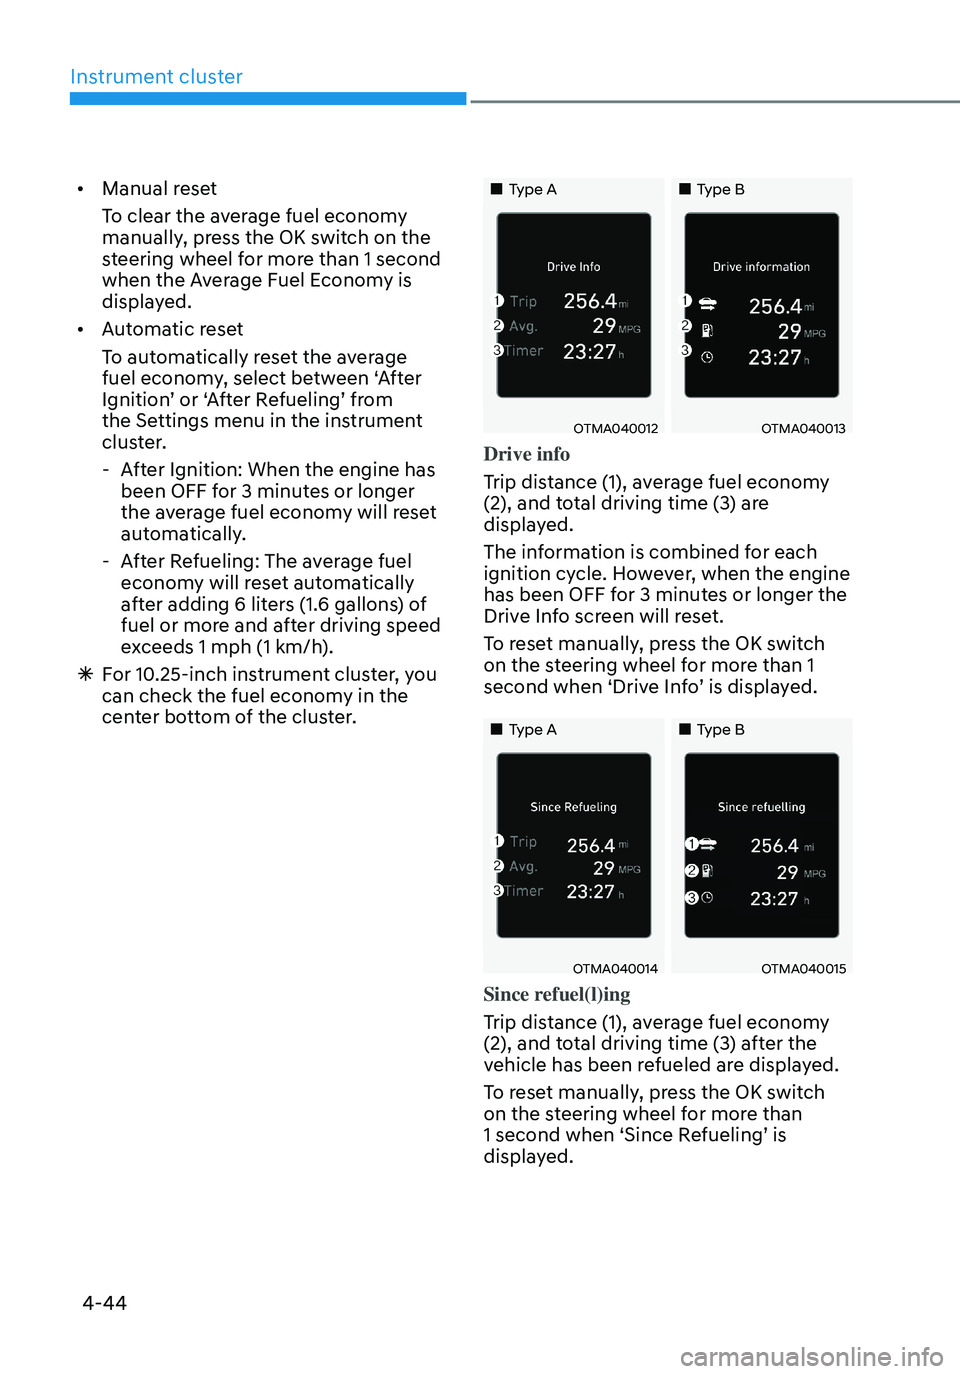
Drive info
Trip distance (1), average fuel economy
(2), and total driving time (3) are
displayed.
The information is combined for each
ignition cycle. However, when the engine
has been OFF for 3 minutes or longer the
Drive Info screen will reset.
To reset manually, press the OK switch
on the steering wheel for more than 1
second when ‘Drive Info’ is displayed.
„„Type A„„Type B
OTMA040014OTMA040015
Since refuel(l)ing
Trip distance (1), average fuel economy
(2), and total driving time (3) after the
vehicle has been refueled are displayed.
To reset manually, press the OK switch
on the steering wheel for more than
1 second when ‘Since Refueling’ is
displayed.
Page 143 of 638
04
4-45
„„Type A„„Type B
OTMA040016OTMA040017
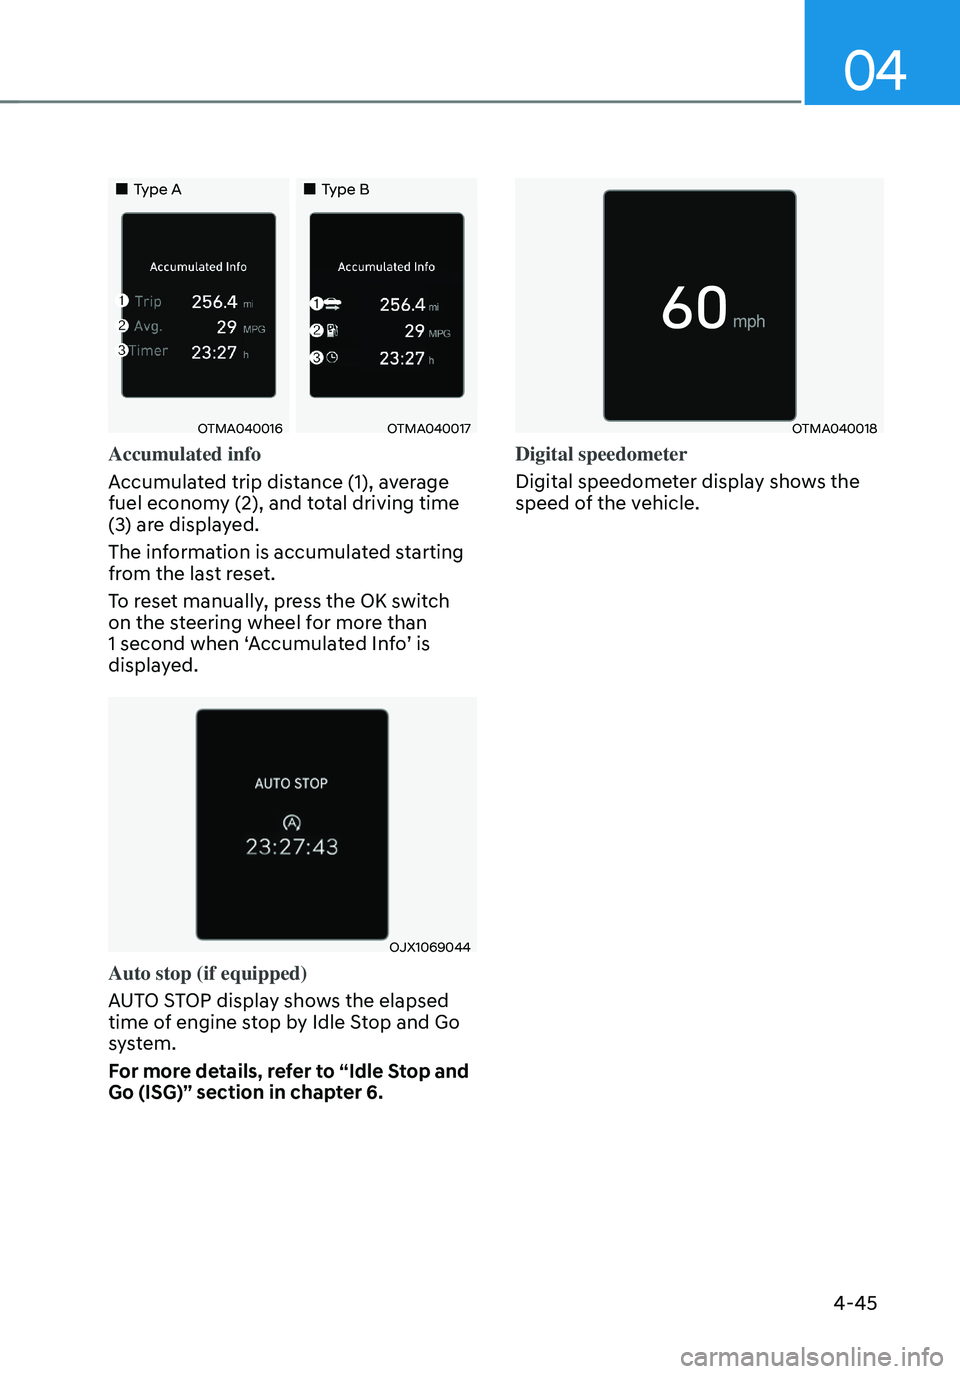
Accumulated info
Accumulated trip distance (1), average
fuel economy (2), and total driving time
(3) are displayed.
The information is accumulated starting
from the last reset.
To reset manually, press the OK switch
on the steering wheel for more than
1 second when ‘Accumulated Info’ is
displayed.
OJX1069044
Auto stop (if equipped)
AUTO STOP display shows the elapsed
time of engine stop by Idle Stop and Go
system.
For more details, refer to “Idle Stop and
Go (ISG)” section in chapter 6.
OTMA040018
Digital speedometer
Digital speedometer display shows the
speed of the vehicle.
Page 182 of 638
Convenient features
5-38
Recalling memory positions
1. Make sure that the vehicle is in the ON
position and the gear selector is in P
(Park).
2. Press the desired button (1 or 2). The
system will beep once and the driver’s
seat position and side view mirror
position will be automatically adjusted
to the stored positions.
3. ‘Driver 1 (or 2) settings applied’ will
appear on the cluster LCD display.
Information
• Note that while the memory settings
are being recalled, if you press the
SET button or the corresponding IMS
memory button (1 or 2) for which the
settings are being recalled, the IMS will
temporarily deactivate. If you select
the alternate IMS memory button (1 or
2), the IMS will activate according to
the settings of the alternate button.
For example, if you press the SET
button or the number 1 button with the
number 1 setting in operation, the IMS
will temporarily deactivate.
If you press the number 2 button, then
the IMS memory settings according to
number 2 will activate.
• If you adjust the driver seat settings
while the IMS is recalling the stored
positions, the memory settings will not
be applied.
Resetting the system
Follow the below procedures to reset the
Integrated Memory System (IMS) if it is
not operating properly:
Resetting the Integrated Memory
System (IMS)
1. Make sure that the vehicle is in Park
(P) and the engine is ON. Open the
driver’s door.
2. Adjust the driver’s seat and seatback
angle to the most forward positions.
3. Press the SET button and push
forward the driver’s seat movement
switch over 2 seconds simultaneously.
While resetting integrated memory
system
1. Resetting starts with a notification
sound.
2. The driver’s seat and seatback is
adjusted to the rearward position with
the notification sound.
3. The driver’s seat and seatback is
re-adjusted to the default position
(central position) with the notification
sound.
However, in the following cases, the
resetting procedure and the notification
sound may stop.
• The memory button is pressed.
• The seat control switch is operated.
• The gear is shifted out of P (Park).
• The driving speed exceeds
2 mph (3km/h).
• The driver’s door is closed.
Page 184 of 638
Convenient features
5-40
Electric Power Steering (EPS)
The system assists you with steering the
vehicle. If the vehicle is turned off or
if the power steering system becomes
inoperative, you may still steer the
vehicle, but it will require increased
steering effort.
Should you notice any change in the
effort required to steer during normal
vehicle operation, we recommend that
you have the system checked by an
authorized HYUNDAI dealer.
CAUTION
If Electric Power Steering does not
operate normally, the warning light and the message ‘Check motor driven
power steering’ will illuminate on the
instrument cluster. You may steer the
vehicle, but it will require increased
steering efforts. We recommend that
you take your vehicle to an authorized
HYUNDAI dealer or to a service station
and have the system checked as soon as
possible.
Information
The following symptoms may occur during
normal vehicle operation:
• The steering effort may be high
immediately after pressing the Engine
Start/Stop button to the ON position.
This happens as the system performs
the EPS system diagnostics. When the
diagnostics are completed, the steering
wheel effort will return to its normal
condition.
• When the battery voltage is low, you
might have to put more steering effort.
However, it is a temporary condition so
that it will return to normal condition
after charging the battery.
• A click noise may be heard from the
EPS relay after the Engine Start/Stop
button is in the ON or OFF position.
• Motor noise may be heard when the
vehicle is at a stop or at a low driving
speed.
• When you operate the steering wheel
in low temperatures, abnormal noise
may occur. If the temperature rises, the
noise will disappear. This is a normal
condition.
• When an error is detected from EPS,
the steering effort assist function will
not be activated in order to prevent
fatal accidents. Instrument cluster
warning lights may be on or the
steering effort may be high. If these
symptoms occur, drive the vehicle
to a safe area as soon as it is safe to
do so. We recommend that you have
the system checked by an authorized
HYUNDAI dealer as soon as possible.
STEERING WHEEL
Page 216 of 638

Convenient features
5-72
Resetting the power liftgate
ONX4E050145
If the battery has been discharged or
disconnected, or if the power liftgate
fuse has been replaced or removed, reset
the power liftgate by performing the
following procedure:
1. Put the gear in P (Park).
2. Press the power liftgate inner button
(B) and the power liftgate handle
switch (A) simultaneously for more
than 3 seconds. The chime will sound.
3. Close the liftgate manually.
If the power liftgate does not work
properly after the above procedure, we
recommend that the system be checked
by an authorized HYUNDAI dealer.
Information
If the power liftgate does not operate
normally, check again if the gear position
is in right position.
WARNING
ONX4E050058R
Do not grab or hold on to the liftgate
support struts at any time. Damage to
the liftgate support struts could result.
Deformation of the liftgate support
struts may cause vehicle damage and
personal injury may occur.
User Settings for the Power Liftgate
From the Infotainment Screen
The driver can select the power liftgate
opening height or speed from the
Settings menu in the infotainment
system screen.
OJX1050111N
Power liftgate opening height
To adjust the power liftgate opening
height, select ‘Setup → Vehicle Settings → Door/Liftgate → Power Liftgate Opening Height → Full Open/Level 3/Level 2/Level 1/User Height Setting’.
See additional information in supplied
Infotainment Manual.
Page 220 of 638
Convenient features
5 -76
Fuel filler door
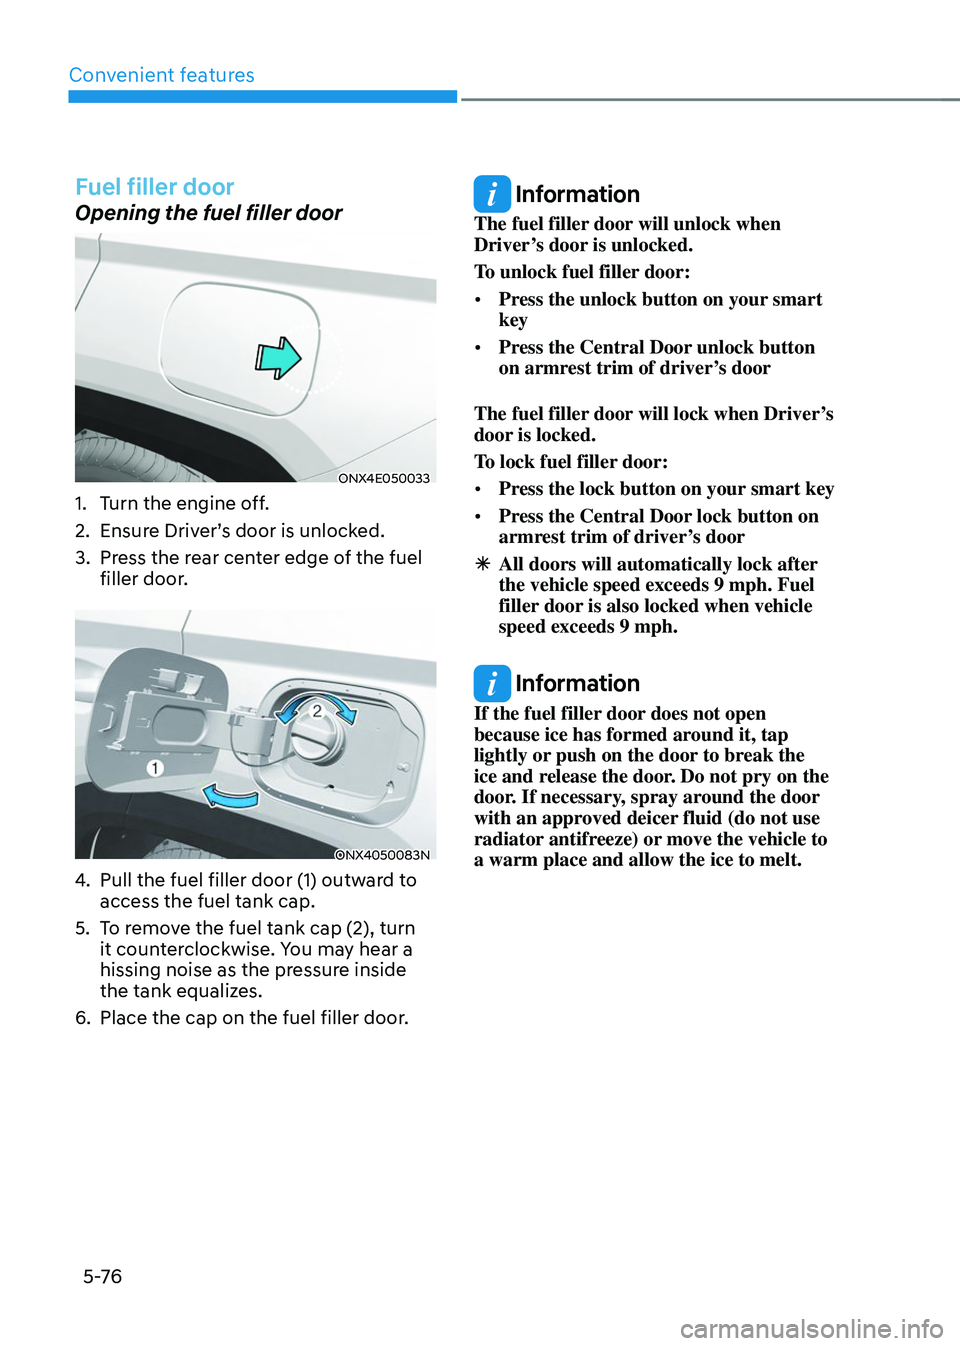
Opening the fuel filler door
ONX4E050033
1. Turn the engine off.
2. Ensure Driver’s door is unlocked.
3. Press the rear center edge of the fuel
filler door.
ONX4050083N
4. Pull the fuel filler door (1) outward to
access the fuel tank cap.
5. To remove the fuel tank cap (2), turn
it counterclockwise. You may hear a
hissing noise as the pressure inside
the tank equalizes.
6. Place the cap on the fuel filler door.
Information
The fuel filler door will unlock when
Driver’s door is unlocked.
To unlock fuel filler door:
• Press the unlock button on your smart
key
• Press the Central Door unlock button
on armrest trim of driver’s door
The fuel filler door will lock when Driver’s
door is locked.
To lock fuel filler door:
• Press the lock button on your smart key
• Press the Central Door lock button on
armrest trim of driver’s door
ÃAll doors will automatically lock after
the vehicle speed exceeds 9 mph. Fuel
filler door is also locked when vehicle
speed exceeds 9 mph.
Information
If the fuel filler door does not open
because ice has formed around it, tap
lightly or push on the door to break the
ice and release the door. Do not pry on the
door. If necessary, spray around the door
with an approved deicer fluid (do not use
radiator antifreeze) or move the vehicle to
a warm place and allow the ice to melt.
Page 228 of 638
Convenient features
5-84
System operation
Display and control
• After selecting ‘High Beam Assist’
in the Settings menu, High Beam
Assist will operate by following the
procedure below.
-Place the headlamp switch in
the AUTO position and push
the headlamp lever towards the
instrument cluster. The High Beam
Assist (
) indicator light will
illuminate on the cluster and the
system will be enabled.
- When the system is enabled, high
beam will turn on when vehicle
speed is above 25mph (40km/h).
When vehicle speed is below 15mph
(25km/h), high beam will not turn
on.
-The High Beam () indicator light
will illuminate on the cluster when
high beam is on.
• When High Beam Assist is operating, if
the headlamp lever or switch is used,
the system operates as follow:
-If the headlamp lever is pulled
towards you when the high beam
is off, the high beam will turn on
without High Beam Assist canceled.
When you let go of the headlamp
lever, the lever will move to the
middle and the high beam will turn
off.
-If the headlamp lever is pulled
towards you when the high beam is
on by High Beam Assist, low beam
will be on and the system will turn
off.
-If the headlamp switch is placed
from AUTO to another position
(headlamp/position/off), High
Beam Assist will turn off and the
corresponding lamp will turn on. •
When High Beam Assist is operating,
high beam switches to low beam if
any of the following conditions occur:
-When the headlamp of an
oncoming vehicle is detected.
-When the tail lamp of a vehicle in
front is detected.
-When the headlamp or tail lamp of a
motorcycle or a bicycle is detected.
-When the surrounding ambient light
is bright enough that high beams
are not required.
-When streetlights or other lights are
detected.
System malfunction and
limitations
System malfunction
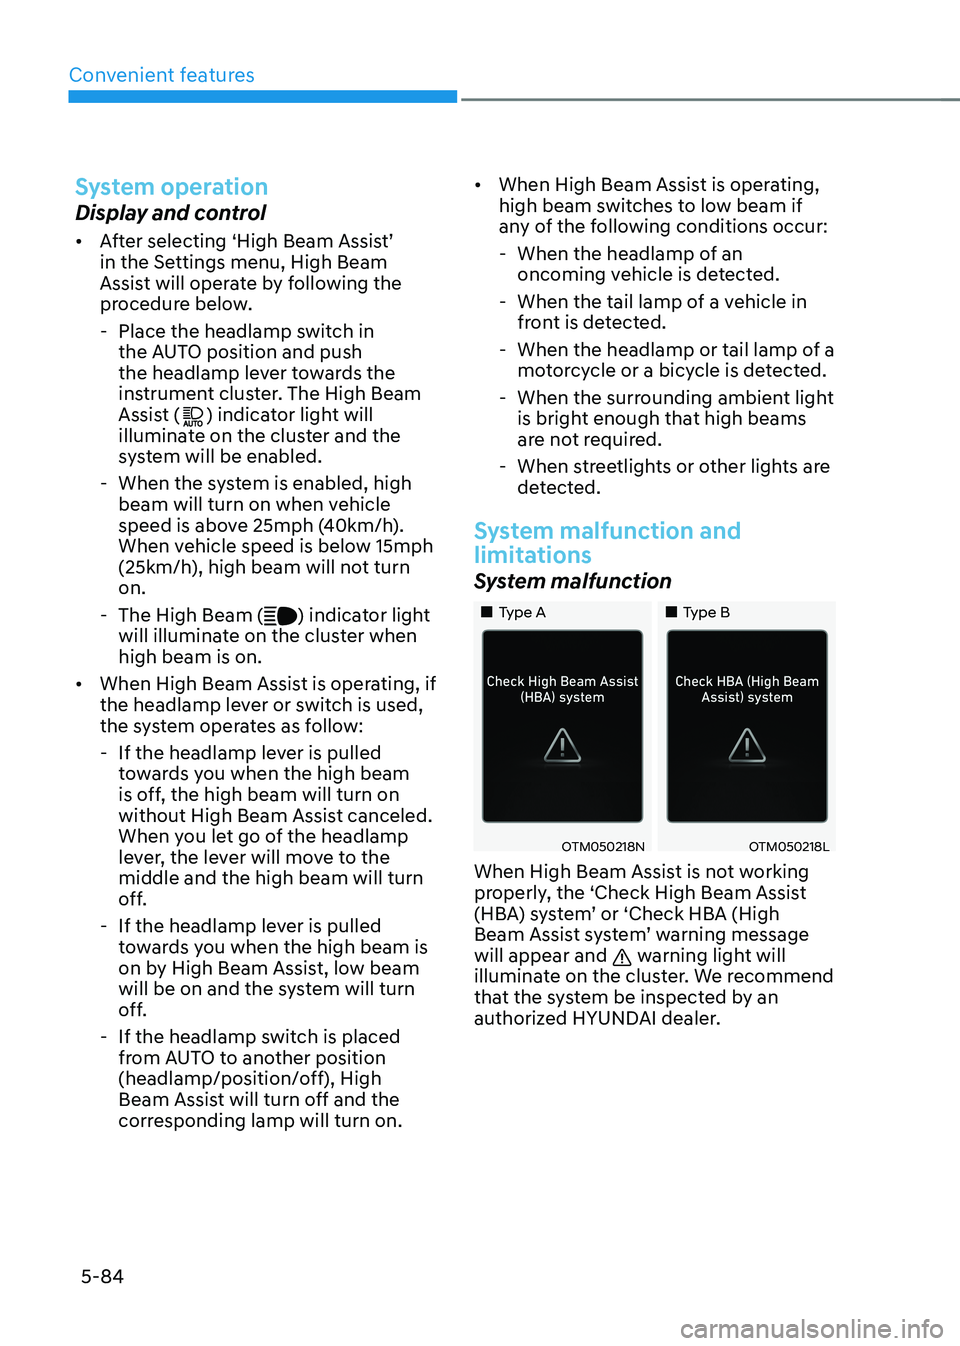
„„Type A„„Type B
OTM050218NOTM050218L
When High Beam Assist is not working
properly, the ‘Check High Beam Assist
(HBA) system’ or ‘Check HBA (High
Beam Assist system’ warning message
will appear and
warning light will
illuminate on the cluster. We recommend
that the system be inspected by an
authorized HYUNDAI dealer.
Page 234 of 638
Convenient features
5-90
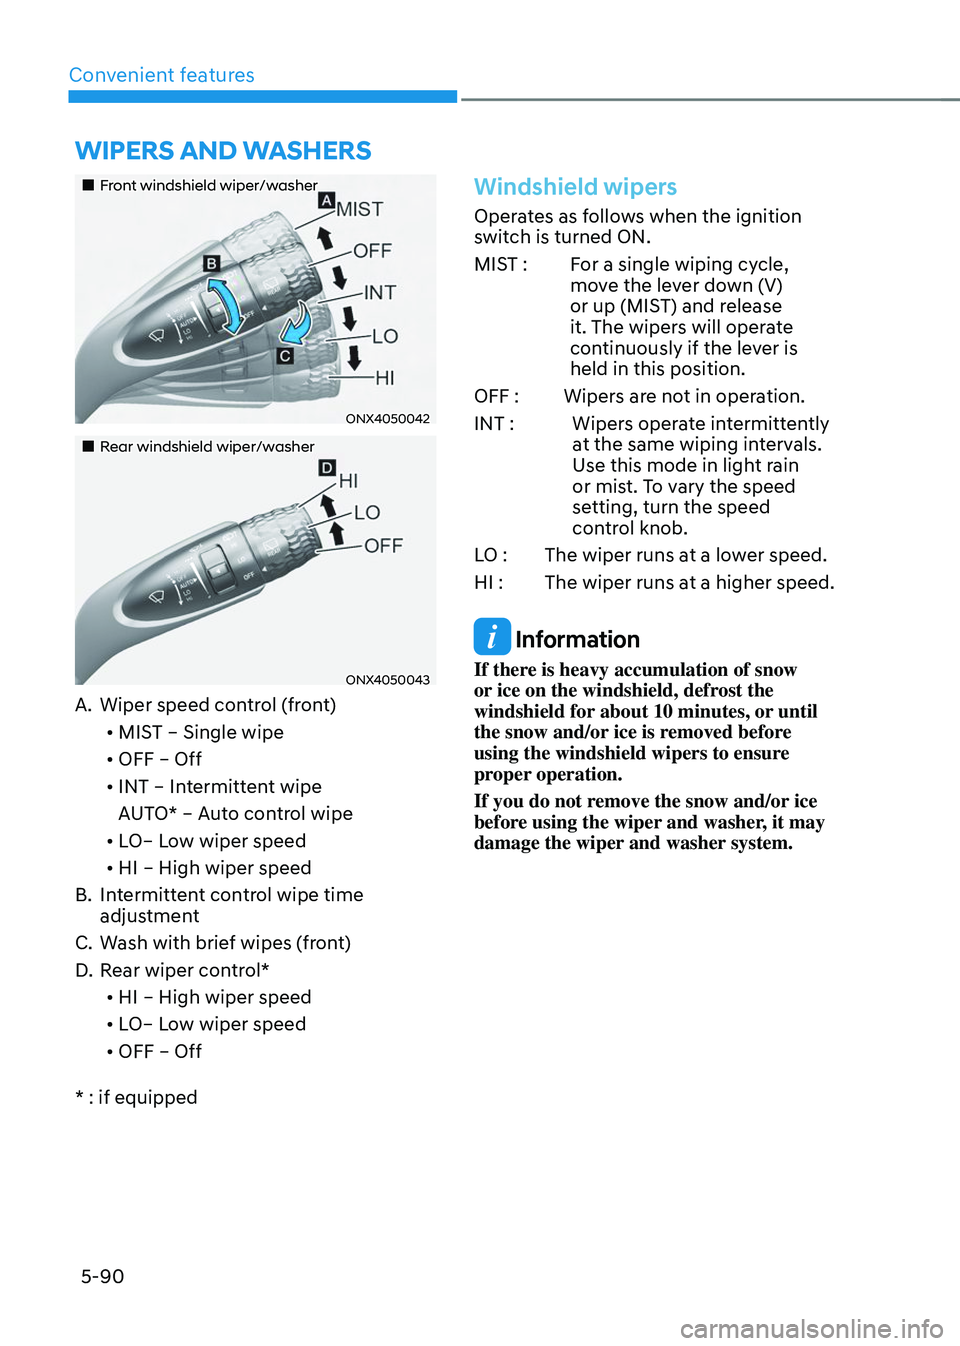
„„Front windshield wiper/washer
ONX4050042
„„Rear windshield wiper/washer
ONX4050043
A. Wiper speed control (front)• MIST – Single wipe
• OFF – Off
• INT – Intermittent wipe
AUTO* – Auto control wipe
• LO– Low wiper speed
• HI – High wiper speed
B. Intermittent control wipe time
adjustment
C. Wash with brief wipes (front)
D. Rear wiper control*
• HI – High wiper speed
• LO– Low wiper speed
• OFF – Off
* : if equipped
Windshield wipers
Operates as follows when the ignition
switch is turned ON.
MIST : For a single wiping cycle,
move the lever down (V)
or up (MIST) and release
it. The wipers will operate
continuously if the lever is
held in this position.
OFF : Wipers are not in operation.
INT : Wipers operate intermittently
at the same wiping intervals.
Use this mode in light rain
or mist. To vary the speed
setting, turn the speed
control knob.
LO : The wiper runs at a lower speed.
HI : The wiper runs at a higher speed.
Information
If there is heavy accumulation of snow
or ice on the windshield, defrost the
windshield for about 10 minutes, or until
the snow and/or ice is removed before
using the windshield wipers to ensure
proper operation.
If you do not remove the snow and/or ice
before using the wiper and washer, it may
damage the wiper and washer system.
WIPERS AND WASHERS