2023 HYUNDAI SONATA mirrors
[x] Cancel search: mirrorsPage 147 of 555
5. Convenience Features
Accessing Your Vehicle .................................................................................. 5-4
Remote Key .............................................................................................................. 5-4
Smart Key .................................................................................................................. 5 -7
Immobilizer System ................................................................................................ 5-14
Door Locks .................................................................................................... 5-16
Operating Door Locks from Outside the Vehicle ..................................................5-16
Operating Door Locks from Inside the Vehicle .....................................................5-17
Automatic Door Lock and Unlock Features ..........................................................5-20
Child-Protector Rear Door Locks .......................................................................... 5-20
Rear Occupant Alert (ROA) System ........................................................................ 5-21
Vehicle Auto-Shut Off Function ............................................................................ 5-22
Theft-Alarm System ..................................................................................... 5-23
Driver position memory system ................................................................. 5-24
Storing Positions into Memory ............................................................................. 5-24
Recalling Positions from Memory ......................................................................... 5-25
Resetting the Driver’s Seat Memory System ........................................................5-25
Easy Access Function ............................................................................................. 5-26
Steering Wheel ............................................................................................. 5-27
Electric Power Steering (EPS) ................................................................................. 5-27
Tilt Steering / Telescope Steering ......................................................................... 5-28
Heated Steering Wheel ......................................................................................... 5-29
Horn......................................................................................................................... 5-30
Mirrors ........................................................................................................... 5-31
Inside Rearview Mirror ............................................................................................ 5-31
Side View Mirrors ................................................................................................... 5-39
Reverse Parking Aid Function ................................................................................ 5-41
Windows ....................................................................................................... 5-42
Power Windows ...................................................................................................... 5-43
Panoramic Sunroof ..................................................................................... 5-46
Sunshade ................................................................................................................ 5-47
Sliding the Sunroof ................................................................................................. 5-47
Tilting the Sunroof ................................................................................................. 5-47
Closing the Sunroof ............................................................................................... 5-48
Resetting the Sunroof ............................................................................................ 5-49
Sunroof Open Warning .......................................................................................... 5-49
5
Page 177 of 555
05
5-31
Inside Rearview Mirror
Before driving your vehicle, check to
see that your inside rearview mirror is
properly positioned. Adjust the rearview
mirror so that the view through the rear
window is properly centered.
WARNING
Make sure your line of sight is not
obstructed. Do not place objects in the
rear seat, cargo area, or behind the rear
head restraints which could interfere
with your vision through the rear
window.
WARNING
To prevent serious injury during an
accident or deployment of the air bag,
do not modify the rearview mirror and
do not install a wide mirror.
WARNING
NEVER adjust the mirror while driving.
This may cause loss of vehicle control
resulting in an accident.
NOTICE
When cleaning the mirror, use a paper
towel or similar material dampened
with glass cleaner. Do not spray glass
cleaner directly on the mirror as this
may cause the liquid cleaner to enter
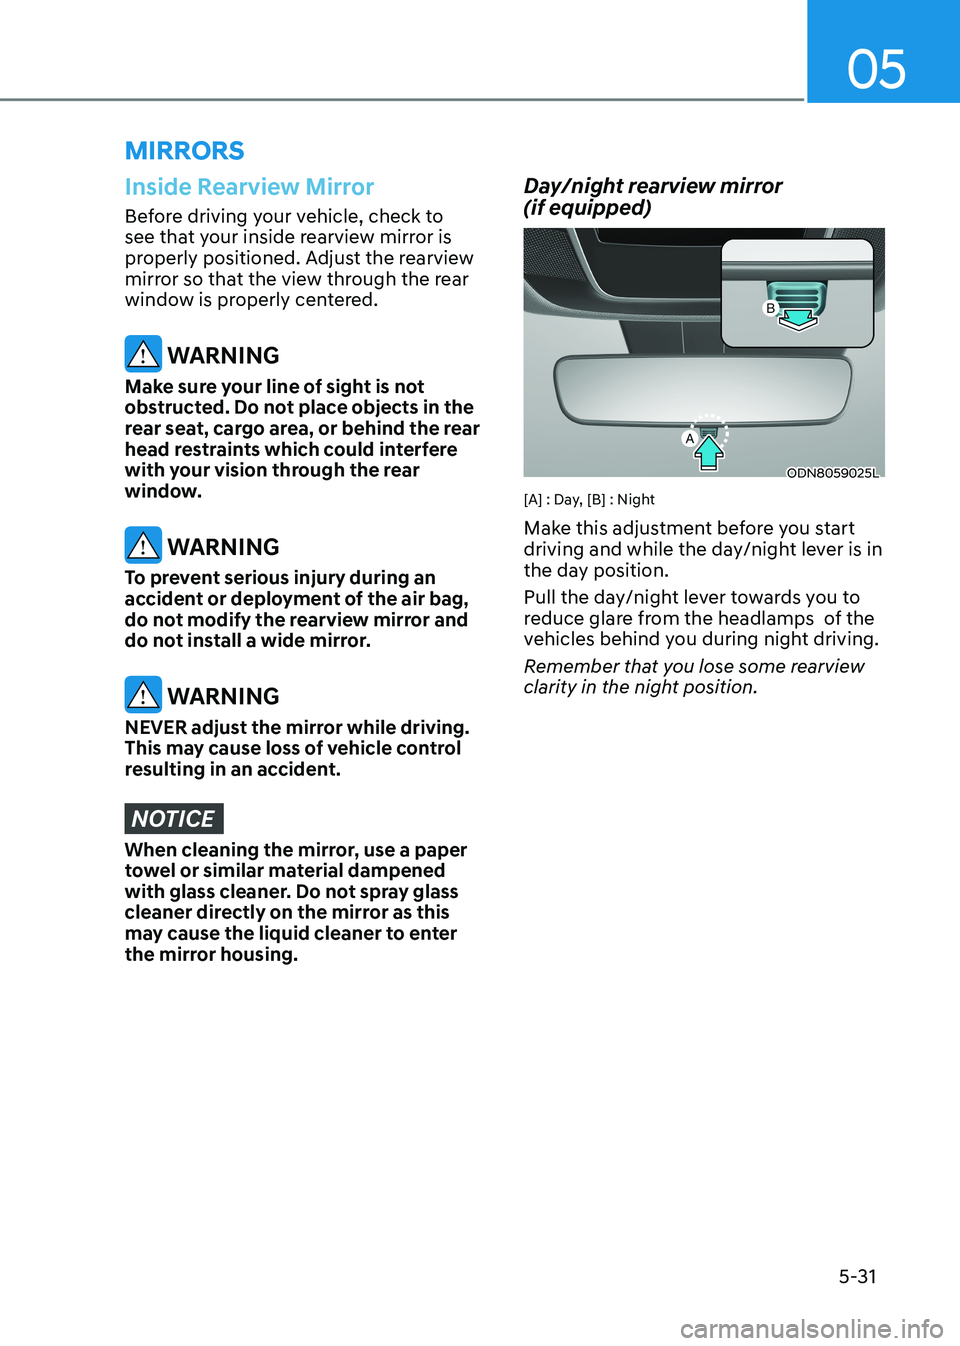
the mirror housing. Day/night rearview mirror (if equipped)
ODN8059025L
[A] : Day, [B] : Night
Make this adjustment before you start
driving and while the day/night lever is in
the day position.
Pull the day/night lever towards you to
reduce glare from the headlamps of the
vehicles behind you during night driving.
Remember that you lose some rearview
clarity in the night position.
mirrorS
Page 179 of 555

05
5-33
Automatic-Dimming Night Vision Safety™ (NVS®
) Mirror (if equipped)
The NVS® Mirror automatically reduces
glare by monitoring light levels in the
front and the rear of the vehicle. Any
object that obstructs either light sensor
will degrade the automatic dimming
control feature.
For more information regarding NVS®
mirrors and other applications, please
refer to the Gentex website:
www.gentex.com
Your mirror will automatically dim
upon detecting glare from the vehicles
traveling behind you.
The mirror defaults to the ON position
each time the vehicle is started. Integrated HomeLink ®
Wireless Control
System
The HomeLink® Wireless Control System
can replace up to three hand-held
radio-frequency (RF) transmitters with
a single built-in device. This innovative
feature will learn the radio frequency
codes of most current transmitters to
operate devices such as gate operators,
garage door openers, entry door locks,
security systems, even home lighting.
Both standard and rolling code-equipped
transmitters can be programmed by
following the outlined procedures.
Additional HomeLink® information can
be found at: www.homelink.com, www.
youtube.com/HomeLinkGentex or by
calling 1-800-355-3515.
Retain the original transmitter of the
RF device you are programming for use
in other vehicles as well as for future
HomeLink® programming. It is also
suggested that upon the sale of the
vehicle, the programmed HomeLink®
buttons be erased for security purposes.
WARNING
Before programming HomeLink® to a
garage door opener or gate operator,
make sure people and objects are out
of the way of the device to prevent
potential harm or damage. Do not
use the HomeLink® with any garage
door opener that lacks the safety
stop and reverse features required by
federal safety standards (this includes
any garage door opener model
manufactured before April 1, 1982).
A garage door that cannot detect an
object - signaling the door to stop
and reverse does not meet current
federal safety standards.Using a garage
door opener without these features
increases the risk of serious injury or
death.
Programming HomeLink ®
Please note the following:
• When programming a garage door opener, it is advised to park the
vehicle outside of the garage.
• It is recommended that a new battery be placed in the hand-held transmitter
of the device being programmed to
HomeLink® for quicker training and
accurate transmission of the radio-
frequency signal.
• Some vehicles may require the Engine Start/Stop button to be in the
ACC (or “Accessories”) position for
programming and/or operation of
HomeLink®.
• In the event that there are still programming difficulties or questions
after following the programming steps
listed below, contact HomeLink® at:
www.homelink.com, www.youtube.
com/HomeLinkGentex or by calling
1-800-355-3515.
Page 185 of 555
05
5-39
Side View Mirrors
ODN8059024
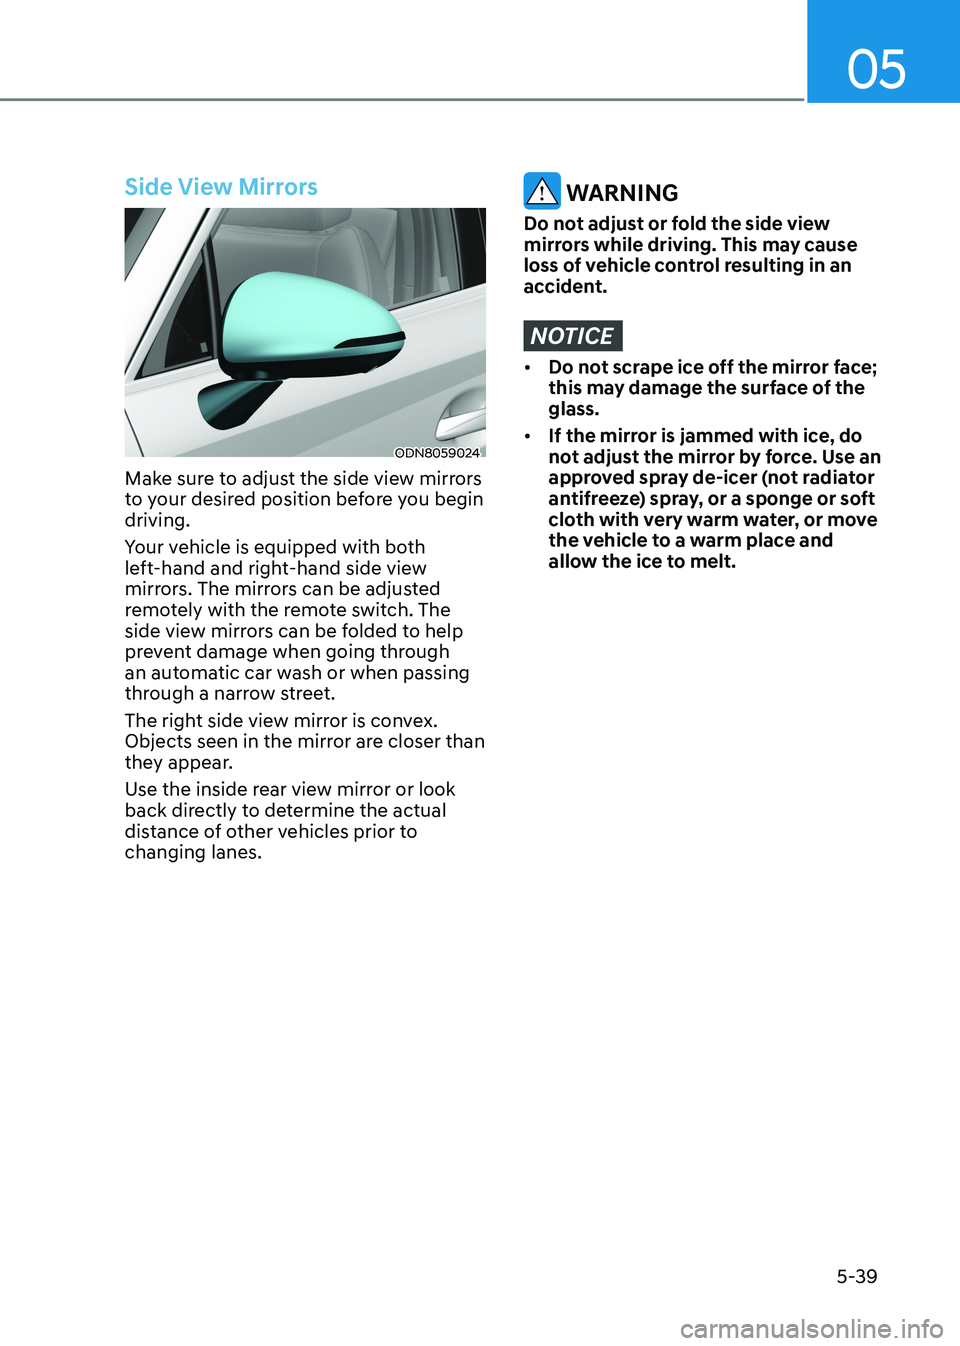
Make sure to adjust the side view mirrors
to your desired position before you begin driving.
Your vehicle is equipped with both
left-hand and right-hand side view
mirrors. The mirrors can be adjusted
remotely with the remote switch. The
side view mirrors can be folded to help
prevent damage when going through
an automatic car wash or when passing
through a narrow street.
The right side view mirror is convex.
Objects seen in the mirror are closer than
they appear.
Use the inside rear view mirror or look
back directly to determine the actual
distance of other vehicles prior to changing lanes.
WARNING
Do not adjust or fold the side view
mirrors while driving. This may cause
loss of vehicle control resulting in an
accident.
NOTICE
• Do not scrape ice off the mirror face;
this may damage the surface of the glass.
• If the mirror is jammed with ice, do
not adjust the mirror by force. Use an
approved spray de-icer (not radiator
antifreeze) spray, or a sponge or soft
cloth with very warm water, or move
the vehicle to a warm place and
allow the ice to melt.
Page 186 of 555
Convenience Features
5-40
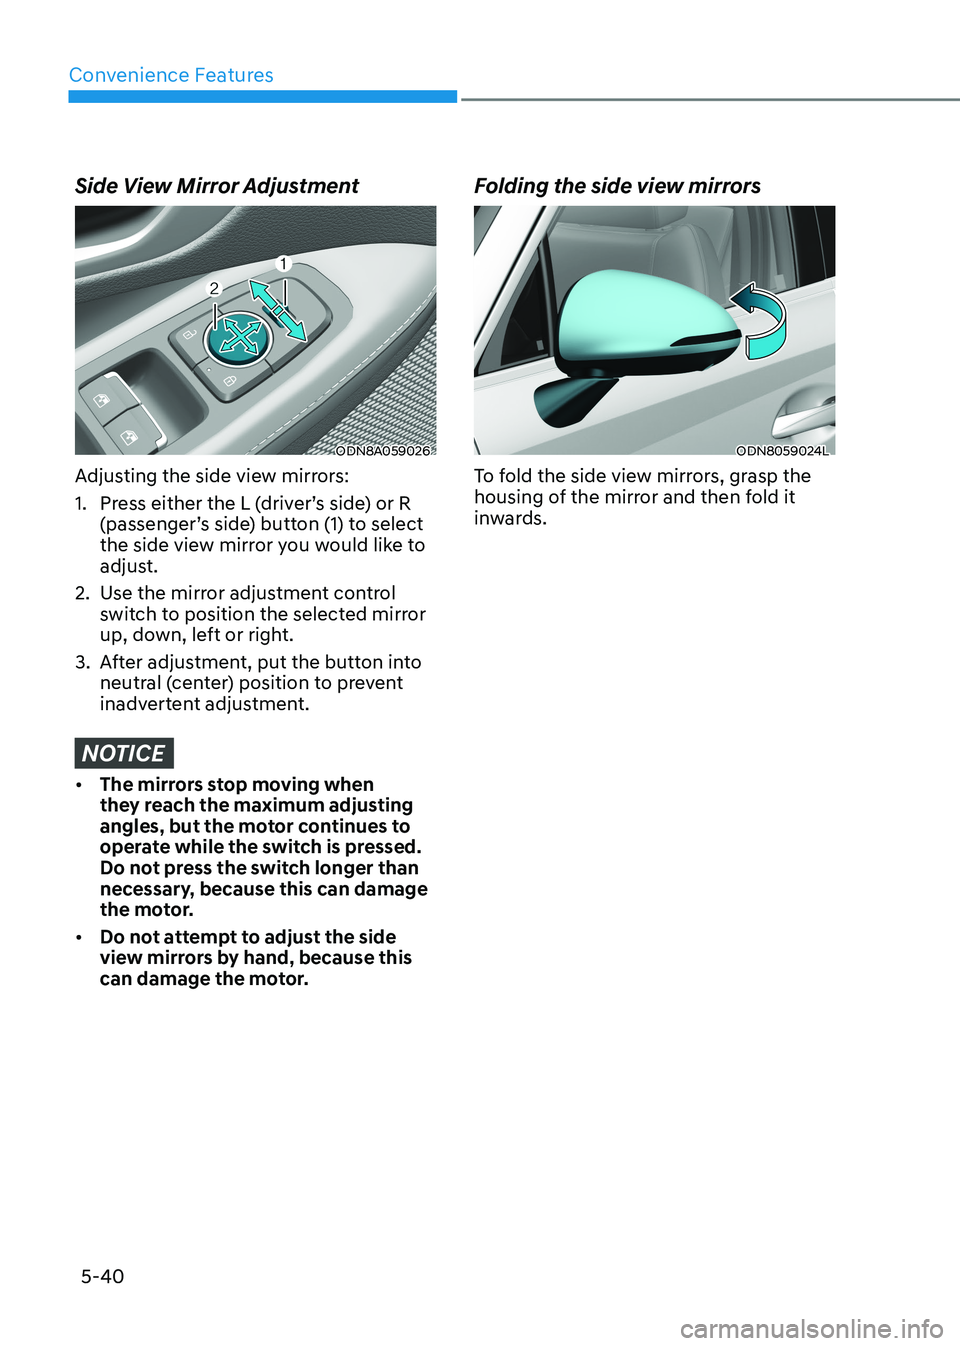
Side View Mirror Adjustment
ODN8A059026
Adjusting the side view mirrors:
1. Press either the L (driver’s side) or R (passenger’s side) button (1) to select
the side view mirror you would like to
adjust.
2. Use the mirror adjustment control switch to position the selected mirror
up, down, left or right.
3. After adjustment, put the button into neutral (center) position to prevent
inadvertent adjustment.
NOTICE
• The mirrors stop moving when
they reach the maximum adjusting
angles, but the motor continues to
operate while the switch is pressed.
Do not press the switch longer than
necessary, because this can damage
the motor.
• Do not attempt to adjust the side
view mirrors by hand, because this
can damage the motor. Folding the side view mirrors
ODN8059024L
To fold the side view mirrors, grasp the
housing of the mirror and then fold it
inwards.
Page 187 of 555
05
5-41
Reverse Parking Aid Function (if equipped)
ODN8A059028
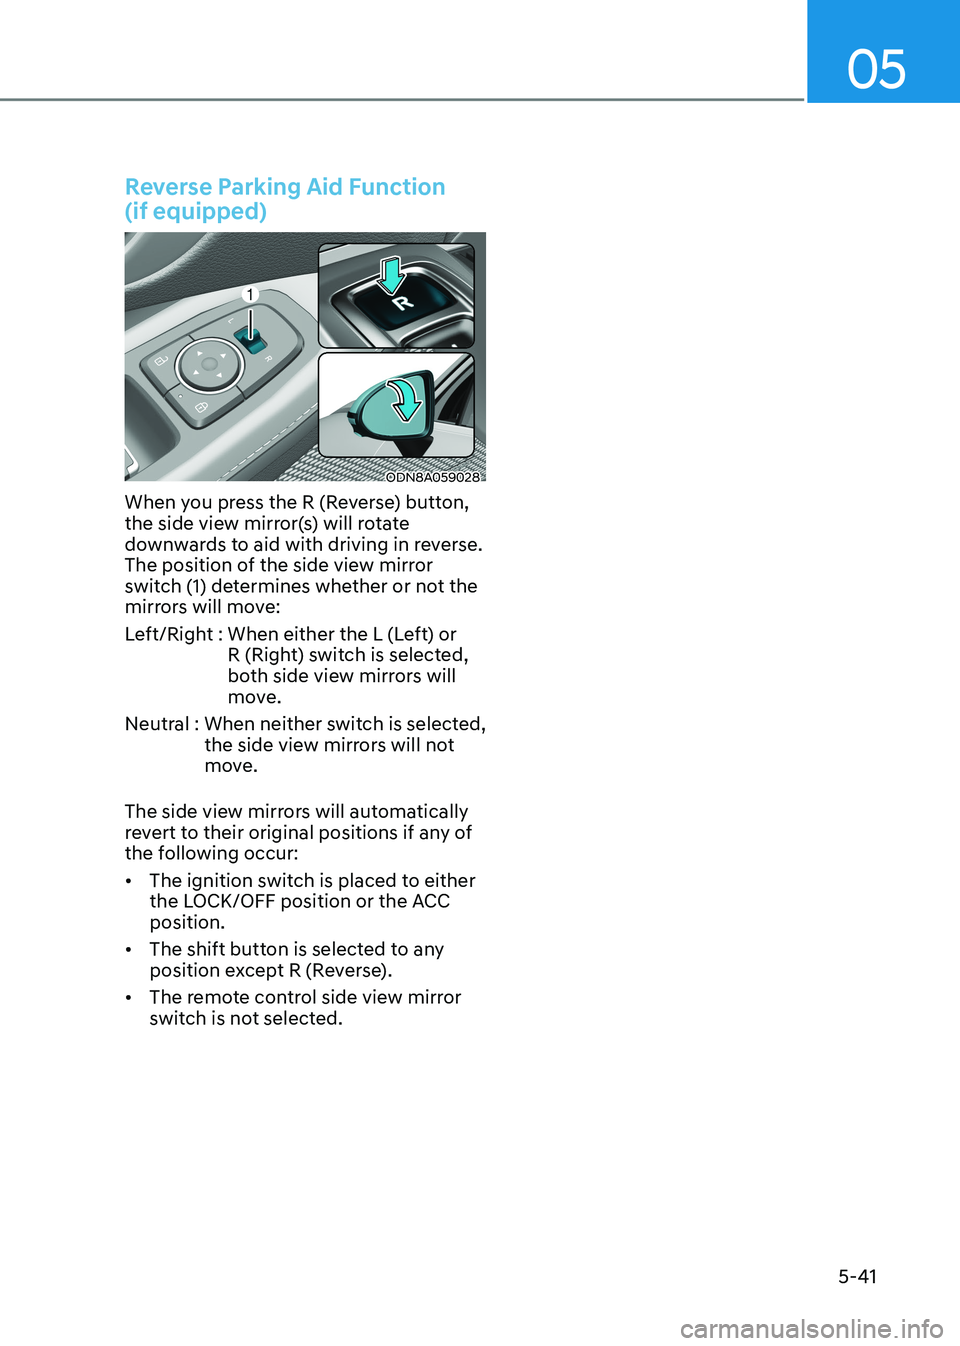
When you press the R (Reverse) button,
the side view mirror(s) will rotate
downwards to aid with driving in reverse.
The position of the side view mirror
switch (1) determines whether or not the
mirrors will move:
Left/Right : When either the L (Left) or R (Right) switch is selected,
both side view mirrors will
move.
Neutral : When neither switch is selected, the side view mirrors will not
move.
The side view mirrors will automatically
revert to their original positions if any of
the following occur: • The ignition switch is placed to either
the LOCK/OFF position or the ACC position.
• The shift button is selected to any
position except R (Reverse).
• The remote control side view mirror
switch is not selected.
Page 211 of 555
05
5-65
2. When the High Beam Assist camera
is adversely affected by an external
condition. Such examples may include:
• When the vehicle’s headlamps
have been damaged or not
repaired properly.
• When the vehicle headlamps are
not aimed properly.
• When the vehicle is driven on a
narrow curved road or rough road
• When the vehicle is driven on an
uphill road or downhill road
• When only part of the vehicle in
front is visible on a crossroad or
curved road.
• When there is a traffic light,
reflecting sign, flashing sign or
mirror.
• When the road conditions are bad
such as being wet or covered with
snow.
• When a vehicle suddenly appears
from a curve.
• When the vehicle is tilted from a
flat tire or being towed.
• When Lane Keeping Assist system
warning light illuminates.
• When the light from the on-coming
or front vehicle is not detected
because of exhaust fume, smoke,
fog, snow, etc.
• When the front window is covered
with foreign matters such as ice,
dust, fog, or is damaged.
3. When the forward visibility is poor. Such examples may include:
• When the headlamps of an on-
coming vehicle or a vehicle in front
is not detected due to poor outside
visibility (smog, smoke, dust, fog,
heavy rain, snow, etc.).
• When the windshield visibility is
poor.
WARNING
• Do not attempt to disassemble
the front view camera without the
assistance of an authorized HYUNDAI
dealer technician. If the front camera
is removed for any reason, the
system may need to be re-calibrated.
Have the system inspected by an
authorized HYUNDAI dealer.
• If the windshield of your vehicle is
replaced, most likely the front view
camera will need to be re-calibrated.
If this occurs, have your vehicle
inspected and have the system re-
calibrated by an authorized HYUNDAI
dealer.
• Be careful that water doesn’t get into
High Beam Assist unit and do not
remove or damage related parts of
High Beam Assist system.
• Do not place objects on the crash
pad that reflect light such as mirrors,
white paper, etc. The system may
malfunction if sunlight is reflected.
• At times, High Beam Assist system
may not work properly. The system
is for your convenience only. It is the
responsibility of the driver for safe
driving practices and always check
the road conditions for your safety.
• When the system does not operate
normally, change the headlamp
position manually between the high
beam and low beam.
Page 271 of 555
05
5-125
WinDshielD DeFrosting AnD DeFogging
WARNING
Windshield heating
Do not use the
or position
during cooling operation in extremely
humid weather. The difference between
the temperature of the outside air and
that of the windshield could cause the
outer surface of the windshield to fog
up, causing loss of visibility could cause
an accident resulting in serious injury
or death. In this case, set the mode
selection knob or button to the
position and fan speed control knob or
button to a lower speed. • For maximum defrost performance,
set the temperature control knob
to the highest temperature setting
(rotated all the way to the right) and
the fan speed control to the highest
setting.
• If warm air to the floor is desired while
defrosting or defogging, set the mode
to the floor-defrost position.
• Before driving, clear all snow and ice
from the windshield, rear window,
side view mirrors, and all side
windows.
• Clear all snow and ice from the
hood and air inlet in the cowl grill
to improve heater and defroster
efficiency and to reduce the
probability of fogging up the inside of the windshield.
NOTICE
If you start the vehicle when the
weather is cold, more adequate way to
heat the cabin is described below.
1. Turn off or lower the blower, right
after engine starting, because
engine temperature is still low and
the air flow is cold.
2. After few minutes of engine warm up, turn the blower to low to medium
speed and set the temperature
control to Hot.
Manual Climate Control System
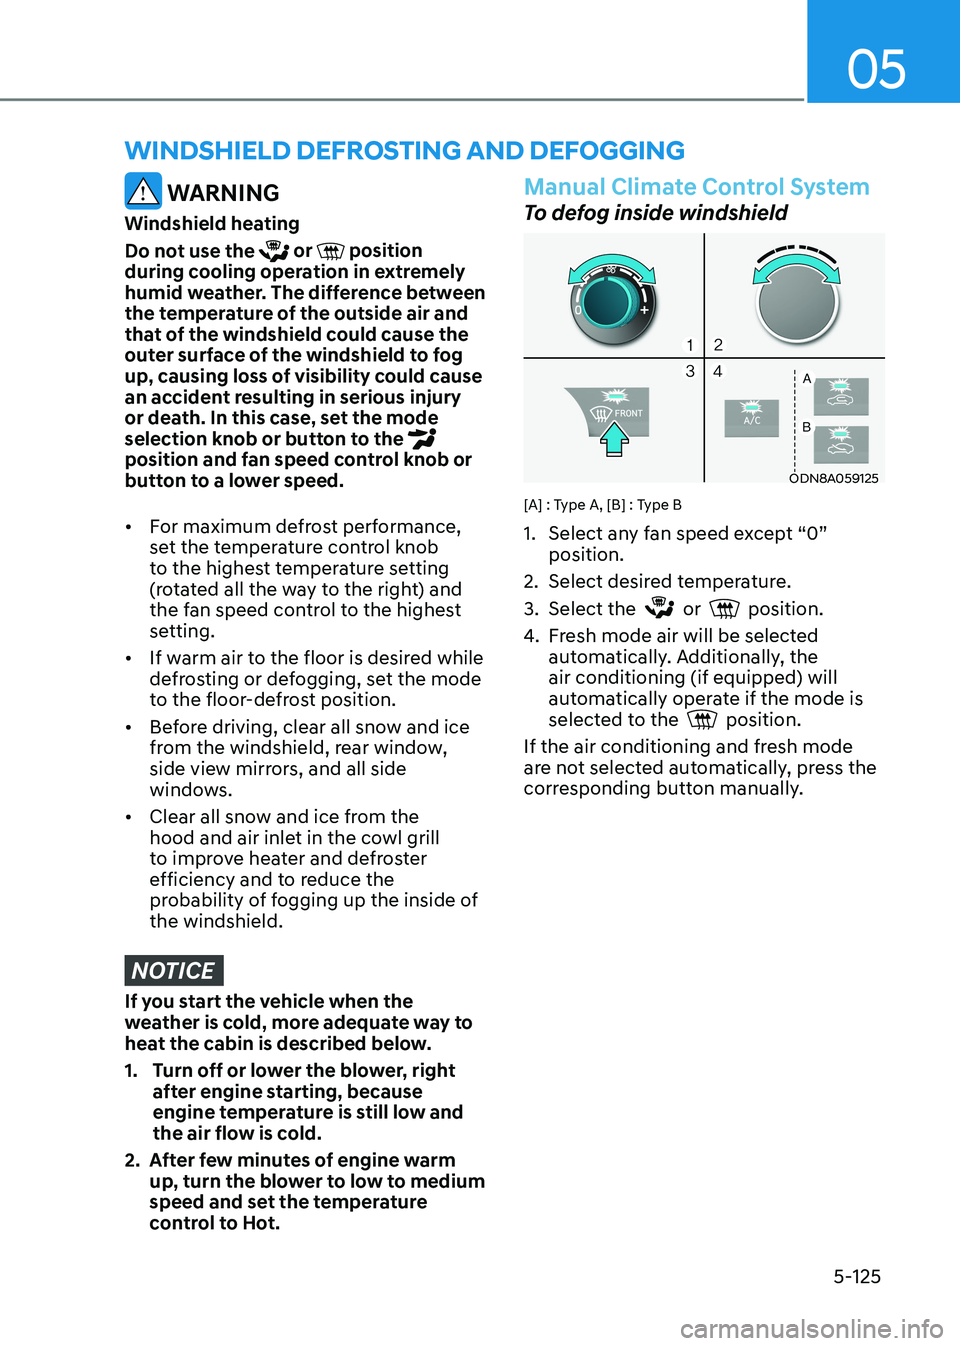
To defog inside windshield
ODN8A059125
[A] : Type A, [B] : Type B
1. Select any fan speed except “0” position.
2. Select desired temperature.
3. Select the
or position.
4. Fresh mode air will be selected automatically. Additionally, the air conditioning (if equipped) will
automatically operate if the mode is
selected to the
position.
If the air conditioning and fresh mode
are not selected automatically, press the
corresponding button manually.