2023 HYUNDAI SONATA display
[x] Cancel search: displayPage 26 of 555
02
2-15
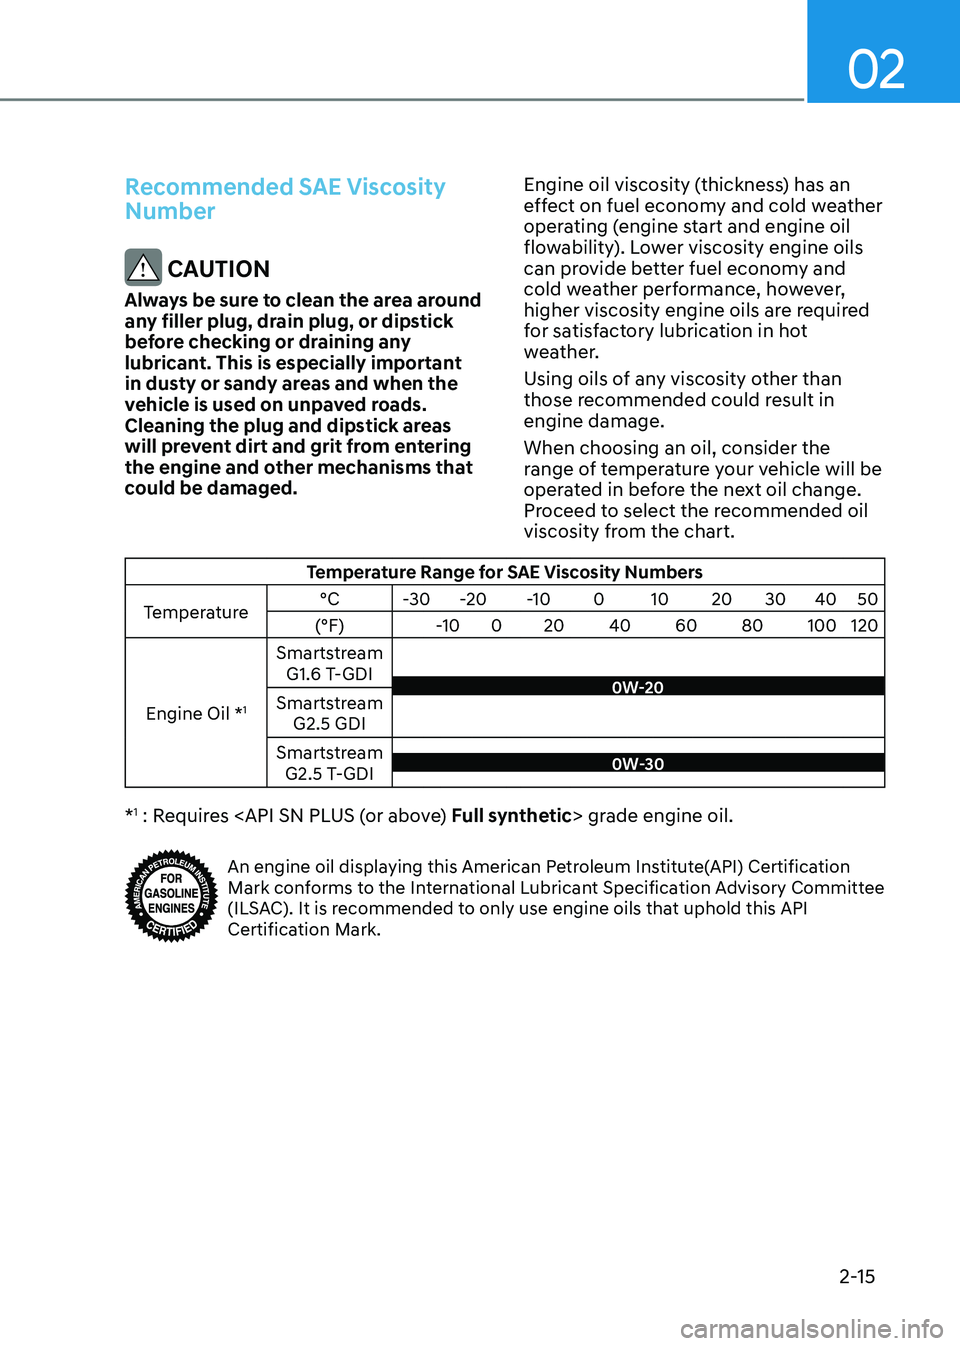
Recommended SAE Viscosity Number
CAUTION
Always be sure to clean the area around
any filler plug, drain plug, or dipstick
before checking or draining any
lubricant. This is especially important
in dusty or sandy areas and when the
vehicle is used on unpaved roads.
Cleaning the plug and dipstick areas
will prevent dirt and grit from entering
the engine and other mechanisms that
could be damaged. Engine oil viscosity (thickness) has an
effect on fuel economy and cold weather
operating (engine start and engine oil
flowability). Lower viscosity engine oils
can provide better fuel economy and
cold weather performance, however,
higher viscosity engine oils are required
for satisfactory lubrication in hot
weather.
Using oils of any viscosity other than
those recommended could result in engine damage. When choosing an oil, consider the
range of temperature your vehicle will be
operated in before the next oil change.
Proceed to select the recommended oil
viscosity from the chart.
Temperature Range for SAE Viscosity Numbers
Temperature °C
-30-20 -10 0 10 20 30 40 50
(°F) -100 20 40 60 80 100 120
Engine Oil * 1Smartstream
G1.6 T-GDI
Smartstream G2.5 GDI
Smartstream G2.5 T-GDI
0W-30
0W-20
* 1
: Requires
An engine oil displaying this American Petroleum Institute(API) Certification
Mark conforms to the International Lubricant Specification Advisory Committee
(ILSAC). It is recommended to only use engine oils that uphold this API
Certification Mark.
Page 72 of 555
03
3-43
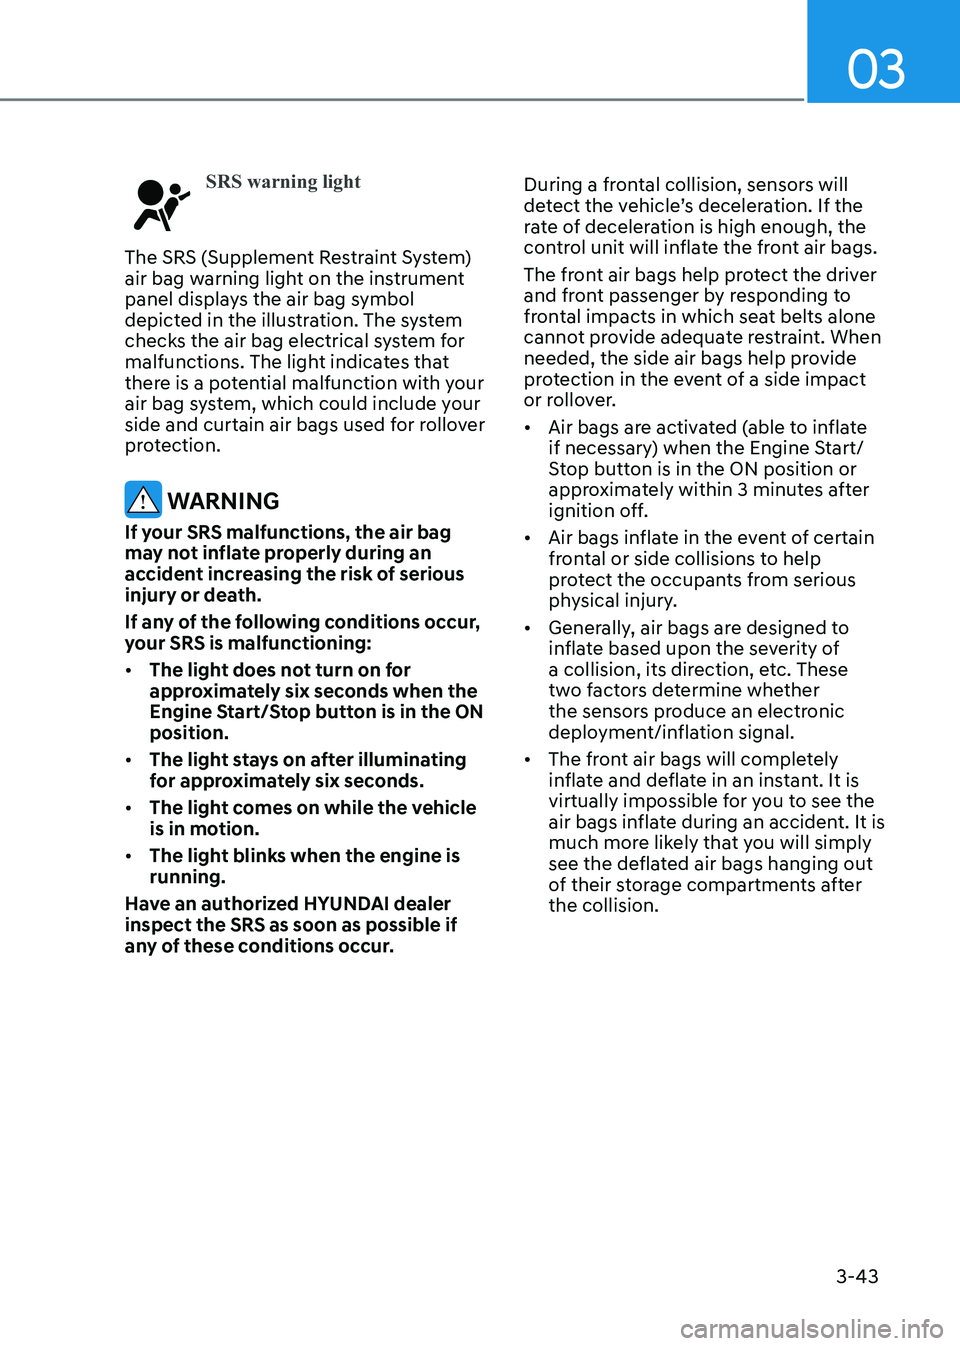
SRS warning light
The SRS (Supplement Restraint System)
air bag warning light on the instrument
panel displays the air bag symbol
depicted in the illustration. The system
checks the air bag electrical system for
malfunctions. The light indicates that
there is a potential malfunction with your
air bag system, which could include your
side and curtain air bags used for rollover
protection.
WARNING
If your SRS malfunctions, the air bag
may not inflate properly during an
accident increasing the risk of serious
injury or death.
If any of the following conditions occur,
your SRS is malfunctioning: • The light does not turn on for
approximately six seconds when the
Engine Start/Stop button is in the ON position.
• The light stays on after illuminating
for approximately six seconds.
• The light comes on while the vehicle
is in motion.
• The light blinks when the engine is running.
Have an authorized HYUNDAI dealer inspect the SRS as soon as possible if
any of these conditions occur. During a frontal collision, sensors will
detect the vehicle’s deceleration. If the
rate of deceleration is high enough, the
control unit will inflate the front air bags.
The front air bags help protect the driver
and front passenger by responding to
frontal impacts in which seat belts alone
cannot provide adequate restraint. When
needed, the side air bags help provide
protection in the event of a side impact
or rollover. •
Air bags are activated (able to inflate
if necessary) when the Engine Start/
Stop button is in the ON position or
approximately within 3 minutes after
ignition off.
• Air bags inflate in the event of certain
frontal or side collisions to help
protect the occupants from serious
physical injury.
• Generally, air bags are designed to
inflate based upon the severity of
a collision, its direction, etc. These
two factors determine whether
the sensors produce an electronic
deployment/inflation signal.
• The front air bags will completely
inflate and deflate in an instant. It is
virtually impossible for you to see the
air bags inflate during an accident. It is
much more likely that you will simply
see the deflated air bags hanging out
of their storage compartments after the collision.
Page 87 of 555
4
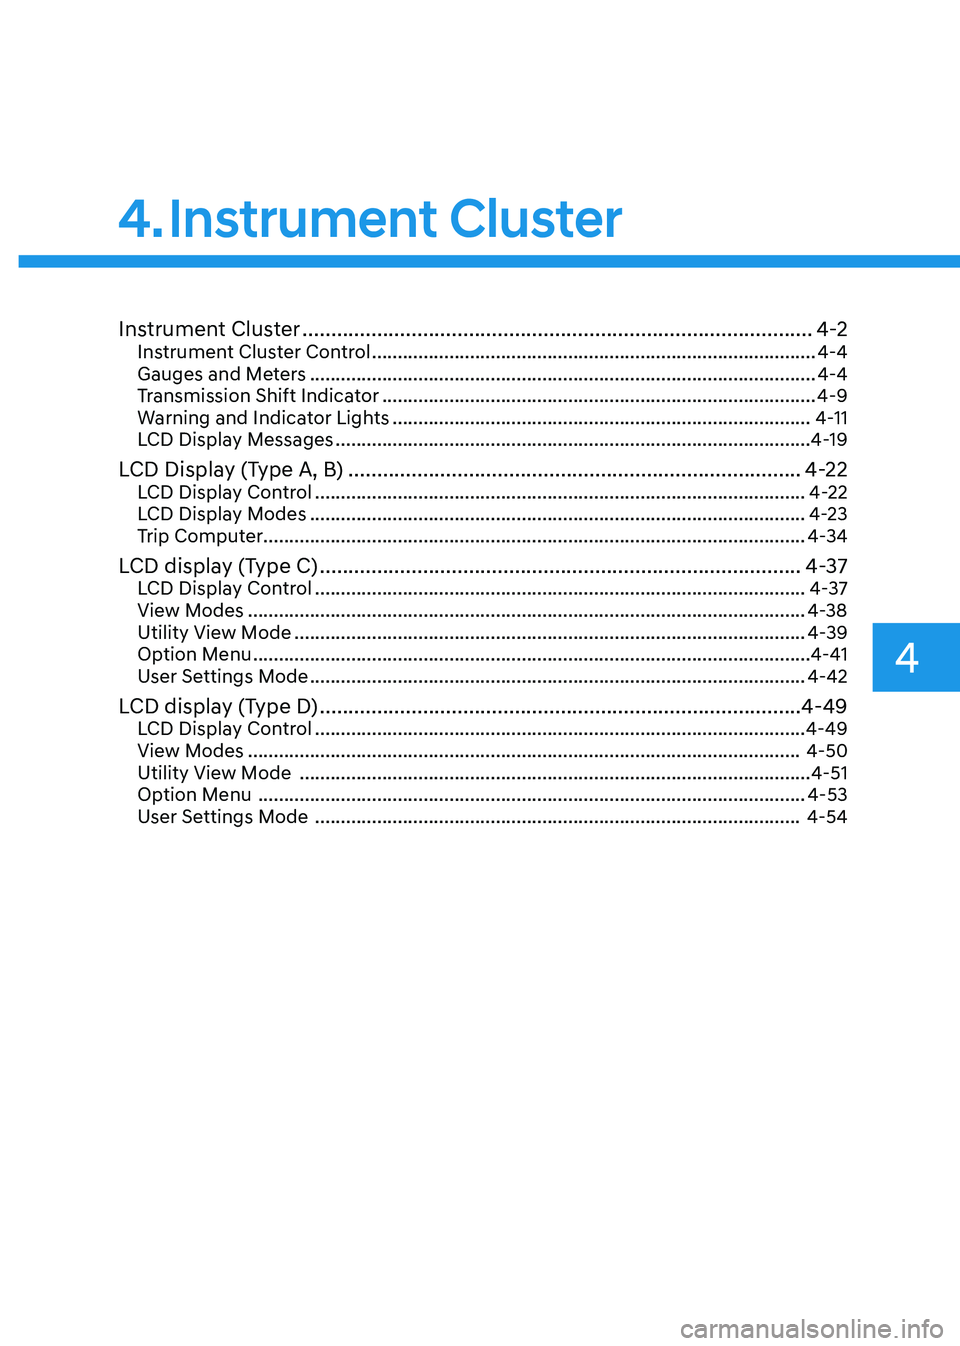
Instrument Cluster ......................................................................................... 4-2
Instrument Cluster Control ...................................................................................... 4-4
Gauges and Meters .................................................................................................. 4-4
Transmission Shift Indicator .................................................................................... 4-9
Warning and Indicator Lights ................................................................................. 4-11
LCD Display Messages ............................................................................................ 4-19
LCD Display (Type A, B) ............................................................................... 4-22
LCD Display Control ............................................................................................... 4-22
LCD Display Modes ................................................................................................ 4-23
Trip Computer......................................................................................................... 4-34
LCD display (Type C) .................................................................................... 4-37
LCD Display Control ............................................................................................... 4-37
View Modes ............................................................................................................ 4-38
Utility View Mode ................................................................................................... 4-39
Option Menu ............................................................................................................ 4-41
User Settings Mode ................................................................................................ 4-42
LCD display (Type D) .................................................................................... 4-49
LCD Display Control ............................................................................................... 4-49
View Modes ........................................................................................................... 4-50
Utility View Mode ................................................................................................... 4-51
Option Menu .......................................................................................................... 4-53
User Settings Mode .............................................................................................. 4-54
4. Instrument Cluster
Page 88 of 555
4-2
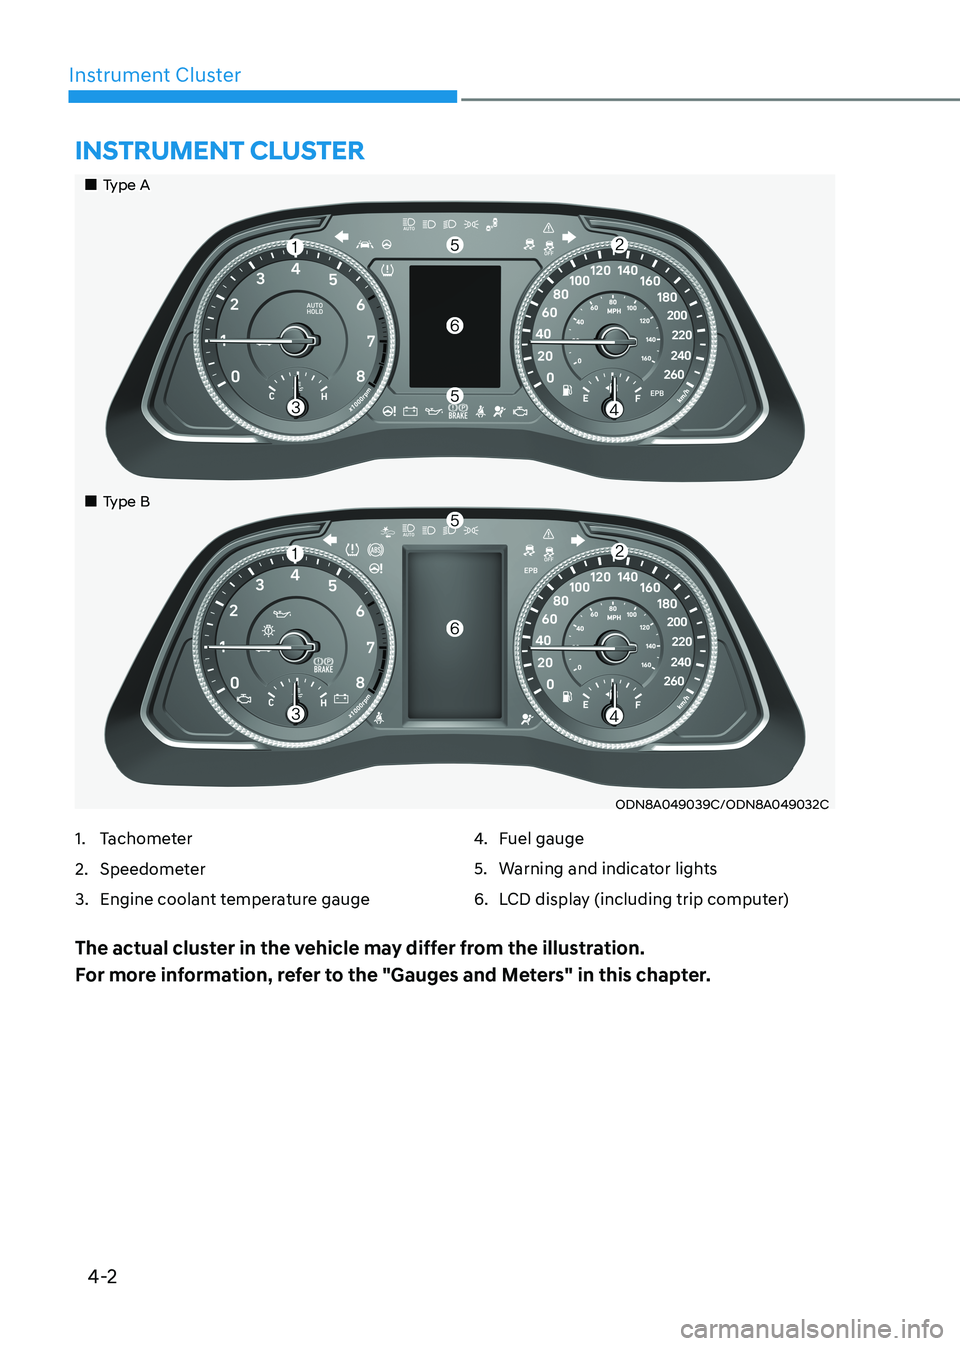
Instrument Cluster
ODN8A049039C/ODN8A049032C
Instrument Cluster
1. Tachometer
2. Speedometer
3. Engine coolant temperature gauge4.
Fuel gauge
5. Warning and indicator lights
6. LCD display (including trip computer)
The actual cluster in the vehicle may differ from the illustration.
For more information, refer to the "Gauges and Meters" in this chapter.
„„Type A
„
„Type B
Page 89 of 555
4-3
04
ODN8A049002/ONX4040002
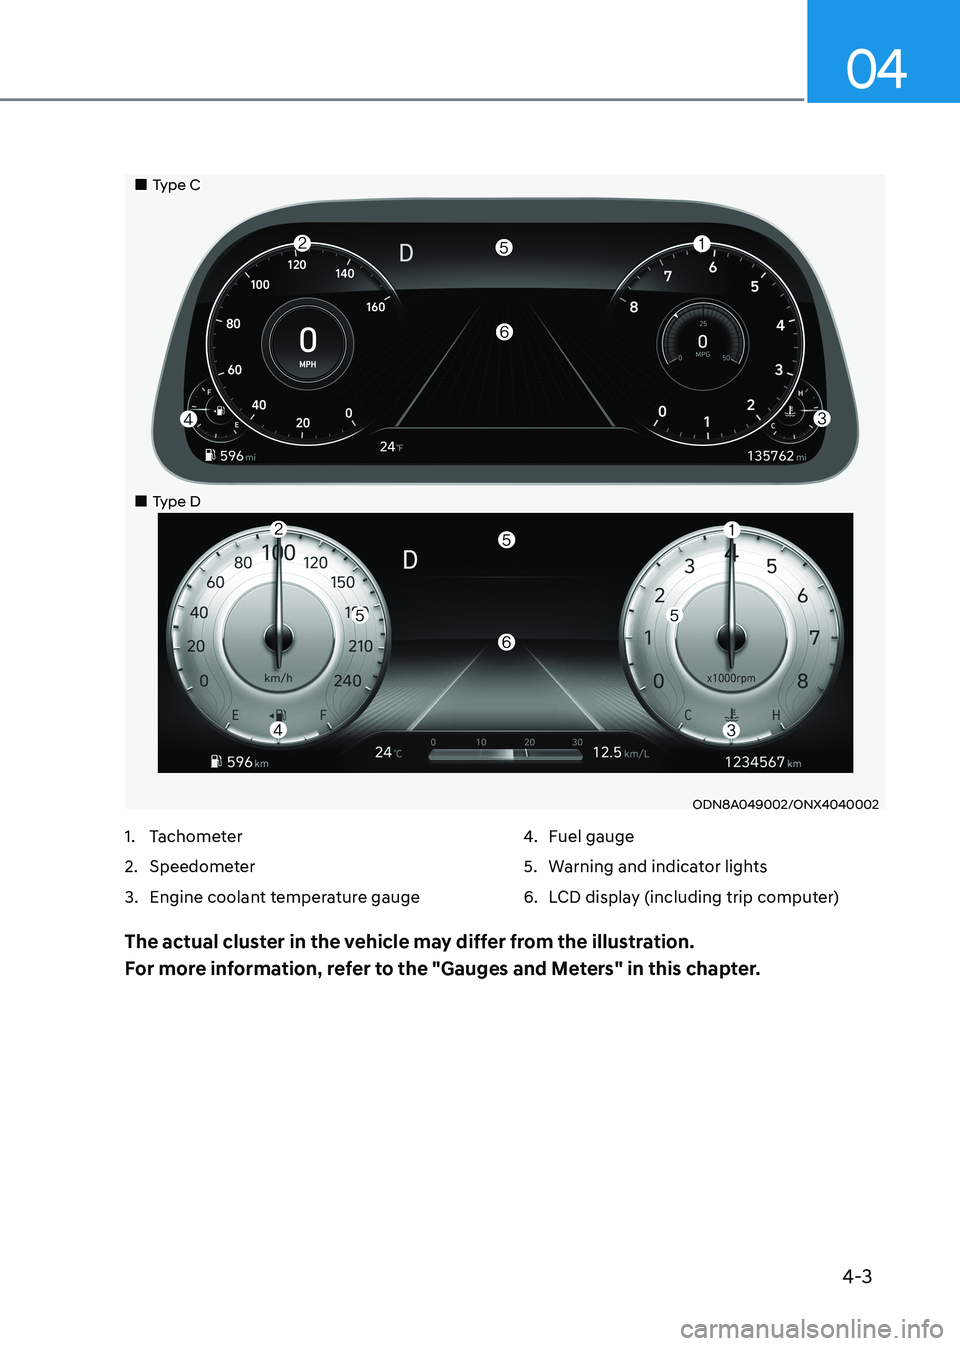
1. Tachometer
2. Speedometer
3. Engine coolant temperature gauge 4.
Fuel gauge
5. Warning and indicator lights
6. LCD display (including trip computer)
The actual cluster in the vehicle may differ from the illustration.
For more information, refer to the "Gauges and Meters" in this chapter.
„„Type C
„
„Type D
Page 90 of 555

Instrument Cluster
4-4
Instrument Cluster Control
Adjusting instrument cluster
illumination
ODN8A059337
When the vehicle's parking lamps or
headlamps are on, press the illumination
control button to adjust the brightness of
the instrument panel illumination.
When pressing the illumination control
button, the interior switch illumination
intensity is also adjustable. • The brightness of the instrument
panel illumination is displayed.
• If the brightness reaches the
maximum or minimum level, a chime will sound.
WARNING
Never adjust the instrument cluster
while driving. Doing so could lead to
driver distraction which may cause an
accident and lead to vehicle damage,
serious injury, or death.
Gauges and Meters
Speedometer
„„Type C
„„Type A, B
„
„Type D
OLX2048102C/OLX2049139C
OCN7040005
The speedometer indicates the speed of
the vehicle and is calibrated in kilometers
per hour (km/h) and/or miles per hour (MPH).
Page 93 of 555
04
4 -7
Information
• The fuel tank capacity is given in
chapter 2.
• The fuel gauge is supplemented by a low fuel warning light, which will illuminate when the fuel tank is nearly
empty.
• On inclines or curves, the fuel gauge
pointer may fluctuate or the low fuel
warning light may come on earlier than usual due to the movement of fuel in the tank.
WARNING
Running out of fuel can expose vehicle
occupants to danger.
You must stop and obtain additional
fuel as soon as possible after the
warning light comes on or when the
gauge indicator comes close to the "E
(Empty)" level.
NOTICE
Avoid driving with an extremely low
fuel level. Running out of fuel could
cause the engine to misfire and damage
the catalytic converter. Outside temperature gauge
„„Type A,B
OTM048112
„„Type C
ODN8A049031C
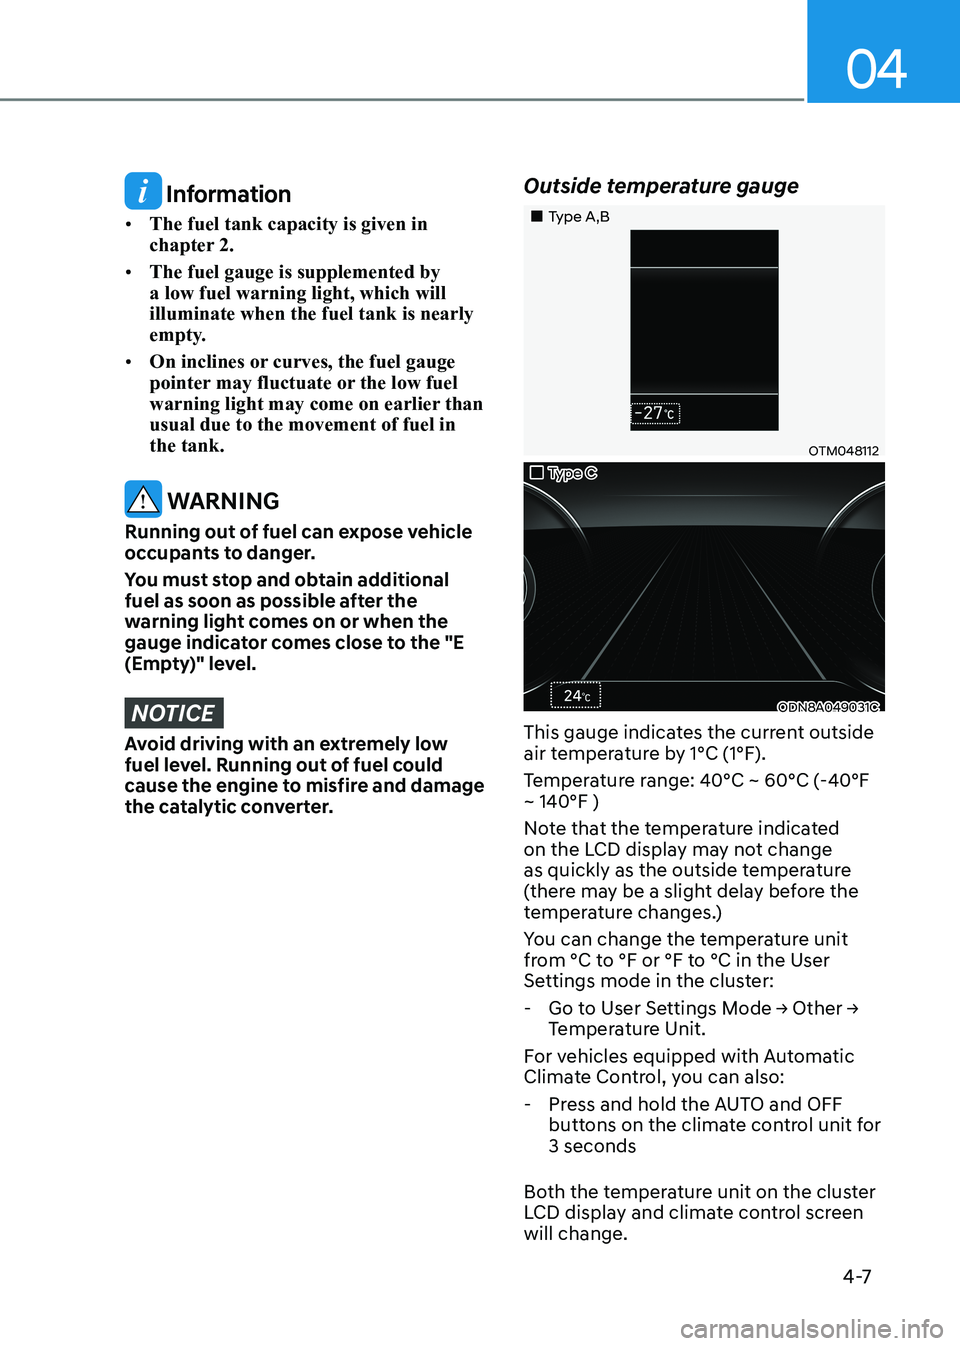
This gauge indicates the current outside
air temperature by 1°C (1°F).
Temperature range: 40°C ~ 60°C (-40°F ~ 140°F )
Note that the temperature indicated
on the LCD display may not change
as quickly as the outside temperature
(there may be a slight delay before the
temperature changes.)
You can change the temperature unit
from °C to °F or °F to °C in the User
Settings mode in the cluster:
- Go to User Settings Mode → Other →
Temperature Unit.
For vehicles equipped with Automatic
Climate Control, you can also: - Press and hold the AUTO and OFF buttons on the climate control unit for 3 seconds
Both the temperature unit on the cluster
LCD display and climate control screen will change.
Page 94 of 555
Instrument Cluster
4-8
Odometer
„„Type A, B
OIG046114
„„Type C
ODN8A049037C
„„Type D
OCN7040015
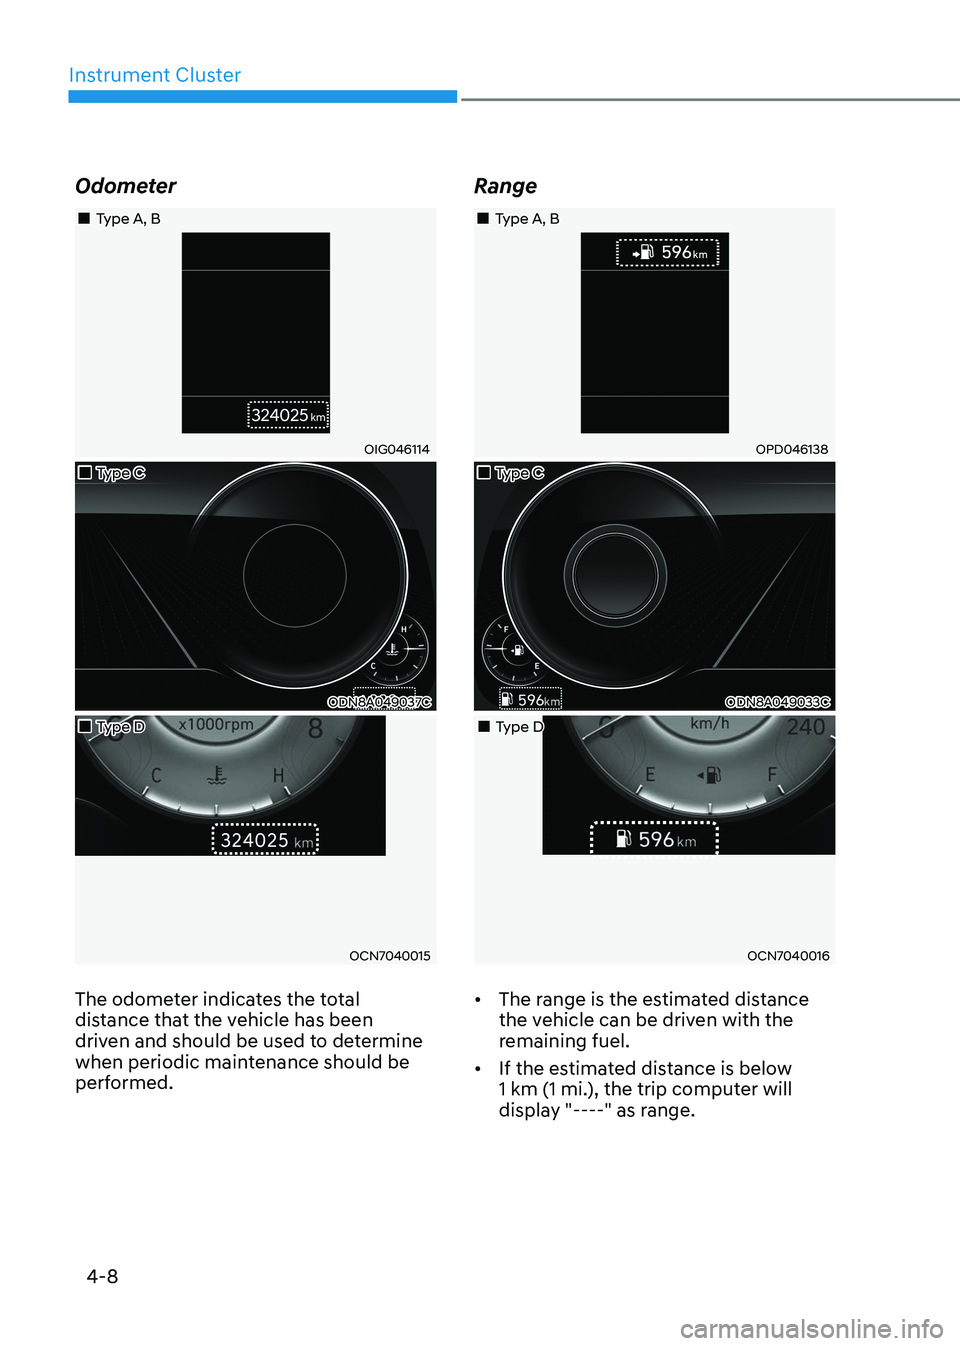
The odometer indicates the total
distance that the vehicle has been
driven and should be used to determine
when periodic maintenance should be
performed. Range
„„Type A, B
OPD046138
„„Type C
ODN8A049033C
„„Type D
OCN7040016
• The range is the estimated distance
the vehicle can be driven with the
remaining fuel.
• If the estimated distance is below
1 km (1 mi.), the trip computer will
display "----" as range.