2023 HYUNDAI SONATA fuel
[x] Cancel search: fuelPage 202 of 555
Convenience Features
5-56
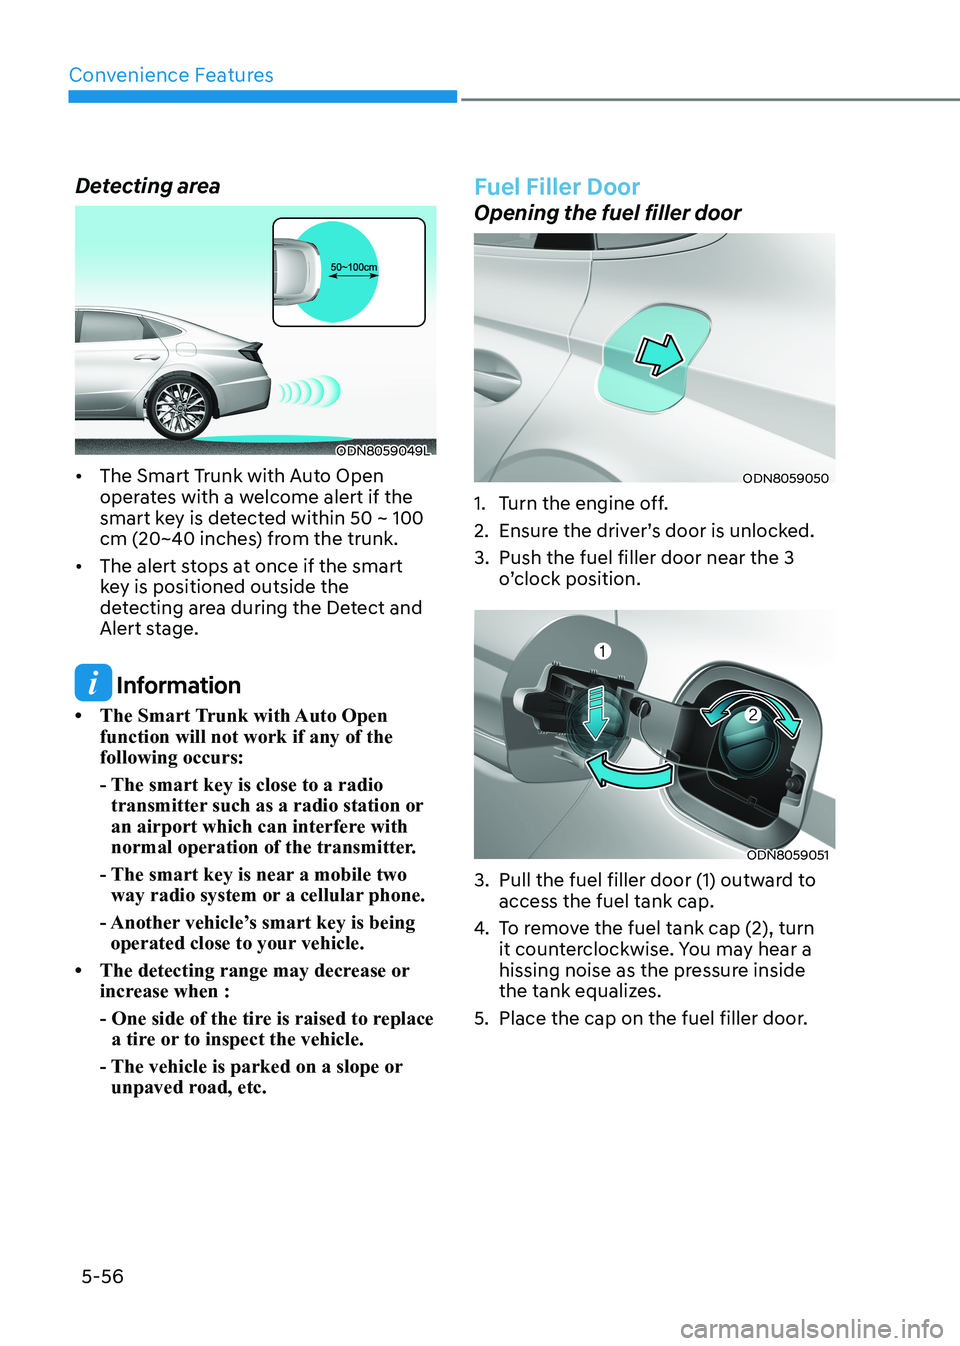
Detecting area
ODN8059049L
• The Smart Trunk with Auto Open operates with a welcome alert if the
smart key is detected within 50 ~ 100
cm (20~40 inches) from the trunk.
• The alert stops at once if the smart key is positioned outside the
detecting area during the Detect and
Alert stage.
Information
• The Smart Trunk with Auto Open function will not work if any of the following occurs:
- The smart key is close to a radio transmitter such as a radio station or
an airport which can interfere with
normal operation of the transmitter.
- The smart key is near a mobile two way radio system or a cellular phone.
- Another vehicle’s smart key is being operated close to your vehicle.
• The detecting range may decrease or increase when :
- One side of the tire is raised to replace a tire or to inspect the vehicle.
- The vehicle is parked on a slope or unpaved road, etc.
Fuel Filler Door
Opening the fuel filler door
ODN8059050
1. Turn the engine off.
2. Ensure the driver’s door is unlocked.
3. Push the fuel filler door near the 3 o’clock position.
ODN8059051
3. Pull the fuel filler door (1) outward to access the fuel tank cap.
4. To remove the fuel tank cap (2), turn
it counterclockwise. You may hear a
hissing noise as the pressure inside
the tank equalizes.
5. Place the cap on the fuel filler door.
Page 203 of 555
05
5-57
Information
If the fuel filler door does not open
because ice has formed around it, tap
lightly or push on the door to break the
ice and release the door. Do not pry on the
door. If necessary, spray around the door
with an approved deicer fluid (do not use
radiator antifreeze) or move the vehicle to a warm place and allow the ice to melt. Closing the fuel filler door
1. To install the fuel tank cap, turn it clockwise until it “clicks” one time.
2. Close the fuel filler door until it is latched securely.
WARNING
Gasoline is highly flammable and
explosive. Failure to follow these
guidelines may result in SERIOUS
INJURY or DEATH: • Read and follow all warnings posted
at the gas station.
• Before refueling, note the location of
the Emergency Gasoline Shut-Off, if
available, at the gas station.
• Before touching the fuel nozzle, you
should eliminate the potential build-
up of static electricity by touching
a metal part of the vehicle, a safe
distance away from the fuel filler
neck, nozzle, or other gas source,
with your bare hand.
• Do not use cellular phones while
refueling. Electric current and/or
electronic interference from cellular
phones can potentially ignite fuel
vapors and cause a fire. •
Do not get back into a vehicle
once you have begun refueling.
You can generate a buildup of
static electricity by touching,
rubbing or sliding against any item
or fabric capable of producing
static electricity. Static electricity
discharge can ignite fuel vapors
causing a fire. If you must re-enter
the vehicle, you should once again
eliminate potentially dangerous
static electricity discharge by
touching a metal part of the vehicle,
away from the fuel filler neck, nozzle
or other gasoline source, with your
bare hand.
• When using an approved portable
fuel container, be sure to place the
container on the ground prior to
refueling. Static electricity discharge
from the container can ignite fuel
vapors causing a fire.
Once refueling has begun, contact
between your bare hand and the
vehicle should be maintained until
the filling is complete.
• Use only approved portable plastic
fuel containers designed to carry and
store gasoline.
• When refueling, always move the
shift button to the P (Park) position
set the parking brake, and place
the ignition switch to the LOCK/
OFF position. Sparks produced by
electrical components related to the
engine can ignite fuel vapors causing
a fire.
• Do not use matches or a lighter and
do not smoke or leave a lit cigarette
in your vehicle while at a gas station,
especially during refueling.
• Do not over-fill or top-off your
vehicle tank, which can cause gasoline spillage.
Page 204 of 555
Convenience Features
5-58
• If a fire breaks out during refueling,
leave the vicinity of the vehicle, and
immediately contact the manager
of the gas station and then contact
the local fire department. Follow any
safety instructions they provide.
• If pressurized fuel sprays out, it can
cover your clothes or skin and thus
subject you to the risk of fire and
burns. Always remove the fuel cap
carefully and slowly. If the cap is
venting fuel or if you hear a hissing
sound, wait until the condition stops
before completely removing the cap.
• Always check that the fuel cap is
installed securely to prevent fuel
spillage in the event of an accident.
Information
Make sure to refuel your vehicle according
to the “Fuel Requirements” suggested in
the Introduction chapter.
NOTICE
• Do not spill fuel on the exterior
surfaces of the vehicle. Any type of
fuel spilled on painted surfaces may
damage the paint.
• If the fuel filler cap requires
replacement, use only a genuine
HYUNDAI cap or the equivalent
specified for your vehicle. An
incorrect fuel filler cap can result
in a serious malfunction of the fuel
system or emission control system.
Page 302 of 555
06
6-15
D (Drive)
This is the normal driving position. The
transmission will automatically shift
through a 8-gear sequence, providing
the best fuel economy and power.
To start the vehicle forward, push the D
(Drive) button by depressing the brake
pedal with the engine ON. Then depress
the accelerator pedal smoothly.
For extra power when passing another
vehicle or driving uphill, depress the
accelerator fully. The transmission will
automatically downshift to the next
lower gear (or gears, as appropriate).
When the vehicle is stopped in D (Drive)
position, if you open the driver's door
with the seat belt unfastened, the gear is
shifted to P (Park) position automatically.
However when the vehicle moves in D
(Drive) position, if you open the driver's
door with the seat belt unfastened, the
gear may not shift to P (Park) position
automatically to protect the automatic
transmission.
Shift-lock system
For your safety, the automatic
transmission has a shift-lock system
which prevents shifting the gear from
P (Park) or N (Neutral) to R (Reverse)
or D (Drive) unless the brake pedal is
depressed.
To shift the gear from P (Park) or N
(Neutral) to R (Reverse) or D (Drive):
1. Depress and hold the brake pedal.
2. Start the engine or place the ignition switch in the ON position.
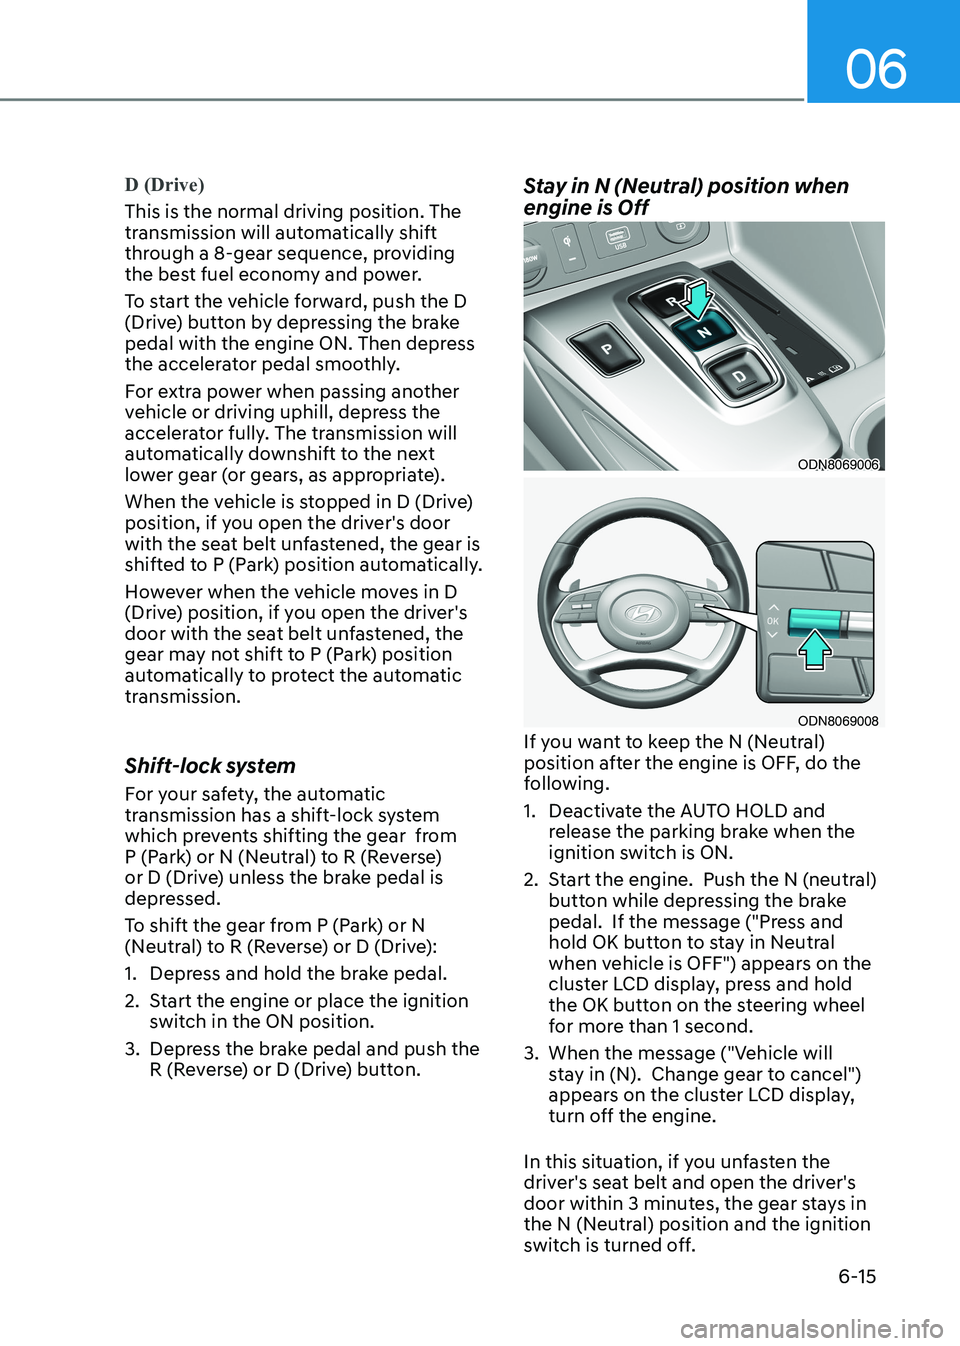
3. Depress the brake pedal and push the R (Reverse) or D (Drive) button. Stay in N (Neutral) position when engine is Off
ODN8069006
ODN8069008
If you want to keep the N (Neutral)
position after the engine is OFF, do the
following.
1. Deactivate the AUTO HOLD and release the parking brake when the
ignition switch is ON.
2. Start the engine. Push the N (neutral) button while depressing the brake
pedal. If the message ("Press and
hold OK button to stay in Neutral
when vehicle is OFF") appears on the
cluster LCD display, press and hold
the OK button on the steering wheel
for more than 1 second.
3. When the message ("Vehicle will stay in (N). Change gear to cancel")
appears on the cluster LCD display,
turn off the engine.
In this situation, if you unfasten the
driver's seat belt and open the driver's
door within 3 minutes, the gear stays in
the N (Neutral) position and the ignition
switch is turned off.
Page 308 of 555
06
6-21
•
The dual clutch transmission can be
thought of as an automatically shifting
manual transmission. It gives the
driving feel of a manual transmission,
yet provides the ease of a fully
automatic transmission.
• When D (Drive) is selected, the
transmission will automatically
shift through the gears similar to a
conventional automatic transmission.
Unlike a traditional automatic
transmission, the gear shifting can
sometimes be felt and heard as the
actuators engage the clutches and the
gears are selected.
• The dual clutch transmission
incorporates a wet-type dual clutch
mechanism, which allows for better
acceleration performance and
increased fuel efficiency while driving.
But it differs from a conventional
automatic transmission because
it does not incorporate a torque
converter. Instead, the transition from
one gear to the next is managed by
clutch slip, especially at lower speeds.
As a result, shifts are sometimes more
noticeable, and a light vibration can
be felt as the transmission shaft speed
is matched with the engine shaft
speed. This is a normal condition of
the dual clutch transmission.
• The wet-type clutch transfers torque
more directly and provides a direct-
drive feeling which may feel different
from a conventional automatic
transmission. This may be more
noticeable when launching the vehicle
from a stop or when traveling at low,
stop-and-go vehicle speeds. •
When rapidly accelerating from a
lower vehicle speed, the engine
rpm may increase dramatically as a
result of clutch slip as the dual clutch
transmission selects the correct gear. This is a normal condition.
• When accelerating from a stop on
an incline, press the accelerator
smoothly and gradually to avoid any
shudder feeling or jerkiness.
• When traveling at a lower vehicle
speed, if you release the accelerator
pedal quickly, you may feel engine
braking before the transmission
changes gears. This engine braking
feeling is similar to operating a
manual transmission at low speed.
• When driving downhill, you may wish
to move the gear shift lever/button to
Manual Shift mode and downshift to
a lower gear in order to control your
speed without using the brake pedal
excessively.
• When you turn the engine on and off,
you may hear clicking sounds as the
system goes through a self-test. This
is a normal sound for the dual clutch
transmission.
• During the first 1,500 km (1000 miles),
you may feel that the vehicle may not
be smooth when accelerating at low
speed. During this break-in period, the
shift quality and performance of your
new vehicle is continuously optimized.
Page 313 of 555
While Driving
6-26
D (Drive)
This is the normal driving position. The
transmission will automatically shift
through a 8-gear sequence, providing
the best fuel economy and power.
To start the vehicle forward, push the D
(Drive) button by depressing the brake
pedal with the engine ON. Then depress
the accelerator pedal smoothly. For extra
power when passing another vehicle or
driving uphill, depress the accelerator
fully. The transmission will automatically
downshift to the next lower gear (or
gears, as appropriate). When the vehicle
is stopped in D (Drive) position, if you
open the driver’s door with the seat belt
unfastened, the gear is shifted to P (Park)
position automatically.
However when the vehicle moves in D
(Drive) position, if you open the driver’s
door with the seat belt unfastened,
the gear may be not shifted to P (Park)
position automatically for protecting the
dual clutch transmission.
The DRIVE MODE switch, located on
the shift lever/button console, allows
the driver to switch from NORMAL/
COMFORT mode to SPORT or ECO mode. (if equipped)
For more details, refer to “Drive Mode
Integrated Control System” later in this
chapter. Shift-lock system
For your safety, the automatic
transmission has a shift-lock system
which prevents shifting the transmission
from P (Park) or N (Neutral) to R
(Reverse) or D (Drive) unless the brake
pedal is depressed.
To shift the transmission from P (Park)
into R (Reverse):
1. Depress and hold the brake pedal.
2. Start the engine or place the ignition
switch in the ON position.
3. Depress the brake pedal and move the shift lever to R (Reverse). (shift lever
type)
Depress the brake pedal and push the
R (Reverse) button. (shift button type)
When the battery is discharged:
You cannot shift the shift lever/button,
when the battery is discharged.
In emergencies, do the following
to move the shift lever/button to N
(Neutral) on a level ground.
1. Connect the battery cables from another vehicle or from a another
battery to the jump-starting terminals
inside the engine compartment.
For more details, refer to “Jump
Starting” in chapter 8.
2. Release the parking brake with the ignition switch in the ON position.
3. Shift the gear to the N(Neutral) position refer to the “Stay in Neutral
when vehicle is Off” in this chapter.
Page 330 of 555
06
6-43
The Launch Control system controls the
vehicle to reduce wheel spin or slip on a
hard acceleration from a standing start.
Launch control operation and
release
Prerequisite for activation
The Launch Control gets ready to
be activated, when the following
prerequisites are satisfied. •
All doors, hood and trunk are closed.
• The driver’s seat belt is fastened.
• If the engine temperature is
overheated, cooling down it before
using the launch control.
• If the engine temperature is low,
warming up the engine.
• The vehicle is at a complete stop.
Then align the steering wheel straight.
• Release the parking brake by pressing
the EPB switch and if the AUTO HOLD
function is working, please turn off
the function by releasing the AUTO
HOLD button.
CAUTION
• The Launch Control system is
intended for use at a closed race
track and not intended for use on
public roads. It will not compensate
for driver’s who are inexperienced or
lack familiarity with the race track.
• The Launch performance may be
varied by fuel, environment, tire and
load condition.
• We recommend you use the function
after breaking in your vehicle and
constant use of Launch Control can
put enormous stress on the vehicle
resulting in premature wear of
related components. To Ready Launch Control
ODN8N050001L
1. Select SPORT+ mode using the drive mode selection Switch. (SPORT+
indicator will illuminate on the
instrument cluster LCD display.)
2. Turn off ESC by pressing the ESC OFF button for more than 3 seconds. (The
ESC OFF indicator will illuminate on
the instrument cluster.)
3. Shift to the D (Drive) position.
4. Depress the brake pedal firmly with
your left foot, and depressing the
accelerator pedal down fully with your
right foot. Then, the launch control
is ready for operation. The message
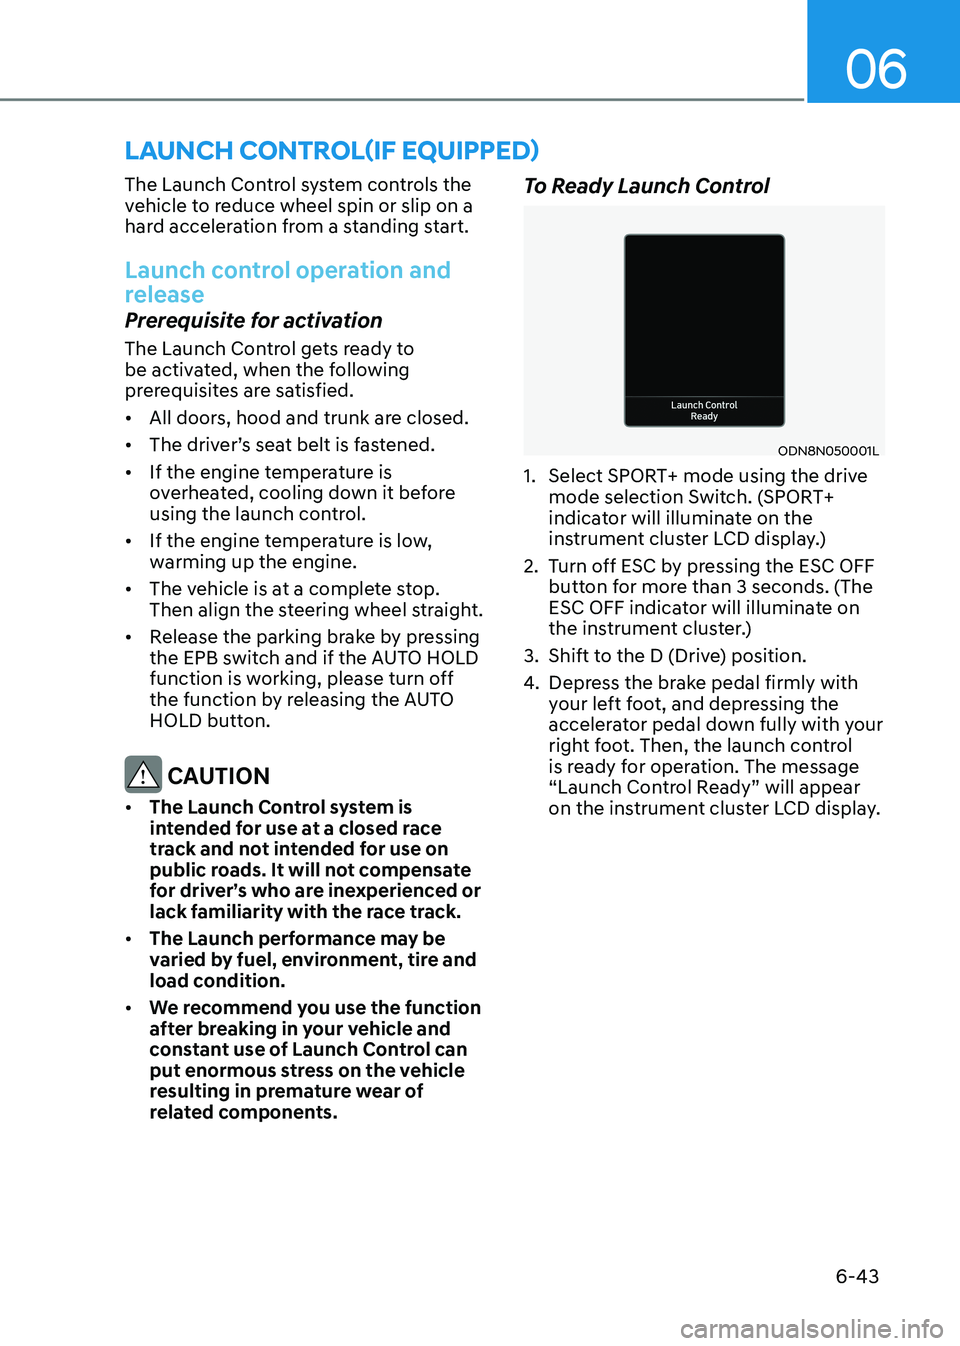
“Launch Control Ready” will appear
on the instrument cluster LCD display.
launch control(if equippeD)
Page 333 of 555
While Driving
6-46
CUSTOM mode
In CUSTOM mode, the driver
can select separate modes and combine them on the
infotainment system screen.
• Type A
- Engine/Transmission: NORMAL/ SPORT
- Steering wheel: NORMAL/SPORT
• Type B
- Engine/Transmission : NORMAL/
SPORT/SPORT+
- Steering wheel : NORMAL/SPORT
- Electronic Stability Control (ESC) :
NORMAL/SPORT
For more infomation, refer to the
separately supplied manual with your
vehicle. • When CUSTOM mode is selected
by using the DRIVE MODE button,
the CUSTOM mode indicator will
illuminate. SPORT mode SPORT mode manages the
driving dynamics by
automatically adjusting the
steering effort, the engine
and transmission control
logic for enhanced driver
performance.
• When SPORT mode is selected by
using the DRIVE MODE button, the
SPORT indicator will illuminate.
• Whenever the engine is restarted,
the Drive Mode will revert back to
NORMAL mode. If SPORT mode is
desired, re-select SPORT mode from
the DRIVE MODE button.
• When SPORT mode is activated:
- The engine rpm will tend to remain raised over a certain length of time
even after releasing the accelerator
- Upshifts are delayed when accelerating
Information
In SPORT mode, the fuel efficiency may
decrease.