2023 HYUNDAI SONATA buttons
[x] Cancel search: buttonsPage 179 of 555

05
5-33
Automatic-Dimming Night Vision Safety™ (NVS®
) Mirror (if equipped)
The NVS® Mirror automatically reduces
glare by monitoring light levels in the
front and the rear of the vehicle. Any
object that obstructs either light sensor
will degrade the automatic dimming
control feature.
For more information regarding NVS®
mirrors and other applications, please
refer to the Gentex website:
www.gentex.com
Your mirror will automatically dim
upon detecting glare from the vehicles
traveling behind you.
The mirror defaults to the ON position
each time the vehicle is started. Integrated HomeLink ®
Wireless Control
System
The HomeLink® Wireless Control System
can replace up to three hand-held
radio-frequency (RF) transmitters with
a single built-in device. This innovative
feature will learn the radio frequency
codes of most current transmitters to
operate devices such as gate operators,
garage door openers, entry door locks,
security systems, even home lighting.
Both standard and rolling code-equipped
transmitters can be programmed by
following the outlined procedures.
Additional HomeLink® information can
be found at: www.homelink.com, www.
youtube.com/HomeLinkGentex or by
calling 1-800-355-3515.
Retain the original transmitter of the
RF device you are programming for use
in other vehicles as well as for future
HomeLink® programming. It is also
suggested that upon the sale of the
vehicle, the programmed HomeLink®
buttons be erased for security purposes.
WARNING
Before programming HomeLink® to a
garage door opener or gate operator,
make sure people and objects are out
of the way of the device to prevent
potential harm or damage. Do not
use the HomeLink® with any garage
door opener that lacks the safety
stop and reverse features required by
federal safety standards (this includes
any garage door opener model
manufactured before April 1, 1982).
A garage door that cannot detect an
object - signaling the door to stop
and reverse does not meet current
federal safety standards.Using a garage
door opener without these features
increases the risk of serious injury or
death.
Programming HomeLink ®
Please note the following:
• When programming a garage door opener, it is advised to park the
vehicle outside of the garage.
• It is recommended that a new battery be placed in the hand-held transmitter
of the device being programmed to
HomeLink® for quicker training and
accurate transmission of the radio-
frequency signal.
• Some vehicles may require the Engine Start/Stop button to be in the
ACC (or “Accessories”) position for
programming and/or operation of
HomeLink®.
• In the event that there are still programming difficulties or questions
after following the programming steps
listed below, contact HomeLink® at:
www.homelink.com, www.youtube.
com/HomeLinkGentex or by calling
1-800-355-3515.
Page 181 of 555
05
5-35
7. Return to the vehicle and firmly press,
hold for two seconds and release the
HomeLink button up to three times.
Do not press the HomeLink button
rapidly. At this point programming
is complete and your device should
operate when the HomeLink button is
pressed and released.
Information
• Some garage door openers require to
press the programmed button on the
mirror up to three times right after
the programming is just completed to
operate the garage door.
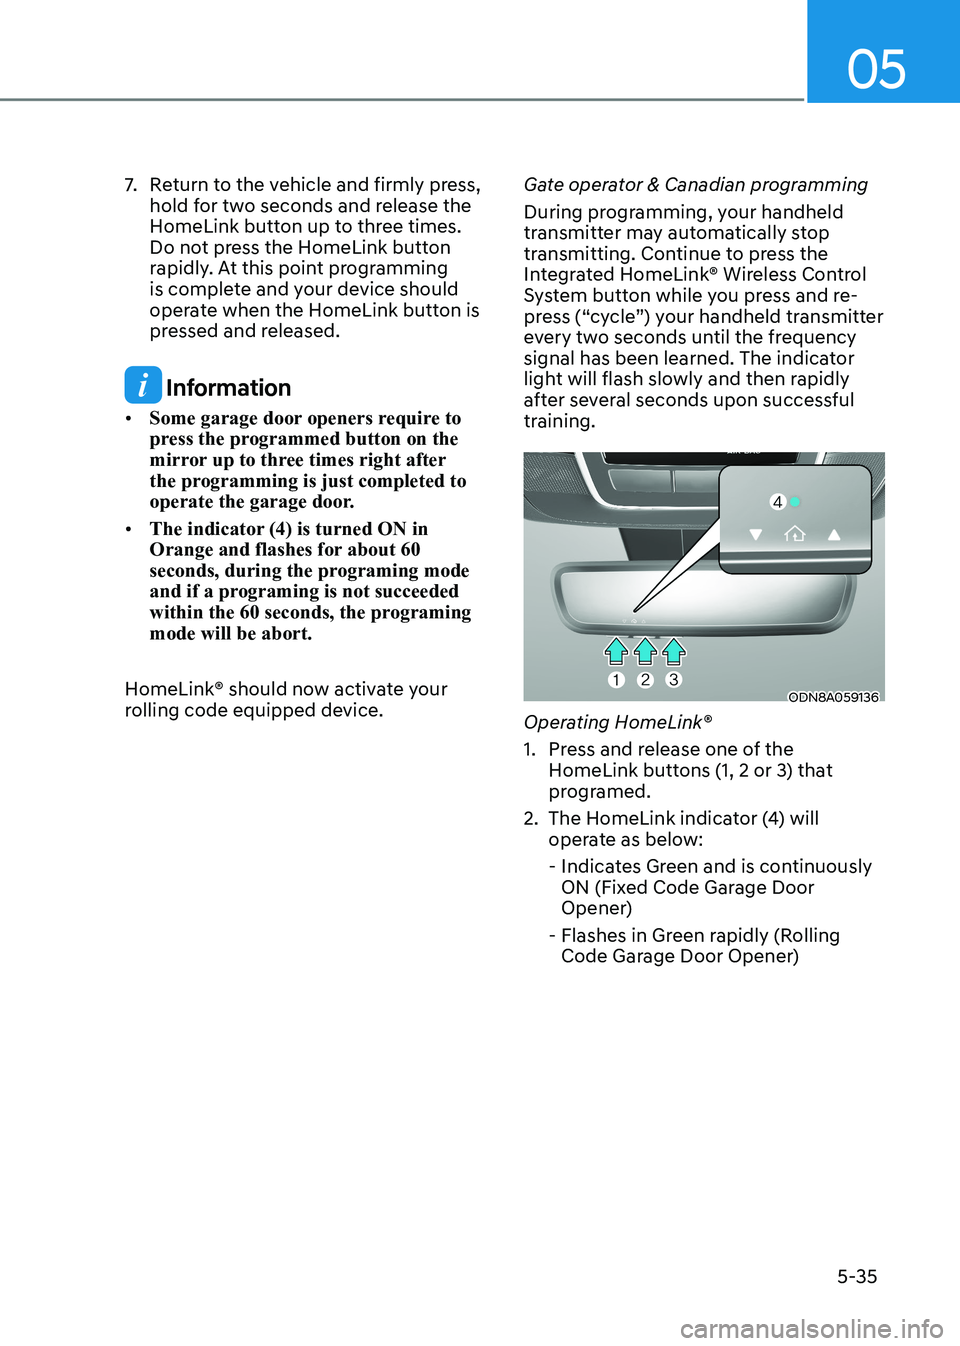
• The indicator (4) is turned ON in
Orange and flashes for about 60
seconds, during the programing mode
and if a programing is not succeeded
within the 60 seconds, the programing mode will be abort.
HomeLink® should now activate your
rolling code equipped device. Gate operator & Canadian programming
During programming, your handheld
transmitter may automatically stop
transmitting. Continue to press the
Integrated HomeLink® Wireless Control
System button while you press and re-
press (“cycle”) your handheld transmitter
every two seconds until the frequency
signal has been learned. The indicator
light will flash slowly and then rapidly
after several seconds upon successful
training.
ODN8A059136
Operating HomeLink®
1. Press and release one of the HomeLink buttons (1, 2 or 3) that
programed.
2. The HomeLink indicator (4) will operate as below:
- Indicates Green and is continuously ON (Fixed Code Garage Door
Opener)
- Flashes in Green rapidly (Rolling Code Garage Door Opener)
Page 182 of 555
Convenience Features
5-36
ODN8A059138
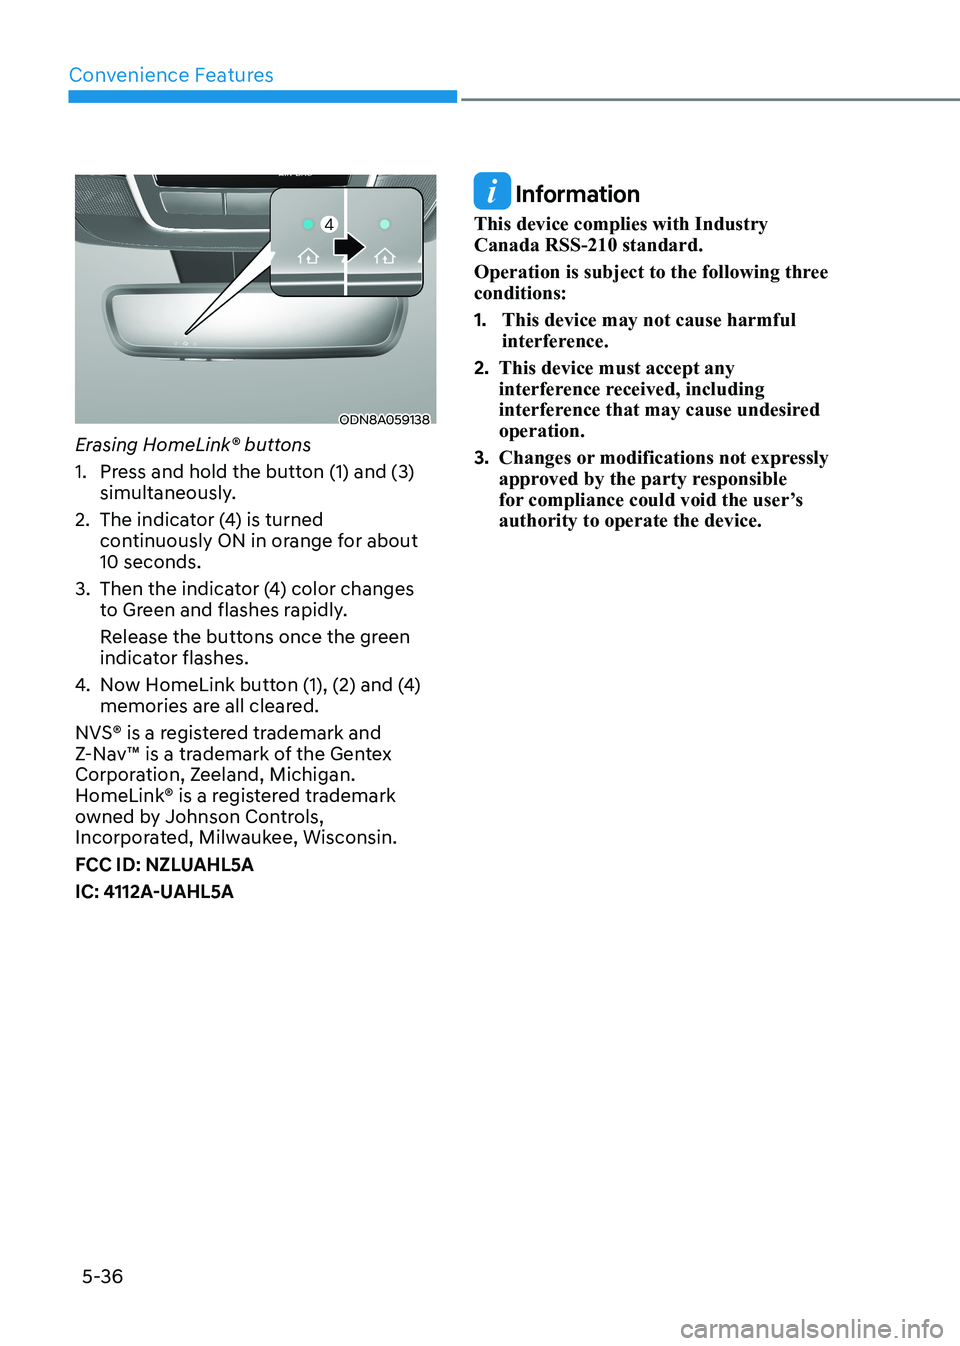
Erasing HomeLink® buttons
1. Press and hold the button (1) and (3) simultaneously.
2. The indicator (4) is turned continuously ON in orange for about 10 seconds.
3. Then the indicator (4) color changes to Green and flashes rapidly.
Release the buttons once the green indicator flashes.
4. Now HomeLink button (1), (2) and (4) memories are all cleared.
NVS® is a registered trademark and
Z-Nav™ is a trademark of the Gentex
Corporation, Zeeland, Michigan.
HomeLink® is a registered trademark
owned by Johnson Controls,
Incorporated, Milwaukee, Wisconsin.
FCC ID: NZLUAHL5A
IC: 4112A-UAHL5A
Information
This device complies with Industry Canada RSS-210 standard.
Operation is subject to the following three conditions: 1. This device may not cause harmful
interference.
2. This device must accept any
interference received, including
interference that may cause undesired operation.
3. Changes or modifications not expressly
approved by the party responsible
for compliance could void the user’s authority to operate the device.
Page 184 of 555
Convenience Features
5-38
ODN8A059139
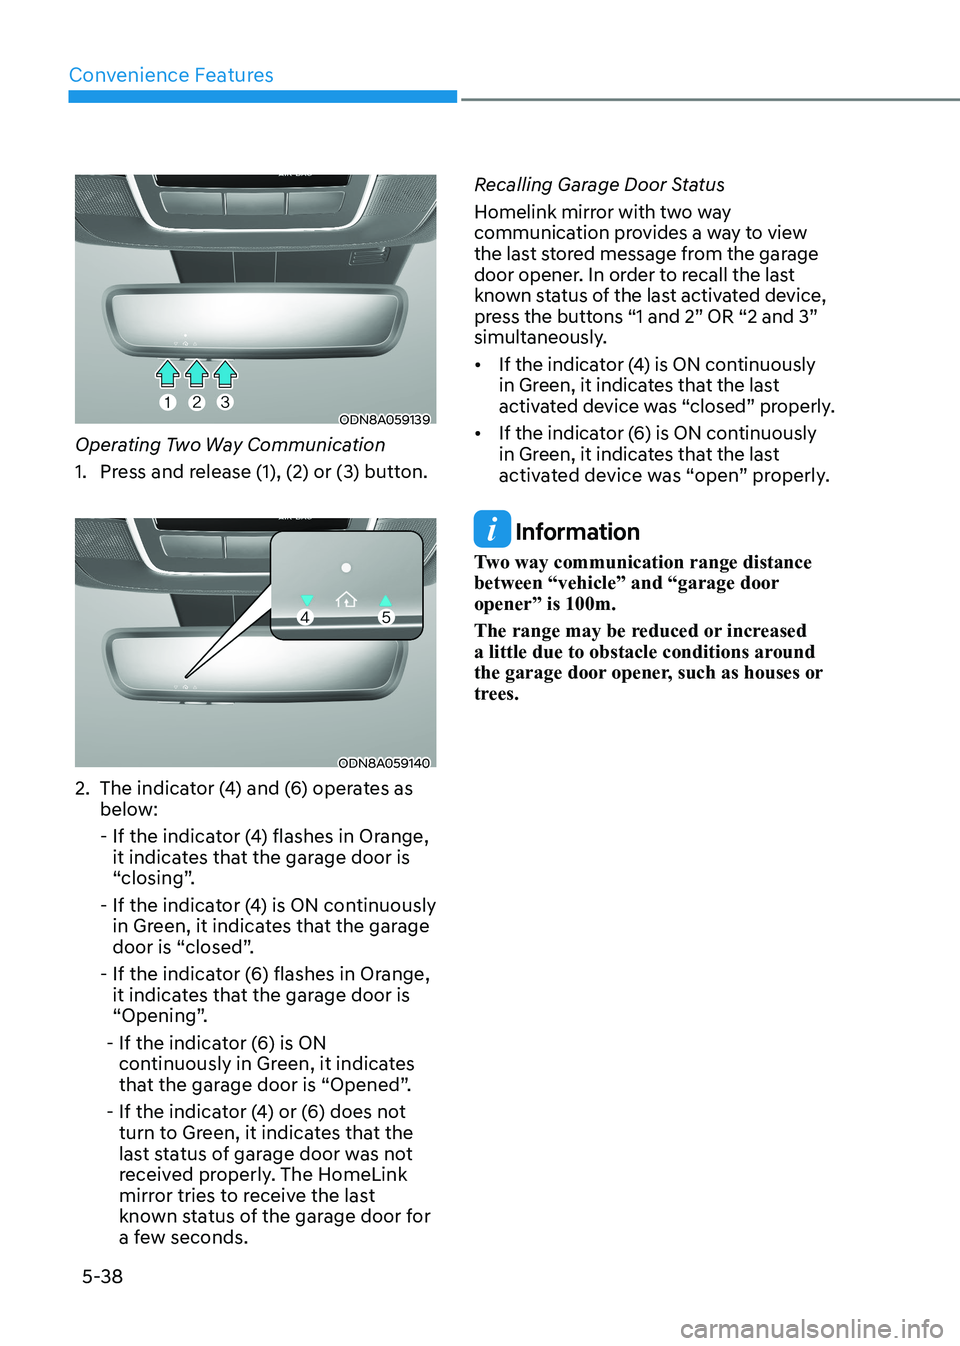
Operating Two Way Communication
1. Press and release (1), (2) or (3) button.
ODN8A059140
2. The indicator (4) and (6) operates as below:
- If the indicator (4) flashes in Orange, it indicates that the garage door is
“closing”.
- If the indicator (4) is ON continuously in Green, it indicates that the garage
door is “closed”.
- If the indicator (6) flashes in Orange, it indicates that the garage door is
“Opening”.
- If the indicator (6) is ON continuously in Green, it indicates
that the garage door is “Opened”.
- If the indicator (4) or (6) does not turn to Green, it indicates that the
last status of garage door was not
received properly. The HomeLink
mirror tries to receive the last
known status of the garage door for
a few seconds. Recalling Garage Door Status
Homelink mirror with two way
communication provides a way to view
the last stored message from the garage
door opener. In order to recall the last
known status of the last activated device,
press the buttons “1 and 2” OR “2 and 3”
simultaneously.
• If the indicator (4) is ON continuously
in Green, it indicates that the last
activated device was “closed” properly.
• If the indicator (6) is ON continuously in Green, it indicates that the last
activated device was “open” properly.
Information
Two way communication range distance
between “vehicle” and “garage door opener” is 100m.
The range may be reduced or increased
a little due to obstacle conditions around
the garage door opener, such as houses or
trees.
Page 245 of 555

05
5-99
The Remote Moving Forward/
Backward assist will stop
temporarily when:
1. An obstacle is detected at the
direction the vehicle is heading.
2. The door or trunk is opened.
3. The moving forward/backward button on the smart key is released.
4. Multiple buttons on the smart key are
pressed at the same time.
5. The distance between the smart key and vehicle is over 4 m (13 ft.).
6. A button on the other smart key is pressed during operation.
7. Rear Cross-Traffic Collision-Avoidance
Assist system is activated while
reserving.
8. The vehicle moves 7 m (23 ft.) with the Remote Moving Forward/Backward
while the smart key is pressed.
(Maximum travel distance per move)
à The vehicle stops when the Remote
Smart Parking Assist system will stop
temporarily and the function will
resume when the above condition is
cleared.
The Remote Moving Forward/
Backward assist is cancelled while
in operation when:
1. The driver holds the steering wheel while the steering wheel is controlled.
2. The gear is shifted or the Electronic Parking Brake (EPB) is activated.
3. The hood opens.
4. The vehicle speed exceeds 5km/h (3
mph).
5. The vehicle accelerates suddenly.
6. The vehicle slips back while controlling the vehicle speed.
7. The wheel is stuck and the vehicle is
unable to move. 8. About 3 minutes and 50 seconds
have passed after the Remote Moving
Forward/Backward assist starts.
9. The gradient of the road exceeds
the range supported by the Remote
Moving Forward/Backward assist.
10. The steering, shifting gear and drive assist are difficult.
11. The suspended status lasts for over 1 minute.
12. The driver continuously presses and releases the smart key’s moving
forward/backward button over 10 times.
13. The Traction Control System (TCS) is activated while controlling the vehicle speed.
14. The smart key is damaged.
15. The accelerator/brake pedal is depressed while all the doors are closed.
16. The brake pedal is depressed while the driver’s door is open and the
smart key is outside the vehicle.
17. The vehicle travels more than 14 m (46 ft.) after the Remote Moving
Forward/Backward assist is activated.
18. The theft alarm system is activated.
à When the Remote Moving Forward/
Backward is completed, the gear in
P(Park) and Electronic Parking Brake
(EPB) are engaged automatically and
the vehicle turns off.
à The frequent beep sounds are
generated to show the deactivation
status.
Page 251 of 555
5-105
05
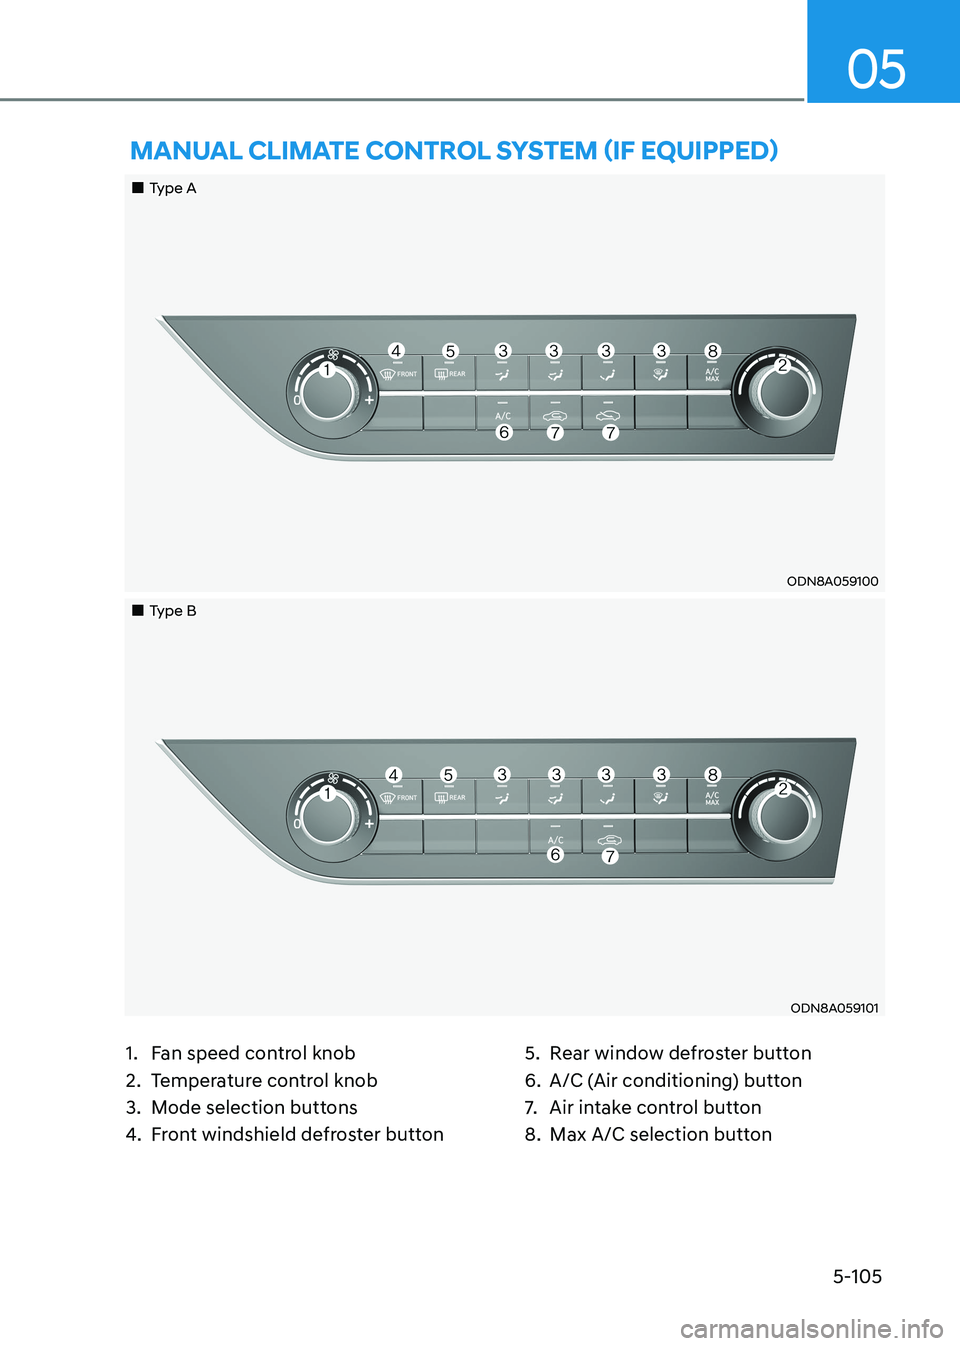
1. Fan speed control knob
2. Temperature control knob
3. Mode selection buttons
4. Front windshield defroster button 5. Rear window defroster button
6. A/C (Air conditioning) button
7.
Air intake control button
8. Max A/C selection button
mAnUAl climATe conTrol SySTem (if eQUippeD)
„„Type A
ODN8A059100
„„Type B
ODN8A059101
Page 262 of 555
Convenience Features
5-116
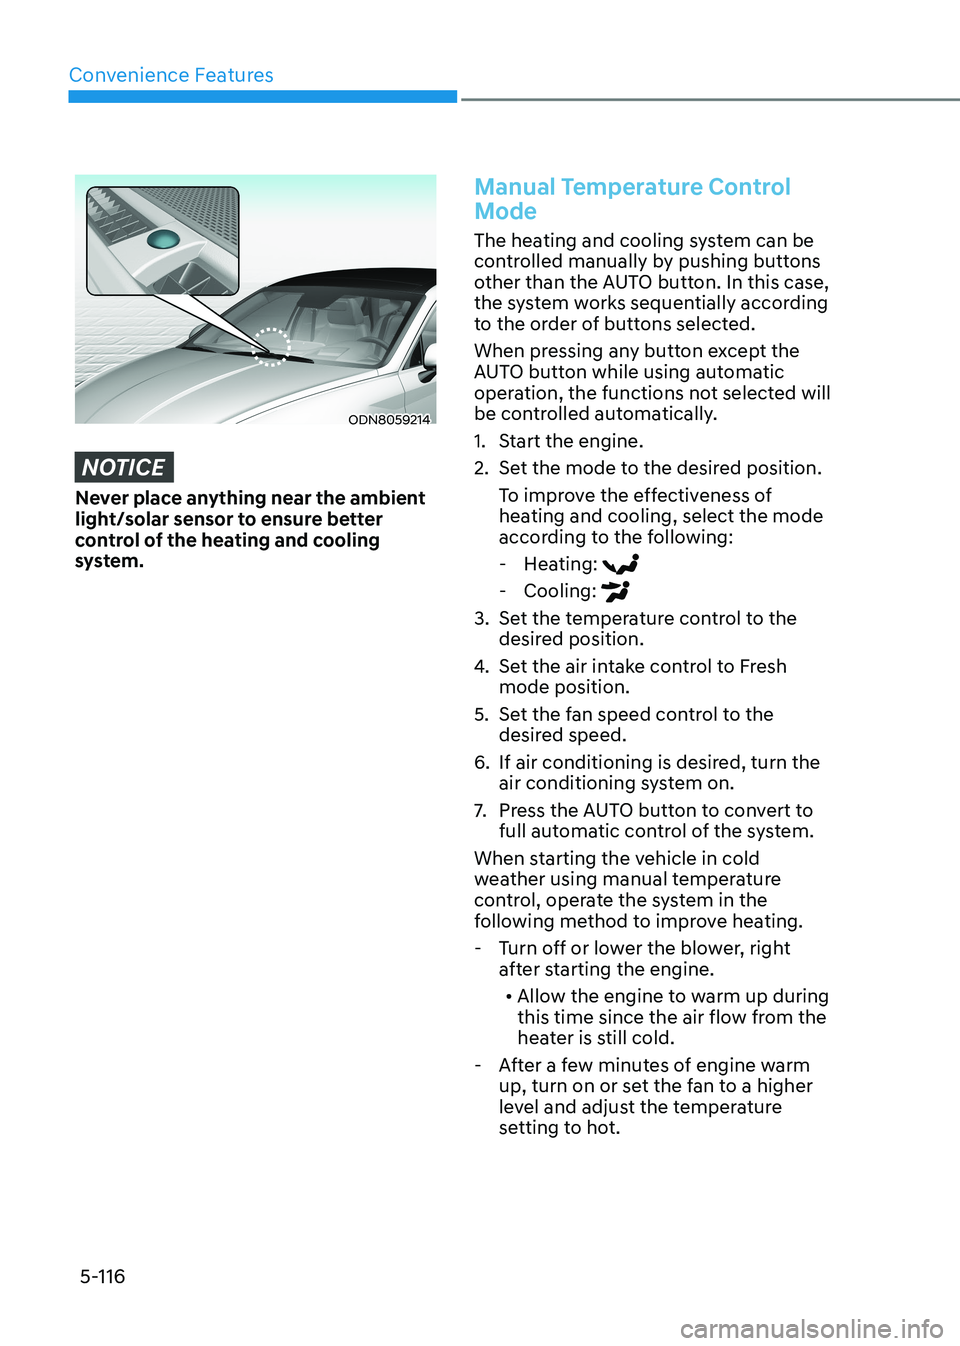
ODN8059214
NOTICE
Never place anything near the ambient
light/solar sensor to ensure better
control of the heating and cooling
system.
Manual Temperature Control
Mode
The heating and cooling system can be
controlled manually by pushing buttons
other than the AUTO button. In this case,
the system works sequentially according
to the order of buttons selected.
When pressing any button except the
AUTO button while using automatic
operation, the functions not selected will
be controlled automatically.
1. Start the engine.
2. Set the mode to the desired position.To improve the effectiveness of
heating and cooling, select the mode
according to the following: - Heating:
- Cooling:
3. Set the temperature control to the desired position.
4. Set the air intake control to Fresh mode position.
5. Set the fan speed control to the desired speed.
6. If air conditioning is desired, turn the air conditioning system on.
7. Press the AUTO button to convert to
full automatic control of the system.
When starting the vehicle in cold
weather using manual temperature
control, operate the system in the
following method to improve heating. - Turn off or lower the blower, right after starting the engine.
• Allow the engine to warm up during
this time since the air flow from the
heater is still cold.
- After a few minutes of engine warm up, turn on or set the fan to a higher
level and adjust the temperature
setting to hot.
Page 267 of 555
05
5-121
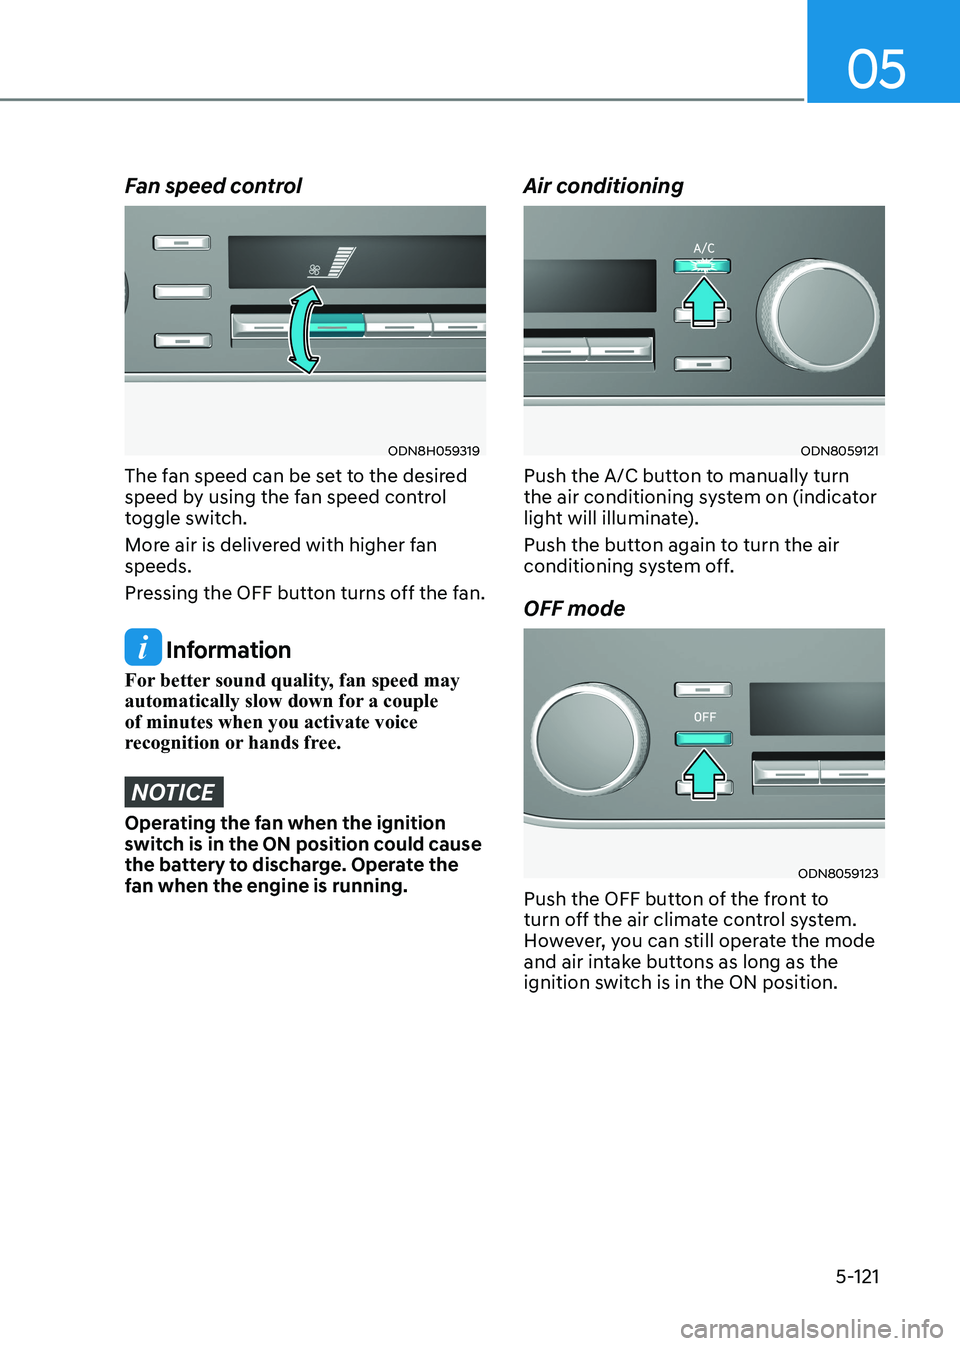
Fan speed control
ODN8H059319
The fan speed can be set to the desired
speed by using the fan speed control
toggle switch.
More air is delivered with higher fan speeds.
Pressing the OFF button turns off the fan.
Information
For better sound quality, fan speed may
automatically slow down for a couple of minutes when you activate voice
recognition or hands free.
NOTICE
Operating the fan when the ignition
switch is in the ON position could cause
the battery to discharge. Operate the
fan when the engine is running. Air conditioning
ODN8059121
Push the A/C button to manually turn
the air conditioning system on (indicator
light will illuminate).
Push the button again to turn the air
conditioning system off. OFF mode
ODN8059123
Push the OFF button of the front to
turn off the air climate control system.
However, you can still operate the mode
and air intake buttons as long as the
ignition switch is in the ON position.