2023 HYUNDAI SONATA start stop button
[x] Cancel search: start stop buttonPage 18 of 555

2-7
02
The actual shape may differ from the illustration.ODN8019005
1. Instrument cluster ..................................4-2
2. Driver’s front air bag .............................3-39
3. Key ignition switch/ ................................6-6
Engine Start/Stop button .......................6-9
4. Audio / Video / Navigation system * ...5-141
5. Hazard warning flasher switch ..............7-2
6. Manual climate control system/ .........5-105
Automatic climate control system ......5-114
7. Passenger’s front air bag .....................3-39
8. Glove box .............................................. 5-131
9. Transmission shift button .....................6-1310. Reverse Parking Distance Warning/
....5-82
Forward/Reverse Parking Distance
Warning system button * .....................5-86
11. Surround View Monitor system button * .................................................. 5-75
12. Drive mode integrated control system *.................................... 6-45
13. AUTO HOLD .......................................... 6-34
14. Remote Smart Parking Assist (RSPA) system button * .................................... 5-95
* : if equipped
instrumEnt PanEl ovErviEw
Page 40 of 555
03
3-11
WARNING
When returning the rear seatback from
a folded to an upright position, hold the
seatback and return it slowly. Ensure
that the seatback is completely locked
into its upright position by pushing on
the top of the seatback. In an accident
or sudden stop, an unlocked seatback
could allow cargo to move forward with
great force and enter the passenger
compartment, which could result in
serious injury or death.
WARNING
Do not place objects in the rear seats,
since they cannot be properly secured
and may hit vehicle occupants in a
collision causing serious injury or death.
WARNING
Make sure the vehicle is off, the shift
button is in P (Park), and the parking
brake is securely applied whenever
loading or unloading cargo. Failure
to take these steps may allow the
vehicle to move if the shift button
is inadvertently moved to another position. Armrest (if equipped)
ODN8039018
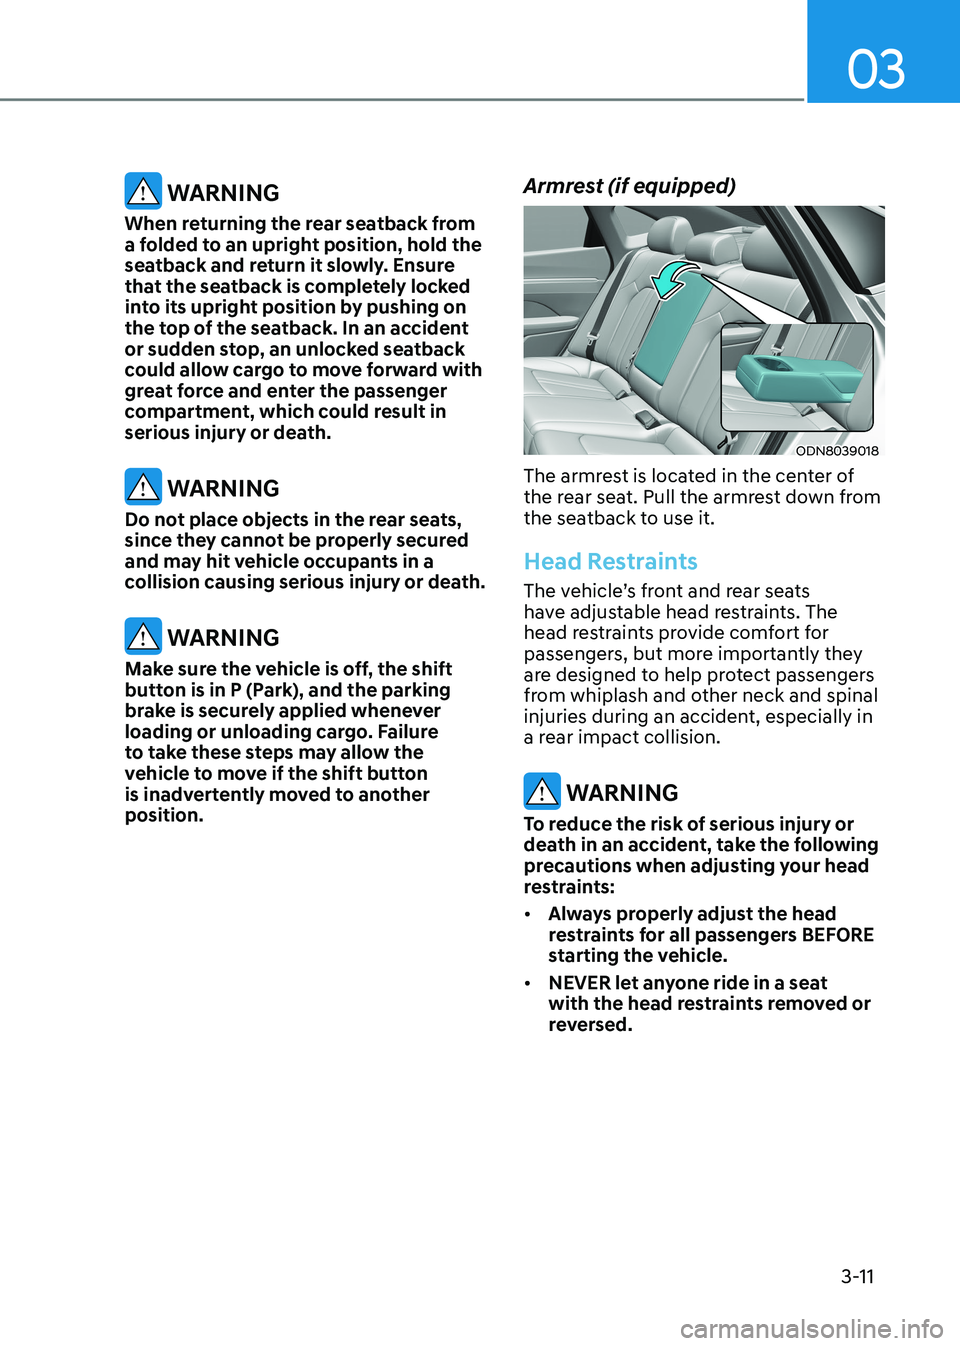
The armrest is located in the center of
the rear seat. Pull the armrest down from
the seatback to use it.
Head Restraints
The vehicle’s front and rear seats
have adjustable head restraints. The
head restraints provide comfort for
passengers, but more importantly they
are designed to help protect passengers
from whiplash and other neck and spinal
injuries during an accident, especially in
a rear impact collision.
WARNING
To reduce the risk of serious injury or
death in an accident, take the following
precautions when adjusting your head
restraints: • Always properly adjust the head
restraints for all passengers BEFORE
starting the vehicle.
• NEVER let anyone ride in a seat
with the head restraints removed or
reversed.
Page 71 of 555
Seats & Safety System
3-42
WARNING
To reduce the risk of serious injury or
death from an inflating curtain air bag,
take the following precautions: • All seat occupants must wear
seat belts at all times to help keep
occupants positioned properly.
• Properly secure child restraints as far
away from the door as possible.
• Do not place any objects over the air
bag. Also, do not attach any objects
around the area the air bag inflates
such as the door, side door glass,
front and rear pillar, roof side rail.
• Do not hang other objects except
clothes, especially hard or breakable
objects. In an accident, it may cause
vehicle damage or personal injury.
• Do not allow passengers to lean their
heads or bodies onto doors, put their
arms on the doors, stretch their arms
out of the window, or place objects
between the doors and seats.
• Do not open or repair the side curtain air bags.How Does the Air Bag System
Operate?
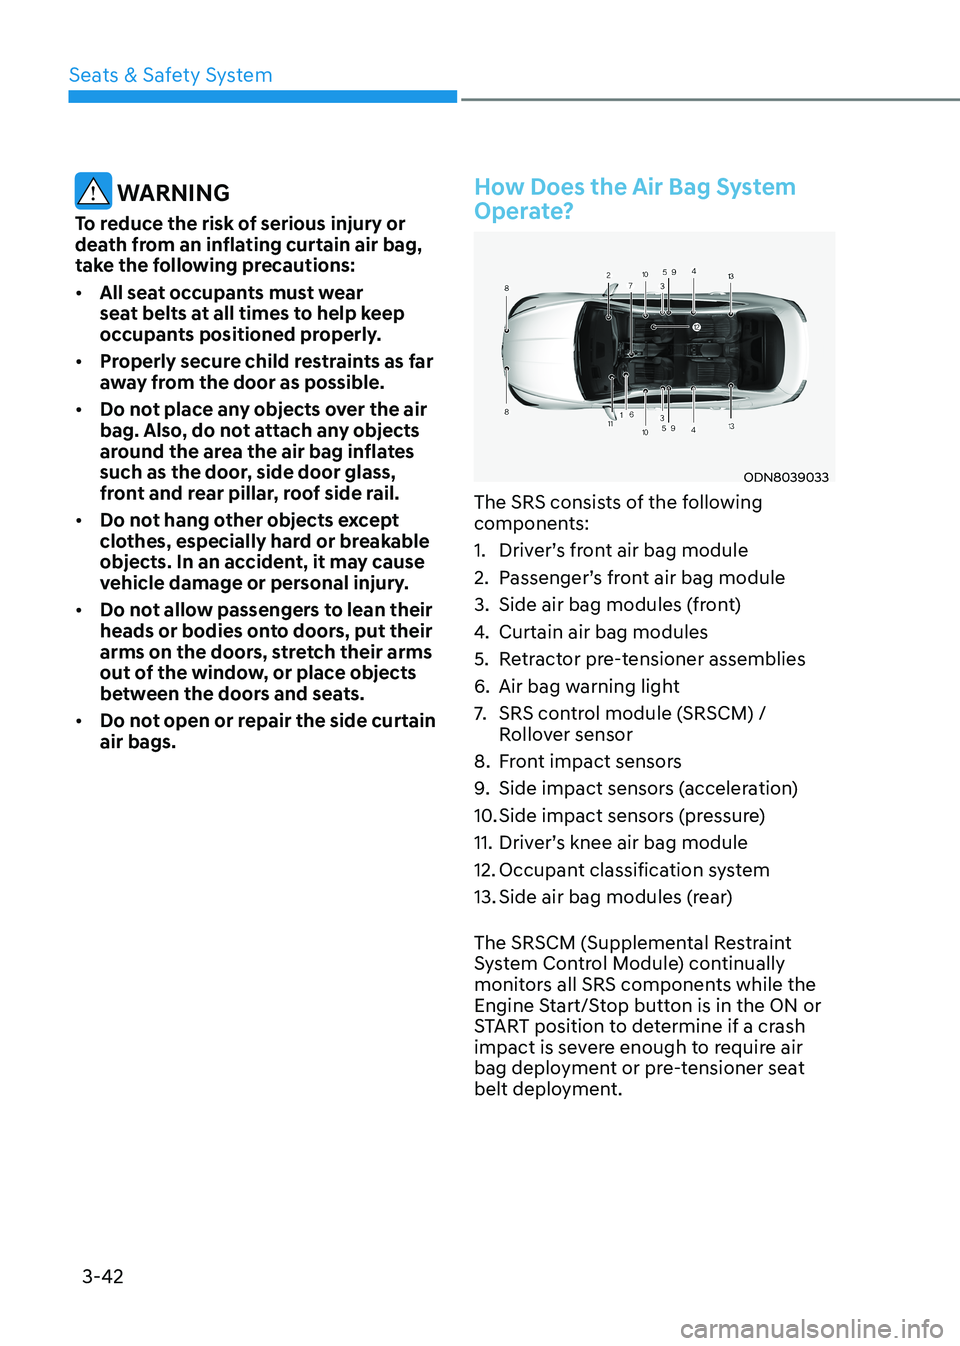
ODN8039033
The SRS consists of the following
components:
1. Driver’s front air bag module
2. Passenger’s front air bag module
3. Side air bag modules (front)
4. Curtain air bag modules
5. Retractor pre-tensioner assemblies
6. Air bag warning light
7. SRS control module (SRSCM) /
Rollover sensor
8. Front impact sensors
9. Side impact sensors (acceleration)
10. Side impact sensors (pressure)
11. Driver’s knee air bag module
12. Occupant classification system
13. Side air bag modules (rear)
The SRSCM (Supplemental Restraint
System Control Module) continually
monitors all SRS components while the
Engine Start/Stop button is in the ON or
START position to determine if a crash
impact is severe enough to require air
bag deployment or pre-tensioner seat
belt deployment.
Page 72 of 555
03
3-43
SRS warning light
The SRS (Supplement Restraint System)
air bag warning light on the instrument
panel displays the air bag symbol
depicted in the illustration. The system
checks the air bag electrical system for
malfunctions. The light indicates that
there is a potential malfunction with your
air bag system, which could include your
side and curtain air bags used for rollover
protection.
WARNING
If your SRS malfunctions, the air bag
may not inflate properly during an
accident increasing the risk of serious
injury or death.
If any of the following conditions occur,
your SRS is malfunctioning: • The light does not turn on for
approximately six seconds when the
Engine Start/Stop button is in the ON position.
• The light stays on after illuminating
for approximately six seconds.
• The light comes on while the vehicle
is in motion.
• The light blinks when the engine is running.
Have an authorized HYUNDAI dealer inspect the SRS as soon as possible if
any of these conditions occur. During a frontal collision, sensors will
detect the vehicle’s deceleration. If the
rate of deceleration is high enough, the
control unit will inflate the front air bags.
The front air bags help protect the driver
and front passenger by responding to
frontal impacts in which seat belts alone
cannot provide adequate restraint. When
needed, the side air bags help provide
protection in the event of a side impact
or rollover. •
Air bags are activated (able to inflate
if necessary) when the Engine Start/
Stop button is in the ON position or
approximately within 3 minutes after
ignition off.
• Air bags inflate in the event of certain
frontal or side collisions to help
protect the occupants from serious
physical injury.
• Generally, air bags are designed to
inflate based upon the severity of
a collision, its direction, etc. These
two factors determine whether
the sensors produce an electronic
deployment/inflation signal.
• The front air bags will completely
inflate and deflate in an instant. It is
virtually impossible for you to see the
air bags inflate during an accident. It is
much more likely that you will simply
see the deflated air bags hanging out
of their storage compartments after the collision.
Page 80 of 555
03
3-51
OHI038118
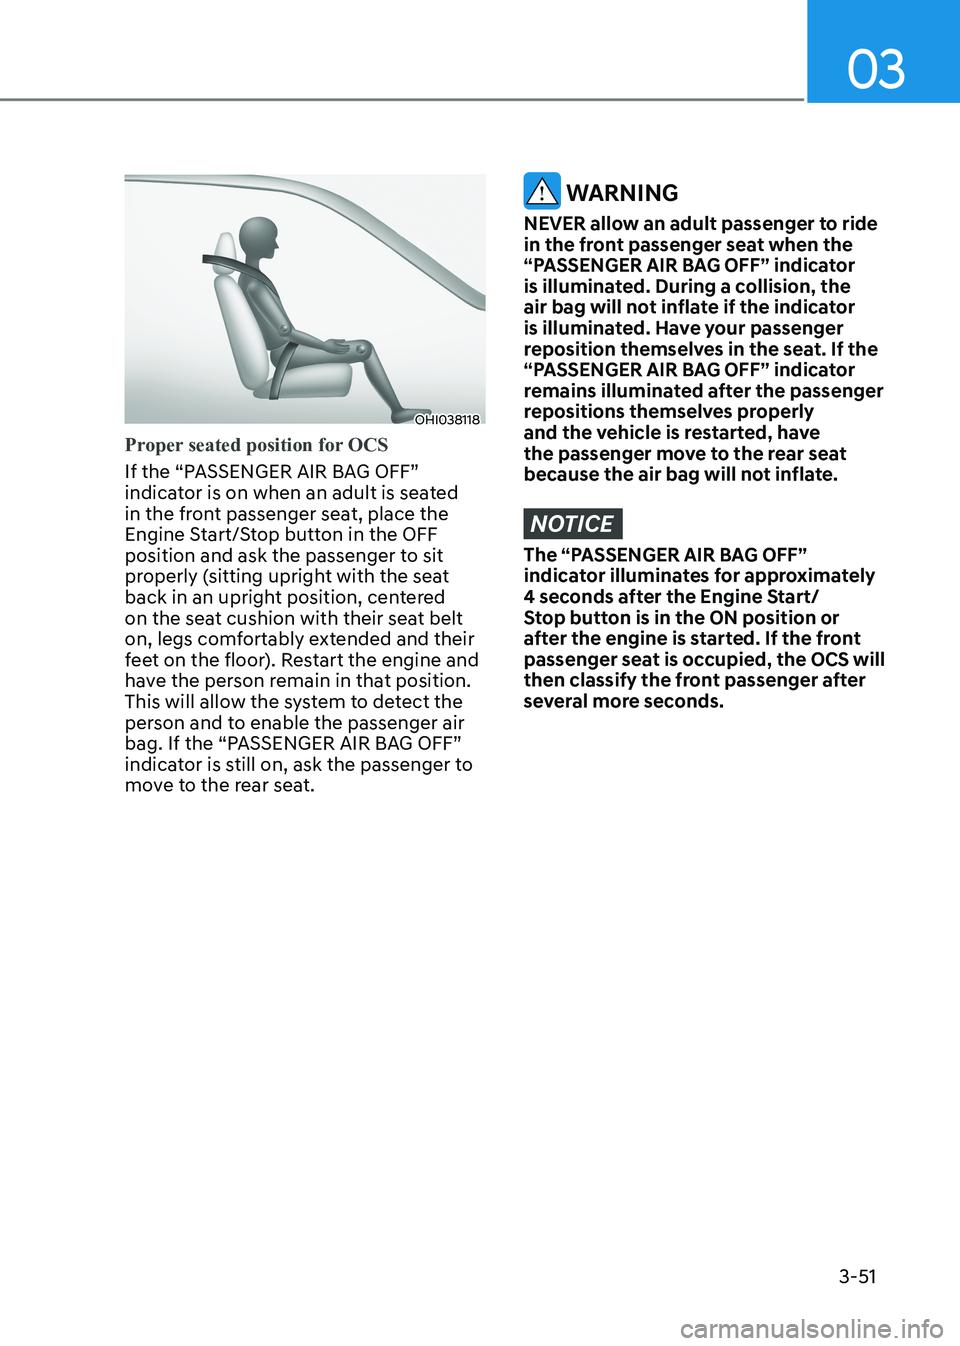
Proper seated position for OCS
If the “PASSENGER AIR BAG OFF”
indicator is on when an adult is seated
in the front passenger seat, place the
Engine Start/Stop button in the OFF
position and ask the passenger to sit
properly (sitting upright with the seat
back in an upright position, centered
on the seat cushion with their seat belt
on, legs comfortably extended and their
feet on the floor). Restart the engine and
have the person remain in that position.
This will allow the system to detect the
person and to enable the passenger air
bag. If the “PASSENGER AIR BAG OFF”
indicator is still on, ask the passenger to
move to the rear seat.
WARNING
NEVER allow an adult passenger to ride
in the front passenger seat when the
“PASSENGER AIR BAG OFF” indicator
is illuminated. During a collision, the
air bag will not inflate if the indicator
is illuminated. Have your passenger
reposition themselves in the seat. If the
“PASSENGER AIR BAG OFF” indicator
remains illuminated after the passenger
repositions themselves properly
and the vehicle is restarted, have
the passenger move to the rear seat
because the air bag will not inflate.
NOTICE
The “PASSENGER AIR BAG OFF”
indicator illuminates for approximately
4 seconds after the Engine Start/
Stop button is in the ON position or
after the engine is started. If the front
passenger seat is occupied, the OCS will
then classify the front passenger after
several more seconds.
Page 86 of 555
03
3-57
Additional Safety Precautions
Passengers should not move out of
or change seats while the vehicle is
moving. A passenger who is not wearing
a seat belt during a crash or emergency
stop can be thrown against the inside of
the vehicle, against other occupants, or
be ejected from the vehicle.
Do not use any accessories on seat belts. Devices claiming to improve
occupant comfort or reposition the seat
belt can reduce the protection provided
by the seat belt and increase the chance
of serious injury in a crash.
Do not modify the front seats.
Modification of the front seats could
interfere with the operation of the
supplemental restraint system sensing
components or side air bags.
Do not place items under the front
seats. Placing items under the front seats
could interfere with the operation of the
supplemental restraint system sensing
components and wiring harnesses.
Do not cause impact to the doors.
Impact to the doors when the Engine
Start/Stop button is in the ON position
may cause the air bags to inflate.
Modifications to accommodate disabilities. If you require modification
to your vehicle to accommodate a
disability, contact the HYUNDAI Auto
Canada at 1-888-216-2626.
Adding equipment to or modifying
your air bag equipped vehicle
If you modify your vehicle by changing
your vehicle’s frame, bumper system,
front end or side sheet metal or ride
height, this may affect the operation of
your vehicle’s air bag system.
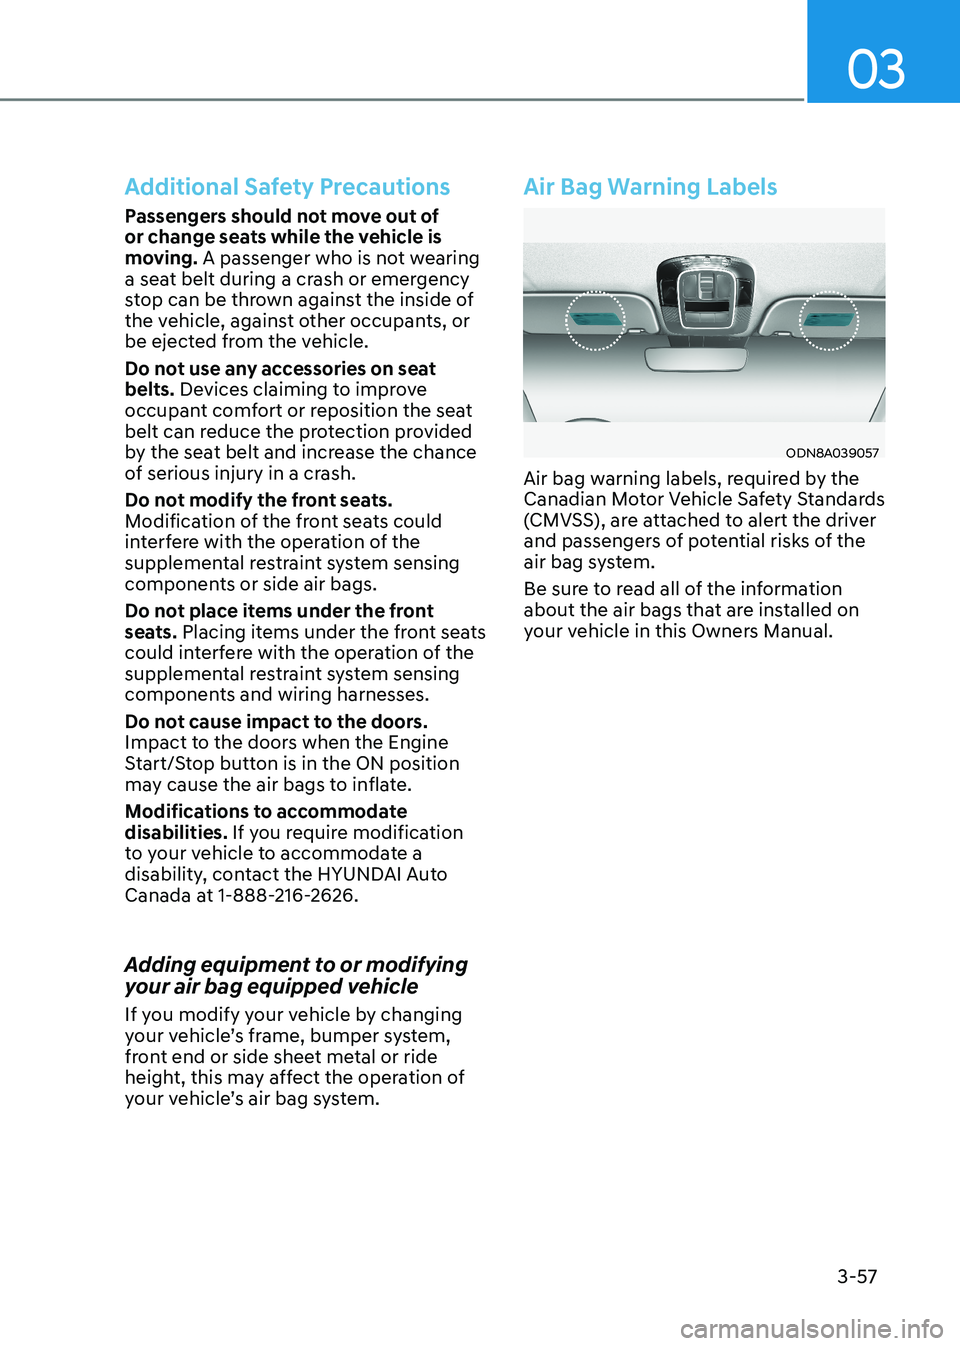
Air Bag Warning Labels
ODN8A039057
Air bag warning labels, required by the
Canadian Motor Vehicle Safety Standards
(CMVSS), are attached to alert the driver
and passengers of potential risks of the
air bag system.
Be sure to read all of the information
about the air bags that are installed on
your vehicle in this Owners Manual.
Page 99 of 555
04
4-13
Information - Electronic Brake Force Distribution (EBD)
System Warning Light
When the ABS Warning Light is on
or both ABS and Parking Brake &
Brake Fluid Warning Lights are on, the
speedometer, odometer, or tripmeter may
not work. Also, the EPS Warning Light may illuminate and the steering effort may
increase or decrease. In this case, have the vehicle inspected by
an authorized HYUNDAI dealer as soon as possible.
Electronic Parking Brake
(EPB) Warning Light EPB
This warning light illuminates:
• When you place the Engine Start/Stop
button to the ON position.
- The EPB warning light illuminates for approximately 3 seconds and
then turns off.
• Whenever there is a malfunction with the EPB.
If this occurs, have the vehicle
inspected by an authorized HYUNDAI
dealer.
Information
The Electronic Parking Brake (EPB)
Warning Light may illuminate when
the Electronic Stability control (ESC)
Indicator Light comes on to indicates that
the ESC is not working properly (This does not indicate malfunction of the EPB). AUTO HOLD Indicator Light (if equipped)
This indicator light illuminates:
•
[White] When you activate the auto
hold system by pressing the AUTO
HOLD button.
• [Green] When you stop the vehicle
completely by depressing the brake
pedal with the auto hold system
activated.
• [Yellow] When there is a malfunction
with the auto hold system.
In this case, have the vehicle
inspected by an authorized HYUNDAI
dealer.
For more information, refer to “Auto
Hold” in chapter 6.
Electric Power Steering (EPS)
Warning Light
This warning light illuminates:
• When you place the ignition switch to the ON position.
- The Electric Power Steering Warning
light illuminates for about 3 seconds
and then goes off.
• Whenever there is a malfunction with the EPS.
If this occurs, have the vehicle
inspected by an authorized HYUNDAI
dealer.
Page 103 of 555

04
4-17
Immobilizer Indicator Light
This indicator light illuminates:
•
When the vehicle detects the
immobilizer in the key with the
ignition switch in the ON position.
- At this time, you can start the engine.
- The indicator light goes off after starting the engine.
This indicator light blinks:
• When there is a malfunction with the
immobilizer system.
If this occurs, have the vehicle inspected
by an authorized HYUNDAI dealer.
Immobilizer Indicator Light
(with smart key) (if equipped)
This indicator light illuminates for up to 30 seconds:
When the vehicle detects the smart key
in the vehicle with the Engine Start/Stop
button in the ACC or ON position. - Once the smart key is detected, you can start the engine.
- The indicator light goes off after starting the engine.
This indicator light blinks for a few seconds:
When the smart key is not in the vehicle.
- If the smart key is not detected, you cannot start the engine.
This indicator light illuminates for 2 seconds and goes off:
If the smart key is in the vehicle and the
Engine Start/Stop button is ON, but the
vehicle cannot detect the smart key.
In this case, have the vehicle inspected
by an authorized HYUNDAI dealer.
This indicator light blinks:
When there is a malfunction with the
immobilizer system.
In this case, have the vehicle inspected
by an authorized HYUNDAI dealer.
Turn Signal Indicator Light
This indicator light blinks:
When you operate the turn signal
indicator stalk.
If any of the following occur, there may be
a malfunction with the turn signal system.
- The turn signal indicator light illuminates but does not blink
- The turn signal indicator light blinks rapidly
- The turn signal indicator light does not illuminate at all
If any of these conditions occur, have
your vehicle inspected by an authorized
HYUNDAI dealer.
Headlamp Warning Light (if equipped)
This warning light illuminates:
If one of the exterior bulbs (headlamp,
stop lamp, high mounted stop lamp) is
not operating properly. One of the bulbs
may need to be replaced. If the vehicle
is equipped with LED headlamps, have
the vehicle inspected by an authorized
HYUNDAI dealer.
Information
When replacing the bulb, use the same wattage bulb.
For more information, refer to "Light
bulbs" in chapter 8.