2023 HYUNDAI SONATA Direction
[x] Cancel search: DirectionPage 72 of 555
03
3-43
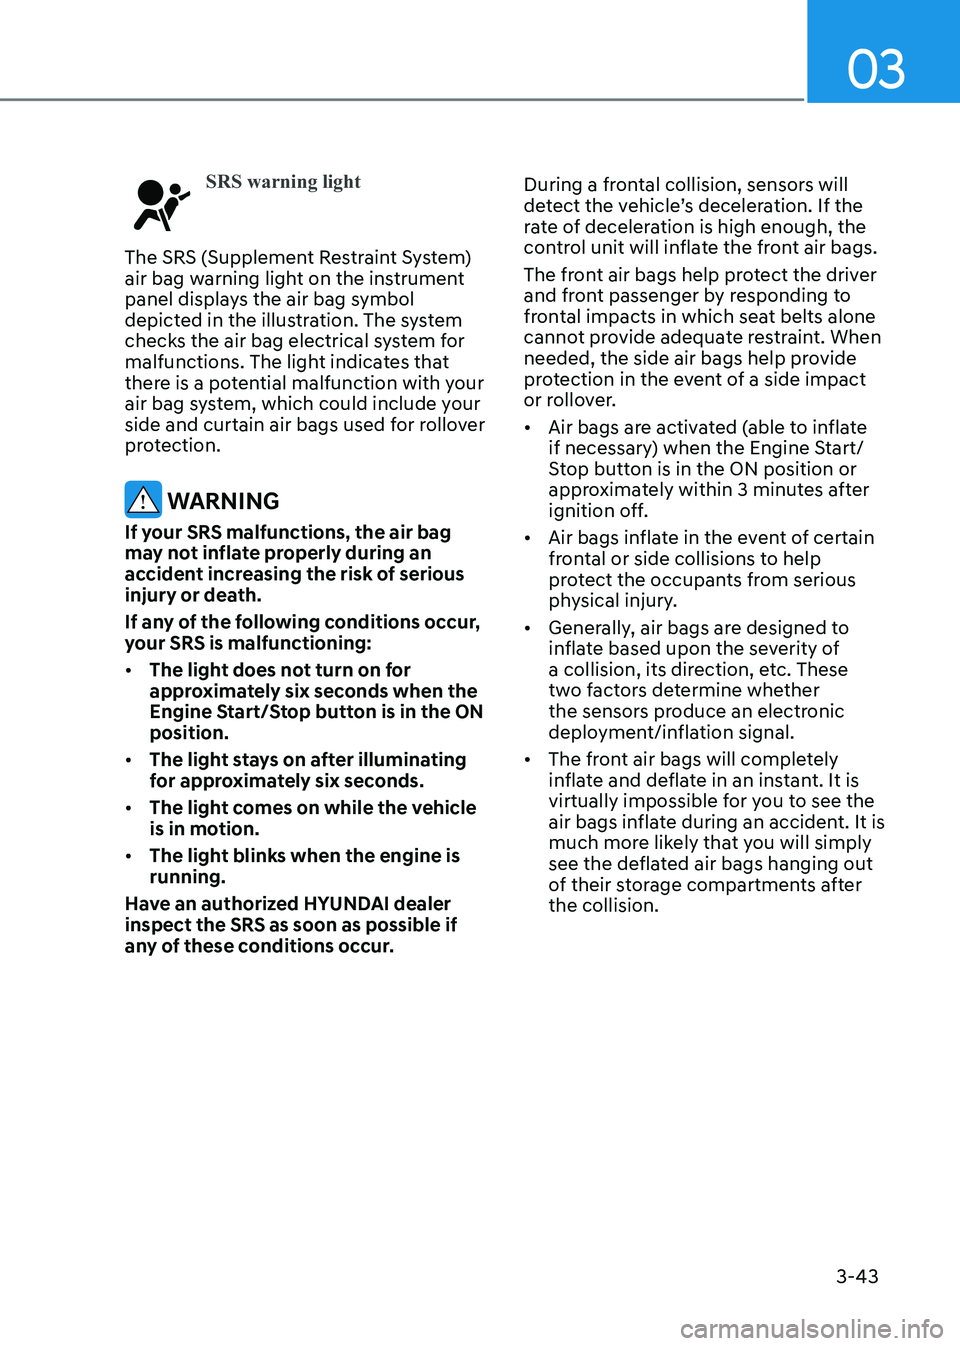
SRS warning light
The SRS (Supplement Restraint System)
air bag warning light on the instrument
panel displays the air bag symbol
depicted in the illustration. The system
checks the air bag electrical system for
malfunctions. The light indicates that
there is a potential malfunction with your
air bag system, which could include your
side and curtain air bags used for rollover
protection.
WARNING
If your SRS malfunctions, the air bag
may not inflate properly during an
accident increasing the risk of serious
injury or death.
If any of the following conditions occur,
your SRS is malfunctioning: • The light does not turn on for
approximately six seconds when the
Engine Start/Stop button is in the ON position.
• The light stays on after illuminating
for approximately six seconds.
• The light comes on while the vehicle
is in motion.
• The light blinks when the engine is running.
Have an authorized HYUNDAI dealer inspect the SRS as soon as possible if
any of these conditions occur. During a frontal collision, sensors will
detect the vehicle’s deceleration. If the
rate of deceleration is high enough, the
control unit will inflate the front air bags.
The front air bags help protect the driver
and front passenger by responding to
frontal impacts in which seat belts alone
cannot provide adequate restraint. When
needed, the side air bags help provide
protection in the event of a side impact
or rollover. •
Air bags are activated (able to inflate
if necessary) when the Engine Start/
Stop button is in the ON position or
approximately within 3 minutes after
ignition off.
• Air bags inflate in the event of certain
frontal or side collisions to help
protect the occupants from serious
physical injury.
• Generally, air bags are designed to
inflate based upon the severity of
a collision, its direction, etc. These
two factors determine whether
the sensors produce an electronic
deployment/inflation signal.
• The front air bags will completely
inflate and deflate in an instant. It is
virtually impossible for you to see the
air bags inflate during an accident. It is
much more likely that you will simply
see the deflated air bags hanging out
of their storage compartments after the collision.
Page 84 of 555
03
3-55
ODN8039052L
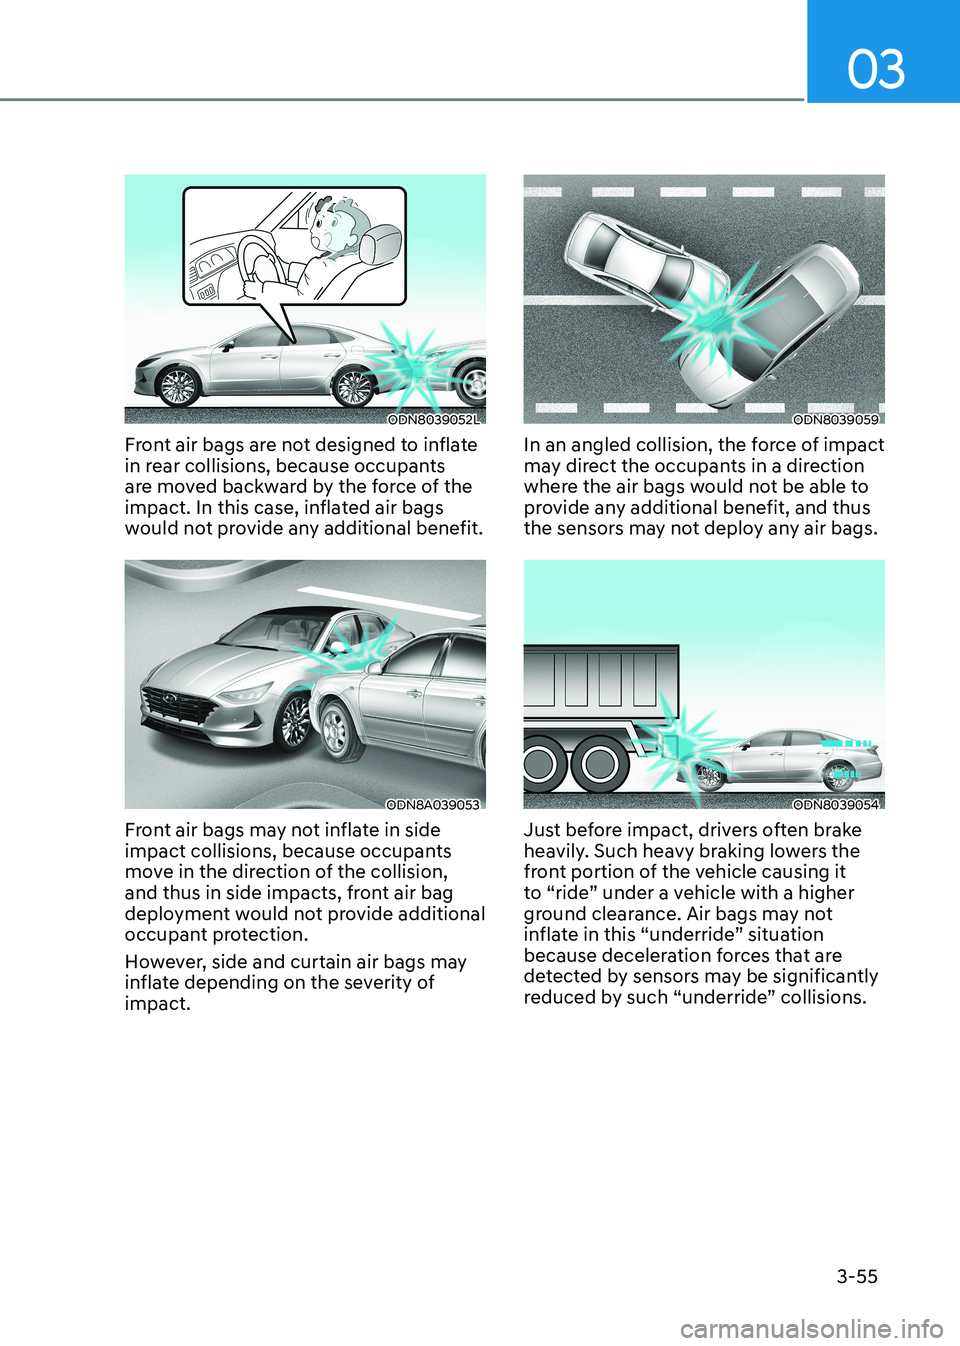
Front air bags are not designed to inflate
in rear collisions, because occupants
are moved backward by the force of the
impact. In this case, inflated air bags
would not provide any additional benefit.
ODN8A039053
Front air bags may not inflate in side
impact collisions, because occupants
move in the direction of the collision,
and thus in side impacts, front air bag
deployment would not provide additional
occupant protection.
However, side and curtain air bags may
inflate depending on the severity of impact.
ODN8039059
In an angled collision, the force of impact
may direct the occupants in a direction
where the air bags would not be able to
provide any additional benefit, and thus
the sensors may not deploy any air bags.
ODN8039054
Just before impact, drivers often brake
heavily. Such heavy braking lowers the
front portion of the vehicle causing it
to “ride” under a vehicle with a higher
ground clearance. Air bags may not
inflate in this “underride” situation
because deceleration forces that are
detected by sensors may be significantly
reduced by such “underride” collisions.
Page 158 of 555
Convenience Features
5-12
Mechanical key
If the Smart Key does not operate
normally, you can lock or unlock the
driver’s door by using the mechanical
key.
OFE048007
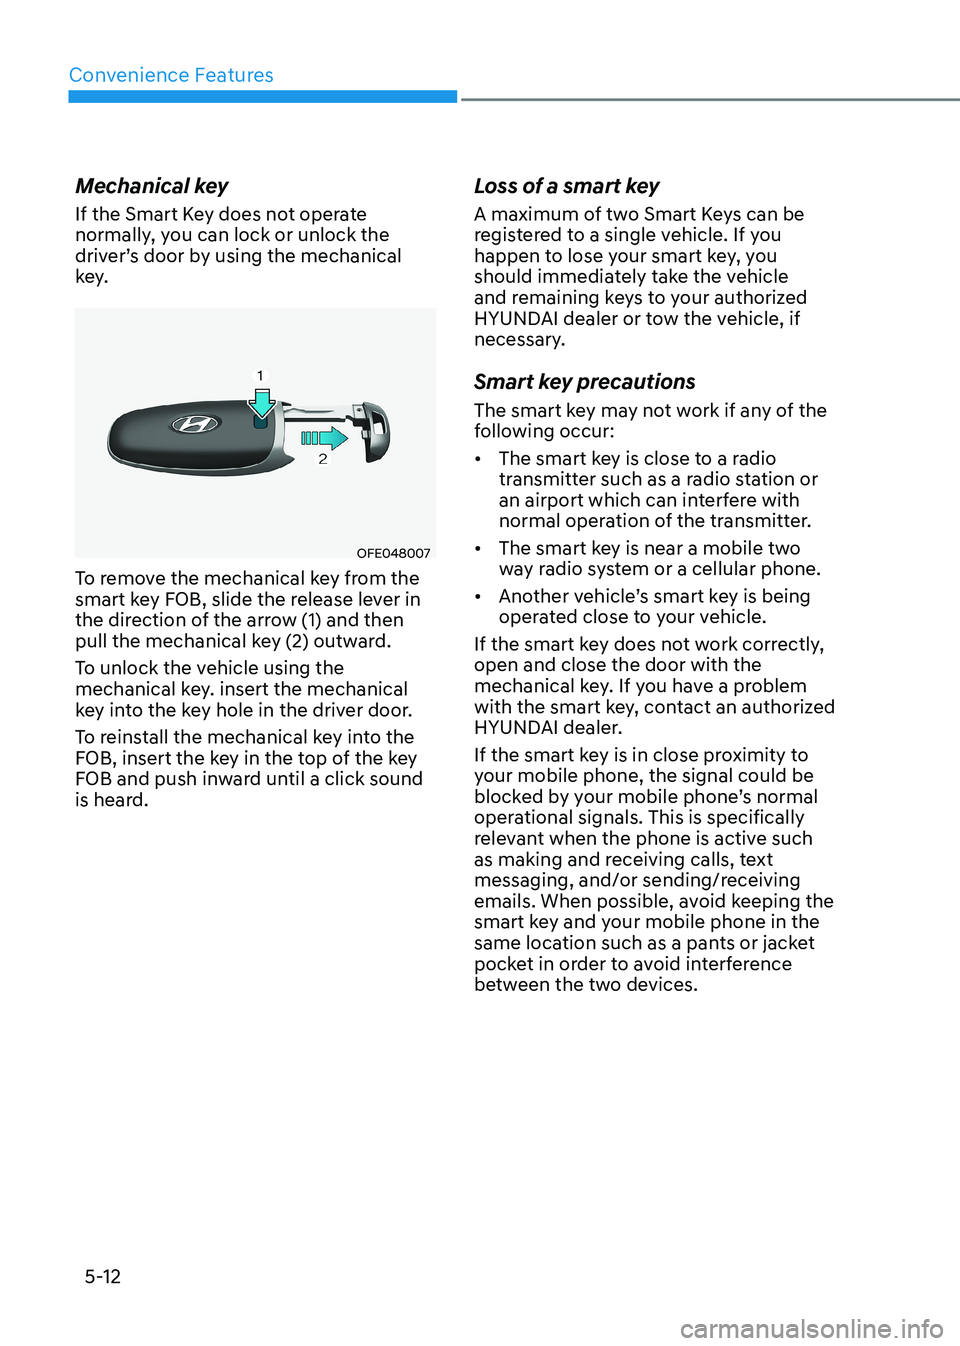
To remove the mechanical key from the
smart key FOB, slide the release lever in
the direction of the arrow (1) and then
pull the mechanical key (2) outward.
To unlock the vehicle using the
mechanical key. insert the mechanical
key into the key hole in the driver door.
To reinstall the mechanical key into the
FOB, insert the key in the top of the key
FOB and push inward until a click sound
is heard. Loss of a smart key
A maximum of two Smart Keys can be
registered to a single vehicle. If you
happen to lose your smart key, you
should immediately take the vehicle
and remaining keys to your authorized
HYUNDAI dealer or tow the vehicle, if
necessary.
Smart key precautions
The smart key may not work if any of the
following occur: •
The smart key is close to a radio
transmitter such as a radio station or
an airport which can interfere with
normal operation of the transmitter.
• The smart key is near a mobile two
way radio system or a cellular phone.
• Another vehicle’s smart key is being
operated close to your vehicle.
If the smart key does not work correctly, open and close the door with the
mechanical key. If you have a problem
with the smart key, contact an authorized
HYUNDAI dealer.
If the smart key is in close proximity to
your mobile phone, the signal could be
blocked by your mobile phone’s normal
operational signals. This is specifically
relevant when the phone is active such
as making and receiving calls, text
messaging, and/or sending/receiving
emails. When possible, avoid keeping the
smart key and your mobile phone in the
same location such as a pants or jacket
pocket in order to avoid interference
between the two devices.
Page 171 of 555
05
5-25
Recalling Positions from Memory
1. Shift to P (Park) while the ignition switch is in the ON position.
2. Press the desired memory button (1 or 2). The system will beep once,
and then the driver’s seat position,
side view mirror position, instrument
panel illumination intensity and
head-up display height/brightness
will automatically adjust to the stored positions.
3. “Settings 1 (or 2) applied” will appear on the cluster LCD display.
If your vehicle is equipped with
additional navigation, please refer to the
infotainment system manual separately supplied.
Information
• While recalling the “1” memory
position, pressing the SET or 1 button temporarily stops the adjustment of
the recalled memory position. Pressing
the 2 button recalls the “2” memory position.
• While recalling the “2” memory
position, pressing the SET or 2 button temporarily stops the adjustment of
the recalled memory position. Pressing
the 1 button recalls the “1” memory position.
• While recalling the stored positions,
pressing one of the control buttons
for the driver’s seat, side view mirror,
instrument panel illumination or head-up display will cause the movement of that component to stop and move in
the direction that the control button is
pressed.
Resetting the Driver’s Seat
Memory System
Take the following procedures to reset
the driver’s seat memory system, when it
does not operate properly.
To reset the driver’s seat memory
system
1. Place the ignition switch to the ON
position, shift to P (Park), and open
the driver’s door.
2. Operate the control switch to set the driver’s seat and seatback to the
foremost position.
3. Simultaneously press the SET button and push forward the seat movement
switch over 2 seconds.
While resetting the driver’s seat
memory system
1. It starts with the notification sound.
2. The driver’s seat and seatback is adjusted to the rearward position with
the notification sound.
3. The driver’s seat and seatback is re-adjusted to the default position
(central position) with the notification sound.
However, in the following cases, the
resetting procedure and the notification
sound may stop.
- The memory button is pressed.
- The control switch is operated.
- The gear is shifted out of P (Park) .
- The driving speed exceeds 3 km/h (2 mph).
- The driver’s door is closed.
Page 190 of 555
Convenience Features
5-44
To reset the power windows
If the power windows do not operate
normally, the automatic power window
system must be reset as follows:
1. Place the ignition switch to the ON
position.
2. Close the window and continue pulling up on the power window
switch for at least one second.
If the power windows do not operate
properly after resetting, have the system
checked by an authorized HYUNDAI
dealer.
WARNING
The automatic reverse feature doesn’t
activate while resetting the power
window system. Make sure body parts
or other objects are safely out of the
way before closing the windows to
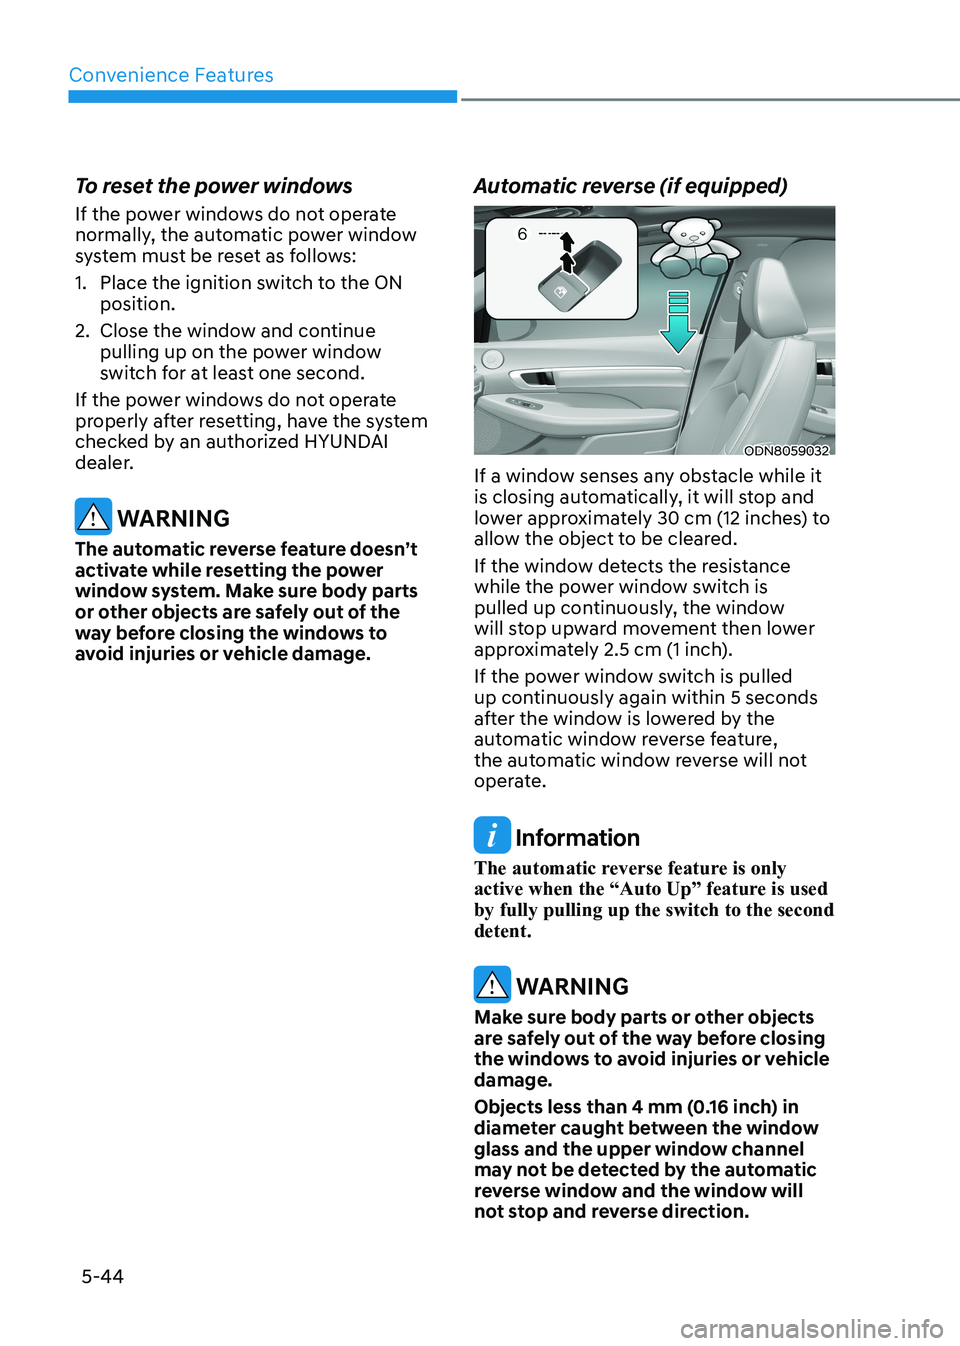
avoid injuries or vehicle damage. Automatic reverse (if equipped)
ODN8059032
If a window senses any obstacle while it
is closing automatically, it will stop and
lower approximately 30 cm (12 inches) to
allow the object to be cleared.
If the window detects the resistance
while the power window switch is
pulled up continuously, the window
will stop upward movement then lower
approximately 2.5 cm (1 inch).
If the power window switch is pulled
up continuously again within 5 seconds
after the window is lowered by the
automatic window reverse feature,
the automatic window reverse will not
operate.
Information
The automatic reverse feature is only
active when the “Auto Up” feature is used by fully pulling up the switch to the second detent.
WARNING
Make sure body parts or other objects
are safely out of the way before closing
the windows to avoid injuries or vehicle damage.
Objects less than 4 mm (0.16 inch) in
diameter caught between the window
glass and the upper window channel
may not be detected by the automatic
reverse window and the window will
not stop and reverse direction.
Page 191 of 555
05
5-45
NOTICE
Do not install any accessories on the
windows. The automatic reverse
feature may not operate.
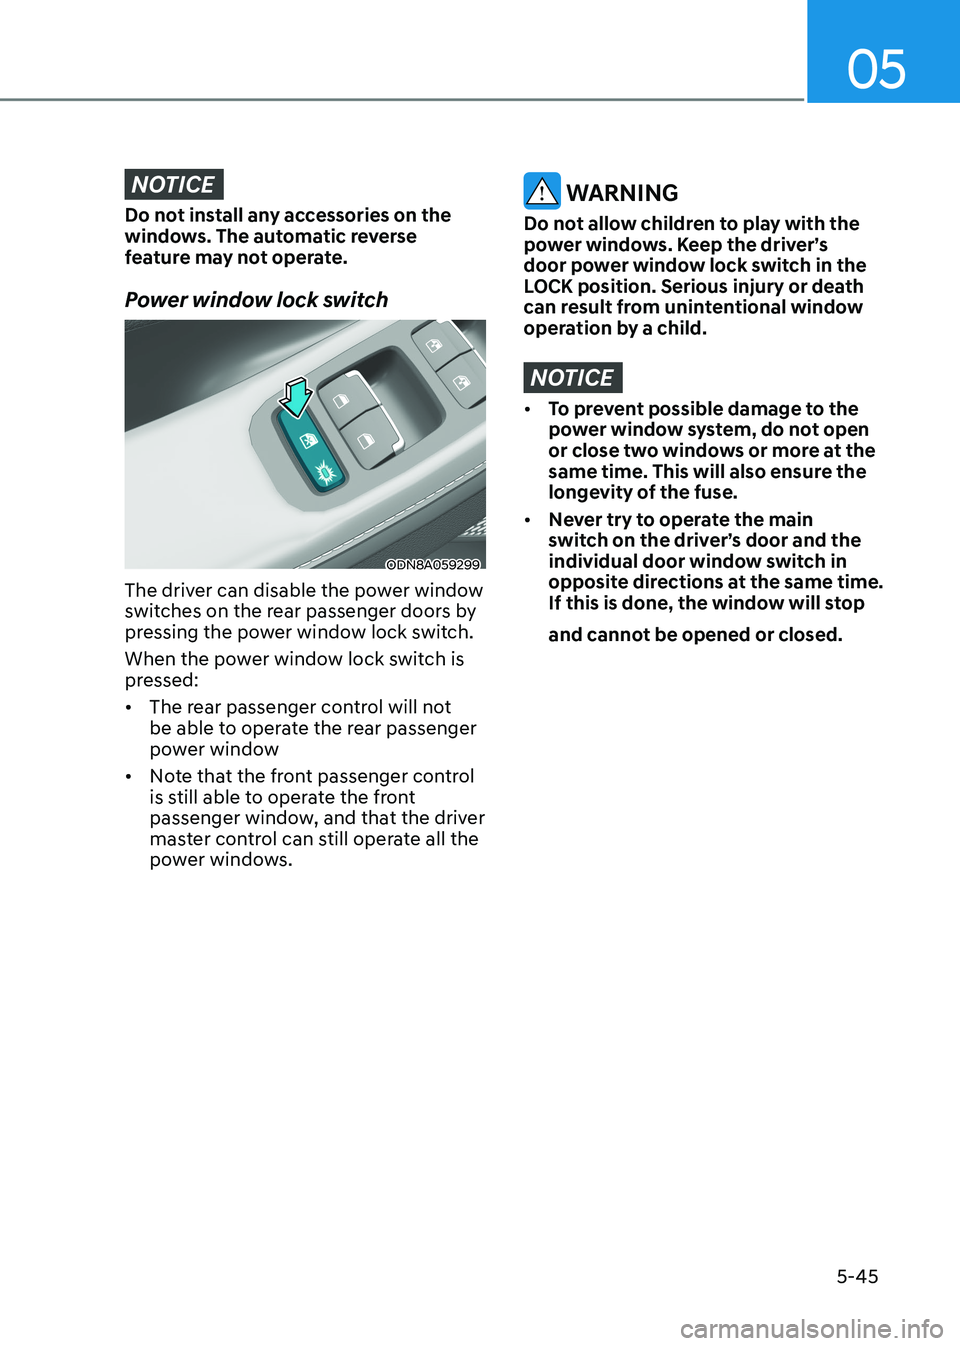
Power window lock switch
ODN8A059299
The driver can disable the power window
switches on the rear passenger doors by
pressing the power window lock switch.
When the power window lock switch is
pressed: • The rear passenger control will not
be able to operate the rear passenger
power window
• Note that the front passenger control
is still able to operate the front
passenger window, and that the driver
master control can still operate all the
power windows.
WARNING
Do not allow children to play with the
power windows. Keep the driver’s
door power window lock switch in the
LOCK position. Serious injury or death
can result from unintentional window
operation by a child.
NOTICE
• To prevent possible damage to the
power window system, do not open
or close two windows or more at the
same time. This will also ensure the
longevity of the fuse.
• Never try to operate the main
switch on the driver’s door and the
individual door window switch in
opposite directions at the same time.
If this is done, the window will stop
and cannot be opened or closed.
Page 194 of 555
Convenience Features
5-48
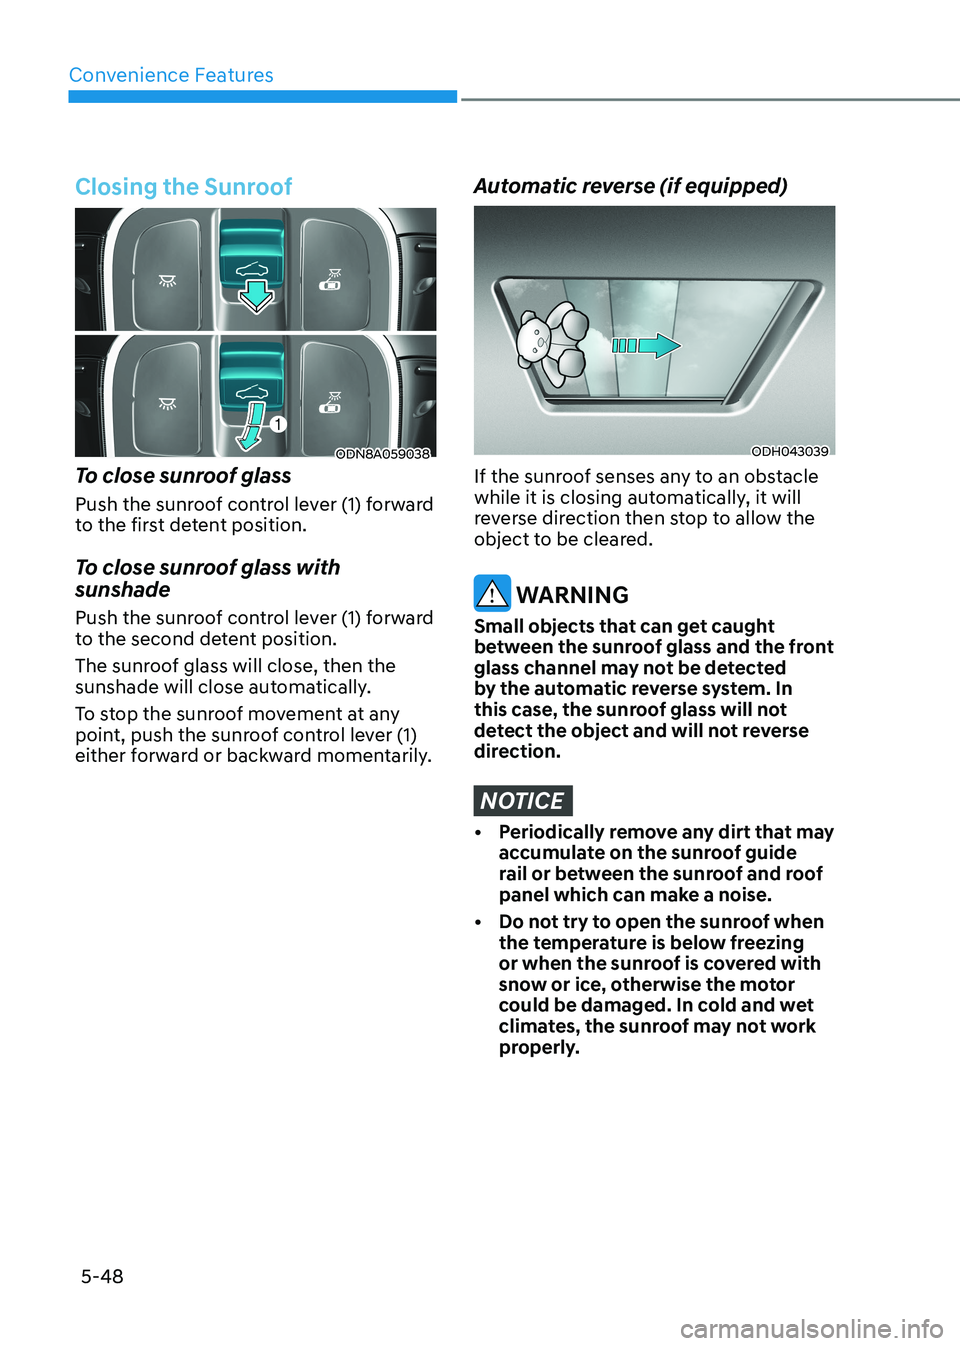
Closing the Sunroof
ODN8A059038
To close sunroof glass
Push the sunroof control lever (1) forward
to the first detent position.
To close sunroof glass with sunshade
Push the sunroof control lever (1) forward
to the second detent position.
The sunroof glass will close, then the
sunshade will close automatically.
To stop the sunroof movement at any
point, push the sunroof control lever (1)
either forward or backward momentarily.
Automatic reverse (if equipped)
ODH043039
If the sunroof senses any to an obstacle
while it is closing automatically, it will
reverse direction then stop to allow the
object to be cleared.
WARNING
Small objects that can get caught
between the sunroof glass and the front
glass channel may not be detected
by the automatic reverse system. In
this case, the sunroof glass will not
detect the object and will not reverse
direction.
NOTICE
• Periodically remove any dirt that may accumulate on the sunroof guide
rail or between the sunroof and roof
panel which can make a noise.
• Do not try to open the sunroof when the temperature is below freezing
or when the sunroof is covered with
snow or ice, otherwise the motor
could be damaged. In cold and wet
climates, the sunroof may not work
properly.
Page 198 of 555
Convenience Features
5-52
Information
In cold and wet climates, trunk lock and
trunk mechanisms may not work properly
due to freezing conditions.
WARNING
Always be careful to open and close the trunk.
• To prevent serious injury and damage, you should check and keep
your body parts such as hands or
head away from the path of the trunk while closing or opening the trunk.
• Your body parts or an object might be damaged by sharp edges so you
should be careful while opening/closing the trunk or taking the thing
out from the trunk. Especially, a child
can hit the face or head around the
trunk so you should be cautious all the time.
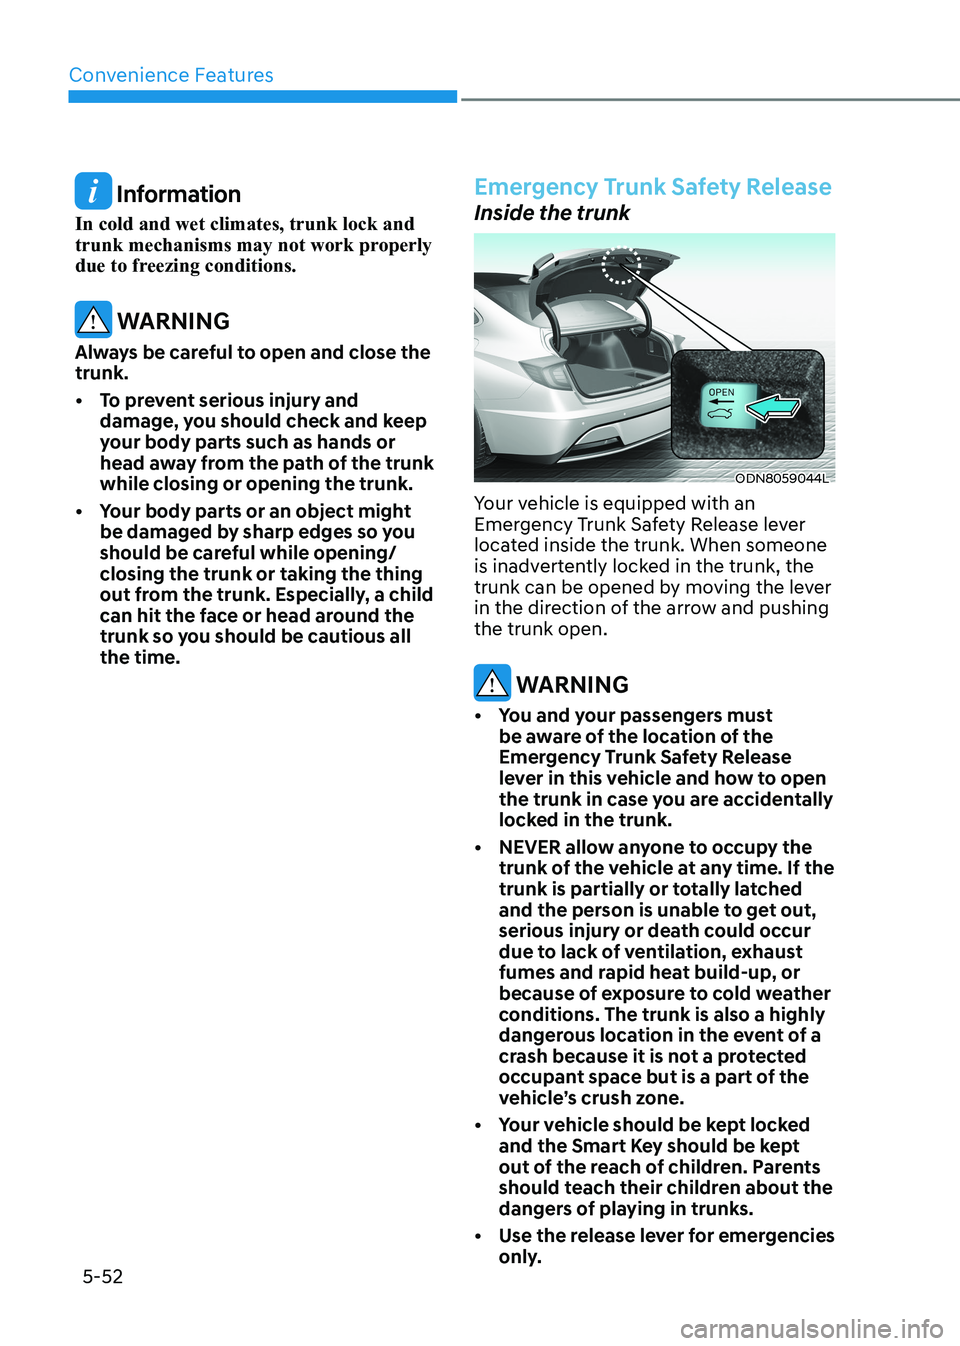
Emergency Trunk Safety Release
Inside the trunk
ODN8059044L
Your vehicle is equipped with an
Emergency Trunk Safety Release lever
located inside the trunk. When someone
is inadvertently locked in the trunk, the
trunk can be opened by moving the lever
in the direction of the arrow and pushing the trunk open.
WARNING
• You and your passengers must be aware of the location of the
Emergency Trunk Safety Release
lever in this vehicle and how to open
the trunk in case you are accidentally
locked in the trunk.
• NEVER allow anyone to occupy the trunk of the vehicle at any time. If the
trunk is partially or totally latched
and the person is unable to get out,
serious injury or death could occur
due to lack of ventilation, exhaust
fumes and rapid heat build-up, or
because of exposure to cold weather
conditions. The trunk is also a highly
dangerous location in the event of a
crash because it is not a protected
occupant space but is a part of the
vehicle’s crush zone.
• Your vehicle should be kept locked and the Smart Key should be kept
out of the reach of children. Parents
should teach their children about the
dangers of playing in trunks.
• Use the release lever for emergencies only.