Page 264 of 680

Convenience Features
5-72
Power Liftgate
The power liftgate open/close button
automatically opens and closes the
liftgate.
Before using the power liftgate
The power liftgate operates when the
gear is in P (Park) with the Start/Stop
button in the ON position. However, the
liftgate will operate regardless of the
gear position when the vehicle is off.
For safety, before attempting to open or
close the liftgate, make sure the vehicle
is in P (Park).
WARNING
• Never leave children unattended
in your vehicle. Children might
operate the power liftgate. Doing so
could result in injury to themselves
or others, and could damage the
vehicle.
• Make sure there are no people or
objects around the liftgate before
operating the power liftgate. Wait
until the liftgate is opened fully and
stopped before loading or unloading
cargo or passengers from the
vehicle.
NOTICE
Do not close or open the power
liftgate manually. This may cause
damage to the power liftgate. If it is
necessary to close or open the power
liftgate manually when the battery is
discharged or disconnected, do not
apply excessive force. Setting the power liftgate
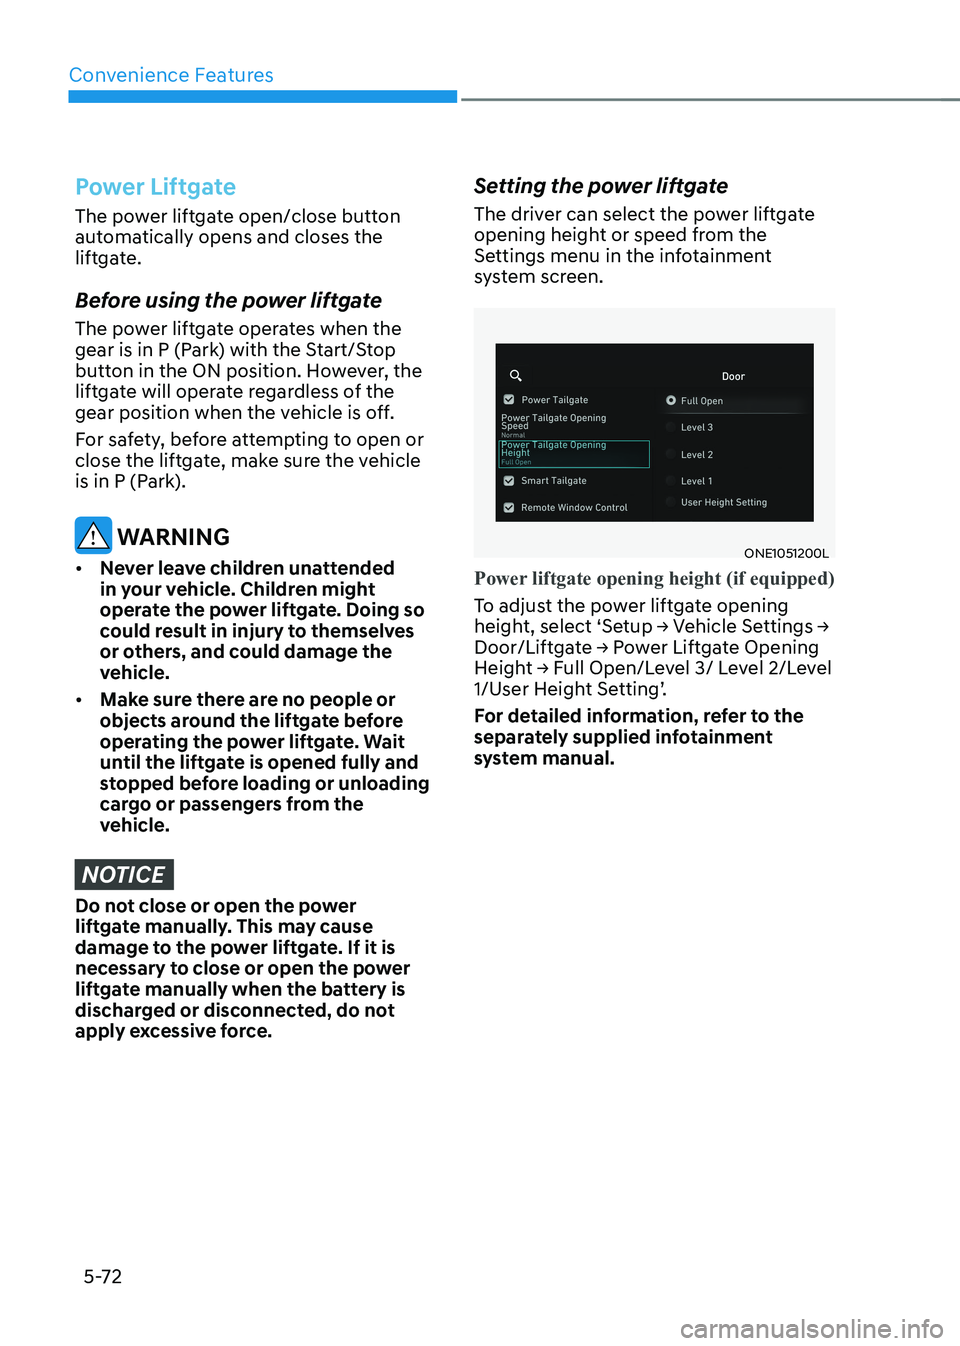
The driver can select the power liftgate
opening height or speed from the
Settings menu in the infotainment
system screen.
ONE1051200L
Power liftgate opening height (if equipped)
To adjust the power liftgate opening
height, select ‘Setup → Vehicle Settings →
Door/Liftgate → Power Liftgate Opening
Height → Full Open/Level 3/ Level 2/Level
1/User Height Setting’.
For detailed information, refer to the
separately supplied infotainment
system manual.
Page 266 of 680

Convenience Features
5 -74
Opening and closing the power
liftgate
„„Type A
„„Type B
ONE1051043ONE1051044
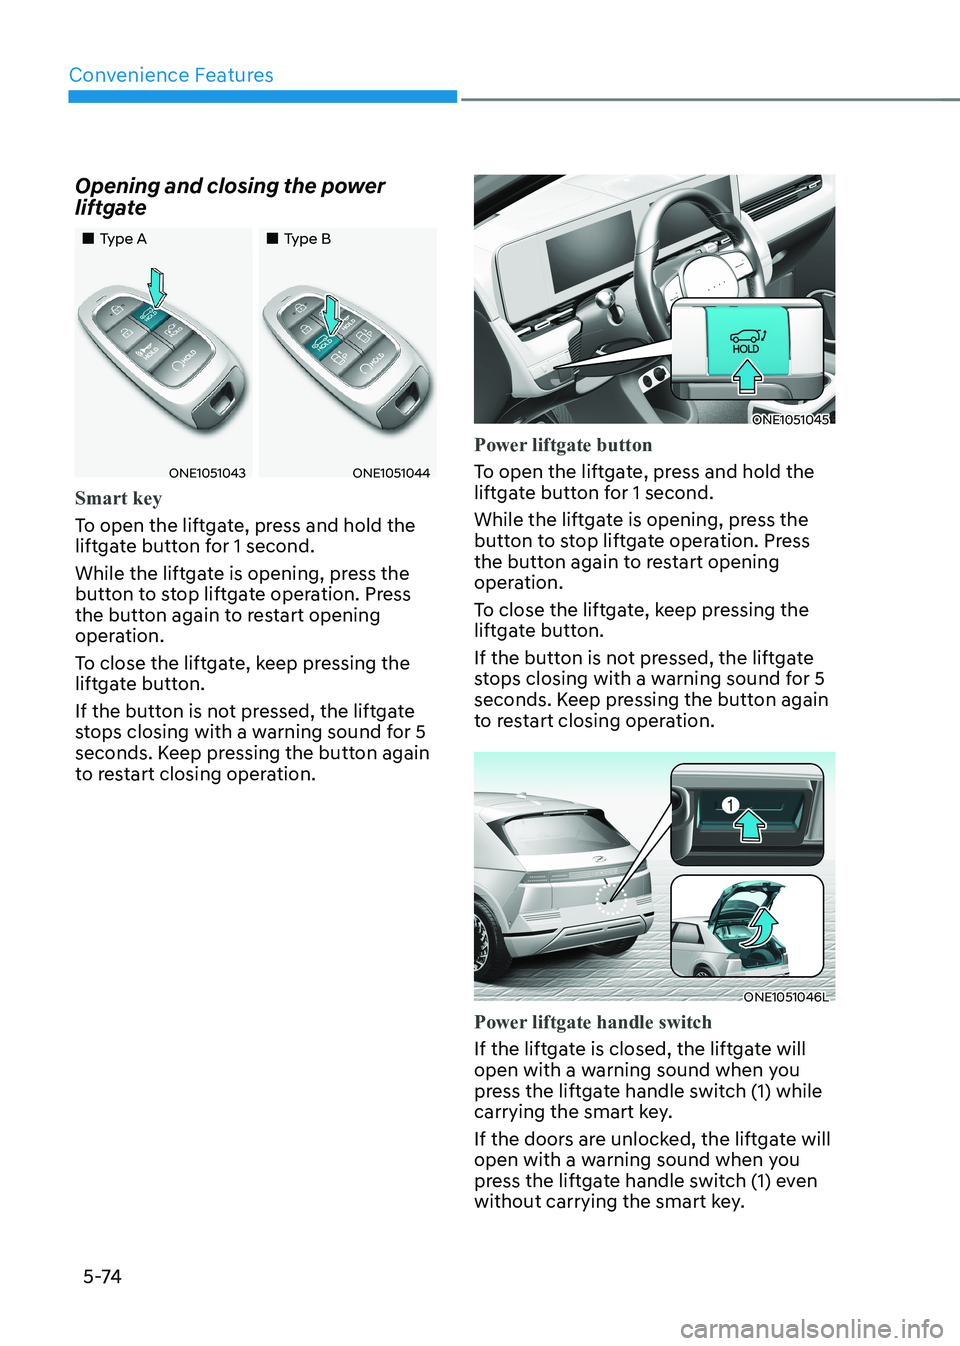
Smart key
To open the liftgate, press and hold the
liftgate button for 1 second.
While the liftgate is opening, press the
button to stop liftgate operation. Press
the button again to restart opening
operation.
To close the liftgate, keep pressing the
liftgate button.
If the button is not pressed, the liftgate
stops closing with a warning sound for 5
seconds. Keep pressing the button again
to restart closing operation.
ONE1051045
Power liftgate button
To open the liftgate, press and hold the
liftgate button for 1 second.
While the liftgate is opening, press the
button to stop liftgate operation. Press
the button again to restart opening
operation.
To close the liftgate, keep pressing the
liftgate button.
If the button is not pressed, the liftgate
stops closing with a warning sound for 5
seconds. Keep pressing the button again
to restart closing operation.
ONE1051046L
Power liftgate handle switch
If the liftgate is closed, the liftgate will
open with a warning sound when you
press the liftgate handle switch (1) while
carrying the smart key.
If the doors are unlocked, the liftgate will
open with a warning sound when you
press the liftgate handle switch (1) even
without carrying the smart key.
Page 267 of 680

05
5-75
ONE1051047
Power liftgate open/close button
Press the liftgate open/close button
located inside the liftgate to open or
close the power liftgate. The power
liftgate will open or close with a warning sound.
While the liftgate is opening or closing,
press the button to stop liftgate
operation. Press the button again to
restart operation.
NOTICE
• The power liftgate can be operated
when the vehicle is not running.
However, power liftgate operation
consumes a large amount of eclectic
power. To prevent the battery from
being discharged, do not operate it
excessively (for example, more than
5 times repeatedly).
• To prevent the battery from being
discharged, do not leave the power
liftgate in the open position for a long time.
• Do not modify or repair any part
of the power liftgate by yourself.
Have the power liftgate modified or
repaired by an authorized HYUNDAI
dealer.
• When jacking up the vehicle to
change a tire or repair the vehicle, do
not operate the power liftgate. This
could cause the power liftgate to
operate improperly.
• In cold and wet climates, the power
liftgate may not work properly due to
freezing conditions.
Page 278 of 680
Convenience Features
5-86
ONE1051058
Position lamp position ()
The position lamp, license plate lamp
and instrument panel lamp are turned ON.
ONE1051059
Headlamp position ()
The headlamp, position lamp, license
plate lamp and instrument panel lamp
are turned ON.
Information
The Start/Stop button must be in the ON position to turn on the headlamp.
Page 280 of 680

Convenience Features
5-88
Battery saver function
The purpose of this feature is to prevent
the battery from being discharged.
The system automatically turns off the
position lamp when the driver turns the
vehicle off and opens the driver-side
door.
With this feature, the position lamps will
turn off automatically if the driver parks
on the side of road at night.
However, the position lamps stay ON
even when the driver-side door is
opened if the light headlamp switch is
turned to the position lamp or AUTO (if
equipped) position after the engine is
turned off.
If necessary, to keep the lamps on turn the position lamps OFF and ON
again using the headlamp switch on
the steering column after the engine is
turned off.
Headlamp delay function
If the Start/Stop button is in the ACC position or the OFF position with the
headlamps ON, the headlamps (and/
or position lamps) remain on for about
5 minutes. However, if the driver’s door is opened and closed, the headlamps
are turned off after 15 seconds. Also,
with the vehicle off if the driver’s door is
opened and closed, the headlamps (and/
or position lamps) are turned off after 15 seconds.
The headlamps (and/or position lamps)
can be turned off by pressing the lock
button on the smart key twice or turning
the headlamp switch to the OFF or AUTO position.
You can enable the headlamp delay
function by selecting ‘Setup → Vehicle
Settings → Lights → Headlight Delay (or
Headlight time-out)’ in the infotainment
system screen.
For detailed information, refer to the
separately supplied infotainment
system manual.
NOTICE
If the driver exits the vehicle through
another door besides the driver
door, the battery saver function
does not operate and the headlamp
delay function does not turn OFF
automatically.
This may cause the battery to
discharge. To avoid battery discharge,
turn OFF the headlamps manually from
the headlamp switch before exiting the
vehicle.
Page 281 of 680

05
5-89
Interior Lights
WARNING
Do not use the interior lights when
driving in the dark. The interior lights
may obscure your view and cause an
accident.
NOTICE
Do not use the interior lights for
extended periods when the vehicle is
turned off or the battery will discharge.
Interior lamp AUTO cut
The interior lamps will automatically go
off approximately 20 minutes after the
vehicle is turned off and the doors are closed. If a door is opened, the lamp
will go off 25 minutes after the vehicle
is turned off. If the doors are locked by
the smart key and the vehicle enters the
armed stage of the theft alarm system,
the lamps will go off five seconds later. Front lamps
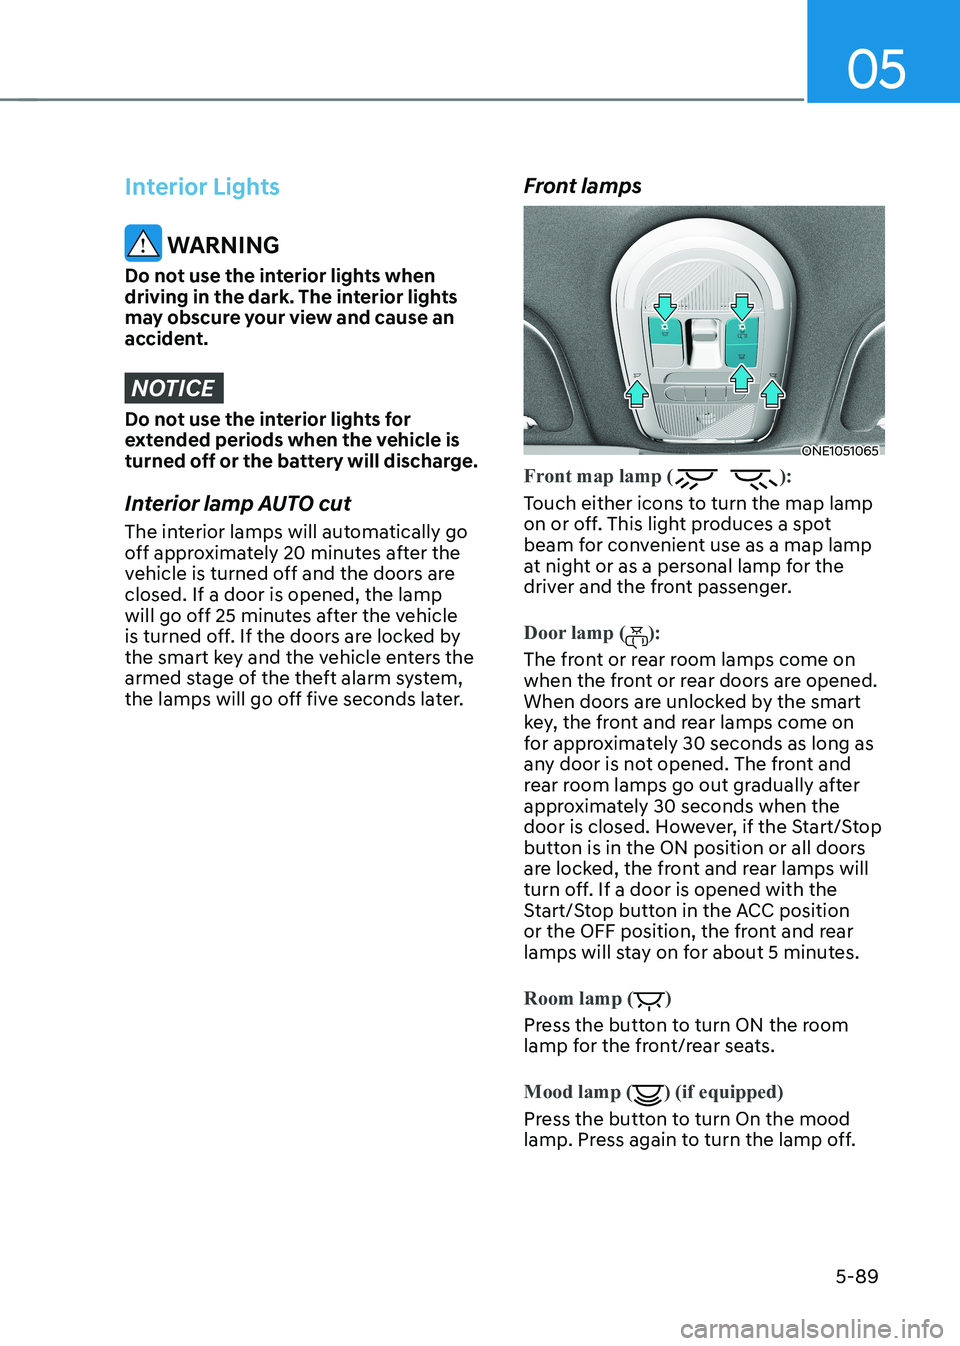
ONE1051065
Front map lamp ():
Touch either icons to turn the map lamp
on or off. This light produces a spot
beam for convenient use as a map lamp
at night or as a personal lamp for the
driver and the front passenger.
Door lamp ():
The front or rear room lamps come on
when the front or rear doors are opened.
When doors are unlocked by the smart
key, the front and rear lamps come on
for approximately 30 seconds as long as
any door is not opened. The front and
rear room lamps go out gradually after
approximately 30 seconds when the
door is closed. However, if the Start/Stop
button is in the ON position or all doors
are locked, the front and rear lamps will
turn off. If a door is opened with the
Start/Stop button in the ACC position
or the OFF position, the front and rear
lamps will stay on for about 5 minutes.
Room lamp ()
Press the button to turn ON the room
lamp for the front/rear seats.
Mood lamp
() (if equipped)
Press the button to turn On the mood
lamp. Press again to turn the lamp off.
Page 285 of 680

05
5-93
ONE1051064
High Beam Assist will automatically
adjust the headlamp range (switches
between high beam and low beam)
depending on the brightness of detected
vehicles and certain road conditions.
Detecting sensor
ONE1071262
[1] : front view camera
The front view camera is used as a
detecting sensor to detect ambient light
and brightness while driving.
Refer to the picture above for the
detailed location of the detecting sensor.
NOTICE
• Always keep the front view camera in
good condition to maintain optimal
performance of High Beam Assist.
• For more details on the precautions
of the front view camera, refer to
“Forward Collision-Avoidance Assist
(FCA)” section in chapter 7.
High Beam Assist Settings
Setting features
ONE1051248L
With the Start/Stop button in the ON
position, select ‘Lights → High Beam
Assist’ from the Settings menu to turn on
High Beam Assist and deselect to turn off the function.
WARNING
For your safety, change the Settings
after parking the vehicle at a safe
location.
hIgh Beam assIsT (hBa) (If eQUIPPed)
Page 288 of 680

Convenience Features
5-96
WIPers and Washers
ONE1051070E
A. Wiper speed control
• MIST – Single wipe
• OFF – Off
• INT – Intermittent wipe
AUTO* – Auto control wipe
• LO – Low wiper speed
• HI – High wiper speed
B. Intermittent wipe time adjustment/
Auto control wipe time adjustment*
C. Wash with brief wipes
* : if equipped
Front Windshield Wipers
Operates as follows when the Start/Stop
button is in the ON position.
MIST : For a single wiping cycle, push the lever upward (or
downward) and release.
The wipers will operate
continuously if the lever is held in this position.
OFF : Wiper is not in operation.
INT : Wiper operates intermittently at the same wiping intervals.
To vary the speed setting, turn
the speed control knob (B).
AUTO : The rain sensor located on the upper end of the windshield
glass senses the amount of
rainfall and controls the wiping
cycle for the proper interval.
The more it rains, the faster the
wiper operates. When the rain
stops, the wiper stops. To vary
the speed setting, turn the speed
control knob.
LO : The wiper runs at a lower speed.
HI : The wiper runs at a higher speed.
Information
If there is heavy accumulation of snow
or ice on the windshield, defrost the
windshield for about 10 minutes, or until
the snow and/or ice is removed before
using the windshield wipers to ensure
proper operation.
If you do not remove the snow and/or ice
before using the wiper and washer, it may
damage the wiper and washer system.