2023 HYUNDAI IONIQ 5 start stop button
[x] Cancel search: start stop buttonPage 235 of 680

05
5-43
memory seaT confIgUraTIons (If eQUIPPed)
Memory seat configurations for the
seats are provided to store and recall the
following memory settings with a simple
operation on the infotainment system.
WARNING
Never attempt to operate the
integrated memory system while the
vehicle is moving.
This could result in loss of control, and
an accident causing death, serious
injury, or property damage.
CAUTION
The function requires a large amount of
electrical power. To prevent the battery
from discharging, refrain from using it
when the vehicle start switch is off. • If the battery is disconnected, the
memory settings will be erased.
• If integrated memory system does
not operate normally, have the
system inspected by an authorized
HYUNDAI dealer.
Storing Memory Positions
ONE1051250L
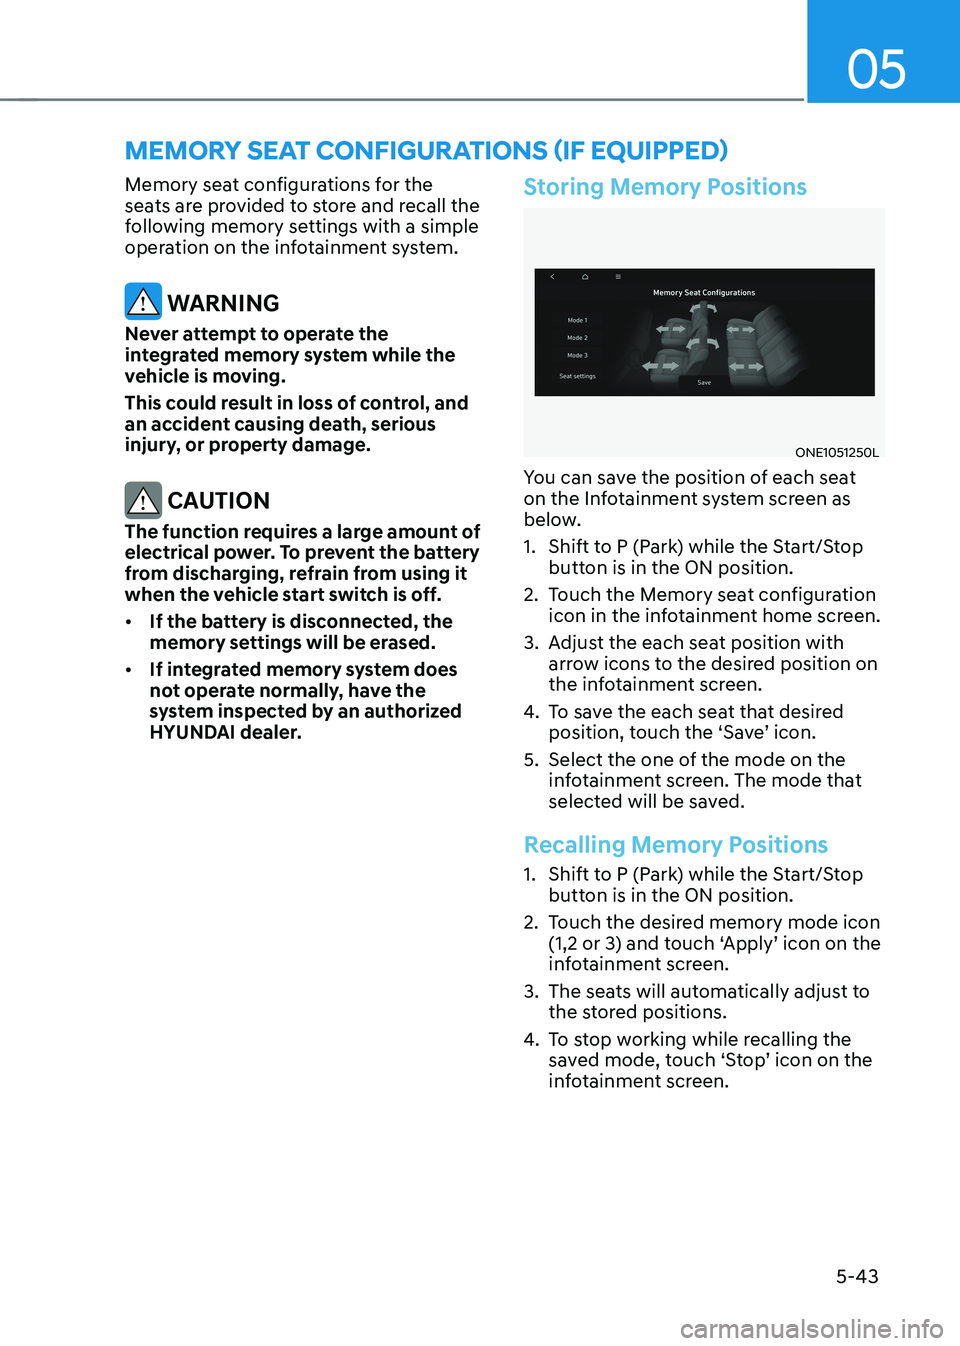
You can save the position of each seat
on the Infotainment system screen as
below.
1. Shift to P (Park) while the Start/Stop button is in the ON position.
2. Touch the Memory seat configuration icon in the infotainment home screen.
3. Adjust the each seat position with arrow icons to the desired position on
the infotainment screen.
4. To save the each seat that desired
position, touch the ‘Save’ icon.
5. Select the one of the mode on the infotainment screen. The mode that
selected will be saved.
Recalling Memory Positions
1. Shift to P (Park) while the Start/Stop button is in the ON position.
2. Touch the desired memory mode icon (1,2 or 3) and touch ‘Apply’ icon on the
infotainment screen.
3. The seats will automatically adjust to the stored positions.
4. To stop working while recalling the
saved mode, touch ‘Stop’ icon on the
infotainment screen.
Page 236 of 680

Convenience Features
5-44
steering wheel
Electric Power Steering (EPS)
The system assists you with steering the
vehicle. If the vehicle is turned off or
if the power steering system becomes
inoperative, you may still steer the
vehicle, but it will require increased
steering effort.
Should you notice any change in the
effort required to steer during normal
vehicle operation, have the system
checked by an authorized HYUNDAI
dealer.
CAUTION
If Electric Power Steering does not
operate normally, the
warning light
and the message ‘Check motor driven
power steering’ will illuminate on the
instrument cluster. You may steer the
vehicle, but it will require increased
steering efforts. Take the vehicle to an
authorized HYUNDAI dealer and have
the system checked as soon as possible.
Information
The following symptoms may occur during normal vehicle operation: • The steering effort may be high
immediately after pressing the Start/Stop button to the ON position. This happens as the system performs
the EPS system diagnostics. When the
diagnostics are completed, the steering
wheel effort will return to its normal condition.
• When the battery voltage is low, you
might have to put more steering effort.
However, it is a temporary condition so
that it will return to normal condition
after charging the battery.
• A click noise may be heard from the
EPS relay after the Start/Stop button is
in the ON or OFF position.
• Motor noise may be heard when the
vehicle is at a stop or at a low driving speed.
• When you operate the steering wheel
in low temperatures, abnormal noise
may occur. If the temperature rises, the
noise will disappear. This is a normal condition.
• When an error is detected from EPS, the steering effort assist function will
not be activated in order to prevent
fatal accidents. Instrument cluster
warning lights may be on or the steering effort may be high. If these
symptoms occur, drive the vehicle to
a safe area as soon as it is safe to do so. Have the system checked by an
authorized HYUNDAI dealer as soon as possible.
Page 239 of 680

05
5-47
ONE1051216L
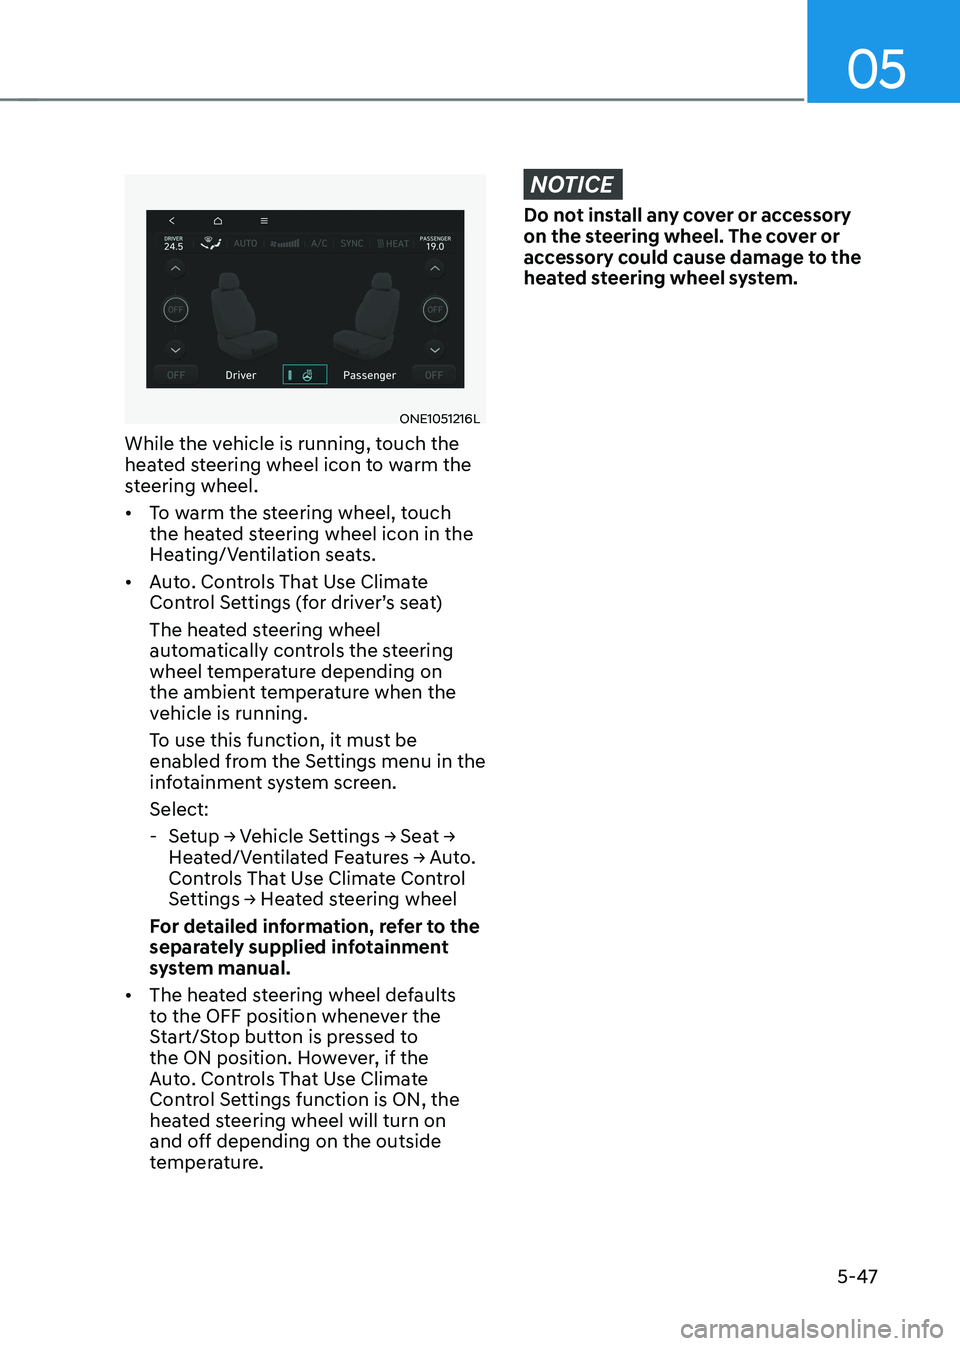
While the vehicle is running, touch the
heated steering wheel icon to warm the
steering wheel. • To warm the steering wheel, touch
the heated steering wheel icon in the
Heating/Ventilation seats.
• Auto. Controls That Use Climate
Control Settings (for driver’s seat)
The heated steering wheel
automatically controls the steering
wheel temperature depending on
the ambient temperature when the
vehicle is running.
To use this function, it must be
enabled from the Settings menu in the
infotainment system screen. Select:
- Setup → Vehicle Settings → Seat →
Heated/Ventilated Features → Auto.
Controls That Use Climate Control
Settings → Heated steering wheel
For detailed information, refer to the
separately supplied infotainment
system manual.
• The heated steering wheel defaults
to the OFF position whenever the
Start/Stop button is pressed to
the ON position. However, if the
Auto. Controls That Use Climate
Control Settings function is ON, the
heated steering wheel will turn on
and off depending on the outside
temperature.
NOTICE
Do not install any cover or accessory
on the steering wheel. The cover or
accessory could cause damage to the
heated steering wheel system.
Page 244 of 680

Convenience Features
5-52
ONE1051264N
2. Position the garage door opener remote 1 – 3 inches (2 – 8cm) away
from the HoleLink buttons.
3. While the HomeLink indicator light (7) is flashing orange, press and hold the
hand-held remote button. Continue
pressing the handheld remote button
until the HomeLink indicator light (7)
light changes from orange to green.
You may now release the handheld
remote button.
4. Wait until your garage door comes
to a complete stop, regardless of
position, before proceeding to the
next steps.
5. Press and release the HomeLink button you are programming and
observe the indicator light.
• If the indicator light remains solid
green, your device should operate
when the HomeLink button is
pressed. At this point, if your device
operates, programming is complete.
• If the indicator light rapidly
flashes green, firmly press, hold
for two seconds and release the
HomeLink button up to three times
in a row slowly to complete the
programming process. Do not press
the HomeLink button rapidly. At
this point if your device operates,
programming is complete. If the
device does not operate, continue
with step 6. 6. At the garage door opener motor,
(security gate motor, etc.) locate the
“Learn”, “Smart”, “Set” or “Program”
button. This can usually be found
where the hanging antenna wire is
attached to the motor-head unit (see
the device’s manual to identify this
button). The name and color of the
button may vary by manufacturer.
ODL3A040504
à A ladder and/or second person may
simplify the following steps.
7. Firmly press and release the “Learn”,
“Smart”, “Set” or “Program” button.
You now have up to 30 seconds in
which to complete the next step.
8. Return to the vehicle and firmly press, hold for two seconds and release,
the HomeLink button up to three
times in a row slowly. Do not press
the HomeLink button rapidly. As soon
as you see the garage door start to
move, stop pressing any buttons
until a few seconds after the garage
door has come to a complete stop,
regardless of position. At this point,
programming is complete and your
device should operate when the
HomeLink button is pressed and
released.
Page 252 of 680

Convenience Features
5-60
Adjusting the rearview mirrors
ONE1051028
Adjusting the rearview mirrors:
1. When the START/STOP button is in the ACC, ON or START position, press
either the L (Left side) or R (Right side)
button (1) to select the rearview mirror
you would like to adjust.
2. Use the mirror adjustment control switch (2) to position the selected
mirror up, down, left or right.
3. After adjustment, move the lever (1) to the middle to prevent inadvertent
adjustment.
NOTICE
• The mirrors stop moving when
they reach the maximum adjusting
angles, but the motor continues to
operate while the switch is pressed.
Do not press the switch longer than
necessary, because this can damage
the motor.
• Do not attempt to adjust the
rearview mirrors by hand, because
this can damage the motor. Folding the rearview mirrors
ONE1051029
Folding button
The rearview mirrors can be folded or
unfolded by pressing the button.
Infotainment system setting
•
Enable on door unlock
If ‘Setup → Vehicle Settings → Welcome
Mirror → Enable on Door Unlock’ is
selected from the Settings menu in
the infotainment system screen,
- The mirror will fold or unfold when the door is locked or unlocked by
the smart key.
- The mirror will fold or unfold when the door is locked or unlocked by
the touch sensor or button on the outside door handle.
• Enable on driver approach
If ‘Setup → Vehicle Settings →
Convenience → Welcome Mirror
→ Enable on Driver Approach’ is
selected from the Settings menu in
the infotainment system screen, the
mirror will unfold when the vehicle
is approached with the smart key in possession.
For detailed information, refer to the
separately supplied infotainment
system manual.
Page 253 of 680

05
5-61
NOTICE
The electric type outside rearview
mirror operates even though the Start/
Stop button is in the OFF position.
However, to prevent unnecessary
battery discharge, do not adjust the
mirrors longer than necessary while the
vehicle is not running.
NOTICE
Do not fold the electric type outside
rearview mirror by hand. It could cause
motor failure.
Reverse Parking Aid (if equipped)
ONE1051030
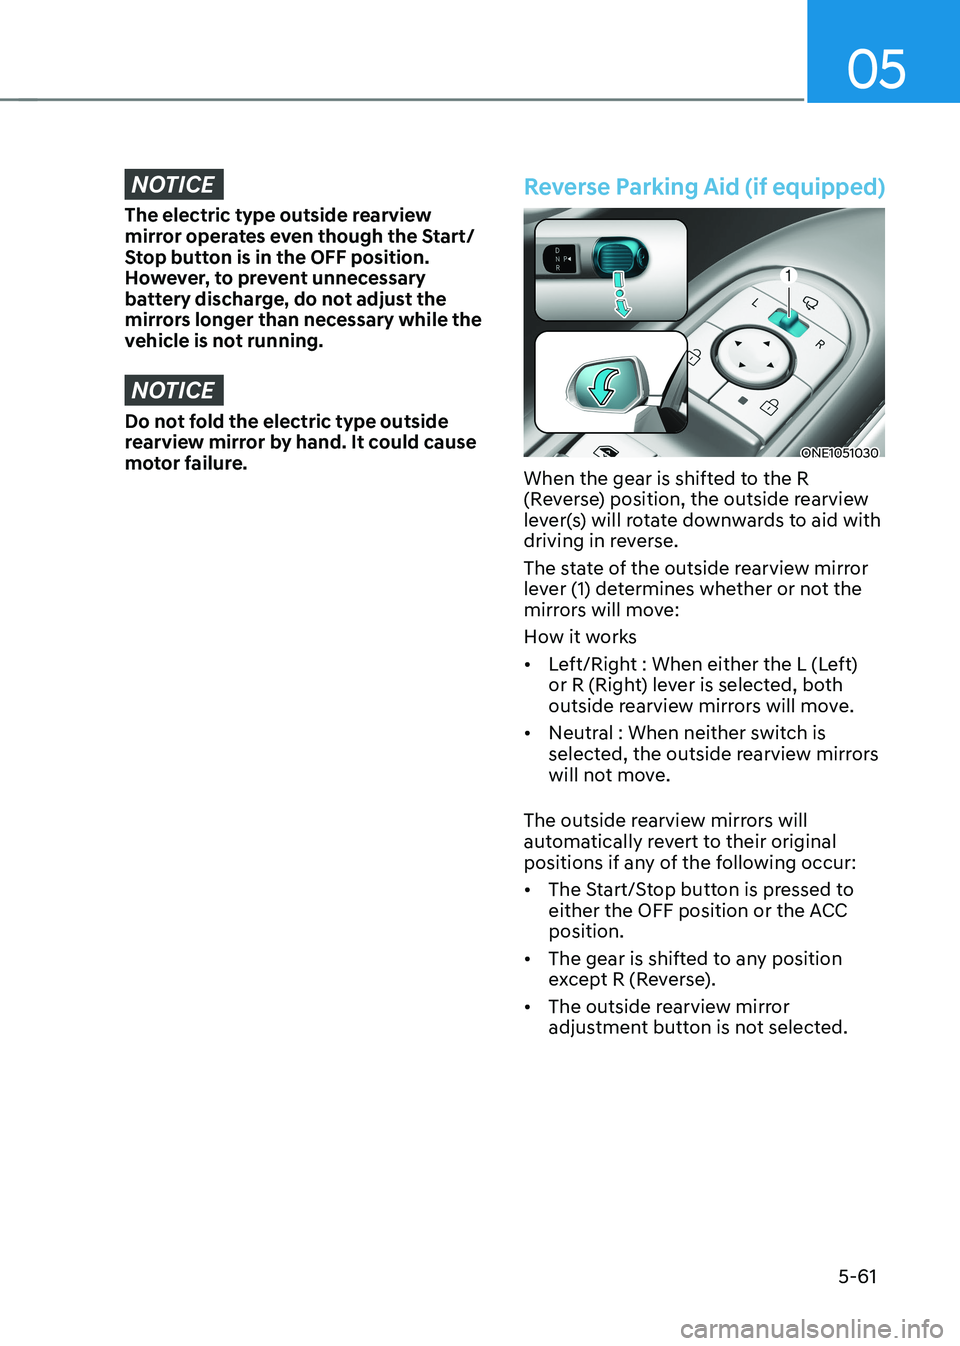
When the gear is shifted to the R
(Reverse) position, the outside rearview
lever(s) will rotate downwards to aid with
driving in reverse.
The state of the outside rearview mirror
lever (1) determines whether or not the
mirrors will move:
How it works• Left/Right : When either the L (Left)
or R (Right) lever is selected, both
outside rearview mirrors will move.
• Neutral : When neither switch is
selected, the outside rearview mirrors
will not move.
The outside rearview mirrors will
automatically revert to their original
positions if any of the following occur: • The Start/Stop button is pressed to
either the OFF position or the ACC position.
• The gear is shifted to any position
except R (Reverse).
• The outside rearview mirror
adjustment button is not selected.
Page 256 of 680

Convenience Features
5-64
Power Windows
The Start/Stop button must be in
the ON position to be able to raise or
lower the windows. Each door has a
Power Window switch to control that
door’s window. The driver has a Power
Window Lock button which can block
the operation of passenger windows.
The power windows will operate for
approximately 3 minutes after the
Start/Stop button is in the ACC or OFF
position. However, if the front doors are
opened, the Power Windows will not
operate even within the 3 minute period.
Window opening and closing
ONE1051033
To open:
Press the window switch down to the
first detent position (5). Release the
switch when you want the window to
stop.
To close:
Pull the window switch up to the first
detent position (5). Release the window
switch when you want the window to
stop. Auto up/down window
Pressing the power window switch
momentarily to the second detent
position (6) completely lowers or lifts
the window even when the switch is
released. To stop the window at the
desired position while the window is in
operation, pull up or press down and
release the switch.
WARNING
• Do not leave the vehicle running
and the key in your vehicle with
unsupervised children. Unattended
children could operate the window,
which could result in serious injury.
• Do not extend your head, arms or any
other body parts or objects outside
the window while driving to avoid
serious injury.
Resetting the power windows
If the power windows do not operate
normally, the automatic power window
system must be reset as follows:
1. Press the Start/Stop button to the ON position.
2. Close the window and continue pulling up on the power window
switch for at least one second.
If the power windows do not operate
properly after resetting, have the system
inspected by an authorized HYUNDAI
dealer.
Page 259 of 680

05
5-67
ONE1051036
If your vehicle is equipped with a vision
roof, you can slide open the power
sunshade and an all-glass roof appears.
Power sunshade
Use the power sunshade to block direct
sunlight coming through the sunroof glass.
ONE1051037
ONE1051038
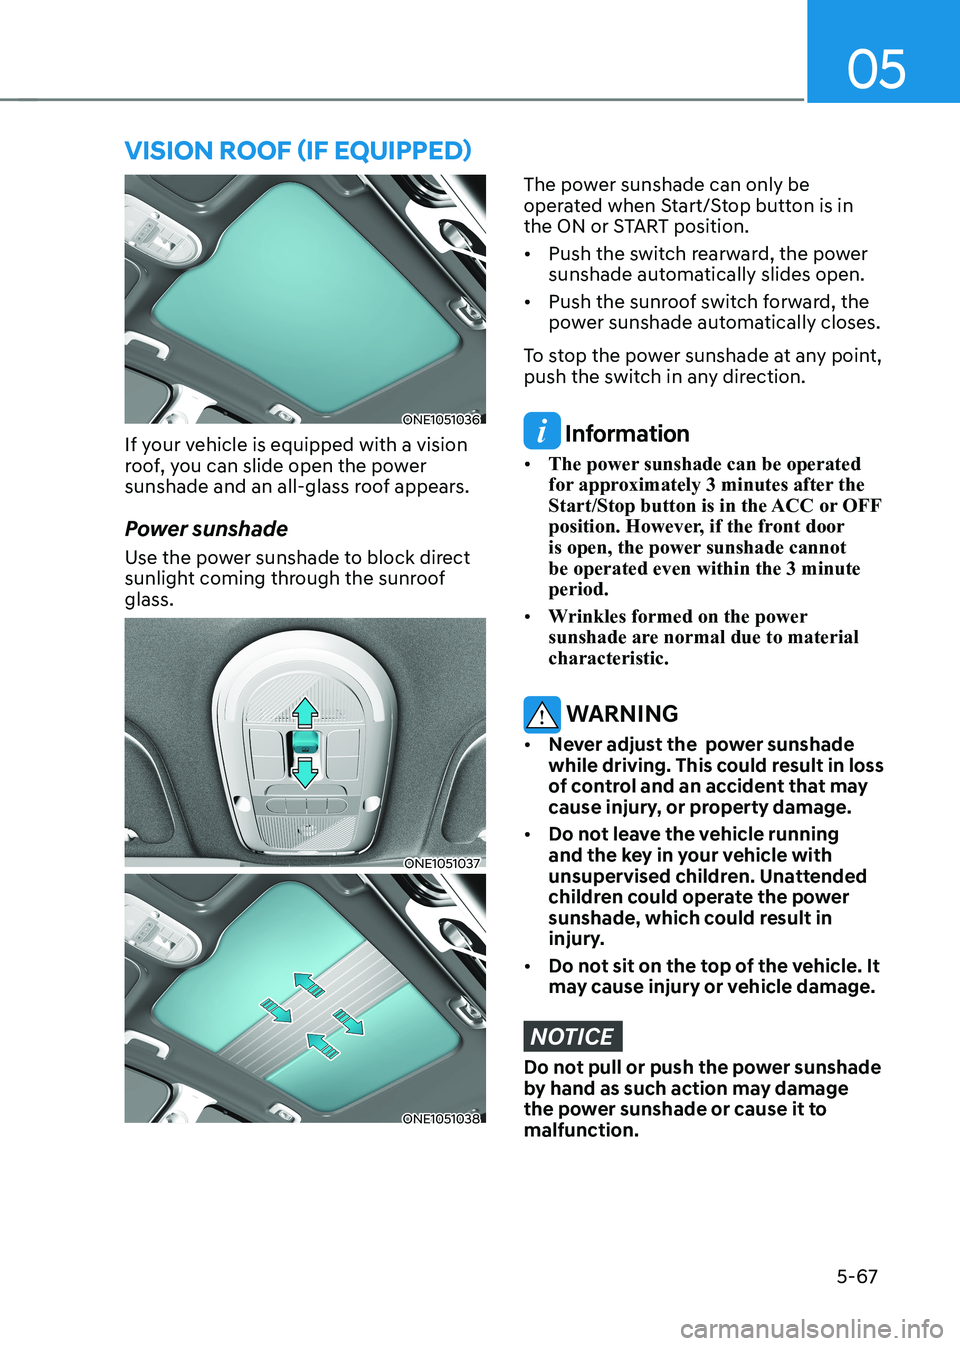
The power sunshade can only be
operated when Start/Stop button is in
the ON or START position. • Push the switch rearward, the power
sunshade automatically slides open.
• Push the sunroof switch forward, the
power sunshade automatically closes.
To stop the power sunshade at any point,
push the switch in any direction.
Information
• The power sunshade can be operated
for approximately 3 minutes after the
Start/Stop button is in the ACC or OFF
position. However, if the front door
is open, the power sunshade cannot be operated even within the 3 minute period.
• Wrinkles formed on the power
sunshade are normal due to material characteristic.
WARNING
• Never adjust the power sunshade
while driving. This could result in loss
of control and an accident that may
cause injury, or property damage.
• Do not leave the vehicle running
and the key in your vehicle with
unsupervised children. Unattended
children could operate the power
sunshade, which could result in
injury.
• Do not sit on the top of the vehicle. It
may cause injury or vehicle damage.
NOTICE
Do not pull or push the power sunshade
by hand as such action may damage
the power sunshade or cause it to malfunction.
VIsIon roof (If eQUIPPed)