2023 HYUNDAI IONIQ 5 tow
[x] Cancel search: towPage 290 of 680

Convenience Features
5-98
Front Windshield Washers
ONE1051073
In the OFF position, pull the lever gently
toward you to spray washer fluid on the
windshield and to run the wipers 1-3
cycles. The spray and wiper operation
will continue until you release the lever. If
the washer does not work, you may need
to add washer fluid to the washer fluid
reservoir.
Recirculating air when washer fluid is used
When washer fluid is used, in order to
reduce any objectionable scent of the
washer fluid from entering the cabin,
recirculation mode and air conditioning
are automatically activated depending
on the outside temperature. If you
select fresh mode while the function is
operating, the function will resume after
a certain amount of time. It may not work
in some conditions such as cold weather
or vehicle OFF.
For more details, refer to “Climate
Control Additional Features” section in
this chapter.
WARNING
When the outside temperature is below
freezing, ALWAYS warm the windshield
using the defroster to help prevent
the washer fluid from freezing on the
windshield and obscuring your vision
which could result in an accident and
serious injury or death.
NOTICE
• To prevent possible damage to the
washer pump, do not operate the
washer when the fluid reservoir is
empty.
• To prevent possible damage to the
wipers or windshield, do not operate
the wipers when the windshield is
dry.
• To prevent damage to the wiper
arms and other components, do
not attempt to move the wipers
manually.
• To prevent possible damage to the
wipers and washer system, use anti-
freezing washer fluids in the winter
season or cold weather.
Page 296 of 680
Convenience Features
5-104
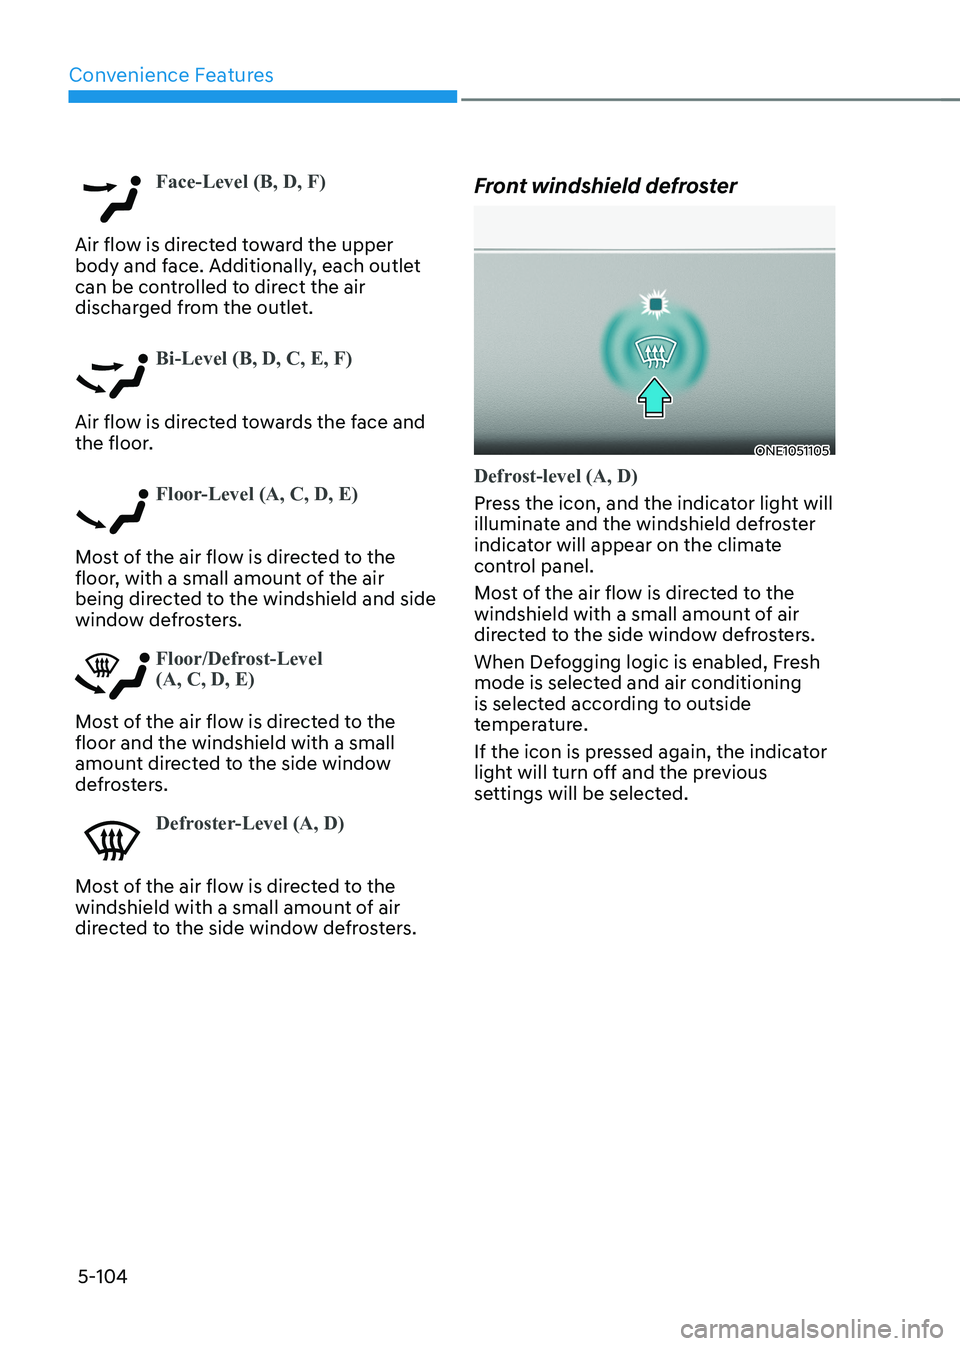
Face-Level (B, D, F)
Air flow is directed toward the upper
body and face. Additionally, each outlet
can be controlled to direct the air
discharged from the outlet.
Bi-Level (B, D, C, E, F)
Air flow is directed towards the face and
the floor.
Floor-Level (A, C, D, E)
Most of the air flow is directed to the
floor, with a small amount of the air
being directed to the windshield and side
window defrosters.
Floor/Defrost-Level (A, C, D, E)
Most of the air flow is directed to the floor and the windshield with a small
amount directed to the side window
defrosters.
Defroster-Level (A, D)
Most of the air flow is directed to the
windshield with a small amount of air
directed to the side window defrosters.Front windshield defroster
ONE1051105
Defrost-level (A, D)
Press the icon, and the indicator light will
illuminate and the windshield defroster
indicator will appear on the climate
control panel.
Most of the air flow is directed to the
windshield with a small amount of air
directed to the side window defrosters.
When Defogging logic is enabled, Fresh
mode is selected and air conditioning
is selected according to outside
temperature.
If the icon is pressed again, the indicator
light will turn off and the previous
settings will be selected.
Page 297 of 680
05
5-105
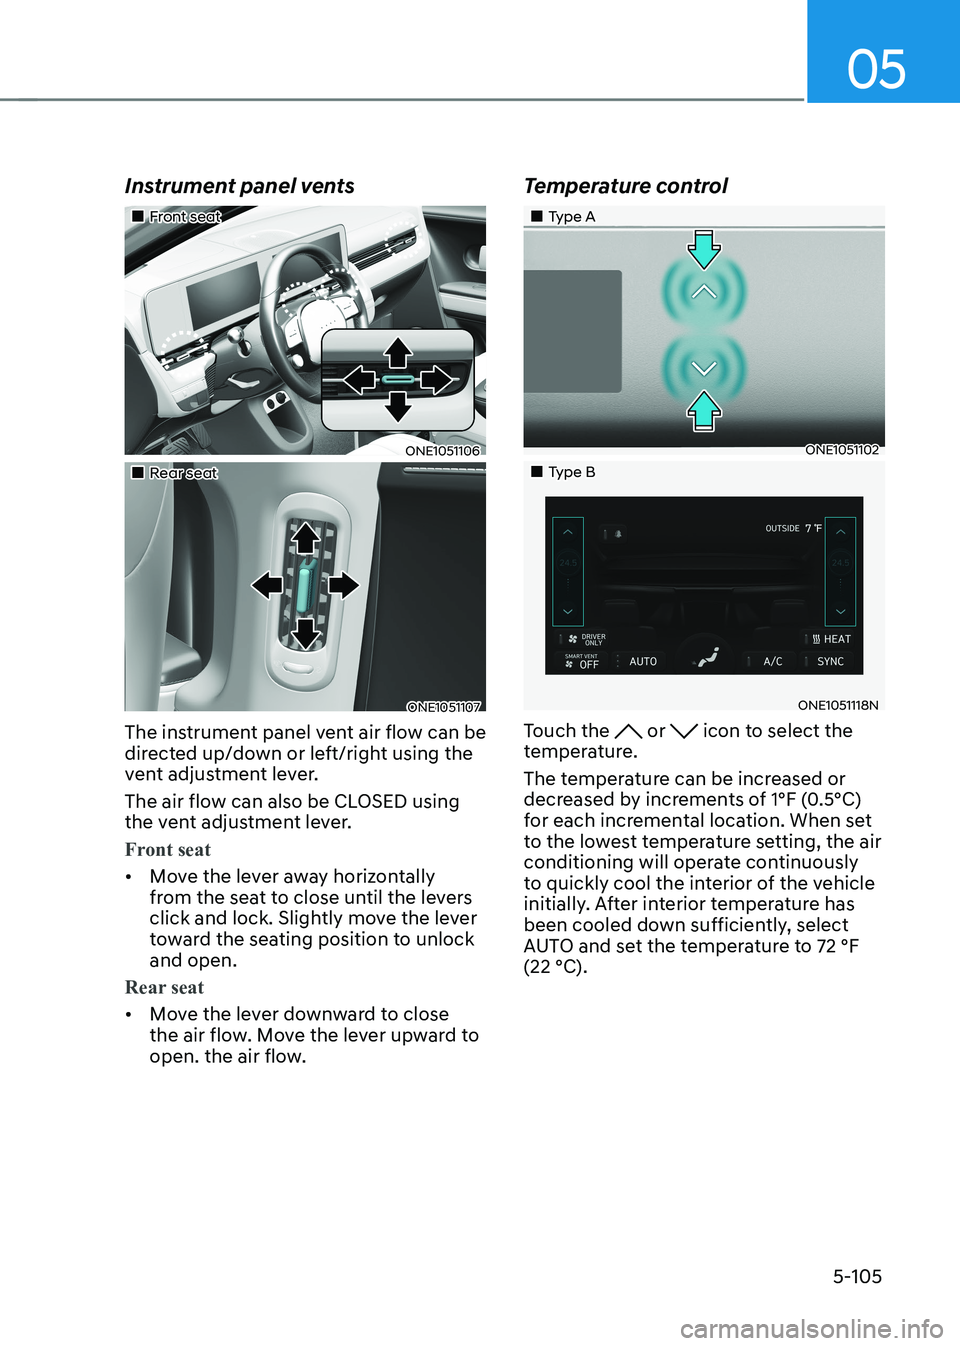
Instrument panel vents
„„Front seat
ONE1051106
„„Rear seat
ONE1051107
The instrument panel vent air flow can be
directed up/down or left/right using the
vent adjustment lever.
The air flow can also be CLOSED using
the vent adjustment lever.
Front seat
• Move the lever away horizontally
from the seat to close until the levers
click and lock. Slightly move the lever
toward the seating position to unlock and open.
Rear seat
• Move the lever downward to close
the air flow. Move the lever upward to
open. the air flow. Temperature control
„„Type A
ONE1051102
„„Type B
ONE1051118N
Touch the
or icon to select the
temperature.
The temperature can be increased or
decreased by increments of 1°F (0.5°C)
for each incremental location. When set
to the lowest temperature setting, the air
conditioning will operate continuously
to quickly cool the interior of the vehicle
initially. After interior temperature has
been cooled down sufficiently, select
AUTO and set the temperature to 72 °F (22 °C).
Page 314 of 680
Convenience Features
5-122
Sunvisor
OHI048444
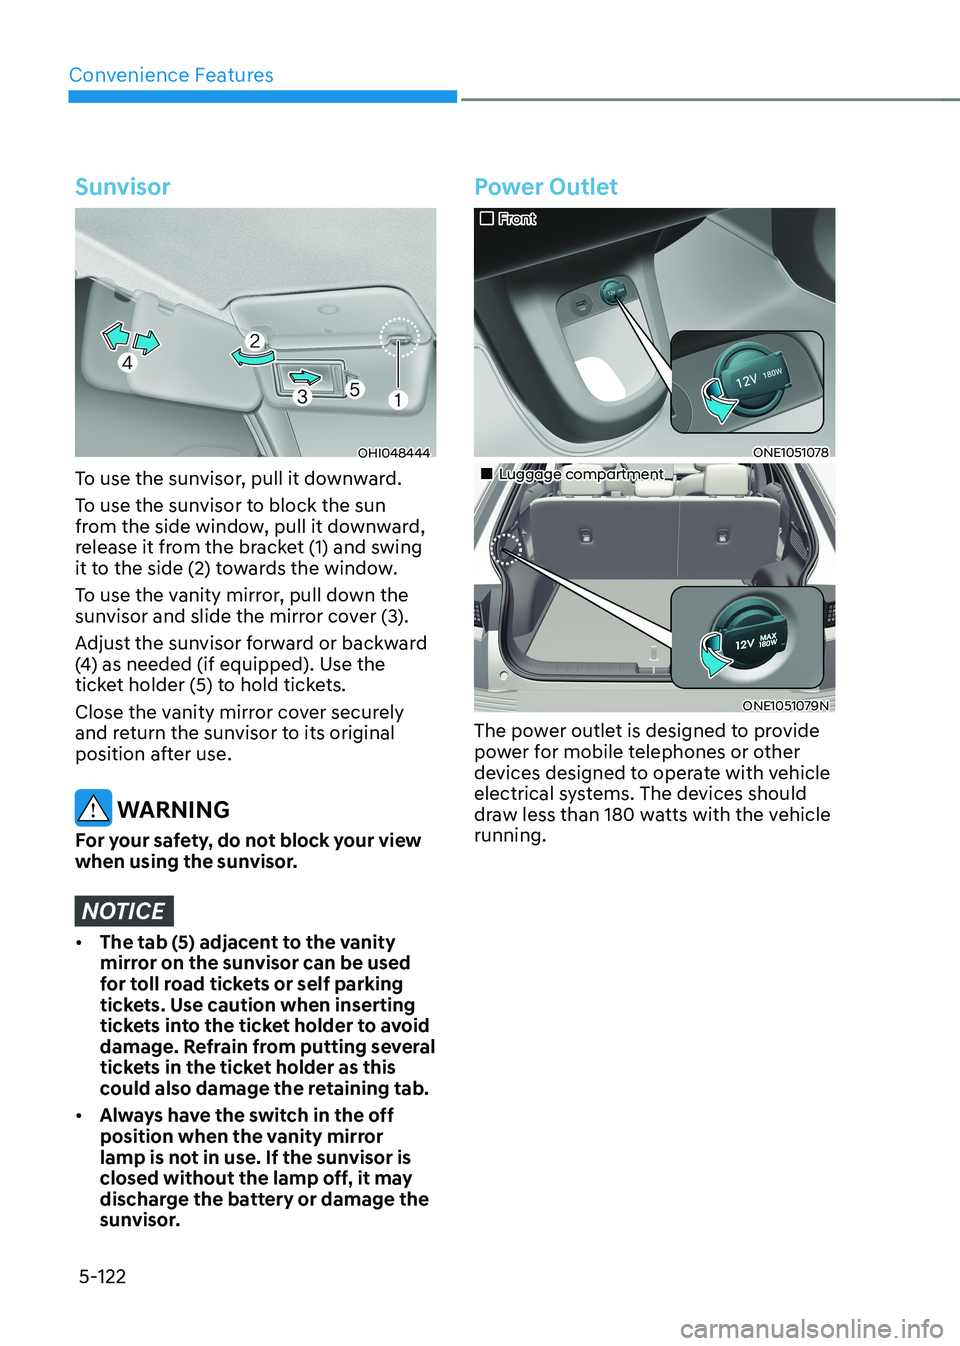
To use the sunvisor, pull it downward.
To use the sunvisor to block the sun
from the side window, pull it downward,
release it from the bracket (1) and swing
it to the side (2) towards the window.
To use the vanity mirror, pull down the
sunvisor and slide the mirror cover (3).
Adjust the sunvisor forward or backward
(4) as needed (if equipped). Use the
ticket holder (5) to hold tickets.
Close the vanity mirror cover securely
and return the sunvisor to its original
position after use.
WARNING
For your safety, do not block your view
when using the sunvisor.
NOTICE
• The tab (5) adjacent to the vanity
mirror on the sunvisor can be used
for toll road tickets or self parking
tickets. Use caution when inserting
tickets into the ticket holder to avoid
damage. Refrain from putting several
tickets in the ticket holder as this
could also damage the retaining tab.
• Always have the switch in the off
position when the vanity mirror
lamp is not in use. If the sunvisor is
closed without the lamp off, it may
discharge the battery or damage the
sunvisor.
Power Outlet
„„Front
ONE1051078
„„Luggage compartment
ONE1051079N
The power outlet is designed to provide
power for mobile telephones or other
devices designed to operate with vehicle
electrical systems. The devices should
draw less than 180 watts with the vehicle running.
Page 322 of 680
Convenience Features
5-130
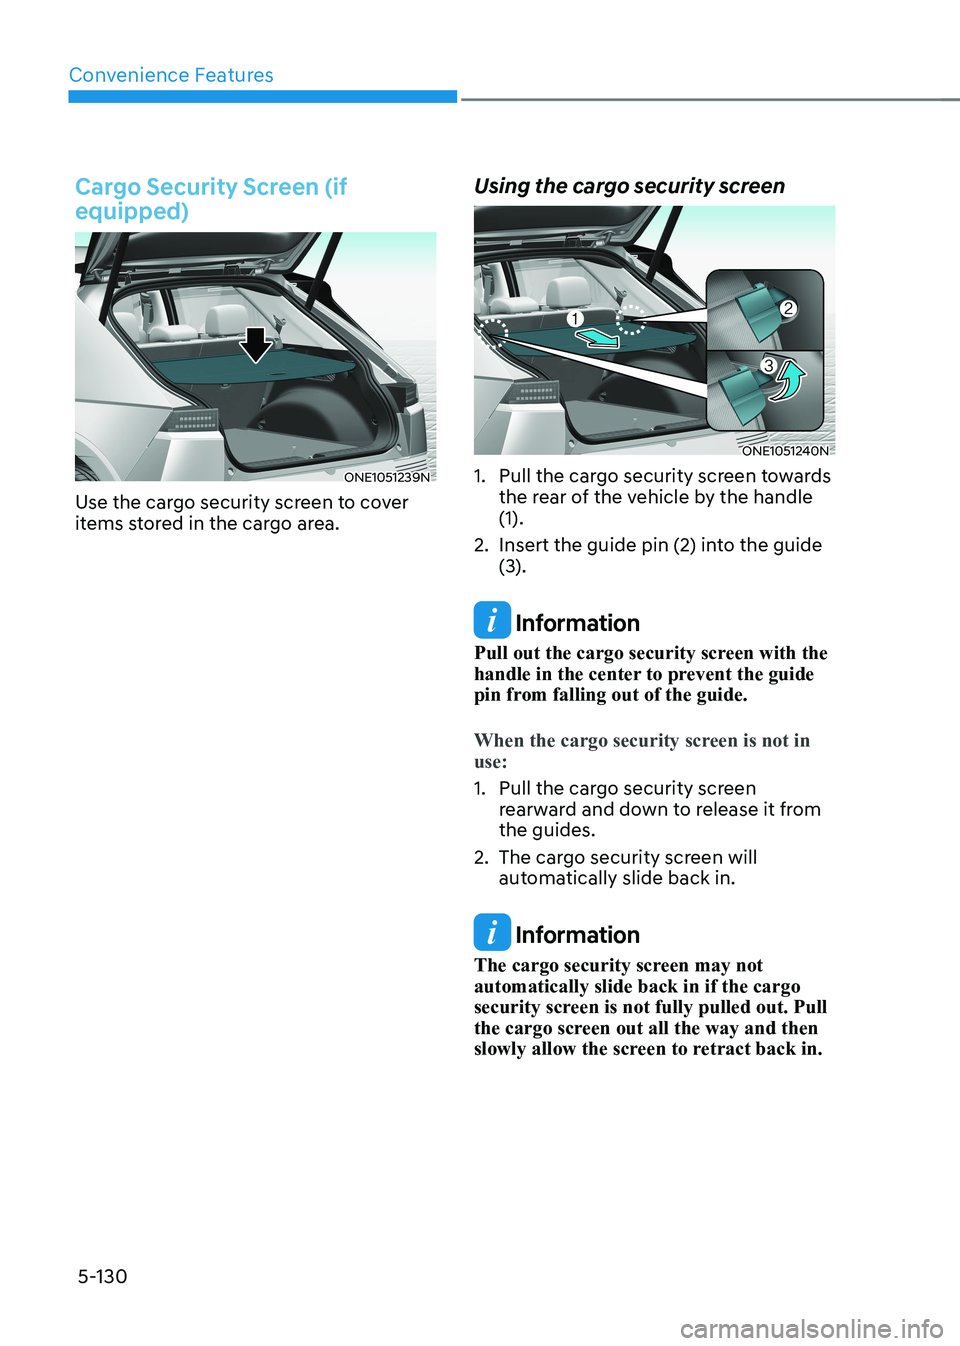
Cargo Security Screen (if equipped)
ONE1051239N
Use the cargo security screen to cover
items stored in the cargo area. Using the cargo security screen
ONE1051240N
1. Pull the cargo security screen towards the rear of the vehicle by the handle (1).
2. Insert the guide pin (2) into the guide (3).
Information
Pull out the cargo security screen with the
handle in the center to prevent the guide
pin from falling out of the guide.
When the cargo security screen is not in use:
1. Pull the cargo security screen rearward and down to release it from the guides.
2. The cargo security screen will automatically slide back in.
Information
The cargo security screen may not automatically slide back in if the cargo
security screen is not fully pulled out. Pull
the cargo screen out all the way and then
slowly allow the screen to retract back in.
Page 328 of 680
6
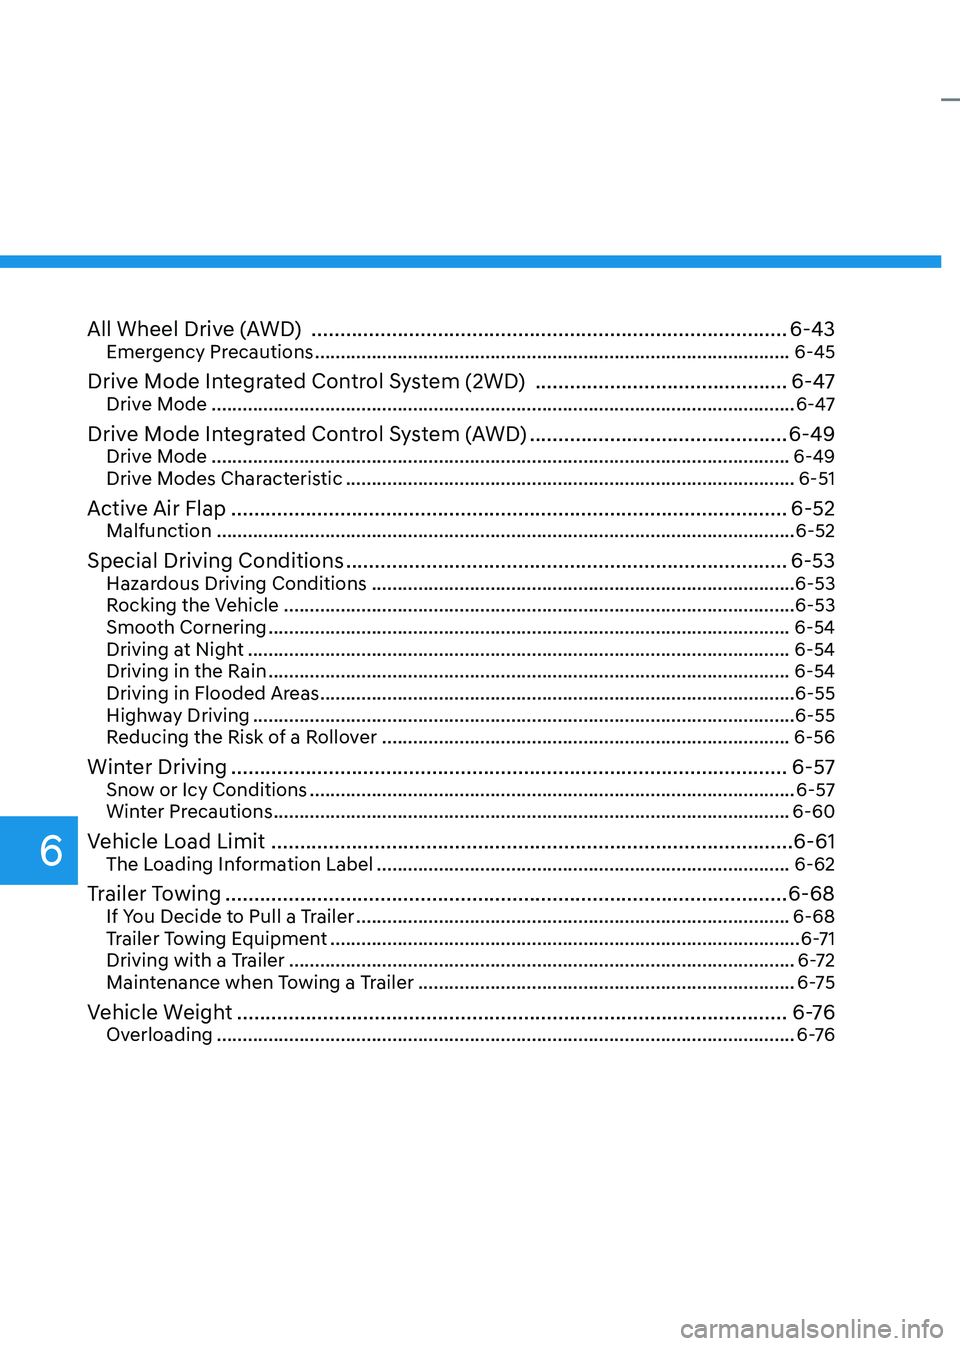
All Wheel Drive (AWD) ................................................................................... 6-43
Emergency Precautions ............................................................................................ 6-45
Drive Mode Integrated Control System (2WD) ............................................6-47
Drive Mode ................................................................................................................. 6-47
Drive Mode Integrated Control System (AWD) .............................................6-49
Drive Mode ................................................................................................................ 6-49
Drive Modes Characteristic ....................................................................................... 6-51
Active Air Flap ................................................................................................. 6-52
Malfunction ................................................................................................................ 6-52
Special Driving Conditions ............................................................................. 6-53
Hazardous Driving Conditions .................................................................................. 6-53
Rocking the Vehicle ................................................................................................... 6-53
Smooth Cornering ..................................................................................................... 6-54
Driving at Night ......................................................................................................... 6-54
Driving in the Rain ..................................................................................................... 6-54
Driving in Flooded Areas ............................................................................................ 6-55
Highway Driving ......................................................................................................... 6-55
Reducing the Risk of a Rollover ............................................................................... 6-56
Winter Driving ................................................................................................. 6-57
Snow or Icy Conditions .............................................................................................. 6-57
Winter Precautions .................................................................................................... 6-60
Vehicle Load Limit ........................................................................................... 6-61
The Loading Information Label ................................................................................ 6-62
Trailer Towing .................................................................................................. 6-68
If You Decide to Pull a Trailer .................................................................................... 6-68
Trailer Towing Equipment ........................................................................................... 6-71
Driving with a Trailer .................................................................................................. 6-72
Maintenance when Towing a Trailer ......................................................................... 6-75
Vehicle Weight ................................................................................................ 6 -76
Overloading ................................................................................................................ 6 -76
Page 332 of 680

Driving Your Vehicle
6-6
Starting the Vehicle
WARNING
• Always wear appropriate shoes when
operating your vehicle. Unsuitable
shoes, such as high heels, ski boots,
sandals, flipflops, etc., may interfere
with your ability to use the brake and
accelerator pedals.
• Do not start the vehicle with the
accelerator pedal depressed.
The vehicle can move which can lead
to an accident.
Information
• The vehicle will start by pressing the Start/Stop button, only when the smart key is in the vehicle.
• Even if the smart key is in the vehicle,
and when it is far away from the driver, the vehicle may not start.
• When the Start/Stop button is in the
ACC or ON position, if any door is
open, the system checks for the smart
key. When the smart key is not in the
vehicle, the “
” indicator will
blink and the warning 'Key not in
vehicle' will come on. When all doors
are closed, the chime will also sound for about 5 seconds. Keep the smart key in
the vehicle when in the ACC position
or if the vehicle is in the ready (
)
mode.
Starting the vehicle
1. Always carry the smart key with you.
2. Make sure the parking brake is applied.
3. Make sure the gear is in P (Park).
4. Depress the brake pedal.
5. Press the START/STOP button. If the vehicle starts, the "
" indicator
will come on.
Information
• Always start the vehicle with your foot
on the brake pedal. Do not depress the
accelerator while starting the vehicle.
Do not race the motor while warming it up.
• If ambient temperature is low, the “
” indicator may remain
illuminated longer than the normal amount of time.
NOTICE
To prevent damage to the vehicle: • If the (
) indicator turns off
while you are in motion, do not
attempt to shift the gear to the P
(Park) position.
If traffic and road conditions permit,
you may put the gear in N (Neutral)
while the vehicle is still moving and
press the Start/Stop button in an
attempt to restart the vehicle.
• Do not push or tow your vehicle to
start the vehicle.
Page 358 of 680

Driving Your Vehicle
6-32
NOTICE
• If the EPB warning light is still on,
have the system checked by an
authorized HYUNDAI dealer.
• If the Parking Brake warning light
does not illuminate or blinks even
though the EPB switch was pulled
up, EPB may not be applied.
• If the Parking Brake warning light
blinks when the EPB warning light is
on, press the switch, and then pull it
up. Repeat this one more time. If the
EPB warning does not go off, have
the system checked by an authorized
HYUNDAI dealer.
Parking brake warning light
Check the Parking Brake
warning light by pressing the
Vehicle Stop/Start button to the ON position.
This light will be illuminated when the
parking brake is applied with the Vehicle
Stop/Start button in the START or ON position.
Before driving, be sure the parking
brake is released and the Parking Brake
warning light is OFF.
If the Parking Brake warning light
remains on after the parking brake is
released while the motor is running,
there may be a malfunction in the
brake system. Immediate attention is
necessary.
If at all possible, cease driving the vehicle
immediately. If that is not possible,
use extreme caution while operating
the vehicle and only continue to drive
the vehicle until you can reach a safe
location. When the EPB (Electronic Parking
Brake) does not release
If the EPB does not release normally,
contact an authorized HYUNDAI dealer
by loading the vehicle on a flatbed tow
truck and have the system checked.
Auto Hold
Auto Hold maintains the vehicle in a
standstill even though the brake pedal is
not depressed after the driver brings the
vehicle to a complete stop by depressing
the brake pedal.
To apply:
ONE1061017
1. With the driver's door and hood closed, depress the brake pedal and
then press the AUTO HOLD switch.
The white AUTO HOLD indicator will
come on and the system will be in the
standby position.