2023 HYUNDAI I30 Drive
[x] Cancel search: DrivePage 81 of 533

2-60
Safety system of your vehicle
In an angled collision, the force of
impact may direct the occupants in a
direction where the air bags would
not be able to provide any additional
benefit, and thus the sensors may
not deploy any air bags.Just before impact, drivers often
brake heavily. Such heavy braking
lowers the front portion of the vehicle
causing it to “ride” under a vehicle
with a higher ground clearance. Air
bags may not inflate in this "under-
ride" situation because deceleration
forces that are detected by sensors
may be significantly reduced by such
“underride” collisions.Front air bags may not inflate in
rollover accidents because front air
bag deployment would not provide
additional occupant protection.
Information
The side and/or curtain air bags may
inflate when the vehicle is rolled over
by a side impact collision, if the vehi-
cle is equipped with side and/or cur-
tain air bags.
i
OTL035069OPD036057OTL035068
Page 83 of 533

2-62
Safety system of your vehicle
Additional safety precautions
Passengers should not move out of
or change seats whilst the vehicle
is moving.A passenger who is not
wearing a seat belt during a crash or
emergency stop can be thrown
against the inside of the vehicle,
against other occupants, or be ejected
from the vehicle.
Do not use any accessories on seat
belts.Devices claiming to improve
occupant comfort or reposition the
seat belt can reduce the protection
provided by the seat belt and increase
the chance of serious injury in a crash.
Do not modify the front seats.
Modification of the front seats could
interfere with the operation of the sup-
plemental restraint system sensing
components or side air bags.
Do not place items under the front
seats.Placing items under the front
seats could interfere with the opera-
tion of the supplemental restraint sys-
tem sensing components and wiring
harnesses.
Do not cause impact to the doors.
Impact to the doors when the ignition
switch is in the ON position may cause
the air bags to inflate.
Adding equipment to or modify-
ing your air bag equipped vehicle
If you modify your vehicle by changing
your vehicle's frame, bumper system,
front end or side sheet metal or ride
height, this may affect the operation of
your vehicle's air bag system.
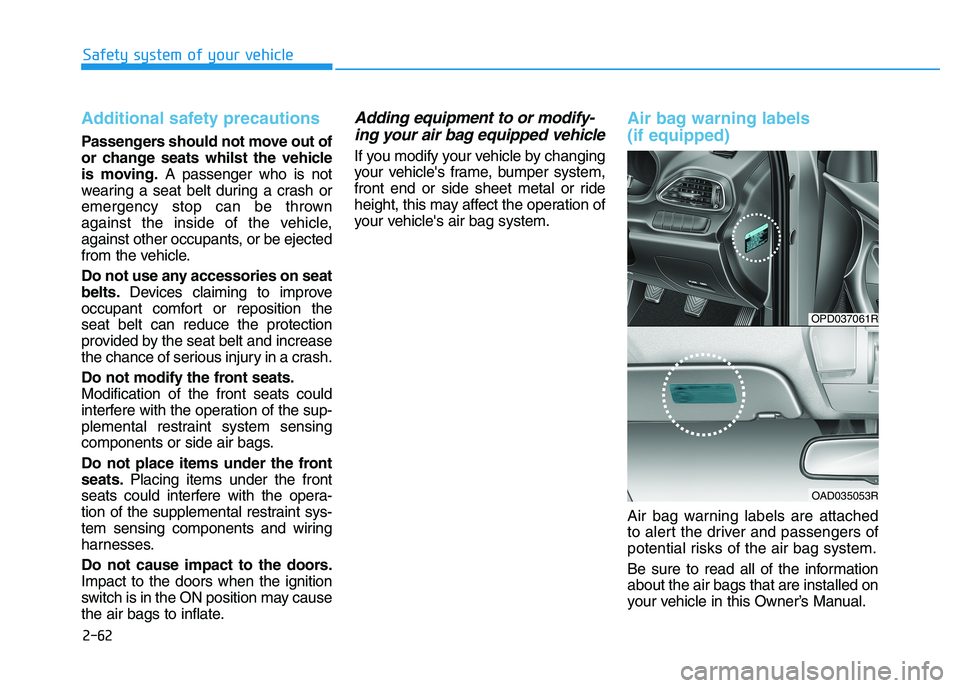
Air bag warning labels
(if equipped)
Air bag warning labels are attached
to alert the driver and passengers of
potential risks of the air bag system.
Be sure to read all of the information
about the air bags that are installed on
your vehicle in this Owner’s Manual.
OPD037061R
OAD035053R
Page 85 of 533

Wipers and washers ............................................3-92
Windscreen wipers..........................................................3-92
Windscreen washers ......................................................3-94
Rear window wiper and washer switch.....................3-95
Driver Assist System ...........................................3-96
Rear view monitor...........................................................3-96
Parking distance warning (reverse) system .............3-97
Parking distance warning (forward/reverse)
system..............................................................................3-100
Defroster .............................................................3-104
Rear window defroster ...............................................3-104
Manual climate control system........................3-105
Heating and air conditioning......................................3-106
System operation ..........................................................3-110
System maintenance ....................................................3-112
Automatic climate control system ...................3-114
Automatic heating and air conditioning ..................3-115
Manual heating and air conditioning .......................3-116
System operation ..........................................................3-122
System maintenance ....................................................3-124
Windscreen defrosting and defogging ...........3-126
Manual climate control system .................................3-126
Automatic climate control system ............................3-127
Defogging logic..............................................................3-128
Auto defogging system
(only for automatic climate control system) .........3-129
Climate control additional features.................3-130
Cluster ionizer ................................................................3-130
Automatic ventilation ...................................................3-130
Sunroof inside air recirculation.................................3-130
Storage compartment ........................................3-131
Centre console storage ...............................................3-131
Glove box ........................................................................3-131
Sunglasses holder .........................................................3-132
Multi box .........................................................................3-132
Interior features.................................................3-133
Ashtray ............................................................................3-133
Cup holder.......................................................................3-133
Sliding armrest ...............................................................3-134
Sunvisor ...........................................................................3-135
Power outlet ...................................................................3-135
Cigarette lighter ............................................................3-137
Wireless mobile phone charging system ................3-137
Clock .................................................................................3-139
Clothes hanger ..............................................................3-139
Floor mat anchor(s)......................................................3-140
Luggage net....................................................................3-141
Luggage compartment cover .....................................3-142
3
Page 88 of 533

3-5
Convenient features of your vehicle
3
Remote key precautions
The remote key will not work if any of
the following occur:
The key is in the ignition switch.
You exceed the operating distance
limit (about 30 m).
The remote key battery is weak.
Other vehicles or objects may be
blocking the signal.
The weather is extremely cold.
The remote key is close to a radio
transmitter such as a radio station
or an airport which can interfere
with normal operation of the remote
key.
When the remote key does not work
correctly, open and close the door
with the mechanical key. If you have a
problem with the remote key, it is rec-
ommended that you contact an autho-
rised HYUNDAI dealer.
If the remote key is in close proximity
to your mobile phone, the signal could
be blocked by your mobile phone's
normal operational signals.This is especially important when the
phone is active such as making and
receiving calls, text messaging,
and/or sending/receiving emails.
Avoid placing the remote key and your
mobile phone in the same location
and always try to maintain an ade-
quate distance between the two
devices.
Information
Changes or modifications not express-
ly approved by the party responsible
for compliance could void the user’s
authority to operate the equipment. If
the keyless entry system is inoperative
due to changes or modifications not
expressly approved by the party
responsible for compliance, it will not
be covered by your manufacturer’s
vehicle warranty.
Keep the remote key away from
electromagnetic materials that
block electromagnetic waves to
the key surface.
Battery replacement
If the remote key is not working prop-
erly, try replacing the battery with a
new one.
Battery Type: CR2032
To replace the battery:
1. Insert a slim tool into the slot and
gently pry open the cover.
2. Using a screw driver, remove the
battery cover.
3. Remove the old battery and insert
a new battery. Make sure the bat-
tery position is correct.
4. Reinstall the battery cover and key
cover in the reverse order of
removal.
NOTICE
i
OPD046002
Page 94 of 533

3-11
Convenient features of your vehicle
3
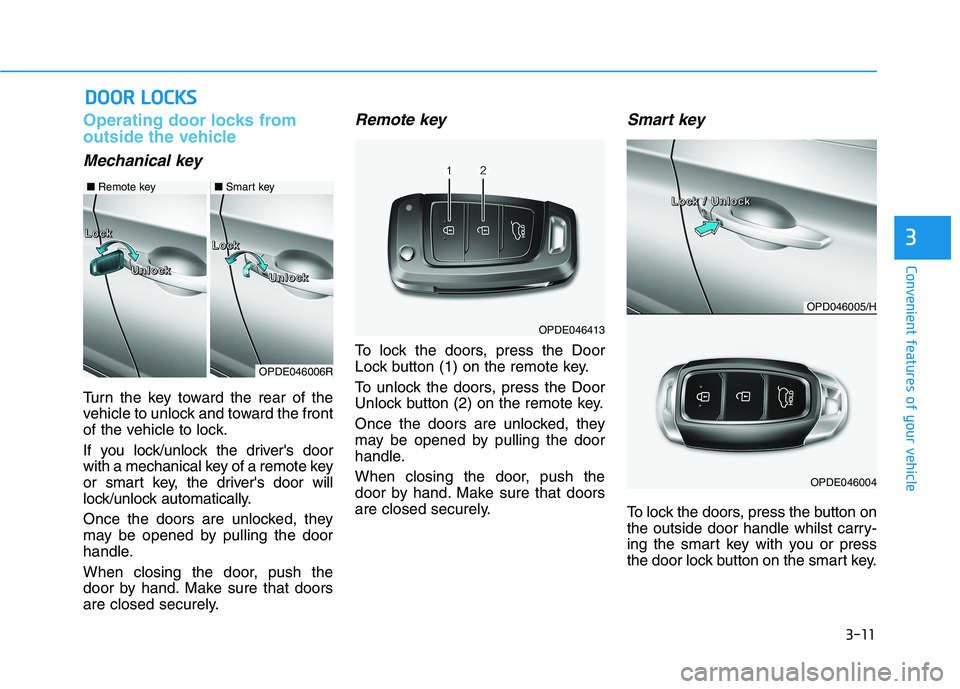
Operating door locks from
outside the vehicle
Mechanical key
Turn the key toward the rear of the
vehicle to unlock and toward the front
of the vehicle to lock.
If you lock/unlock the driver's door
with a mechanical key of a remote key
or smart key, the driver's door will
lock/unlock automatically.
Once the doors are unlocked, they
may be opened by pulling the door
handle.
When closing the door, push the
door by hand. Make sure that doors
are closed securely.
Remote key
To lock the doors, press the Door
Lock button (1) on the remote key.
To unlock the doors, press the Door
Unlock button (2) on the remote key.
Once the doors are unlocked, they
may be opened by pulling the door
handle.
When closing the door, push the
door by hand. Make sure that doors
are closed securely.
Smart key
To lock the doors, press the button on
the outside door handle whilst carry-
ing the smart key with you or press
the door lock button on the smart key.
D DO
OO
OR
R
L
LO
OC
CK
KS
S
OPDE046413
OPDE046006R
L L L L
o o o o
c c c c
k k k k
L L L L
o o o o
c c c c
k k k k
U U U U
n n n n
l l l l
o o o o
c c c c
k k k k
U U U U
n n n n
l l l l
o o o o
c c c c
k k k k
■Remote key■Smart key
OPD046005/H
OPDE046004
L L L L
o o o o
c c c c
k k k k
/ / / /
U U U U
n n n n
l l l l
o o o o
c c c c
k k k k
Page 96 of 533

3-13
Convenient features of your vehicle
3
Information
If a power door lock ever fails to func-
tion whilst you are in the vehicle try
one or more of the following tech-
niques to exit:
• Operate the door unlock feature
repeatedly (both electronic and
manual) whilst simultaneously
pulling on the door handle.
• Operate the other door locks and
handles.
• Lower a front window and use the
mechanical key to unlock the door
from outside.
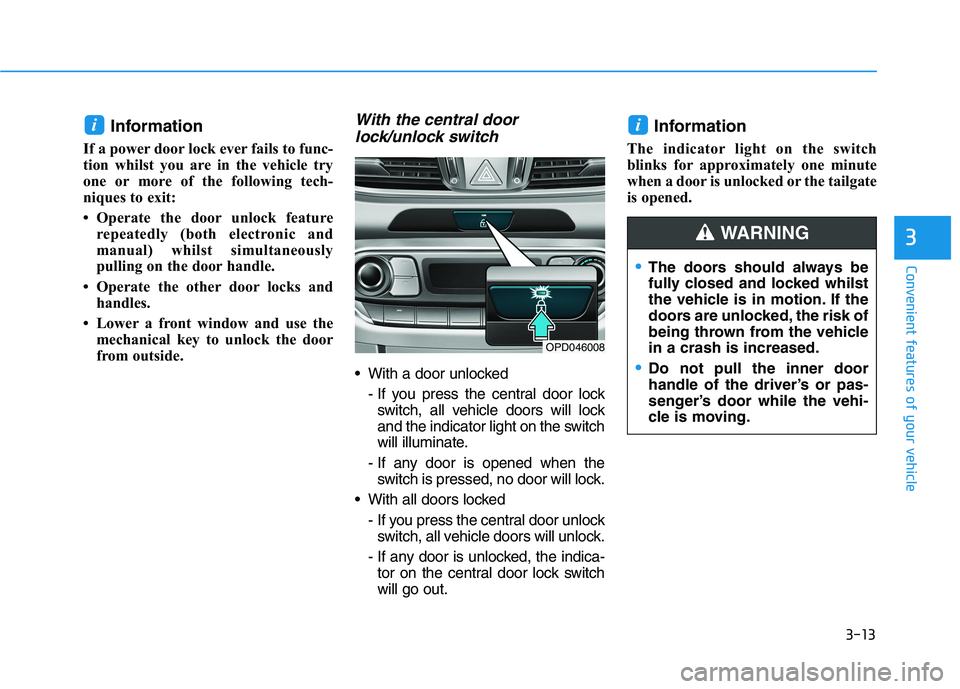
With the central door
lock/unlock switch
With a door unlocked
- If you press the central door lock
switch, all vehicle doors will lock
and the indicator light on the switch
will illuminate.
- If any door is opened when the
switch is pressed, no door will lock.
With all doors locked
- If you press the central door unlock
switch, all vehicle doors will unlock.
- If any door is unlocked, the indica-
tor on the central door lock switch
will go out.
Information
The indicator light on the switch
blinks for approximately one minute
when a door is unlocked or the tailgate
is opened.
ii
OPD046008
The doors should always be
fully closed and locked whilst
the vehicle is in motion. If the
doors are unlocked, the risk of
being thrown from the vehicle
in a crash is increased.
Do not pull the inner door
handle of the driver’s or pas-
senger’s door while the vehi-
cle is moving.
WARNING
Page 98 of 533

3-15
Convenient features of your vehicle
3
Auto door lock/unlock features
Impact sensing door unlock
system (if equipped)
All doors will be automatically
unlocked when an impact causes the
air bags to deploy.
Speed sensing door lock system
(if equipped)
All doors will be automatically locked
when vehicle speed exceeds 15
km/h.
You can activate or deactivate the
Auto Door Lock/Unlock features from
the User Settings mode on the LCD
display.For more details, refer to
"LCD Display" in this chapter.
Child-protector rear door locks
The child safety lock is provided to
help prevent children seated in the
rear seats from accidentally opening
the rear doors. The rear door safety
locks should be used whenever chil-
dren are in the vehicle.
The child safety lock is located on
the edge of each rear door. When the
child safety lock is in the lock posi-
tion, the rear door will not open if the
inner door handle is pulled.To lock the child safety lock, insert a
key (or screwdriver) (1) into the hole
and turn it to the lock position.
To allow a rear door to be opened
from inside the vehicle, unlock the
child safety lock.
OPDE046009
If children accidently open the
rear doors whilst the vehicle is
in motion, they could fall out of
the vehicle. The rear door safety
locks should always be used
whenever children are in the
vehicle.
WARNING
Page 104 of 533

3-21
Convenient features of your vehicle
3
Electric Chromic Mirror (ECM)
(if equipped)
The electric rearview mirror automati-
cally controls the glare from the head-
lamp of the vehicle behind you in
nighttime or low light driving condi-
tions.
When the engine is running, the
glare is automatically controlled by
the sensor mounted in the rearview
mirror. The sensor detects the light
level around the vehicle, and auto-
matically adjusts to control the head-
lamp glare from vehicles behind you.
Whenever the shift lever is placed in
R (Reverse), the mirror will automat-
ically go to the brightest setting in
order to improve the driver's view
behind the vehicle.
To operate the electric rearview
mirror:
Press the ON/OFF button (1) to
turn the automatic dimming func-
tion off. The mirror indicator light
will turn off.
Press the ON/OFF button (1) to
turn the automatic dimming func-
tion on. The mirror indicator light
will illuminate.
The mirror defaults to the ON posi-
tion whenever the ignition switch is
in the ON position.
Outside rearview mirror
Be sure to adjust mirror angles
before driving.
Your vehicle is equipped with both
left-hand and right-hand outside
rearview mirrors.
The mirror can be adjusted remotely
with the remote switch.
The mirrors can be folded to prevent
damage to them in an automatic car
wash or when driving in a narrow
street.
OAD045010
OPD046016
I I I I
n n n n
d d d d
i i i i
c c c c
a a a a
t t t t
o o o o
r r r r