Page 551 of 664

549
uuRefueling uHow to Refuel
Driving
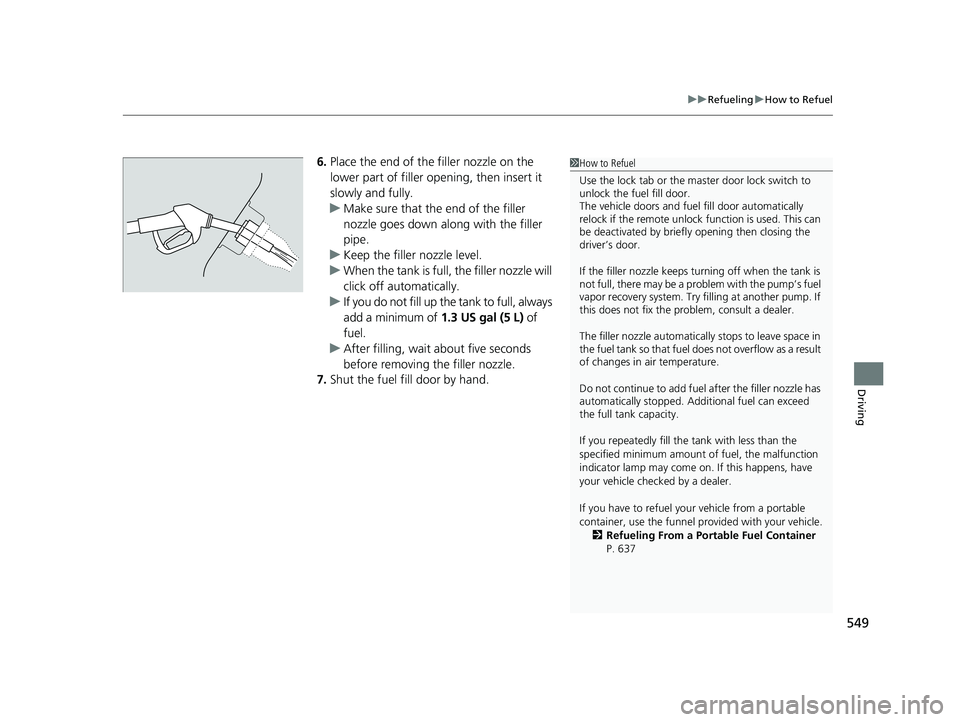
6. Place the end of the filler nozzle on the
lower part of filler opening, then insert it
slowly and fully.
u Make sure that the end of the filler
nozzle goes down along with the filler
pipe.
u Keep the filler nozzle level.
u When the tank is full, the filler nozzle will
click off automatically.
u If you do not fill up the tank to full, always
add a minimum of 1.3 US gal (5 L) of
fuel.
u After filling, wait about five seconds
before removing the filler nozzle.
7. Shut the fuel fill door by hand.1How to Refuel
Use the lock tab or the ma ster door lock switch to
unlock the fuel fill door.
The vehicle doors and fuel fill door automatically
relock if the remote unlock function is used. This can
be deactivated by briefl y opening then closing the
driver’s door.
If the filler nozzle keeps tu rning off when the tank is
not full, there may be a pr oblem with the pump’s fuel
vapor recovery system. Try fi lling at another pump. If
this does not fix the problem, consult a dealer.
The filler nozzle automatically stops to leave space in
the fuel tank so that fuel does not overflow as a result
of changes in air temperature.
Do not continue to add fuel after the filler nozzle has
automatically stopped. Addi tional fuel can exceed
the full tank capacity.
If you repeatedly fill the tank with less than the
specified minimum amount of fuel, the malfunction
indicator lamp may come on. If this happens, have
your vehicle checked by a dealer.
If you have to refuel y our vehicle from a portable
container, use the funnel pr ovided with your vehicle.
2 Refueling From a Portable Fuel Container
P. 637
23 HR-V-313V06000_01.book 549 ページ 2022年4月4日 月曜日 午前10時49分
Page 570 of 664

568
uuMaintenance Under the Hood uChanging the Engine Oil and Oil Filter
Maintenance
Changing the Engine Oil and Oil Filter
You must change the engine oil and oil f ilter regularly in order to maintain the
engine’s lubrication. The engine may be damaged if they are not changed regularly.
Change the oil and filter in accordance with the maintenance message on the driver
information interface. 1.Run the engine until it reaches normal
operating temperature, and then turn the
engine off.
2. Open the hood and remove the engine oil
fill cap.
3. Remove the Phillips-head screws and
slotted head screws by turning 90°
counter-clockwise on the undercarriage
and remove the under cover.
4. Remove the drain bolt and washer from
the bottom of the engine, and drain the
oil into a suitable container.1Changing the Engine Oil and Oil Filter
NOTICE
You may damage the environment if you do not
dispose of the oil in a suitable way. If you are
changing the oil by yourself , appropriately dispose of
the used oil. Put the oil in a sealed container and take
it to a recycling center. Do not throw the oil away
into a garbage can or onto the ground.
Under
Cover
Washer
Drain Bolt
23 HR-V-313V06000_01.book 568 ページ 2022年4月4日 月曜日 午前10時49分
Page 571 of 664

569
uuMaintenance Under the Hood uChanging the Engine Oil and Oil Filter
Maintenance
5. Remove the oil filter and dispose of the
remaining oil.
6. Check that the filter gasket is not stuck to
the engine contact surface.
u If it is stuck, you must detach it.
7. Wipe away dirt and dust adhering to the
contact surface of the engine block, and
install a new oil filter.
u Apply a light coat of new engine oil to
the filter gasket.
8. Put a new washer on the drain bolt, then
reinstall the drain bolt.
u Tightening torque:
30 lbf∙ft (40 N∙m, 4.0 kgf∙m)
9. Pour the recommended engine oil into the
engine.
u Engine oil change capacity (including
filter):
4.4 US qt (4.2 L)
10. Reinstall the engine oil fill cap securely and
start the engine.
11. Run the engine for a few minutes, and
then check that there is no leak from the
drain bolt or oil filter.
12. Stop the engine, wait for three minutes,
and then check the oil level on the
dipstick.
u If necessary, add more engine oil.1Changing the Engine Oil and Oil Filter
You will need a special wrench to replace the oil
filter. You can buy this wrench from a dealer.
When installing the new oil filter, follow the
instructions supplied with the oil filter.
Reinstall the engine oil fill cap. Start the engine. If the
Engine oil pressure low warning appears, turn off
the engine, and check your work.
Oil Filter
23 HR-V-313V06000_01.book 569 ページ 2022年4月4日 月曜日 午前10時49分
Page 573 of 664
571
uuMaintenance Under the Hood uEngine Coolant
Maintenance
1. Make sure the engine and radiator are
cool.
2. Turn the radiator cap 1/8 turn counter-
clockwise and relieve any pressure in the
cooling system. Do not push the cap down
when turning.
3. Push down and turn the radiator cap
counter-clockwise to remove it.
4. The coolant level should be up to the base
of the filler neck. Add coolant if it is low.
5. Put the radiator cap back on, and tighten it
fully.
■Radiator1Radiator
NOTICE
Pour the fluid slowly and ca refully so you do not spill
any. Clean up any spills immediately; they can
damage components in the engine compartment.
Radiator Cap
23 HR-V-313V06000_01.book 571 ページ 2022年4月4日 月曜日 午前10時49分
Page 580 of 664
578
uuChecking and Maintaining Wiper Blades uChanging the Front Wiper Blade
Maintenance
4. Depress the lock tab, then slide the wiper
blade off the wiper arm.
5. Slide the new wiper blade onto the wiper
arm until it clicks into place.
6. Lower both wiper arms.
7. Set the power mode to ON, then set the
wiper switch to the MIST position once.
u The wiper arms return to the standard
position.
Tab
23 HR-V-313V06000_01.book 578 ページ 2022年4月4日 月曜日 午前10時49分
Page 594 of 664

592
Maintenance
Battery
Checking the Battery
The condition of the battery is monitored by a
sensor located on the negative terminal of the
battery. If there is a problem with this sensor,
the driver information interface will display a
warning message. If this happens, have your
vehicle inspected by a dealer.
Check the battery te rminals for corrosion
monthly.
If your vehicle’s battery is disconnected or goes dead:
• The audio system is disabled.
2 Audio System Theft Protection P. 214
•The clock resets.
2 Clock P. 134
•
The immobilizer system needs to be reset.
2 Immobilizer System Indicator P. 97
1Battery
WARNING: Battery post, terminals,
and related accessories contain lead
and lead compounds.
Wash your hands after handling.
When replacing the battery, the replacement must be
of the same specifications.
Consult a dealer for more information.
3WARNING
The battery gives off explosive hydrogen
gas during normal operation.
A spark or flame can cause the battery to
explode with enough force to kill or
seriously hurt you.
When conducting any battery
maintenance, wear prot ective clothing and
a face shield, or have a skilled technician do
it.
Canadian models only
23 HR-V-313V06000_01.book 592 ページ 2022年4月4日 月曜日 午前10時49分
Page 599 of 664

597
uuCleaning uInterior Care
Maintenance
Wipe using a glass cleaner.
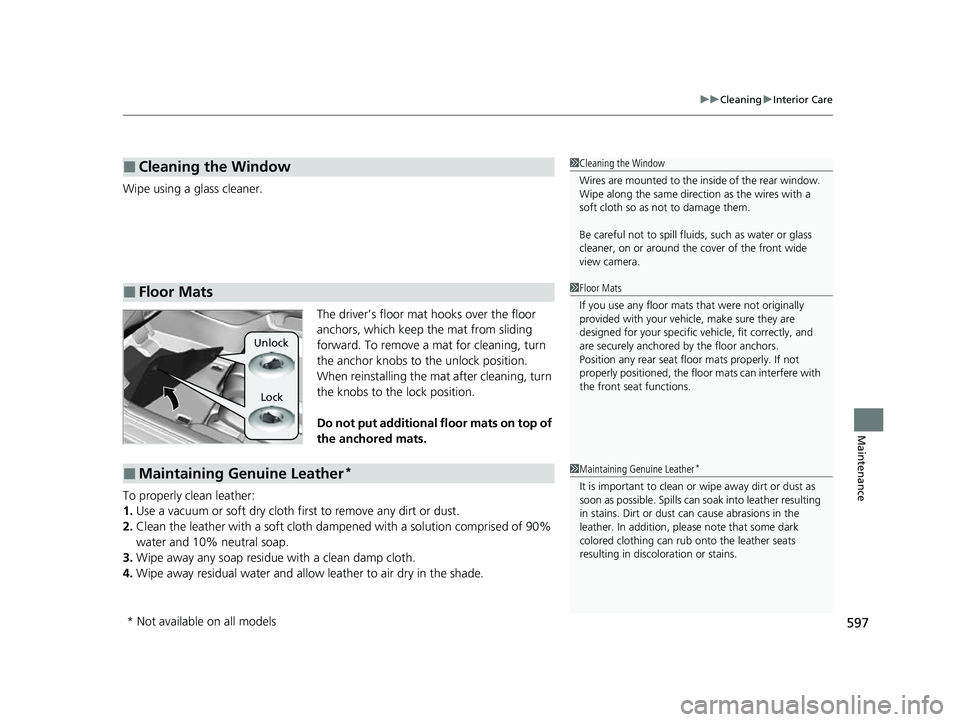
The driver’s floor mat hooks over the floor
anchors, which keep the mat from sliding
forward. To remove a mat for cleaning, turn
the anchor knobs to the unlock position.
When reinstalling the mat after cleaning, turn
the knobs to the lock position.
Do not put additional floor mats on top of
the anchored mats.
To properly clean leather:
1. Use a vacuum or soft dry cloth first to remove any dirt or dust.
2. Clean the leather with a soft cloth dampen ed with a solution comprised of 90%
water and 10% neutral soap.
3. Wipe away any soap residu e with a clean damp cloth.
4. Wipe away residual water and allo w leather to air dry in the shade.
■Cleaning the Window
■Floor Mats
1Cleaning the Window
Wires are mounted to the in side of the rear window.
Wipe along the same direct ion as the wires with a
soft cloth so as not to damage them.
Be careful not to spill fluids, such as water or glass
cleaner, on or around the cover of the front wide
view camera.
1 Floor Mats
If you use any floor mats that were not originally
provided with your vehicle, make sure they are
designed for your specific ve hicle, fit correctly, and
are securely anchored by the floor anchors.
Position any rear seat floor mats properly. If not
properly positioned, the floor mats can interfere with
the front seat functions.
Lock
Unlock
■Maintaining Genuine Leather*1
Maintaining Genuine Leather*
It is important to clean or wipe away dirt or dust as
soon as possible. Spills can soak into leather resulting
in stains. Dirt or dust ca n cause abrasions in the
leather. In addition, pl ease note that some dark
colored clothing can rub onto the leather seats
resulting in discol oration or stains.
* Not available on all models
23 HR-V-313V06000_01.book 597 ページ 2022年4月4日 月曜日 午前10時49分
Page 600 of 664

598
uuCleaning uExterior Care
Maintenance
Exterior Care
Dust off the vehicle body after you drive.
Regularly inspect your vehi cle for scratches on painted surfaces. A scratch on a
painted surface can result in body rust. If you find a scratch, promptly repair it.
Wash the vehicle regularly. Wash more frequently when driving in the following
conditions:
• If driving on roads with road salt.
• If driving in coastal areas.
• If tar, soot, bird droppings, insects, or tree sap are stuck to painted surfaces.
• Make sure to follow the instructions indicated on the automated car wash.
• Fold in the door mirrors.
• Keep sufficient distance between the cleaning nozzl e and the vehicle body.
• Take particular care around the windows. St anding too close may cause water to
enter the vehicle interior.
• Do not spray high pressure water directly into the engine compartment. Instead,
use low pressure water and a mild detergent.
• Do not spray water directly onto the ca mera or the area around it. Water may
enter the lens and cause the camera to malfunction.
■Washing the Vehicle
■Using an Automated Car Wash
■Using High Pressure Cleaners
1 Washing the Vehicle
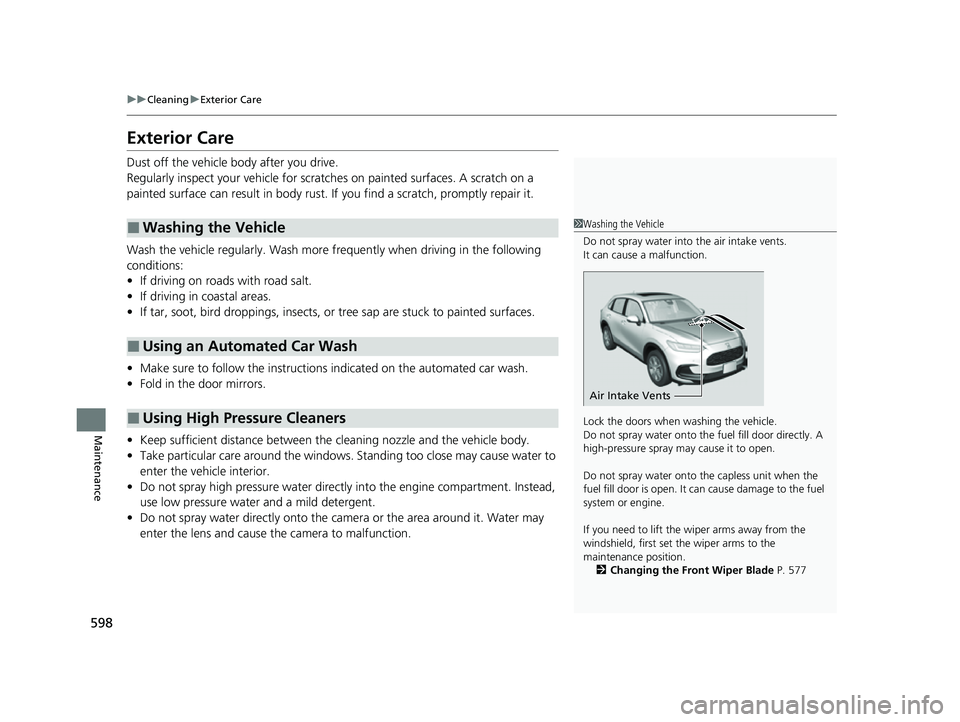
Do not spray water into the air intake vents.
It can cause a malfunction.
Lock the doors when washing the vehicle.
Do not spray water onto the fuel fill door directly. A
high-pressure spray ma y cause it to open.
Do not spray water onto the capless unit when the
fuel fill door is open. It ca n cause damage to the fuel
system or engine.
If you need to lift the wiper arms away from the
windshield, first set the wiper arms to the
maintenance position. 2 Changing the Front Wiper Blade P. 577
Air Intake Vents
23 HR-V-313V06000_01.book 598 ページ 2022年4月4日 月曜日 午前10時49分