Page 179 of 664

177
uuOperating the Switches Around the Steering Wheel uAdjusting the Steering Wheel
Controls
Adjusting the Steering Wheel
The steering wheel height and distance from your body can be adjusted so that you
can comfortably grip the steering wheel in an appropriate driving posture.
1. While the vehicle is stopped, push the
steering wheel adjustment lever down.
u The steering wheel adjustment lever is
under the steering column.
2. Move the steering wheel up or down, and
in or out.
u Make sure you can see the instrument
panel gauges and indicators.
3. Pull the steering wheel adjustment lever up
to lock the steering wheel in position.
u After adjusting the position, make sure
you have securely locked the steering
wheel in place by trying to move it up,
down, in, and out.1Adjusting the Steering Wheel
3WARNING
Adjusting the steering wheel position while
driving may cause you to lose control of the
vehicle and be seriously injured in a crash.
Adjust the steering wheel only when the
vehicle is stopped.
To adjustTo lock
Lever
23 HR-V-313V06000_01.book 177 ページ 2022年4月4日 月曜日 午前10時49分
Page 182 of 664

180
Controls
Seats
Front Seats
Adjust the driver’s seat as far back as possible
while allowing you to maintain full control of
the vehicle. You should be able to sit upright,
well back in the seat and be able to
adequately press the pedals without leaning
forward, and grip the steering wheel
comfortably. The passenger’s seat should be
adjusted in a similar manner, so that it is as far
back from the front airbag in the dashboard
as possible.
■Adjusting the driver’s power seat*
1Seats
Always make seat adjustments before driving.
Move back.
Allow sufficient
space.
■Adjusting the Seat Positions
1
Front Seats
The National Highway Traffic Safety Administration
and Transport Cana da recommend that drivers allow
at least 10 inches (25 cm) between the center of the
steering wheel and the chest.
3WARNING
Sitting too close to a front airbag can result
in serious injury or death if the front
airbags inflate.
Always sit as far back from the front
airbags as possible while maintaining
control of the vehicle.
1 Adjusting the Seat Positions
Once a seat is adjusted co rrectly, rock it back and
forth to make sure it is locked in position.
Horizontal
Position
Adjustment
Height
Adjustment Seat-back
Angle
Adjustment
* Not available on all models
23 HR-V-313V06000_01.book 180 ページ 2022年4月4日 月曜日 午前10時49分
Page 185 of 664

183
uuSeats uRear Seats
Continued
Controls
Rear Seats
The rear seats can be folded down separa tely to allow for additional storage space.
■To fold down the seat
1. Store the center seat belt first. Insert the
latch plate into the slot on the side of the
anchor buckle.
2. Retract the seat belt into the holder on the
ceiling.
2 Seat Belt with Detachable Anchor P. 47
3.Lower the head restraint to its lowest
position.
4. Pull the release lever and fold down the
seat-back.
To return the seat to the original position, pull
up the seat-back in the upright position.
■Folding Down the Rear Seats1 Folding Down the Rear Seats
Make sure all items in the cargo area or items
extending to the rear seats are properly
secured. Loose items can fly forward if you have
to brake hard.
Remove any items from th e rear seat cushion and
floor before you fold down the rear seat.
To lock the seat-back upri ght, push it backwards until
it locks.
Make sure the seat-back, head restraints and seat
cushion are securely latche d back into place before
driving. Also, make sure all rear shoulder belts are
positioned in front of the seat-back, and the center
shoulder belt is re-posit ioned in the holding slot.
Make sure that the folded seat-back does not press
against the front passenger seat, as this can cause the
weight sensors in the front passenger seat to work
improperly.
2 Passenger Airbag Off Indicator P. 67
Anchor
Buckle
Latch Plate
Release Lever
23 HR-V-313V06000_01.book 183 ページ 2022年4月4日 月曜日 午前10時49分
Page 189 of 664

187
uuSeats uHead Restraints
Controls
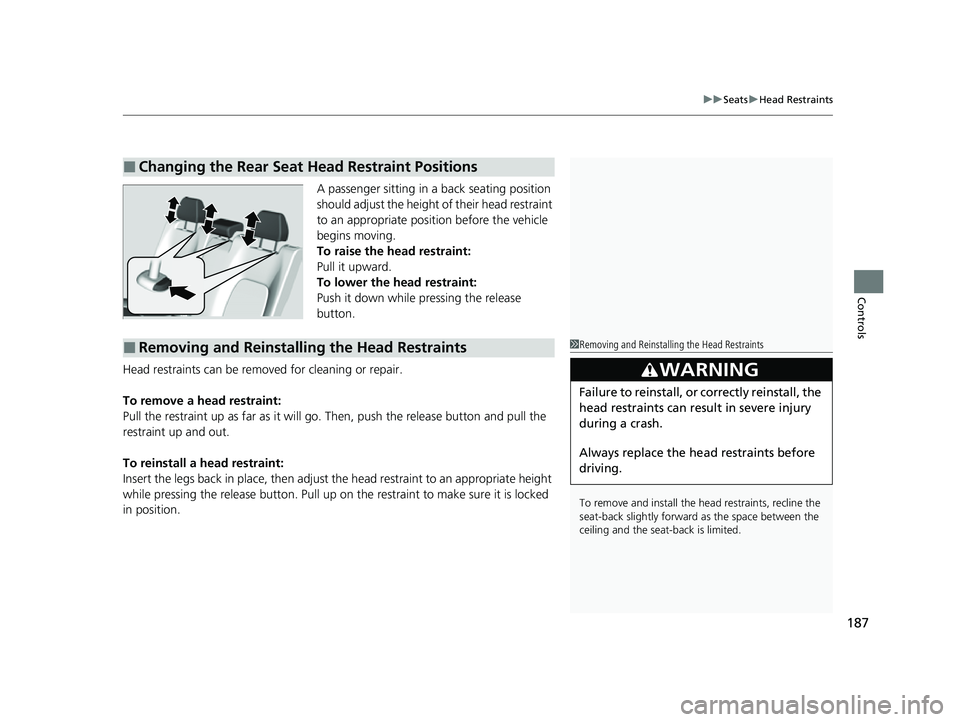
A passenger sitting in a back seating position
should adjust the height of their head restraint
to an appropriate position before the vehicle
begins moving.
To raise the head restraint:
Pull it upward.
To lower the head restraint:
Push it down while pressing the release
button.
Head restraints can be removed for cleaning or repair.
To remove a head restraint:
Pull the restraint up as far as it will go. Then, push the release button and pull the
restraint up and out.
To reinstall a head restraint:
Insert the legs back in place, then adjust the head restraint to an appropriate height
while pressing the release button. Pull up on the restraint to make sure it is locked
in position.
■Changing the Rear Seat Head Restraint Positions
■Removing and Reinstalling the Head Restraints1 Removing and Reinstalling the Head Restraints
To remove and install the head restraints, recline the
seat-back slightly forward as the space between the
ceiling and the seat -back is limited.
3WARNING
Failure to reinstall, or correctly reinstall, the
head restraints can result in severe injury
during a crash.
Always replace the he ad restraints before
driving.
23 HR-V-313V06000_01.book 187 ページ 2022年4月4日 月曜日 午前10時49分
Page 191 of 664

189Continued
Controls
Interior Convenience Items
Interior Lights
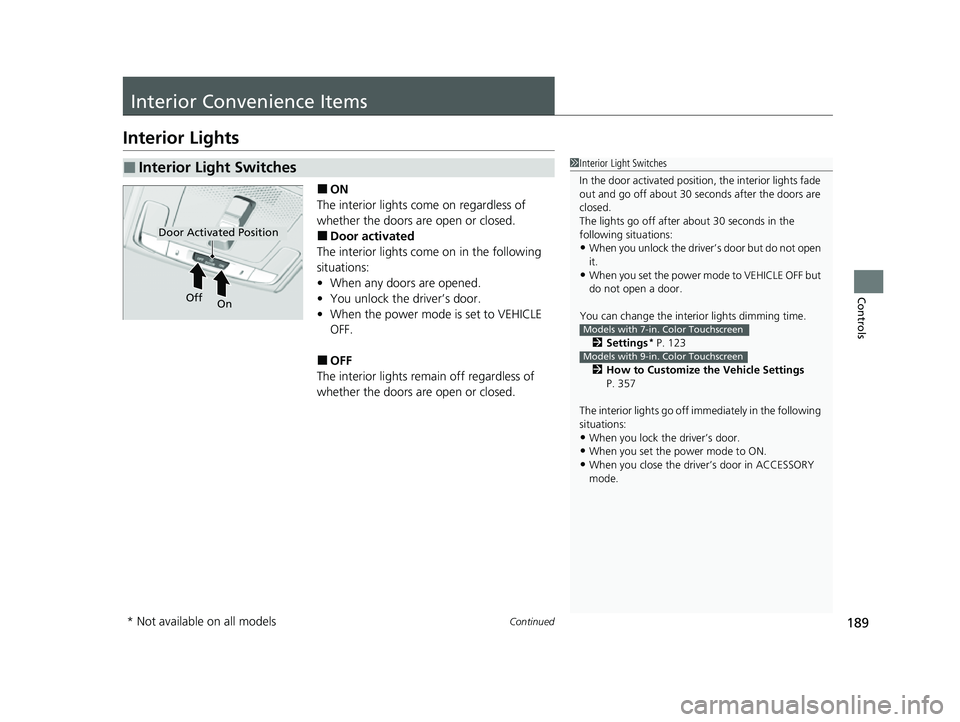
■ON
The interior lights come on regardless of
whether the doors are open or closed.
■Door activated
The interior lights come on in the following
situations:
• When any doors are opened.
• You unlock the driver’s door.
• When the power mode is set to VEHICLE
OFF.
■OFF
The interior lights remain off regardless of
whether the doors are open or closed.
■Interior Light Switches1 Interior Light Switches
In the door activated position, the interior lights fade
out and go off about 30 seconds after the doors are
closed.
The lights go off after about 30 seconds in the
following situations:
•When you unlock the driver’s door but do not open
it.
•When you set the power mode to VEHICLE OFF but
do not open a door.
You can change the interi or lights dimming time.
2 Settings
* P. 123
2 How to Customize the Vehicle Settings
P. 357
The interior lights go off im mediately in the following
situations:
•When you lock the driver’s door.
•When you set the power mode to ON.
•When you close the driver’s door in ACCESSORY
mode.
Models with 7-in. Color Touchscreen
Models with 9-in. Color Touchscreen
Door Activated Position
Off
On
* Not available on all models
23 HR-V-313V06000_01.book 189 ページ 2022年4月4日 月曜日 午前10時49分
Page 221 of 664

219
Features
Audio System Basic Operation
To use the audio system, the power mode must be in ACCESSORY or ON.Use the selector knob or MENU button to
access some au dio functions.
Press to switch between the normal and
extended display fo r some functions.
Selector knob: Rotate left or right to scroll
through the available choices. Press to set
your selection.
MENU button: Press to display the menu
screen. (Back) button: Press to go back to the
previous display.
Models with 7-in. Color Touchscreen1 Audio System Basic Operation
These indications are used to show how to operate
the selector knob.
Rotate to select.
Press to enter.
Menu Items 2 Adjusting the Clock P. 134
2 Adjusting the Sound P. 220
2 Display Setup P. 221
2 Customized Features P. 337
Press the buttons on the steering wheel to change
any audio setting. 2 Audio Remote Controls P. 215
Touchscreen operation
•Use simple gestures - in cluding touching, swiping
and scrolling - to operate certain audio functions.
•Some items may be grayed out during driving to
reduce the potential for distraction.
•You can select them when the vehicle is stopped.•Wearing gloves may limit or prevent touchscreen
response.
You can change the touchs creen sensitivity setting.
2 Customized Features P. 337
(Back)
Button
Selector Knob
MENU Button
Menu Display
23 HR-V-313V06000_01.book 219 ページ 2022年4月4日 月曜日 午前10時49分
Page 250 of 664
248
uuAudio System Basic Operation uAudio/Information Screen
Features
■Trip Computer
Displays the trip computer information.
• Current Drive tab: Displays the current trip information.
• Trip A /Trip B tab: Displays information for the current and three previous drives.
The information is stored ever y time you reset Trip A/B.
To reset the Trip A/B, select Settings, then select Delete Trip History .
To change the setting of how to reset Trip A/B, select Settings, then select “Trip A”
Reset Timing or “Trip B” Reset Timing .
■System Updates
Updates the software versi on of the audio system.
2System Updates P. 257
■Clock
Displays the clock.
■Smart Shortcuts
Displays the Smart Shortcuts screen.
2Smart Shortcuts P. 297
■Display Mode
Displays the brightness bar.
■Compass*
Displays the compass screen.
* Not available on all models
23 HR-V-313V06000_01.book 248 ページ 2022年4月4日 月曜日 午前10時49分
Page 251 of 664

Continued249
uuAudio System Basic Operation uAudio/Information Screen
Features
You can change, store, and delete the wallpaper on the audio/ information screen.
■Import wallpaper
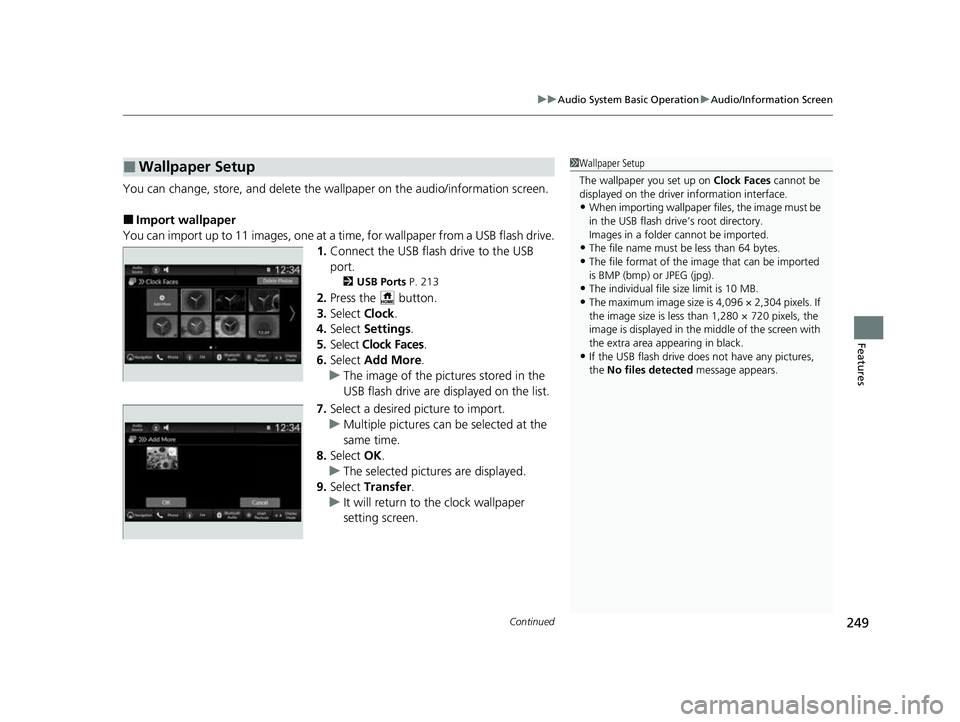
You can import up to 11 images, one at a ti me, for wallpaper from a USB flash drive.
1. Connect the USB flash drive to the USB
port.
2 USB Ports P. 213
2.Press the button.
3. Select Clock.
4. Select Settings .
5. Select Clock Faces .
6. Select Add More .
u The image of the pictures stored in the
USB flash drive are displayed on the list.
7. Select a desired picture to import.
u Multiple pictures can be selected at the
same time.
8. Select OK.
u The selected pictures are displayed.
9. Select Transfer .
u It will return to the clock wallpaper
setting screen.
■Wallpaper Setup1Wallpaper Setup
The wallpaper you set up on Clock Faces cannot be
displayed on the driver information interface.
•When importing wallpaper f iles, the image must be
in the USB flash drive’s root directory.
Images in a folder cannot be imported.
•The file name must be less than 64 bytes.
•The file format of the im age that can be imported
is BMP (bmp) or JPEG (jpg).
•The individual file size limit is 10 MB.
•The maximum image size is 4,096 × 2,304 pixels. If
the image size is less than 1,280 × 720 pixels, the
image is displayed in the middle of the screen with
the extra area appearing in black.
•If the USB flash drive doe s not have any pictures,
the No files detected message appears.
23 HR-V-313V06000_01.book 249 ページ 2022年4月4日 月曜日 午前10時49分