Page 213 of 840

Continued211
uuOperating the Switches Around the Steering Wheel uAuto High-Beam
Controls
■Automatic switching between high-beam and low-beam
When the auto high-beam indicator comes on, the headlights switch between high
beam and low beam based on the following conditions.1 How to Use the Auto High-Beam
In the following cases, th e auto high-beam system
may not switch the head lights properly or the
switching timing may be ch anged. In case of the
automatic switching operation does not fit for your
driving habits, please swit ch the headlights manually.
•The brightness of the lights from the preceding or
oncoming vehicle is intense or poor.
•Visibility is poor due to the weather (rain, snow,
fog, windshield frost, etc.).
•Surrounding light sources, such as street lights,
electric billboards and traf fic lights are illuminating
the road ahead.
•The brightness level of th e road ahead constantly
changes.
•The road is bumpy or has many curves.•A vehicle suddenly appears in front of you, or a
vehicle in front of you is not in the preceding or
oncoming direction.
•Your vehicle is tilted with a heavy load in the rear.•A traffic sign, mirror, or other reflective object
ahead is reflecting strong light toward the vehicle.
•The oncoming vehicle freq uently disappears under
roadside trees or be hind median barriers.
•The preceding or oncoming vehicle is a motorcycle,
bicycle, mobility scooter, or other small vehicle.
The auto high-beam system keeps the headlight low
beam when:
•Windshield wipers are op erating at a high speed.
•The camera has detected a dense fog.
High beam
All of the following conditions must
be met before the high beams turn
on.
●Your vehicle speed is 25 mph (40
km/h) or more.
●There are no preceding or
oncoming vehicles with
headlights or taillights turned on.
●There are few street lights on the
road ahead.
Low beam
One of the following conditions
must be met before the low beams
turn on.
●Your vehicle speed is 15 mph (24
km/h) or less.
●There is a preceding or oncoming
vehicles with headlights or
taillights turned on.
●There are many street lights on
the road ahead.
23 CIVIC HATCHBACK TYPE R-31T406100_03.book 211 ページ 2022年6月23日 木曜日 午後9時28分
Page 214 of 840
uuOperating the Switches Around the Steering Wheel uAuto High-Beam
212
Controls
■Manual switching between high-beam and low-beam
If you want to manually switch the headlights between high beam and low beam,
follow either of the proced ures below. Note that when you do this, the auto high-
beam indicator will turn off and the auto high-beam will be deactivated.
Using the lever:
Pull the lever toward you fo r flashing the high beams th en release it within about
one second while driving. u To reactivate the auto high-beam, pull the lever toward you for flashing the
high beams then release it while driving. The auto high-beam indicator will
come on.
Using the light switch:
Turn the light switch to .
u To reactivate the auto high-be am, turn the light switch to AUTO when the
lever is in the low beam position, the auto high-beam indicator will come on.1How to Use the Auto High-Beam
How to turn off the Auto High-Beam System
You can turn the auto high- beam system on and off.
2 Settings P. 138
2 Customized Features P. 390
If the Some driver assist systems cannot operate:
Camera temperature too high message appears:
•Use the climate control system to cool down the
interior and, if necessary, also use defroster mode
with the airflow directed toward the camera.
•Start driving the vehicle to lower the windshield
temperature, which cool s down the area around
the camera.
If the Some driver assist systems cannot operate:
Clean front windshield or poor viewing
conditions. message appears:
•Park your vehicle in a safe place, and make sure the
windshield is clean.
Clean the windshield if it is dirty. If the message
does not disappear after dr iven for a while, have
your vehicle checked by a dealer.
Models with A-type meter
Models with 9-in. Color Touchscreen
23 CIVIC HATCHBACK TYPE R-31T406100_03.book 212 ページ 2022年6月23日 木曜日 午後9時28分
Page 216 of 840
uuOperating the Switches Around the Steering Wheel uWipers and Washers
214
Controls
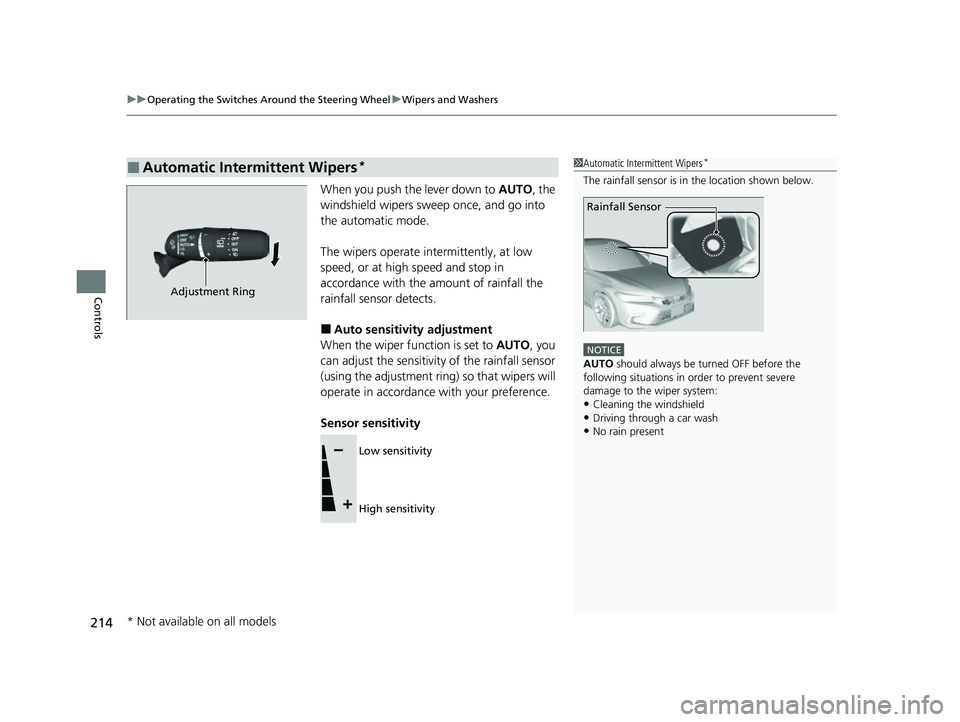
When you push the lever down to AUTO, the
windshield wipers sweep once, and go into
the automatic mode.
The wipers operate intermittently, at low
speed, or at high speed and stop in
accordance with the am ount of rainfall the
rainfall sensor detects.
■Auto sensitivity adjustment
When the wiper function is set to AUTO, you
can adjust the sensitivity of the rainfall sensor
(using the adjustment ring) so that wipers will
operate in accordance with your preference.
Sensor sensitivity
■Automatic Intermittent Wipers*1 Automatic Intermittent Wipers*
The rainfall sensor is in the location shown below.
NOTICE
AUTO should always be turned OFF before the
following situations in order to prevent severe
damage to the wiper system:
•Cleaning the windshield•Driving through a car wash
•No rain present
Rainfall Sensor
Adjustment Ring
Low sensitivity
High sensitivity
* Not available on all models
23 CIVIC HATCHBACK TYPE R-31T406100_03.book 214 ページ 2022年6月23日 木曜日 午後9時28分
Page 221 of 840
219
uuOperating the Switches Around the Steering Wheel uAdjusting the Steering Wheel
Controls
Adjusting the Steering Wheel
The steering wheel height and distance from your body can be adjusted so that you
can comfortably grip the steering wheel in an appropriate driving posture.
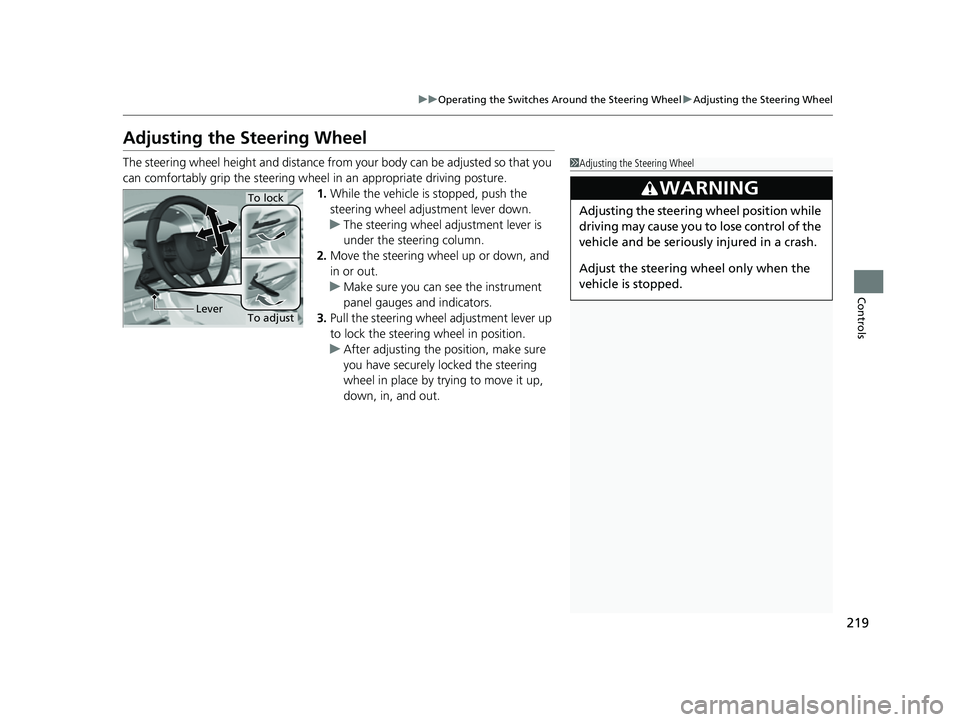
1. While the vehicle is stopped, push the
steering wheel adjustment lever down.
u The steering wheel adjustment lever is
under the steering column.
2. Move the steering wheel up or down, and
in or out.
u Make sure you can see the instrument
panel gauges and indicators.
3. Pull the steering wheel adjustment lever up
to lock the steering wheel in position.
u After adjusting the position, make sure
you have securely locked the steering
wheel in place by trying to move it up,
down, in, and out.1Adjusting the Steering Wheel
3WARNING
Adjusting the steering wheel position while
driving may cause you to lose control of the
vehicle and be seriously injured in a crash.
Adjust the steering wh eel only when the
vehicle is stopped.
To adjust
To lock
Lever
23 CIVIC HATCHBACK TYPE R-31T406100_03.book 219 ページ 2022年6月23日 木曜日 午後9時28分
Page 222 of 840

220
Controls
Mirrors
Interior Rearview Mirror
Adjust the angle of the rearview mirror when you are sitting in the correct driving
position.
Flip the tab to switch the position.
The night position will help to reduce the glare
from headlights behind you when driving
after dark.
When you are driving after dark, the
automatic dimming rearview mirror reduces
the glare from headlights behind you. Press
the AUTO button to turn this function on and
off. When activated, the AUTO indicator
comes on.
■Rearview Mirror with Day and Night Positions*
1 Mirrors
Keep the inside and out side mirrors clean and
adjusted for best visibility.
Adjust the mirrors befo re you start driving.
2 Front Seats P. 222
Tab
Daytime
Position Night
Position
■Automatic Dimming Rearview Mirror*1Automatic Dimming Rearview Mirror*
The auto dimming function cancels when the
transmission is in (R.
Sensor
Auto Button
* Not available on all models
23 CIVIC HATCHBACK TYPE R-31T406100_03.book 220 ページ 2022年6月23日 木曜日 午後9時28分
Page 224 of 840
222
Controls
Seats
Front Seats
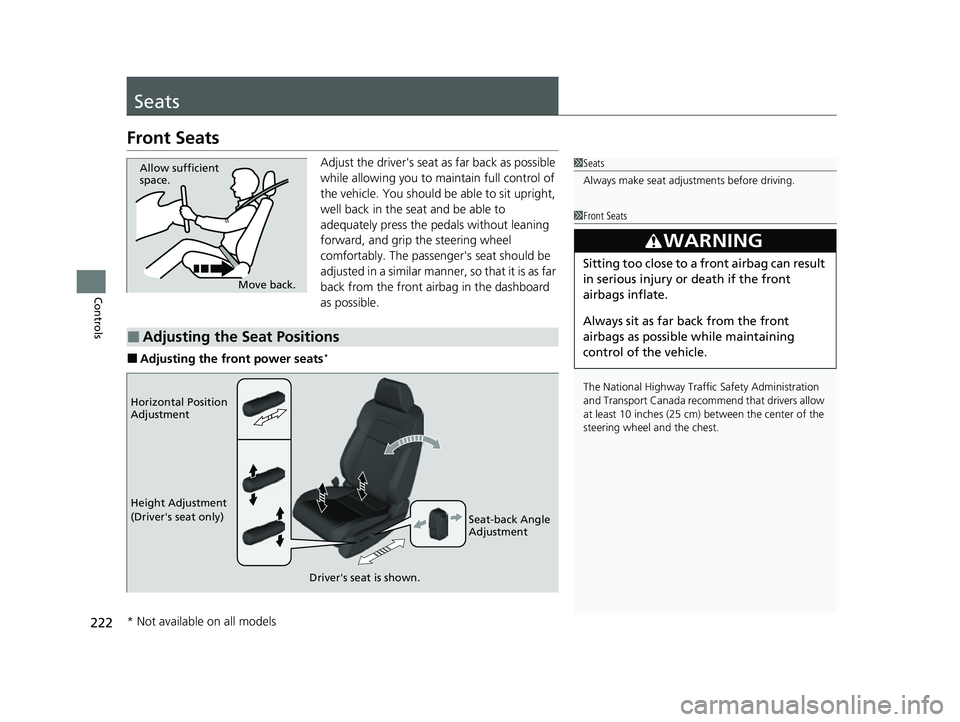
Adjust the driver's seat as far back as possible
while allowing you to maintain full control of
the vehicle. You should be able to sit upright,
well back in the seat and be able to
adequately press the pedals without leaning
forward, and grip the steering wheel
comfortably. The passenger's seat should be
adjusted in a similar manner, so that it is as far
back from the front airbag in the dashboard
as possible.
■Adjusting the front power seats*
1Seats
Always make seat adjustments before driving.
1Front Seats
The National Highway Traffic Safety Administration
and Transport Cana da recommend that drivers allow
at least 10 inches (25 cm) between the center of the
steering wheel and the chest.
3WARNING
Sitting too close to a front airbag can result
in serious injury or death if the front
airbags inflate.
Always sit as far back from the front
airbags as possible while maintaining
control of the vehicle.
Move back.
Allow sufficient
space.
■Adjusting the Seat Positions
Horizontal Position
Adjustment
Height Adjustment
(Driver's seat only)
Seat-back Angle
Adjustment
Driver's seat is shown.
* Not available on all models
23 CIVIC HATCHBACK TYPE R-31T406100_03.book 222 ページ 2022年6月23日 木曜日 午後9時28分
Page 230 of 840
228
uuSeats uHead Restraints
Controls
Head Restraints
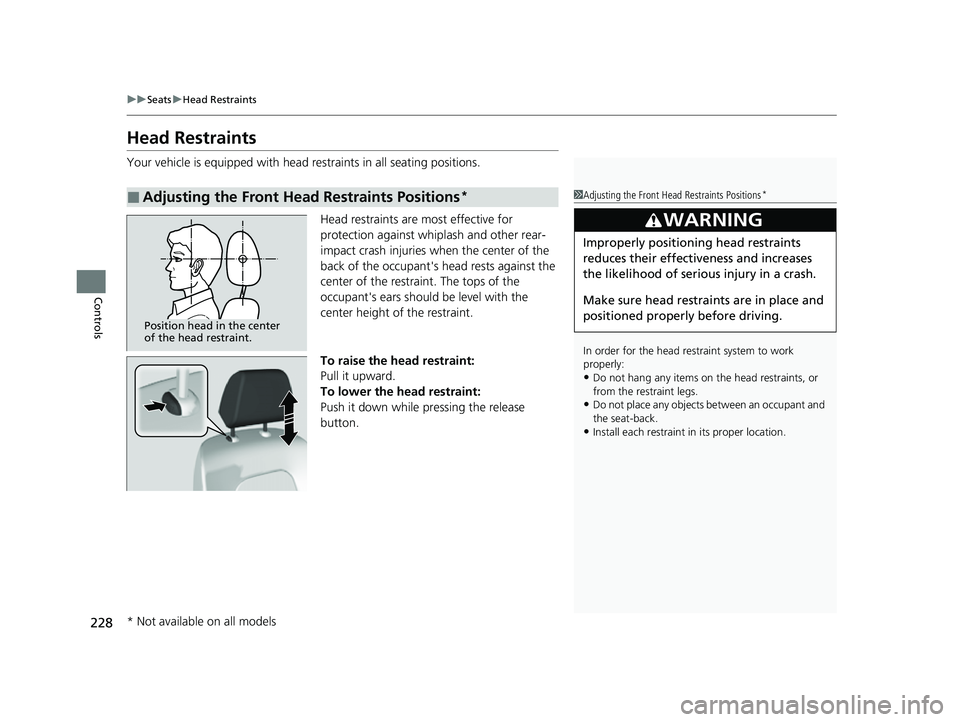
Your vehicle is equipped with head restraints in all seating positions.
Head restraints are most effective for
protection against whiplash and other rear-
impact crash injuries when the center of the
back of the occupant's head rests against the
center of the restraint. The tops of the
occupant's ears should be level with the
center height of the restraint.
To raise the head restraint:
Pull it upward.
To lower the head restraint:
Push it down while pressing the release
button.
■Adjusting the Front Head Restraints Positions*1Adjusting the Front Head Restraints Positions*
In order for the head restraint system to work
properly:
•Do not hang any items on the head restraints, or
from the restraint legs.
•Do not place any objects between an occupant and
the seat-back.
•Install each restraint in its proper location.
3WARNING
Improperly positioning head restraints
reduces their effectiveness and increases
the likelihood of serious injury in a crash.
Make sure head restraints are in place and
positioned properly before driving.
Position head in the center
of the head restraint.
* Not available on all models
23 CIVIC HATCHBACK TYPE R-31T406100_03.book 228 ページ 2022年6月23日 木曜日 午後9時28分
Page 231 of 840
229
uuSeats uHead Restraints
Controls
Head restraints can be removed for cleaning or repair.
To remove a head restraint:
Pull the restraint up as far as it will go. Then, push the release button and pull the
restraint up and out.
To reinstall a head restraint:
Insert the legs back in place, then adjust the head restraint to an appropriate height
while pressing the release button. Pull up on the restraint to make sure it is locked
in position.
■Removing and Reinstalling the Front Head Restraints*1 Removing and Reinstalling the Front Head Restraints*
3WARNING
Failure to reinstall or correctly reinstall, the
head restraints can result in severe injury
during a crash.
Always replace the he ad restraints before
driving.
* Not available on all models
23 CIVIC HATCHBACK TYPE R-31T406100_03.book 229 ページ 2022年6月23日 木曜日 午後9時28分