2023 FORD SUPER DUTY ignition
[x] Cancel search: ignitionPage 467 of 738
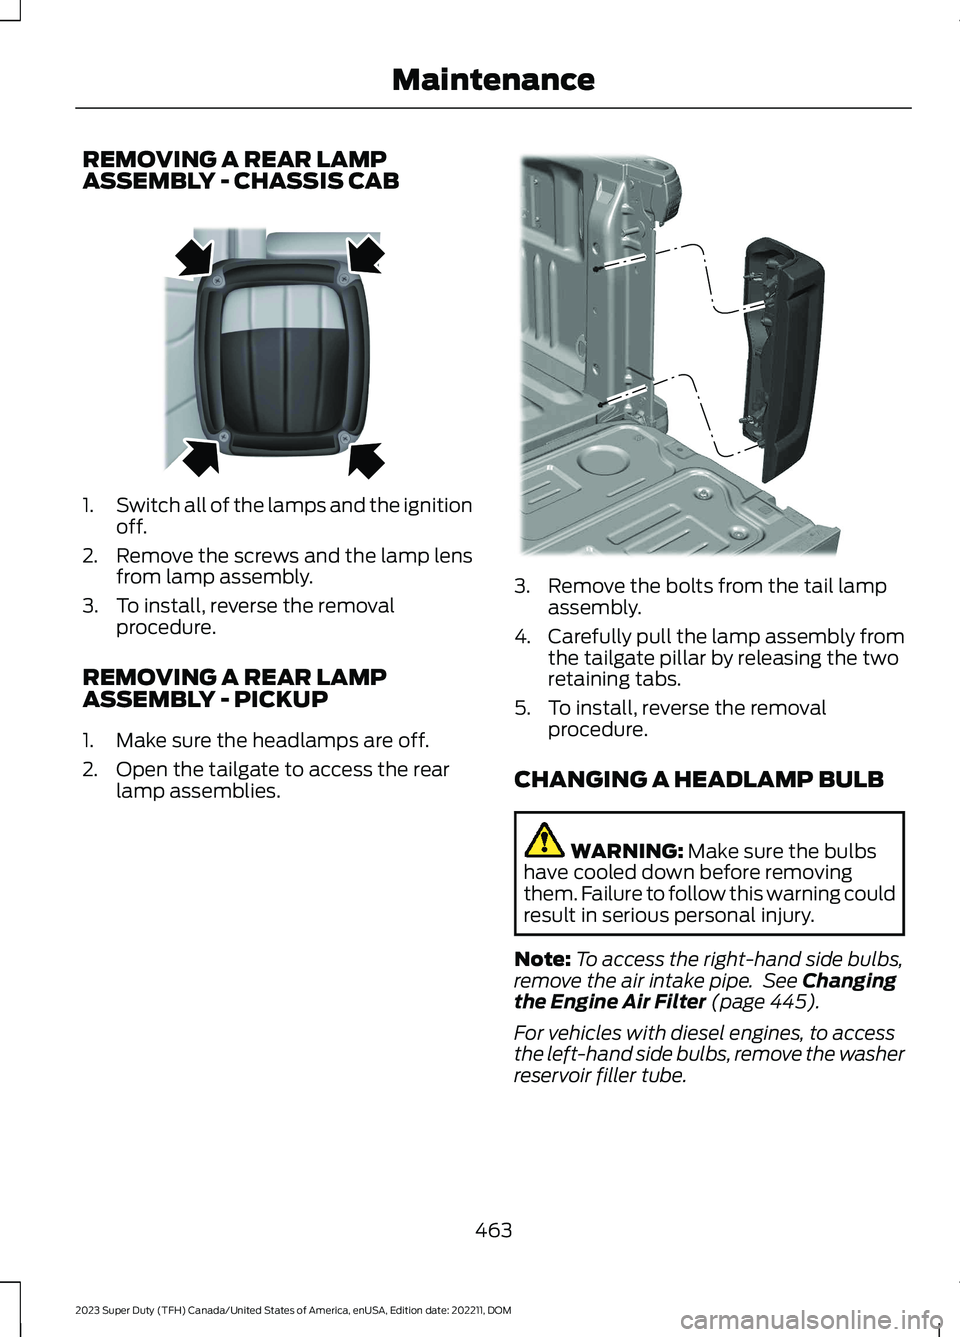
REMOVING A REAR LAMPASSEMBLY - CHASSIS CAB
1.Switch all of the lamps and the ignitionoff.
2.Remove the screws and the lamp lensfrom lamp assembly.
3.To install, reverse the removalprocedure.
REMOVING A REAR LAMPASSEMBLY - PICKUP
1.Make sure the headlamps are off.
2.Open the tailgate to access the rearlamp assemblies.
3.Remove the bolts from the tail lampassembly.
4.Carefully pull the lamp assembly fromthe tailgate pillar by releasing the tworetaining tabs.
5.To install, reverse the removalprocedure.
CHANGING A HEADLAMP BULB
WARNING: Make sure the bulbshave cooled down before removingthem. Failure to follow this warning couldresult in serious personal injury.
Note:To access the right-hand side bulbs,remove the air intake pipe. See Changingthe Engine Air Filter (page 445).
For vehicles with diesel engines, to accessthe left-hand side bulbs, remove the washerreservoir filler tube.
463
2023 Super Duty (TFH) Canada/United States of America, enUSA, Edition date: 202211, DOMMaintenanceE163828 E386885
Page 468 of 738
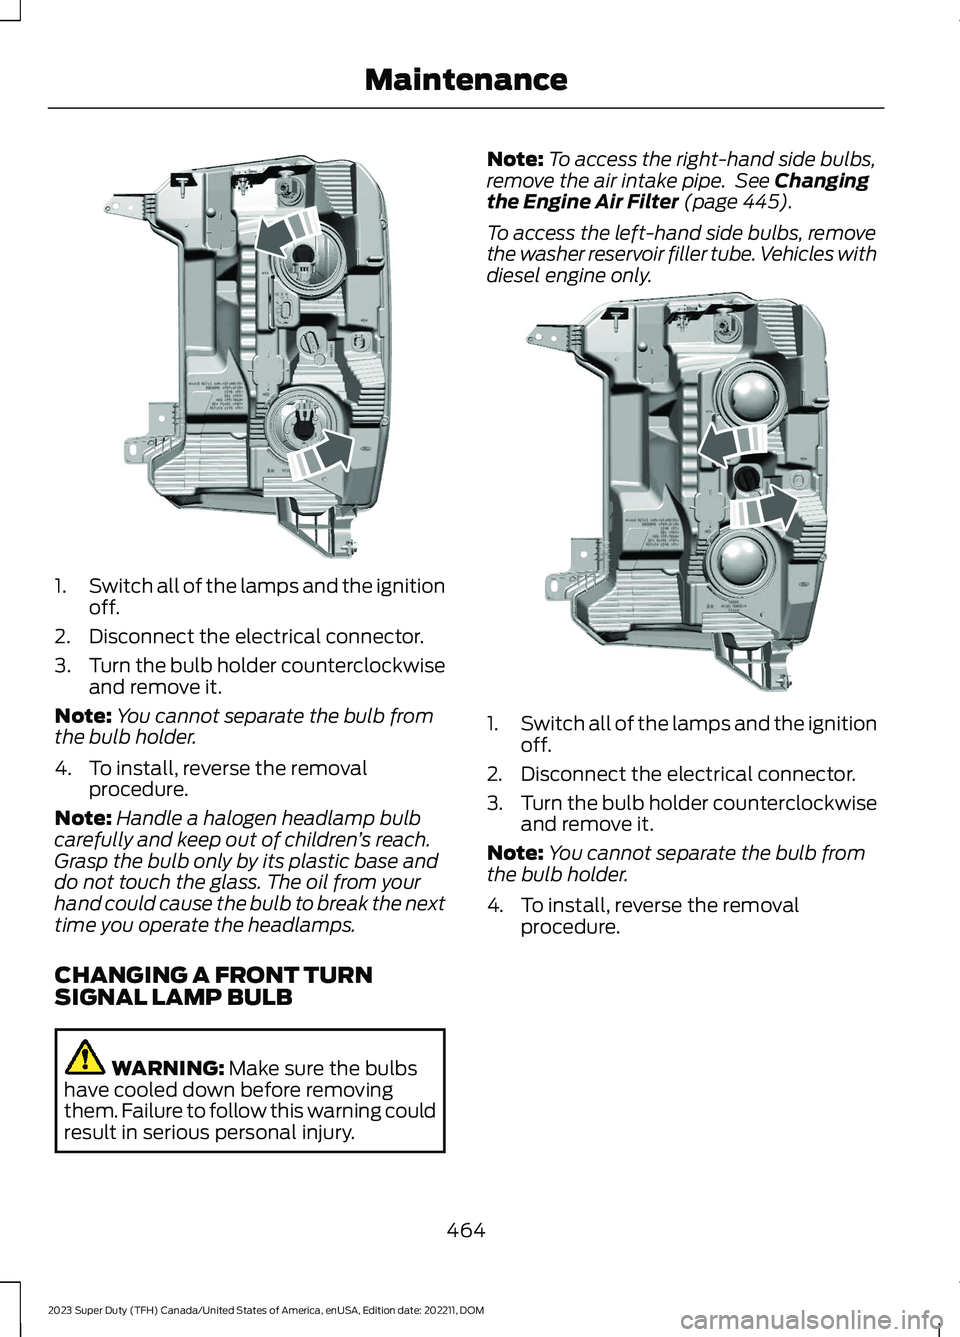
1.Switch all of the lamps and the ignitionoff.
2.Disconnect the electrical connector.
3.Turn the bulb holder counterclockwiseand remove it.
Note:You cannot separate the bulb fromthe bulb holder.
4.To install, reverse the removalprocedure.
Note:Handle a halogen headlamp bulbcarefully and keep out of children’s reach.Grasp the bulb only by its plastic base anddo not touch the glass. The oil from yourhand could cause the bulb to break the nexttime you operate the headlamps.
CHANGING A FRONT TURNSIGNAL LAMP BULB
WARNING: Make sure the bulbshave cooled down before removingthem. Failure to follow this warning couldresult in serious personal injury.
Note:To access the right-hand side bulbs,remove the air intake pipe. See Changingthe Engine Air Filter (page 445).
To access the left-hand side bulbs, removethe washer reservoir filler tube. Vehicles withdiesel engine only.
1.Switch all of the lamps and the ignitionoff.
2.Disconnect the electrical connector.
3.Turn the bulb holder counterclockwiseand remove it.
Note:You cannot separate the bulb fromthe bulb holder.
4.To install, reverse the removalprocedure.
464
2023 Super Duty (TFH) Canada/United States of America, enUSA, Edition date: 202211, DOMMaintenanceE386875 E386884
Page 471 of 738
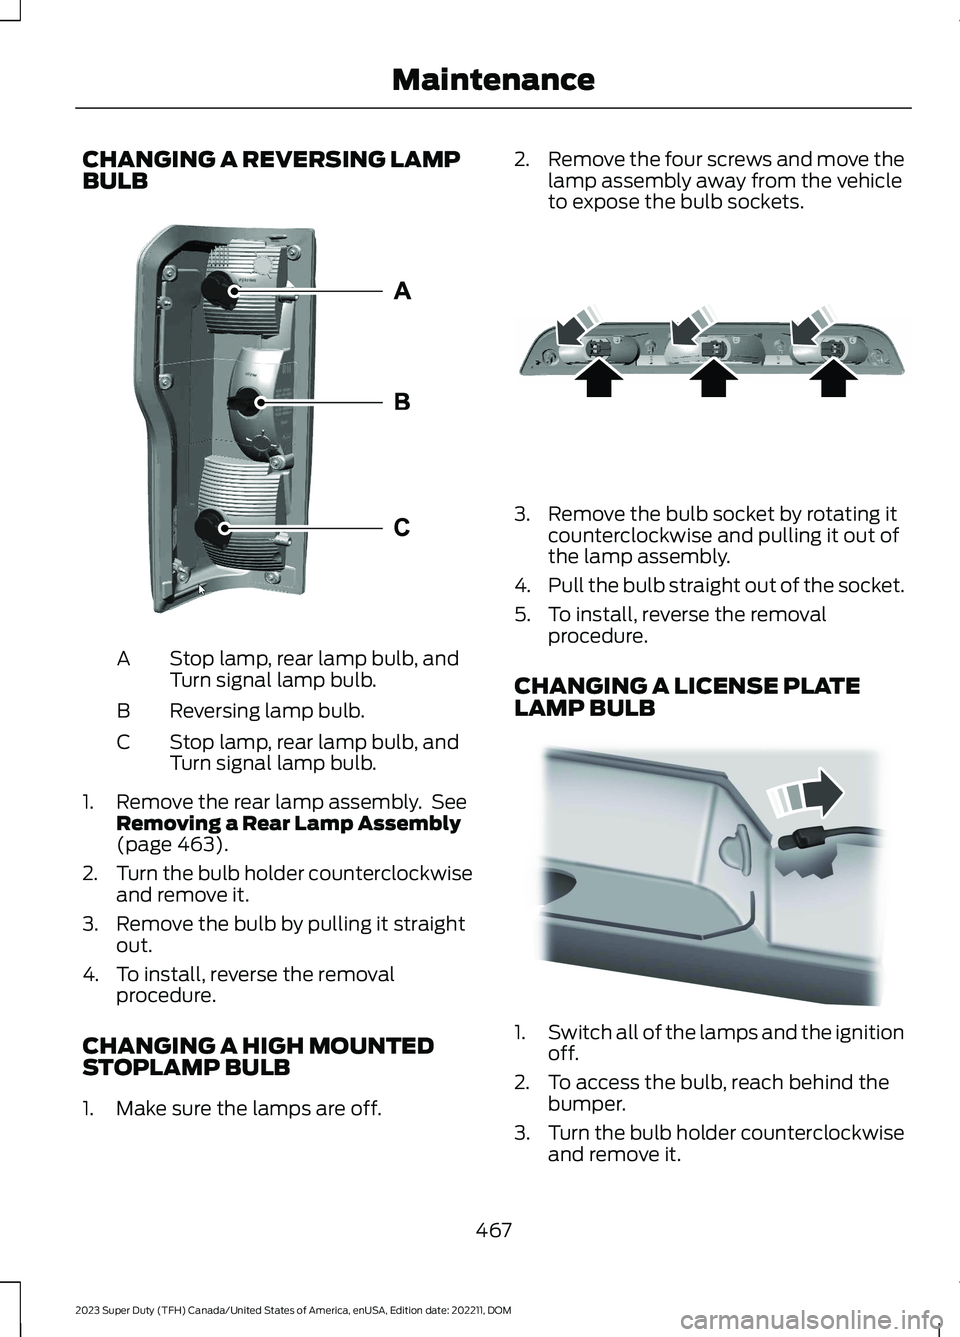
CHANGING A REVERSING LAMPBULB
Stop lamp, rear lamp bulb, andTurn signal lamp bulb.A
Reversing lamp bulb.B
Stop lamp, rear lamp bulb, andTurn signal lamp bulb.C
1.Remove the rear lamp assembly. SeeRemoving a Rear Lamp Assembly(page 463).
2.Turn the bulb holder counterclockwiseand remove it.
3.Remove the bulb by pulling it straightout.
4.To install, reverse the removalprocedure.
CHANGING A HIGH MOUNTEDSTOPLAMP BULB
1.Make sure the lamps are off.
2.Remove the four screws and move thelamp assembly away from the vehicleto expose the bulb sockets.
3.Remove the bulb socket by rotating itcounterclockwise and pulling it out ofthe lamp assembly.
4.Pull the bulb straight out of the socket.
5.To install, reverse the removalprocedure.
CHANGING A LICENSE PLATELAMP BULB
1.Switch all of the lamps and the ignitionoff.
2.To access the bulb, reach behind thebumper.
3.Turn the bulb holder counterclockwiseand remove it.
467
2023 Super Duty (TFH) Canada/United States of America, enUSA, Edition date: 202211, DOMMaintenanceE386886 E187290 E163830
Page 475 of 738

Cleaning Running Boards
We recommend that you clean yourrunning boards in the following way:
1.Use a clean, soft, non-abrasive spongeor brush to remove heavy deposits ofdirt.
2.Allow the cleaner to sit on the runningboard surface for the time specified.Rinse thoroughly with cold water.
3.For additional information andassistance, contact an authorizeddealer.
Note:Do not leave the cleaner on longerthan the recommended wait time. Thiscould damage the running boards.
Note:Do not allow the cleaner to dry unlessinstructed.
Note:Some car washes could damage therunning boards.
Note:Using non-recommended cleaners,harsh cleaning products, chrome wheelcleaners or abrasive materials coulddamage the running boards.
CLEANING THE ENGINECOMPARTMENT
Use a vacuum cleaner to remove debrisfrom the screen area below windshield.
Note:If you are not familiar with the partsaround the engine do not wash the enginecompartment. Avoid frequent enginewashes.
When washing the engine compartment:
•Never wash or rinse the engine while itis hot or running.
•Never wash or rinse any ignition coil,spark plug wire or spark plug well.
•Cover the battery, power distributionbox, and air filter assembly to preventwater damage.
Note:If your vehicle has an engine coverremove the cover before application ofshampoo and degreaser.
•Spray an approved engine shampooand degreaser on all parts that requirecleaning and rinse with water.
CLEANING STRIPES ORGRAPHICS
It is recommended to wash your vehicle byhand however, pressure washing may beused under the following conditions:
•Use a spray with a 40° wide sprayangle pattern.
•Keep the nozzle at a 12 in (30 cm)distance and 90° angle to yourvehicle's surface.
•Do not use water pressure higher than1,450 psi (10,000 kPa).
•Do not use water hotter than 167°F(75°C).
Note:Holding the pressure washer nozzleat an angle to the vehicle's surface maydamage graphics and cause the edges topeel away from the vehicle's surface.
CLEANING CAMERA LENSES ANDSENSORS
We recommend that you only uselukewarm or cold water and a soft clothto clean the camera lens and sensors.
Note:Do not pressure wash camera lensand sensors.
CLEANING THE UNDERBODY
Flush the complete underside of yourvehicle frequently. Keep body and doordrain holes free from packed dirt.
471
2023 Super Duty (TFH) Canada/United States of America, enUSA, Edition date: 202211, DOMVehicle Care
Page 507 of 738
VIEWING THE TIRE
PRESSURES
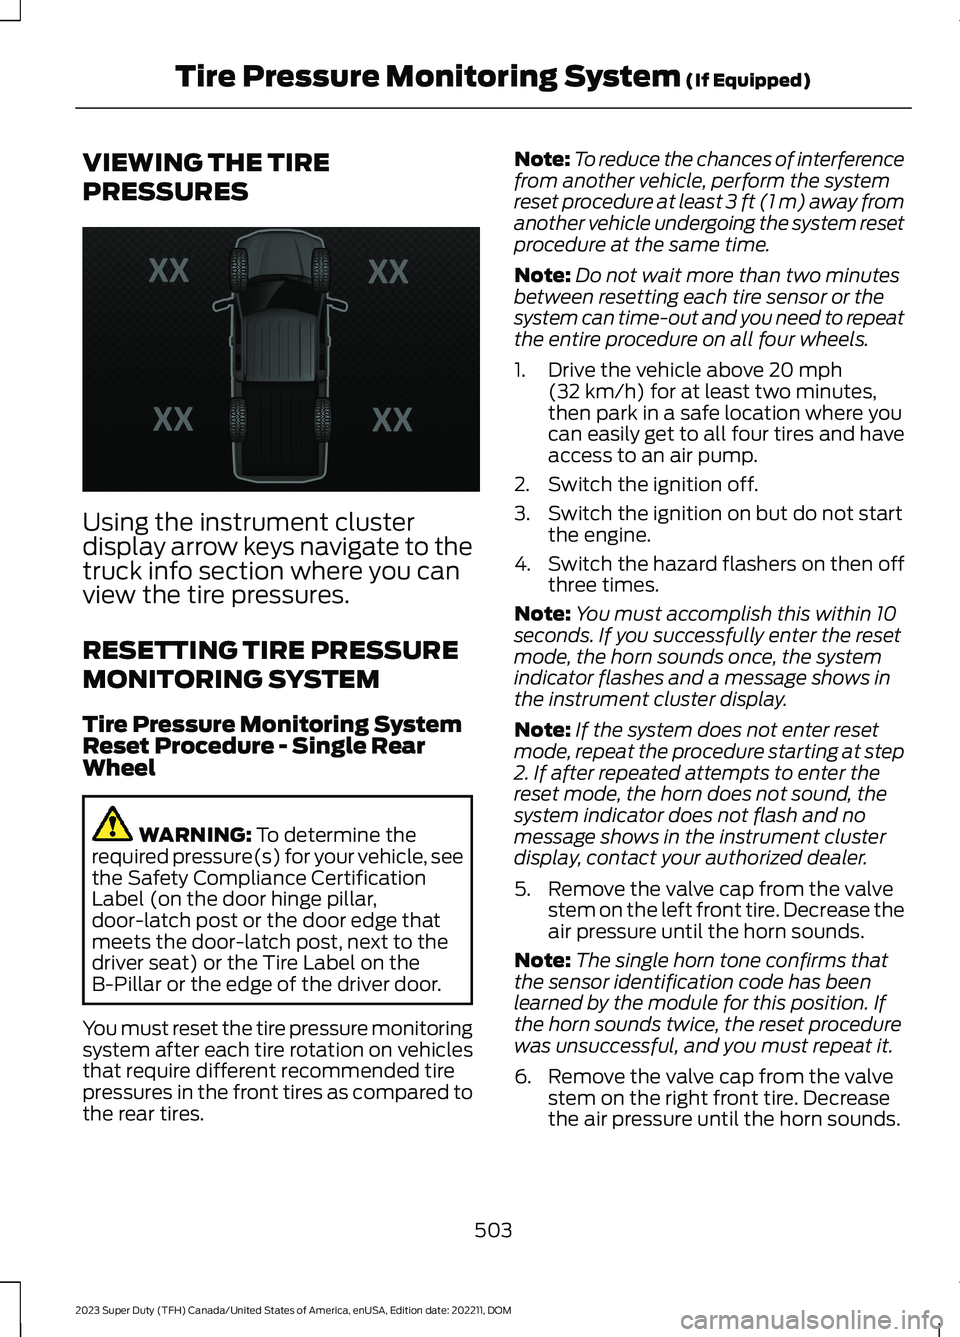
Using the instrument clusterdisplay arrow keys navigate to thetruck info section where you canview the tire pressures.
RESETTING TIRE PRESSURE
MONITORING SYSTEM
Tire Pressure Monitoring SystemReset Procedure - Single RearWheel
WARNING: To determine therequired pressure(s) for your vehicle, seethe Safety Compliance CertificationLabel (on the door hinge pillar,door-latch post or the door edge thatmeets the door-latch post, next to thedriver seat) or the Tire Label on theB-Pillar or the edge of the driver door.
You must reset the tire pressure monitoringsystem after each tire rotation on vehiclesthat require different recommended tirepressures in the front tires as compared tothe rear tires.
Note:To reduce the chances of interferencefrom another vehicle, perform the systemreset procedure at least 3 ft (1 m) away fromanother vehicle undergoing the system resetprocedure at the same time.
Note:Do not wait more than two minutesbetween resetting each tire sensor or thesystem can time-out and you need to repeatthe entire procedure on all four wheels.
1.Drive the vehicle above 20 mph(32 km/h) for at least two minutes,then park in a safe location where youcan easily get to all four tires and haveaccess to an air pump.
2.Switch the ignition off.
3.Switch the ignition on but do not startthe engine.
4.Switch the hazard flashers on then offthree times.
Note:You must accomplish this within 10seconds. If you successfully enter the resetmode, the horn sounds once, the systemindicator flashes and a message shows inthe instrument cluster display.
Note:If the system does not enter resetmode, repeat the procedure starting at step2. If after repeated attempts to enter thereset mode, the horn does not sound, thesystem indicator does not flash and nomessage shows in the instrument clusterdisplay, contact your authorized dealer.
5.Remove the valve cap from the valvestem on the left front tire. Decrease theair pressure until the horn sounds.
Note:The single horn tone confirms thatthe sensor identification code has beenlearned by the module for this position. Ifthe horn sounds twice, the reset procedurewas unsuccessful, and you must repeat it.
6.Remove the valve cap from the valvestem on the right front tire. Decreasethe air pressure until the horn sounds.
503
2023 Super Duty (TFH) Canada/United States of America, enUSA, Edition date: 202211, DOMTire Pressure Monitoring System (If Equipped)E224333
Page 508 of 738
7.Repeat the previous step on the rightrear tire and then on the left rear tire.
8.Switch the ignition off.
Note:If the horn sounds twice again afterswitching the ignition off, and repeating theprocedure, contact your authorized dealerand have your vehicle checked as soon aspossible.
9.Set all four tires to the recommendedair pressure as indicated on the SafetyCompliance Certification Label.
Tire Pressure Monitoring SystemReset Procedure - Dual Rear Wheel
For further information seeUnderstanding Your Tire PressureMonitoring System and refer to DualRear Wheel, earlier in this section.
Read the entire procedure beforeattempting.
1.Drive the vehicle above 20 mph(32 km/h) for at least two minutes,then park in a safe location where youcan easily get to all six tires and haveaccess to an air pump.
2.Place the ignition in the off position andkeep the key in the ignition.
3.Cycle the ignition to the on positionwith the engine off.
4.Turn the hazard flashers on then offthree times. You must accomplish thiswithin 10 seconds. If you successfullyenter the reset mode, the horn soundsonce, the system indicator flashes anda message shows in the instrumentcluster display. If this does not occur,repeat the procedure starting at step2. If after repeated attempts to enterthe reset mode, the horn does notsound, the system indicator does notflash and no message shows in theinstrument cluster display, contact yourauthorized dealer as soon as possible.
5.Train the tire pressure monitoringsystem sensors in the tires using thefollowing system reset sequencestarting with the left front tire in thefollowing order: Left front - driver sidefront tire, Right front - passenger sidefront tire, Right outer rear -passengerside rear outer tire, Right inner rear -passenger side rear inner tire, Left outerrear - driver side rear outer tire, Leftinner rear - driver side rear inner tire.
6.Remove the valve cap from the valvestem on the left front tire. Decrease theair pressure until the horn sounds.
Note:The single horn chirp confirms thatthe sensor identification code has beenlearned by the module for this position. If adouble horn is heard, the reset procedurewas unsuccessful, and you must repeat it.
7.Remove the valve cap from the valvestem on the right front tire. Decreasethe air pressure until the horn sounds.
8.Remove the valve cap from the valvestem on the right outer rear tire.Decrease the air pressure until the hornsounds.
9.Remove the valve cap from the valvestem on the right inner rear tire.Decrease the air pressure until the hornsounds.
10.Remove the valve cap from the valvestem on the left outer rear tire.Decrease the air pressure until thehorn sounds.
11.Remove the valve cap from the valvestem on the left inner rear tire.Decrease the air pressure until thehorn sounds. Training is completeafter the horn sounds for the last tiretrained, the system indicator stopsflashing, and a message is shown inthe instrument cluster display.
504
2023 Super Duty (TFH) Canada/United States of America, enUSA, Edition date: 202211, DOMTire Pressure Monitoring System (If Equipped)
Page 509 of 738
12.Turn the ignition off. If two short hornbeeps are heard, the reset procedurewas unsuccessful and you mustrepeat it. If after repeating theprocedure and two short beeps areheard when the ignition is turned tooff, contact your authorized dealer assoon as possible.
13.Set all six tires to the recommendedair pressure as indicated on theSafety Compliance CertificationLabel, affixed to either the door hingepillar, door-latch post, or the dooredge that meets the door-latch post,next to the driver seating position ortire label located on the B-pillar orthe edge of the driver door.
Trailer Tire Pressure MonitoringSystem (If Equipped)
Note:Additional equipment may berequired for your vehicle to support trailertire pressure and temperature monitoring.See your authorized dealer for moreinformation.
Note:The trailer tire pressure monitoringsystem is not a substitute for proper tiremaintenance. It is your responsibility tomaintain correct tire pressures at all times.
Note:Replace the screw and valve on thetrailer tire pressure sensor anytime the trailertire is repaired, replaced or in for service. Seeyour authorized dealer for details.
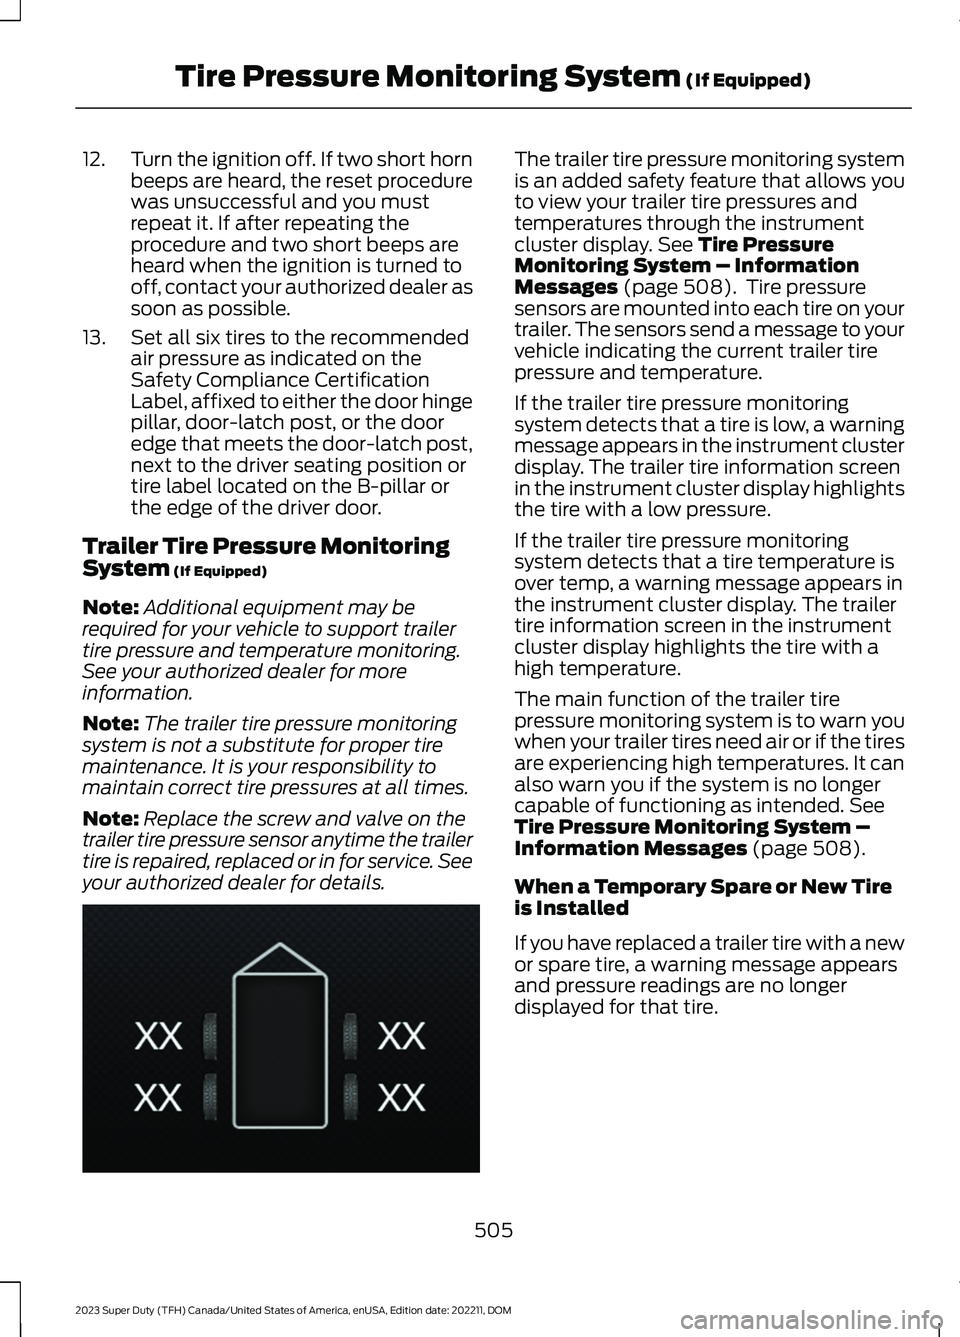
The trailer tire pressure monitoring systemis an added safety feature that allows youto view your trailer tire pressures andtemperatures through the instrumentcluster display. See Tire PressureMonitoring System – InformationMessages (page 508). Tire pressuresensors are mounted into each tire on yourtrailer. The sensors send a message to yourvehicle indicating the current trailer tirepressure and temperature.
If the trailer tire pressure monitoringsystem detects that a tire is low, a warningmessage appears in the instrument clusterdisplay. The trailer tire information screenin the instrument cluster display highlightsthe tire with a low pressure.
If the trailer tire pressure monitoringsystem detects that a tire temperature isover temp, a warning message appears inthe instrument cluster display. The trailertire information screen in the instrumentcluster display highlights the tire with ahigh temperature.
The main function of the trailer tirepressure monitoring system is to warn youwhen your trailer tires need air or if the tiresare experiencing high temperatures. It canalso warn you if the system is no longercapable of functioning as intended. SeeTire Pressure Monitoring System –Information Messages (page 508).
When a Temporary Spare or New Tireis Installed
If you have replaced a trailer tire with a newor spare tire, a warning message appearsand pressure readings are no longerdisplayed for that tire.
505
2023 Super Duty (TFH) Canada/United States of America, enUSA, Edition date: 202211, DOMTire Pressure Monitoring System (If Equipped)E235807
Page 516 of 738
6.Use the ignition key to open the lock atthe rear bumper.
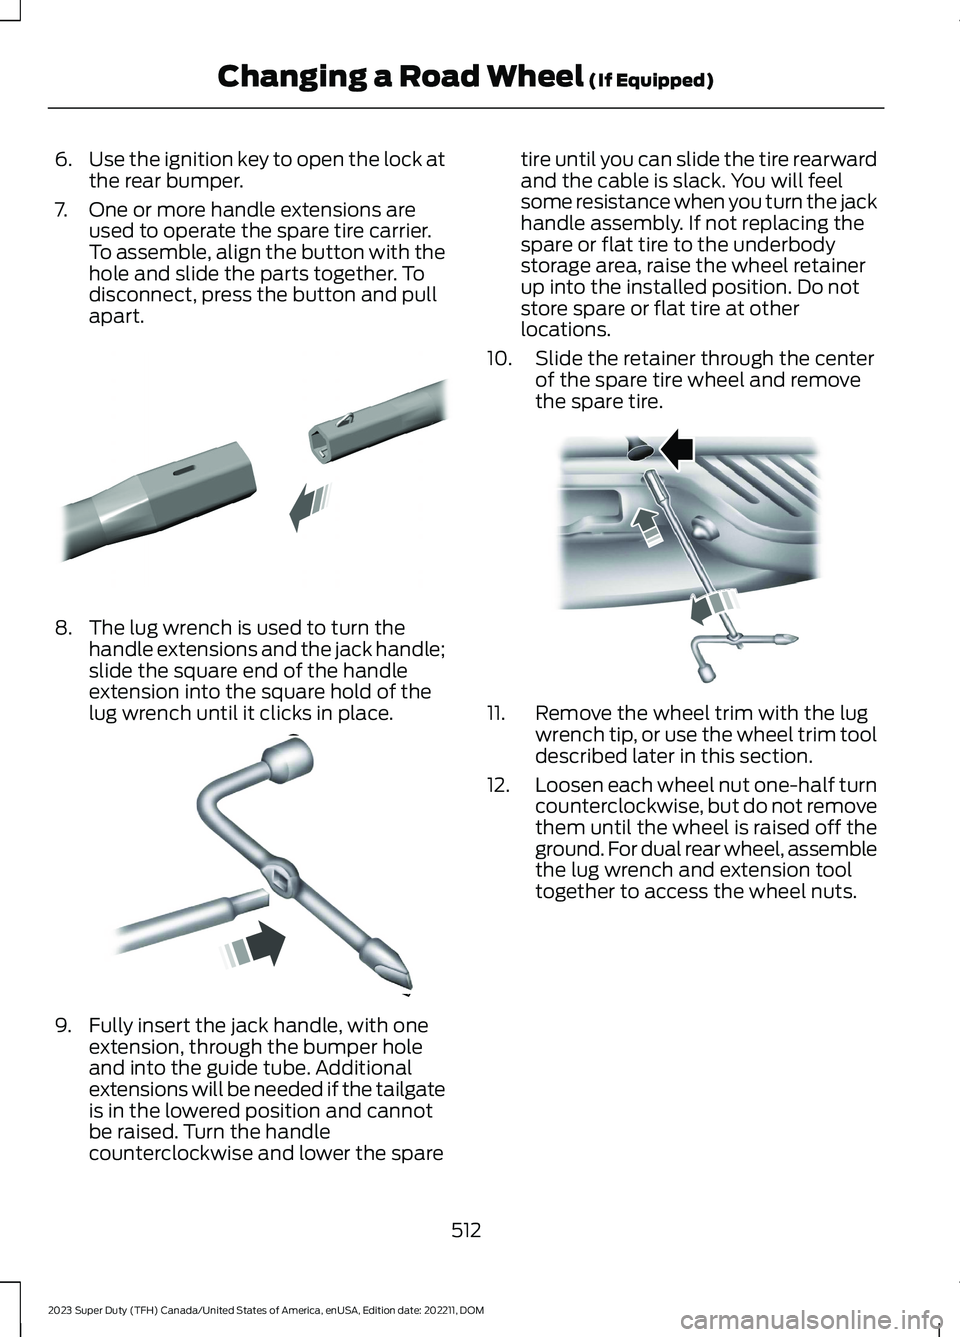
7.One or more handle extensions areused to operate the spare tire carrier.To assemble, align the button with thehole and slide the parts together. Todisconnect, press the button and pullapart.
8.The lug wrench is used to turn thehandle extensions and the jack handle;slide the square end of the handleextension into the square hold of thelug wrench until it clicks in place.
9.Fully insert the jack handle, with oneextension, through the bumper holeand into the guide tube. Additionalextensions will be needed if the tailgateis in the lowered position and cannotbe raised. Turn the handlecounterclockwise and lower the spare
tire until you can slide the tire rearwardand the cable is slack. You will feelsome resistance when you turn the jackhandle assembly. If not replacing thespare or flat tire to the underbodystorage area, raise the wheel retainerup into the installed position. Do notstore spare or flat tire at otherlocations.
10.Slide the retainer through the centerof the spare tire wheel and removethe spare tire.
11.Remove the wheel trim with the lugwrench tip, or use the wheel trim tooldescribed later in this section.
12.Loosen each wheel nut one-half turncounterclockwise, but do not removethem until the wheel is raised off theground. For dual rear wheel, assemblethe lug wrench and extension tooltogether to access the wheel nuts.
512
2023 Super Duty (TFH) Canada/United States of America, enUSA, Edition date: 202211, DOMChanging a Road Wheel (If Equipped)E308882 E162796 E310417