2023 FORD MAVERICK steering
[x] Cancel search: steeringPage 97 of 556
HEADLAMPS –
TROUBLESHOOTING
HEADLAMPS – FREQUENTLYASKED QUESTIONS
Why is there condensation in theheadlamps?
•Headlamps have vents toaccommodate normal changes in airpressure. Condensation can be anatural by-product of this design.When moist air enters the lampassembly through the vents, there is apossibility that condensation can occurwhen the temperature is cold. Whennormal condensation occurs, a finemist can form on the interior of thelens. The fine mist eventually clearsand exits through the vents duringnormal operation.
How much condensation isacceptable?
•The presence of a fine mist, forexample no streaks, drip marks or largedroplets. A fine mist covers less than50% of the lens.
How long may it take for theacceptable condensation to becleared?
•Clearing time may take as long as 48hours under dry weather conditions.
How much condensation isunacceptable?
•A water puddle inside the lamp.Streaks, drip marks or large dropletspresent on the interior of the lens.
What should I do if unacceptablecondensation is present?
•Have your vehicle checked as soon aspossible.
Why do my headlamps turn offwhen I have them switched onwhen I switch my vehicle off?
•The battery saver turns the headlampsoff after a short period of time after youswitch your vehicle off.
AUTOLAMPS
WHAT ARE AUTOLAMPS
WARNING: The system does notrelieve you of your responsibility to drivewith due care and attention. You mayneed to override the system if it does notturn the headlamps on in low visibilityconditions, for example daytime fog.
Autolamps turn the headlamps on in lowlight situations or when the windshieldwipers operate.
AUTOLAMP SETTINGS
1.Using the instrument cluster controlson the steering wheel, select Settings.
2.Select Vehicle.
3.Select Lighting.
4.Select Autolamp Delay.
5.Select a setting and press the OKbutton.
93
2023 Maverick (CFE) Canada/United States of America, enUSA, Edition date: 202208, First-PrintingExterior Lighting
Page 98 of 556
EXTERIOR LAMPS
USING THE TURN SIGNAL LAMPS
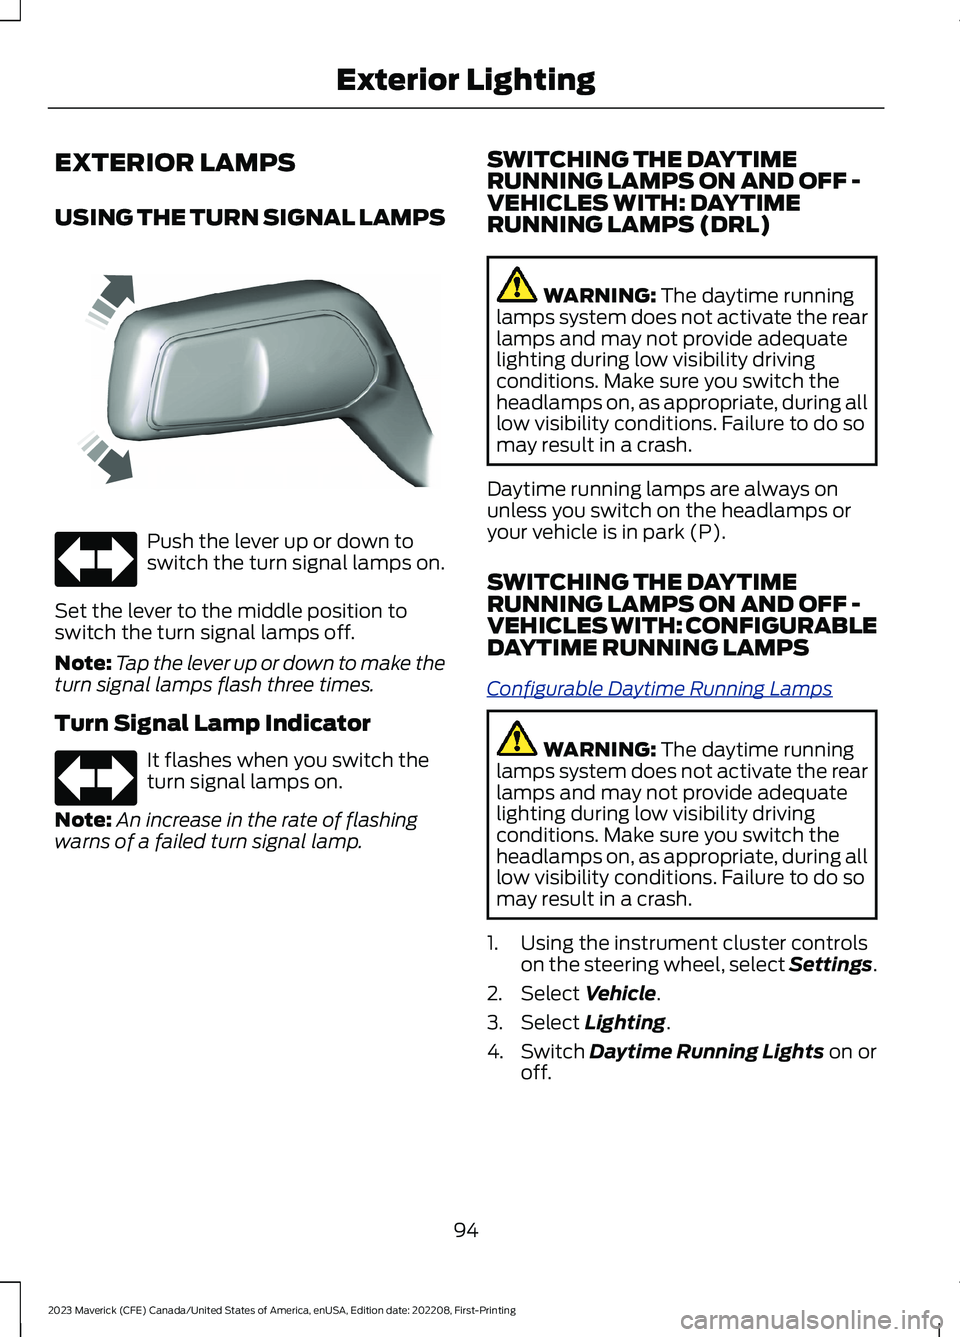
Push the lever up or down toswitch the turn signal lamps on.
Set the lever to the middle position toswitch the turn signal lamps off.
Note:Tap the lever up or down to make theturn signal lamps flash three times.
Turn Signal Lamp Indicator
It flashes when you switch theturn signal lamps on.
Note:An increase in the rate of flashingwarns of a failed turn signal lamp.
SWITCHING THE DAYTIMERUNNING LAMPS ON AND OFF -VEHICLES WITH: DAYTIMERUNNING LAMPS (DRL)
WARNING: The daytime runninglamps system does not activate the rearlamps and may not provide adequatelighting during low visibility drivingconditions. Make sure you switch theheadlamps on, as appropriate, during alllow visibility conditions. Failure to do somay result in a crash.
Daytime running lamps are always onunless you switch on the headlamps oryour vehicle is in park (P).
SWITCHING THE DAYTIMERUNNING LAMPS ON AND OFF -VEHICLES WITH: CONFIGURABLEDAYTIME RUNNING LAMPS
Configurable Daytime Running Lamps
WARNING: The daytime runninglamps system does not activate the rearlamps and may not provide adequatelighting during low visibility drivingconditions. Make sure you switch theheadlamps on, as appropriate, during alllow visibility conditions. Failure to do somay result in a crash.
1.Using the instrument cluster controlson the steering wheel, select Settings.
2.Select Vehicle.
3.Select Lighting.
4.Switch Daytime Running Lights on oroff.
94
2023 Maverick (CFE) Canada/United States of America, enUSA, Edition date: 202208, First-PrintingExterior LightingE242676 E67018 E67018
Page 100 of 556
AUTOMATIC HIGH BEAMCONTROL PRECAUTIONS
WARNING: The system does notrelieve you of your responsibility to drivewith due care and attention. You mayneed to override the system if it does notturn the high beams on or off.
WARNING: The system may notswitch the high beams off if the lights ofoncoming vehicles are hidden byobstacles, for example guard rails.
WARNING: Do not use the systemin poor visibility, for example fog, heavyrain, spray or snow.
WARNING: You may need tooverride the system when approachingother road users.
WARNING: You may need tooverride the system during inclementweather.
AUTOMATIC HIGH BEAMCONTROL REQUIREMENTS
The system turns the high beams on if allof the following occur:
•You switch the system on.
•You set the lighting control to theautolamps position.
•The ambient light level is low enoughthat you require high beams.
•There is no traffic in front of yourvehicle.
•The vehicle speed is greater thanapproximately 25 mph (40 km/h).
AUTOMATIC HIGH BEAMCONTROL LIMITATIONS
The system turns the high beams off if anyof the following occur:
•You switch the system off.
•You set the lighting control to anyposition except autolamps.
•The ambient light level is high enoughthat you do not require high beams.
•The system detects an approachingvehicle's headlamps or a leadingvehicle's tail lamps.
•The system detects severe rain, snowor fog.
•The system detects street lighting.
•The camera has reduced visibility.
•The vehicle speed falls belowapproximately 19 mph (30 km/h).
SWITCHING AUTOMATIC HIGHBEAM CONTROL ON AND OFF
1.Using the instrument cluster controlson the steering wheel, select Settings.
2.Select Vehicle.
3.Select Lighting.
4.Switch Auto High Beam on or off.
AUTOMATIC HIGH BEAMCONTROL INDICATORS
Illuminates to confirm when thesystem is ready to assist.
96
2023 Maverick (CFE) Canada/United States of America, enUSA, Edition date: 202208, First-PrintingExterior LightingE146105
Page 119 of 556
USING THE INSTRUMENT
CLUSTER DISPLAY CONTROLS
WARNING: Driving while distractedcan result in loss of vehicle control, crashand injury. We strongly recommend thatyou use extreme caution when using anydevice that may take your focus off theroad. Your primary responsibility is thesafe operation of your vehicle. Werecommend against the use of anyhand-held device while driving andencourage the use of voice-operatedsystems when possible. Make sure youare aware of all applicable local lawsthat may affect the use of electronicdevices while driving.
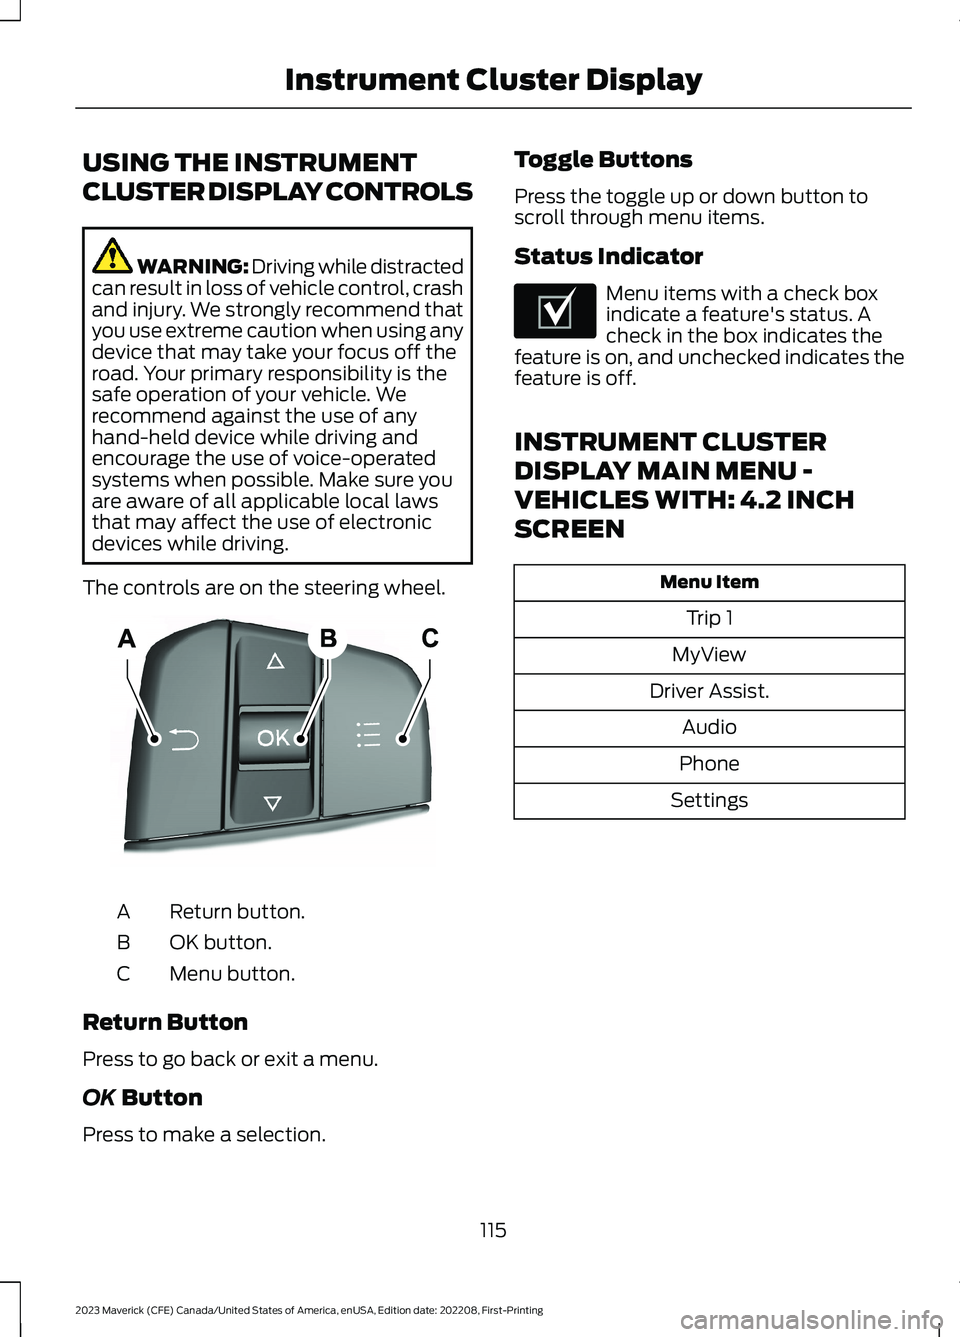
The controls are on the steering wheel.
Return button.A
OK button.B
Menu button.C
Return Button
Press to go back or exit a menu.
OK Button
Press to make a selection.
Toggle Buttons
Press the toggle up or down button toscroll through menu items.
Status Indicator
Menu items with a check boxindicate a feature's status. Acheck in the box indicates thefeature is on, and unchecked indicates thefeature is off.
INSTRUMENT CLUSTER
DISPLAY MAIN MENU -
VEHICLES WITH: 4.2 INCH
SCREEN
Menu Item
Trip 1
MyView
Driver Assist.
Audio
Phone
Settings
115
2023 Maverick (CFE) Canada/United States of America, enUSA, Edition date: 202208, First-PrintingInstrument Cluster DisplayE250032 E204495
Page 120 of 556

INSTRUMENT CLUSTER
DISPLAY MAIN MENU -
VEHICLES WITH: 6.5 INCH
SCREEN
Menu Item
Select Screens
Audio
Phone
Settings
Display Setup
CUSTOMIZING THE
INSTRUMENT CLUSTER
DISPLAY - VEHICLES WITH: 4.2
INCH SCREEN
1.Using the information display controlson the steering wheel, select MyView.
2.Press the menu button.
3.Select a screen.
4.Press the OK button.
CUSTOMIZING THE
INSTRUMENT CLUSTER
DISPLAY - VEHICLES WITH: 6.5
INCH SCREEN
Adding Screens Using SelectScreens
You can select various screens to show onthe instrument cluster display.
1.Select Select Screens.
2.Use the controls on the steering wheelto highlight a screen to add.
3.Press the OK button.
Note:The amount of screens you can addis limited. If the selected screen does notappear, you must deselect items from themenu.
Select Screens
Calm screen
Fuel economy
Trip 1
Trip 2
This trip
EV Coach
Tire pressure
Intelligent AWD
Off-Road
Trailer light check
Seatbelts
Auto StartStop
Now playing
Note:Some options may appear slightlydifferent or not at all if items are optional.
Configuring Gauges
You can select which values yourspeedometer shows in the instrumentcluster display.
1.Select Display Setup.
2.Select a speed unit to display.
116
2023 Maverick (CFE) Canada/United States of America, enUSA, Edition date: 202208, First-PrintingInstrument Cluster Display
Page 122 of 556
4.Select a tire pressure unit.
CHANGING THE TIRE PRESSUREUNIT - VEHICLES WITH: 6.5 INCHSCREEN
You can change the tire pressure unit usingthe instrument cluster display.
1.Select Display Setup.
2.Select Tire pressure.
3.Select a pressure unit.
FUEL ECONOMY DISPLAY -
GASOLINE
An instant fuel economy gauge is providedalong with average fuel economy. Averagefuel economy is continuously averagedsince the last reset.
Note:Press and hold the OK button on thecontrols on the steering wheel to reset youraverage fuel economy.
FUEL ECONOMY DISPLAY -
HYBRID ELECTRIC VEHICLE
(HEV)
An instant fuel economy gauge is providedalong with average fuel economy. Averagefuel economy is continuously averagedsince the last reset.
When the gasoline engine is off, the instantfuel economy gauge is replaced with anelectric driving message.
Note:Press and hold the OK button on thecontrols on the steering wheel to reset youraverage fuel economy.
Note:Fuel economy display is a selectablescreen. See Customizing the InstrumentCluster Display (page 116). SeeCustomizing the Instrument ClusterDisplay (page 116).
EV COACH - HYBRID ELECTRIC
VEHICLE (HEV)
EV coach can help you get the most out ofyour vehicle's electric driving capabilities.
Note:EV coach is a selectable screen. SeeCustomizing the Instrument ClusterDisplay (page 116).
When you are accelerating or maintainingspeed you see a blue or white solid barindicating vehicle power. You may also seea blue rectangular box which shows thepower level at which the engine turns on.
•When the power level is within the box,the color of the bar is blue. This meansyou are in electric operation and theengine is off.
•When the power level is outside of thebox, the color of the bar is white. Thismeans you are in hybrid operation witha combination of the electric motorand the engine providing vehicle power.
When you are decelerating with either yourfoot off the accelerator pedal or on thebrake pedal, a green or white solid bardisplays indicating the power being usedto slow down your vehicle. You may alsosee a green rectangular box which showsthe amount of power that can berecaptured by the regenerative brakingsystem and returned to the high voltagebattery.
•When the power level is within the box,the color of the bar is green. Thismeans that the regenerative brakingsystem is being used to efficiently slowyour vehicle down and return themaximum percentage of energy to thehigh voltage battery.
•When the power level is outside of thebox, the color of the bar is white. Thismeans both the regenerative brakingsystem and conventional brakingsystem are being used.
118
2023 Maverick (CFE) Canada/United States of America, enUSA, Edition date: 202208, First-PrintingInstrument Cluster Display
Page 124 of 556
ACCESSING THE TRIP
COMPUTER - VEHICLES WITH:
4.2 INCH SCREEN
1.Use the instrument cluster displaycontrols to navigate the home screen.
2.Select the trip screen.
3.Press the menu button on the steeringwheel.
4.Select Trip 1 or Trip 2.
ACCESSING THE TRIP
COMPUTER - VEHICLES WITH:
6.5 INCH SCREEN
Using Select Screens
1.Use the instrument cluster displaycontrols to navigate the home menu.
2.Select Select Screens.
3.Use the control on the steering wheelto navigate the menu. SeeCustomizing the Instrument ClusterDisplay (page 116).
Using the Home Screen
Once the screens have been added, usethe instrument cluster display controls onthe steering wheel to view each trip screen.
RESETTING THE TRIP
COMPUTER
1.Use the instrument cluster displaycontrols to navigate the home screen.
2.Select the trip screen you want to reset.
3.Press and hold the OK button until thesystem reset confirmation appears.
RESETTING THE INDIVIDUAL
TRIP VALUES - VEHICLES
WITH: 4.2 INCH SCREEN
1.Use the instrument cluster displaycontrols to navigate the home screen.
2.Select the trip screen.
3.Press the menu button on the steeringwheel.
4.Select Reset Individual Values.
5.Select a trip value to reset.
6.Press and hold the OK button until thesystem reset confirmation appears.
CONFIGURING THE TRIP
COMPUTER - VEHICLES WITH:
4.2 INCH SCREEN
1.Use the instrument cluster displaycontrols to navigate the home screen.
2.Select the trip screen.
3.Press the menu button on the steeringwheel.
4.Select Configure View.
5.Select values to display.
TRIP DATA
Trip 1 and 2
Provides trip timer, trip average fueleconomy and total trip distance traveled.For hybrid vehicles, the trip also shows thedistance traveled on electric power onlywith the engine off.
Note:Trip 1 and 2 are selectable screens.See Accessing the Trip Computer (page120).
120
2023 Maverick (CFE) Canada/United States of America, enUSA, Edition date: 202208, First-PrintingTrip Computer
Page 126 of 556

WHAT IS REMOTE START
The system allows you to remotely startyour vehicle and to adjust the interiortemperature according to the settings thatyou chose.
REMOTE START
PRECAUTIONS
WARNING: Do not start the enginein a closed garage or in other enclosedareas. Exhaust fumes are toxic. Alwaysopen the garage door before you startthe engine. Failure to follow thisinstruction could result in personal injuryor death.
REMOTE START LIMITATIONS
Remote start does not work under thefollowing conditions:
•The alarm horn is sounding.
•The hood is open.
•The transmission is not in park (P).
•The ignition is on.
•The battery voltage is below theminimum operating voltage.
•Remote start is not enabled.
Note:Do not use remote start if the fuellevel is low.
ENABLING REMOTE START
1.Using the information display controlson the steering wheel, select Settings.
2.Select Vehicle Settings.
3.Select Remote Start.
4.Switch System on.
Note:To use remote start, make sure thatthe modem is enabled. See Enabling andDisabling the Modem (page 377).
REMOTELY STARTING AND
STOPPING THE VEHICLE
Remotely Starting the Vehicle
Press the button on the remotecontrol.
Within three seconds, press thebutton twice on the remotecontrol.
Note:You can also use the FordPass Appto start the vehicle.
Note:The turn signals flash twice.
Note:The parking lamps turn on when thevehicle is running.
Note:The horn sounds if the system failsto start.
Note:All other vehicle systems remain offwhen you have remotely started the vehicle.
Note:The vehicle remains secured whenyou have remotely started the vehicle. Avalid key must be inside your vehicle toswitch the ignition on and drive your vehicle.
Remotely Stopping the Vehicle
Within three seconds, press thebutton twice on the remotecontrol.
EXTENDING THE REMOTE
START DURATION
To extend the remote start duration duringremote start, do the following:
Press the button on the remotecontrol.
122
2023 Maverick (CFE) Canada/United States of America, enUSA, Edition date: 202208, First-PrintingRemote Start (If Equipped)E138623 E138625 E138625 E138623