2023 FORD F650/750 warning light
[x] Cancel search: warning lightPage 145 of 378
5. Tighten the nut until the spring is fully
caged and brakes released. Do not
loosen or remove the release stud and
nut unless you completely assemble
and securely clamp the brake chamber.
6. After restoring the air pressure,
unscrew and remove the release stud
and install in the carrying pocket. Install
the access plug.
HILL START ASSIST
WARNING: The system does not
replace the parking brake. When you
leave your vehicle, always apply the
parking brake.
WARNING: You must remain in
your vehicle when the system turns on.
At all times, you are responsible for
controlling your vehicle, supervising the
system and intervening, if required.
Failure to take care may result in the loss
of control of your vehicle, serious
personal injury or death.
WARNING: The system will turn
off if a malfunction is apparent or if you
rev the engine excessively. Failure to take
care may result in the loss of control of
your vehicle, serious personal injury or
death.
The system makes it easier to pull away
when your vehicle is on a slope without the
need to use the parking brake.
When the system is active, your vehicle
remains stationary on the slope for two to
three seconds after you release the brake
pedal. This allows time to move your foot
from the brake to the accelerator pedal.
The system releases the brakes
automatically once the engine hasdeveloped sufficient torque to prevent your
vehicle from rolling down the slope. This
is an advantage when pulling away on a
slope, for example from a car park ramp,
traffic lights or when reversing uphill into
a parking space.
The system activates on any slope that
causes your vehicle to roll.
Note:There is no warning light to indicate
the system is either on or off.
Using Hill Start Assist
1. Press the brake pedal to bring your
vehicle to a complete standstill. Keep
the brake pedal pressed and shift into
first gear when facing uphill or reverse
(R) when facing downhill.
2. If the sensors detect that your vehicle
is on a slope, the system activates
automatically.
3. When you remove your foot from the
brake pedal, your vehicle remains on
the slope without rolling away for
about two to three seconds. This hold
time automatically extends if you are
in the process of driving off.
4. Drive off in the normal manner. The
system releases the brakes
automatically.
Note:When you remove your foot from the
brake pedal and press the pedal again when
the system is active, you will experience
significantly reduced brake pedal travel. This
is normal.
Switching the System On and Off
Vehicles with Manual Transmission
You can switch this feature on or off in the
information display. The system
remembers the last setting when you start
your vehicle.
141
Brakes
Page 146 of 378
Vehicles with Automatic Transmission
You cannot turn the system on or off.
When you switch the ignition on, the
system automatically turns on.
AIR BRAKES (IF EQUIPPED)
WARNING: Do not drive or continue
to drive if the low air pressure buzzer is
sounding or the brake warning light is lit.
These warnings indicate that air pressure
is not to normal operating level.
Continued use of the vehicle could result
in loss of braking ability.
WARNING: Avoid repeated light
application of the brake pedal. This
depletes air pressure faster and could
result in loss of braking capability.
WARNING: Do not move the
vehicle when the air pressure is
insufficient because the brake system
may be inoperative.
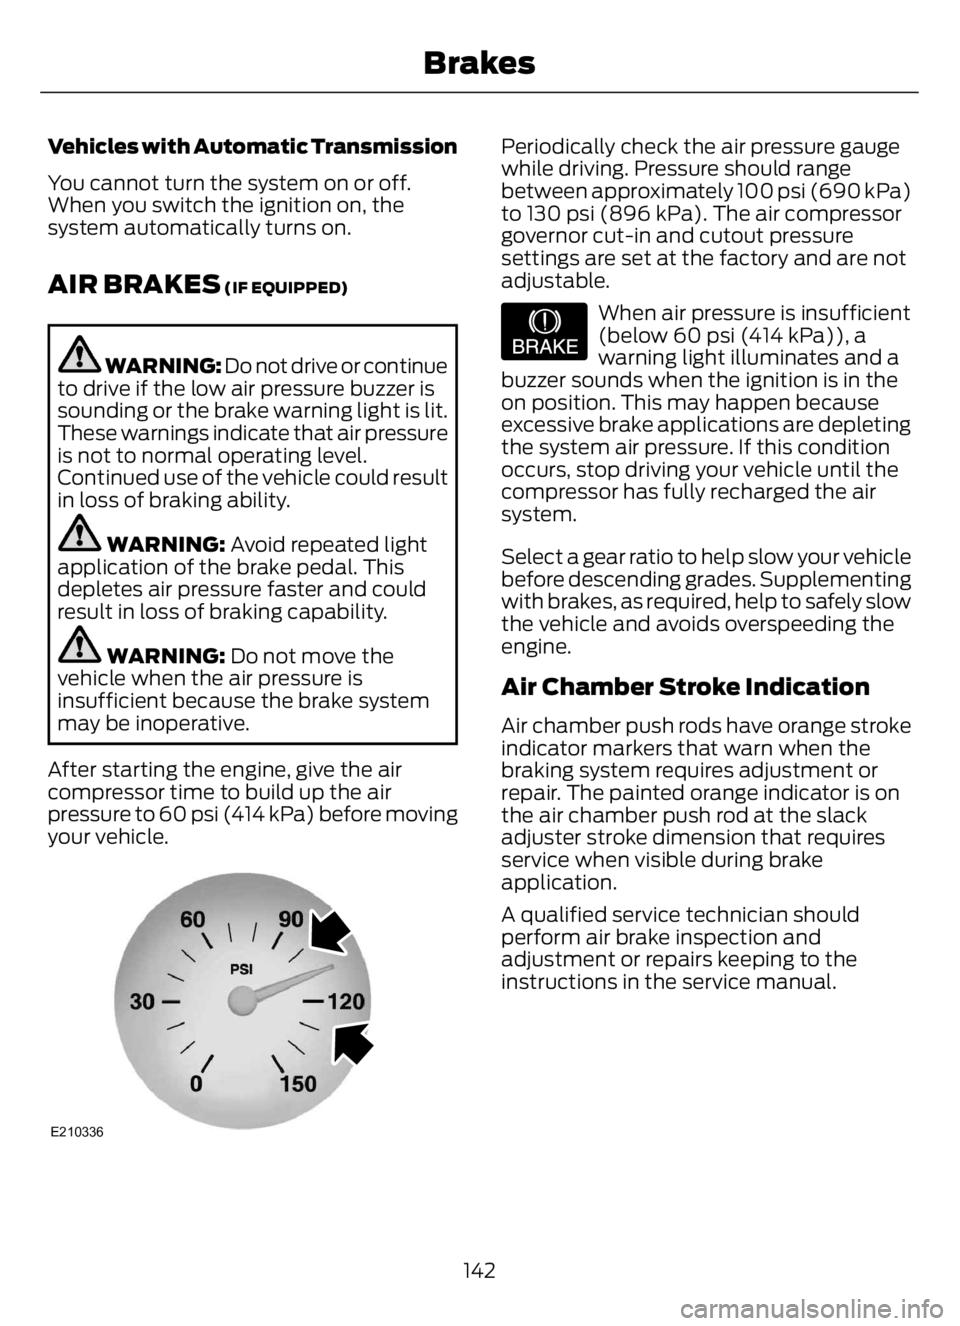
After starting the engine, give the air
compressor time to build up the air
pressure to 60 psi (414 kPa) before moving
your vehicle.
E210336
Periodically check the air pressure gauge
while driving. Pressure should range
between approximately 100 psi (690 kPa)
to 130 psi (896 kPa). The air compressor
governor cut-in and cutout pressure
settings are set at the factory and are not
adjustable.
E206772
When air pressure is insufficient
(below 60 psi (414 kPa)), a
warning light illuminates and a
buzzer sounds when the ignition is in the
on position. This may happen because
excessive brake applications are depleting
the system air pressure. If this condition
occurs, stop driving your vehicle until the
compressor has fully recharged the air
system.
Select a gear ratio to help slow your vehicle
before descending grades. Supplementing
with brakes, as required, help to safely slow
the vehicle and avoids overspeeding the
engine.
Air Chamber Stroke Indication
Air chamber push rods have orange stroke
indicator markers that warn when the
braking system requires adjustment or
repair. The painted orange indicator is on
the air chamber push rod at the slack
adjuster stroke dimension that requires
service when visible during brake
application.
A qualified service technician should
perform air brake inspection and
adjustment or repairs keeping to the
instructions in the service manual.
142
Brakes
Page 153 of 378
PRINCIPLE OF OPERATION
The traction control system helps avoid
drive wheel spin and loss of traction.
If your vehicle begins to slide, the system
applies the brakes to individual wheels
and, when needed, reduces engine power
at the same time. If the wheels spin when
accelerating on slippery or loose surfaces,
the system reduces engine power in order
to increase traction.
Note:The system does not apply the brakes
when vehicle speed is above 25 mph
(40 km/h).
USING TRACTION CONTROL -
VEHICLES WITH: AIR BRAKES
WARNING: Operating your vehicle
with the traction control disabled could
lead to an increased risk of loss of vehicle
control, vehicle rollover, personal injury
and death.
E330660E330660
Press the TCS Off button on the
instrument panel to enable the
mud/snow mode.
This is beneficial when your vehicle is stuck
in snow or on a slippery road surface. This
mode allows wheel spin to dig your vehicle
out and allows you to rock your vehicle.
Press the switch again to select standard
traction control. The system automatically
selects standard traction control at the
next ignition cycle.
System Indicator Light
Note:If the traction control light does not
flash during a traction control event or stays
illuminated, the system is not functioning
properly. Take your vehicle to an authorized
dealer for service.During traction control operation, the
traction control light flashes rapidly and
the engine does not rev-up when you press
further on the accelerator. This is normal
and is no reason for concern.
In mud/snow mode, the TCS OFF light
illuminates on the instrument cluster. If a
traction event occurs in either mode, the
stability and traction control light flashes
rapidly.
USING TRACTION CONTROL -
VEHICLES WITH: HYDRAULIC
BRAKES
WARNING: Operating your vehicle
with the traction control disabled could
lead to an increased risk of loss of vehicle
control, vehicle rollover, personal injury
and death.
The system turns on each time you switch
the ignition on.
E330660E330660
Use the traction control button
on the instrument panel to
switch the system off or on.
If your vehicle is stuck in mud or snow,
switching traction control off is beneficial
as this allows the wheels to spin.
Press the button again to switch the
traction control system on.
System Indicator Light
Note:If the traction control light does not
flash during a traction control event or stays
on, the system is not operating. Have the
system checked as soon as possible.
During a traction control event, the traction
control light rapidly flashes. Pressing
further on the accelerator does not cause
the engine to rev higher. This is normal and
is no reason for concern.
149
Traction Control
Page 155 of 378
PRINCIPLE OF OPERATION -
VEHICLES WITH: HYDRAULIC
BRAKES
WARNING: Vehicle modifications
involving braking system, aftermarket
roof racks, suspension, steering system,
tire construction and wheel and tire size
may change the handling characteristics
of your vehicle and may adversely affect
the performance of the electronic
stability control system. In addition,
installing any stereo loudspeakers may
interfere with and adversely affect the
electronic stability control system. Install
any aftermarket stereo loudspeaker as
far as possible from the front center
console, the tunnel, and the front seats
in order to minimize the risk of interfering
with the electronic stability control
sensors. Reducing the effectiveness of
the electronic stability control system
could lead to an increased risk of loss of
vehicle control, vehicle rollover, personal
injury and death.
WARNING: Remember that even
advanced technology cannot defy the
laws of physics. It's always possible to
lose control of a vehicle due to
inappropriate driver input for the
conditions. Aggressive driving on any
road condition can cause you to lose
control of your vehicle increasing the risk
of personal injury or property damage.
Activation of the electronic stability
control system is an indication that at
least some of the tires have exceeded
their ability to grip the road; this could
reduce the operator's ability to control
the vehicle potentially resulting in a loss
of vehicle control, vehicle rollover,
personal injury and death. If your
electronic stability control system
activates, SLOW DOWN.
The system turns on each time you switch
the ignition on.
If a fault occurs in either the stability
control or the traction control system, the
following conditions are possible:
• The stability and traction control light
illuminate.
• The stability control and traction
control systems are not maintaining
traction of the wheels.
If a driving condition activates either the
stability control or the traction control
system, the following conditions are
possible:
• The stability and traction control light
flash.
• Your vehicle slows down.
• The system reduces engine power.
• A vibration in the brake pedal.
• The brake pedal is stiffer than usual.
• If the driving condition is severe and
your foot is not on the brake, the brake
pedal could move as the system
applies higher brake force.
The stability control system has several
features built into it to help you maintain
control of your vehicle:
Electronic Stability Control
The system assists in preventing skids or
lateral slides by applying the brakes to one
or more of the wheels individually and, if
necessary, decreases engine power.
151
Stability Control
Page 156 of 378

Traction Control
The system helps maintain traction of the
wheels by detecting and controlling wheel
spin. See Using Traction Control (page
149).
E72903
Vehicle without stability control
skidding off its intended route. A
Vehicle with stability control
maintaining control on a slippery
surface. B
PRINCIPLE OF OPERATION -
VEHICLES WITH: AIR BRAKES
WARNING: Vehicle modifications
involving braking system, aftermarket
roof racks, suspension, steering system,
tire construction and wheel and tire size
may change the handling characteristics
of your vehicle and may adversely affect
the performance of the electronic
stability control system. In addition,
installing any stereo loudspeakers may
interfere with and adversely affect the
electronic stability control system. Install
any aftermarket stereo loudspeaker as
far as possible from the front center
console, the tunnel, and the front seats
in order to minimize the risk of interfering
with the electronic stability control
sensors. Reducing the effectiveness of
the electronic stability control system
could lead to an increased risk of loss of
vehicle control, vehicle rollover, personal
injury and death.
WARNING: Remember that even
advanced technology cannot defy the
laws of physics. It's always possible to
lose control of a vehicle due to
inappropriate driver input for the
conditions. Aggressive driving on any
road condition can cause you to lose
control of your vehicle increasing the risk
of personal injury or property damage.
Activation of the electronic stability
control system is an indication that at
least some of the tires have exceeded
their ability to grip the road; this could
reduce the operator's ability to control
the vehicle potentially resulting in a loss
of vehicle control, vehicle rollover,
personal injury and death. If your
electronic stability control system
activates, SLOW DOWN.
The system automatically turns on each
time you switch the ignition on.
If a fault occurs in either the stability
control or the traction control system, you
may experience the following conditions:
• The stability and traction control light
illuminates steadily.
152
Stability Control
Page 160 of 378

E144529
The indicator, current gap setting
and set speed appear in the
information display.
E233874E233874
Setting the Adaptive Cruise Speed
Drive to your preferred speed.
Press and release either button.
Take your foot off the accelerator pedal.
The indicator, current gap setting and set
speed appear in the information display.
E233874E233874
A vehicle graphic illuminates if there is a
vehicle detected in front of you.Note:When adaptive cruise control is
active, the speedometer may vary slightly
from the set speed displayed in the
information display.
Following a Vehicle
WARNING: When following a
vehicle that is braking, your vehicle does
not always decelerate quickly enough to
avoid a crash without driver intervention.
Apply the brakes when necessary. Failure
to follow this instruction could result in
personal injury or death.
WARNING: The system only warns
of vehicles detected by the radar sensor.
In some cases there may be no warning
or a delayed warning. Apply the brakes
when necessary. Failure to follow this
instruction could result in personal injury
or death.
Note:When you are following a vehicle and
you switch on a direction indicator, adaptive
cruise control may provide a small
temporary acceleration to help you pass.
Note:The brakes may emit noise when
applied by the system.
When a vehicle ahead of you enters the
same lane or a slower vehicle is ahead in
the same lane, the vehicle speed adjusts
to maintain a preset gap distance. A
vehicle graphic illuminates in the
instrument cluster.
Your vehicle maintains a consistent gap
from the vehicle ahead until any of the
following occur:
• The vehicle in front of you accelerates
to a speed above the set speed.
• The vehicle in front of you moves out
of the lane you are in.
156
Cruise Control - Vehicles With: Adaptive Cruise Control
Page 161 of 378
• Your vehicle speed falls below 12 mph
(20 km/h).
• You set a new gap distance.
The system applies the brakes to slow your
vehicle to maintain a safe gap distance
from the vehicle in front. The system only
applies limited braking. You can override
the system by applying the brakes.
If the system determines that its maximum
braking level is not sufficient, an audible
warning sounds, a message appears in the
information display and an indicator
flashes when the system continues to
brake. Take immediate action.
Setting the Gap Distance
You can decrease or increase the distance
between your vehicle and the vehicle in
front by pressing the gap control.
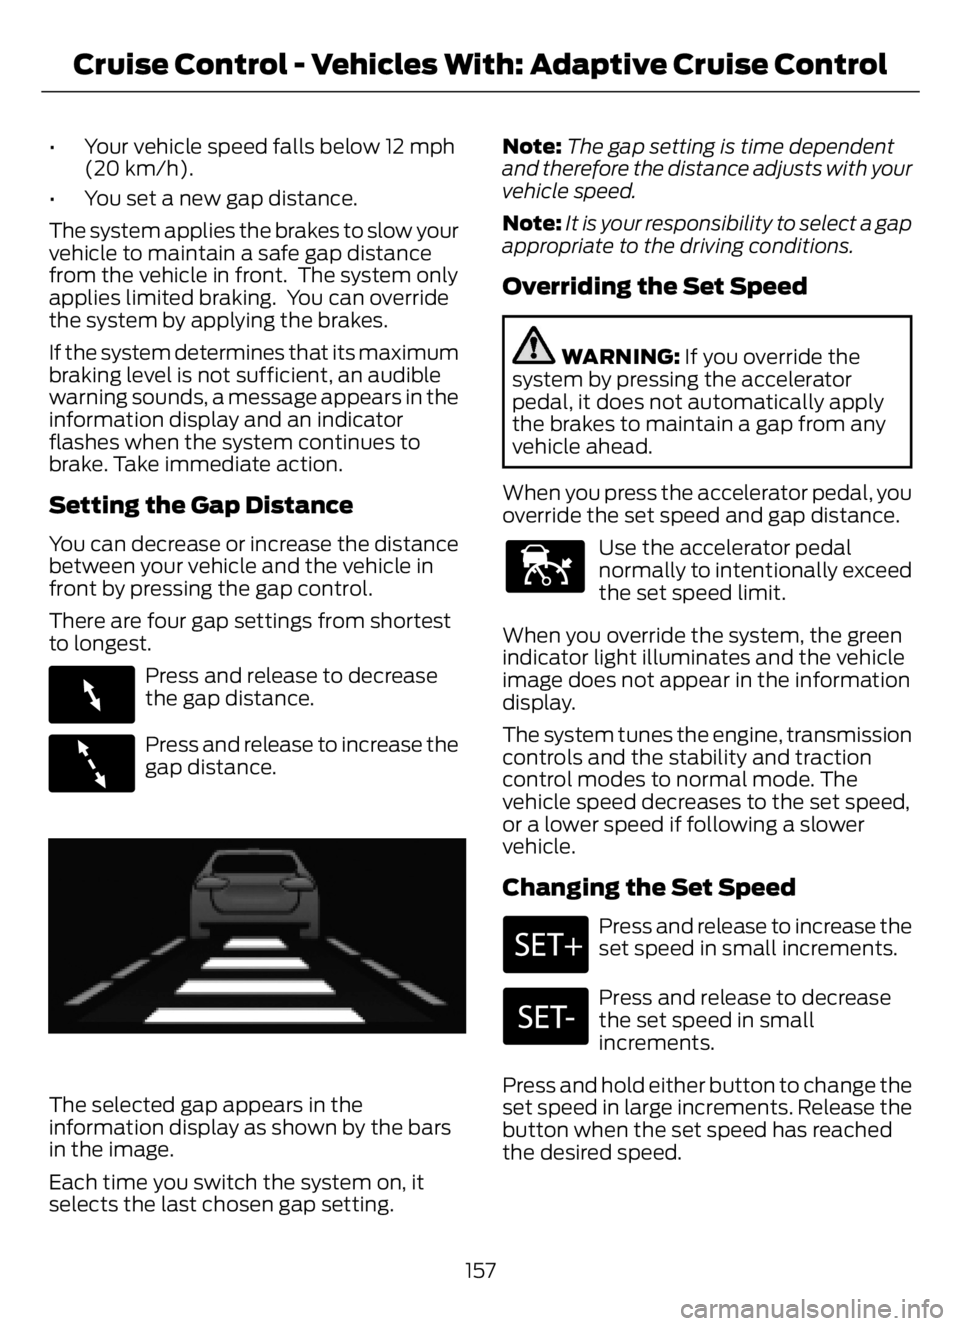
There are four gap settings from shortest
to longest.
E263697
Press and release to decrease
the gap distance.
E263696
Press and release to increase the
gap distance.
E233874E233874
The selected gap appears in the
information display as shown by the bars
in the image.
Each time you switch the system on, it
selects the last chosen gap setting.Note:The gap setting is time dependent
and therefore the distance adjusts with your
vehicle speed.
Note:It is your responsibility to select a gap
appropriate to the driving conditions.
Overriding the Set Speed
WARNING: If you override the
system by pressing the accelerator
pedal, it does not automatically apply
the brakes to maintain a gap from any
vehicle ahead.
When you press the accelerator pedal, you
override the set speed and gap distance.
E144529
Use the accelerator pedal
normally to intentionally exceed
the set speed limit.
When you override the system, the green
indicator light illuminates and the vehicle
image does not appear in the information
display.
The system tunes the engine, transmission
controls and the stability and traction
control modes to normal mode. The
vehicle speed decreases to the set speed,
or a lower speed if following a slower
vehicle.
Changing the Set Speed
Press and release to increase the
set speed in small increments.
Press and release to decrease
the set speed in small
increments.
Press and hold either button to change the
set speed in large increments. Release the
button when the set speed has reached
the desired speed.
157
Cruise Control - Vehicles With: Adaptive Cruise Control
Page 164 of 378

A message displays if something obstructs
the radar signals from the sensor. The
sensor is in the lower grille. The system
cannot detect a vehicle ahead and does
not function when something blocks the
sensor.Note:You cannot see the sensor. It is
behind a fascia panel.
Keep the front of your vehicle free of dirt,
metal badges or objects. Vehicle front
protectors and aftermarket lights may also
block the sensor.
Possible causes and actions for the blocked sensor message displaying:
Action Cause
Clean the grille surface in front of the radar
or remove the object causing the obstruc-
tion. The surface of the radar is dirty or
obstructed
Wait a short time. It may take several
minutes for the radar to detect that it is free
from obstruction. The surface of the radar is clean but the
message remains in the display.
Do not use the system in these conditions
because it may not detect any vehicles
ahead. Heavy rain or snow is interfering with the
radar signals
Do not use the system in these conditions
because it may not detect any vehicles
ahead. Water, snow or ice on the surface of the
road may interfere with the radar signals.
Do not use the system in these conditions
because it may not detect any vehicles
ahead. You are in a desert or remote area with no
other vehicles and no roadside objects.
Due to the nature of radar technology, it is possible to get a blockage warning with no
actual block. A false blocked condition either self-clears, or clears after you restart your
vehicle.
160
Cruise Control - Vehicles With: Adaptive Cruise Control