2023 DODGE CHARGER manual transmission
[x] Cancel search: manual transmissionPage 161 of 292

MULTIMEDIA159
The following options can be selected:
Pressing the STOP button will freeze the graph.
Selecting Play will clear the graph and restart the
process over.
Press the + or - buttons to change the history of the
graph. The selectable options are “30”, “60”, “90”, and
“120” seconds. The graph will expand or constrict
depending on the setting selected.
Select the “Gear” display setting to turn the graph gear
markers on and off for automatic transmission vehicles
only.
NOTE:The Gear on/off feature will only display if your vehicle is
equipped with an Automatic Transmission.
DODGE DRIVE MODES — IF EQUIPPED
PERFORMANCE CONTROL —
I
F EQUIPPED
Your vehicle may be equipped with a Performance Control
feature which allows for coordinating the operation of
various vehicle systems depending upon the type of
driving behavior desired. The Performance Control feature
is controlled through the Uconnect system and may be
accessed by performing any of the following:
Pushing the Super Track Pack button on the instru -
ment panel switch bank.
Selecting “Performance Control” from the Apps menu.
Selecting “Performance Control” from within the
Performance Pages menu. You will be able to enable, disable, and customize the
functionality of the Launch Control and Performance
Control Set-Up features within Performance Control.
To access information about the functionality of these
features through the Uconnect system, press the Info
button on the touchscreen.
NOTE:Dodge vehicles equipped with a 6.4L engine, except for
R/T Scat Pack 1320 6.4L non-widebody vehicles, will use
SRT Drive Modes rather than the Dodge Performance
Control Pages. Please refer to the following sections for
further information on the SRT Drive Modes.
Drive Mode Set-Up
Performance Control Set-Up
Pressing the Drive Mode Set-Up button on the
touchscreen within the Performance Control screen
indicates the real-time status of the various systems.
Pressing the Sport Mode Set-Up, Drag Mode Set-Up
(1320 only), or Default Mode Set-Up buttons on the
touchscreen allows the driver to configure their individual
performance control and see how those configurations
affect the performance of the vehicle.
NOTE:Not all of the options listed in this manual are available on
every vehicle. The following is a chart with all available
Performance Control vehicle configurations.
Available Mode Configurations
Refer to the Sport and Default Modes for their detailed
operation.
NOTE:These settings will remain in effect when using the Launch
Control feature.
Engine
If Manual Transmission
Engine/Transmission If Auto Transmission
Steering X
Paddle Shifters If Auto Transmission
Traction Control X
Suspension If Adaptive Suspension5
23_LD_OM_EN_USC_t.book Page 159
Page 170 of 292

168SAFETY
The following conditions must be met in order for HSA to
activate:
The feature must be enabled.
The vehicle must be stopped.
The parking brake must be off.
The driver door must be closed.
The vehicle must be on a sufficient grade.
The gear selection must match vehicle uphill direction
(i.e., vehicle facing uphill is in forward gear; vehicle
backing uphill is in REVERSE gear).
HSA will work in REVERSE gear and all forward gears.
The system will not activate if the transmission is in
PARK or NEUTRAL. For vehicles equipped with a
manual transmission, if the clutch is pressed, HSA will
remain active.Disabling And Enabling HSA
This feature can be turned on or turned off. To disable
HSA, see Úpage 112 for further information.
Towing With HSA
HSA will also provide assistance to mitigate roll back while
towing a trailer.
Rain Brake Support (RBS)
RBS may improve braking performance in wet conditions.
It will periodically apply a small amount of brake pressure
to remove any water buildup on the front brake rotors. It
functions when the windshield wipers are in LO or HI
speed. When RBS is active, there is no notification to the
driver and no driver interaction is required.
Ready Alert Braking (RAB)
RAB may reduce the time required to reach full braking
during emergency braking situations. It anticipates when
an emergency braking situation may occur by monitoring
how fast the throttle is released by the driver. The
Electronic Brake Controller (EBC) will prepare the brake
system for a panic stop.
Traction Control System (TCS)
The TCS monitors the amount of wheel spin of each of the
driven wheels. If wheel spin is detected, the TCS may apply
brake pressure to the spinning wheel(s) and/or reduce
engine power to provide enhanced acceleration and
stability. A feature of the TCS, Brake Limited Differential
(BLD) functions similarly to a limited slip differential and
controls the wheel spin across a driven axle. If one wheel
on a driven axle is spinning faster than the other, the
system will apply the brake of the spinning wheel. This will
allow more engine power to be applied to the wheel that is
not spinning. BLD may remain enabled even if TCS and
ESC are in reduced modes.WARNING!
There may be situations where the Hill Start Assist
(HSA) will not activate and slight rolling may occur, such
as on minor hills or with a loaded vehicle, or while
pulling a trailer. HSA is not a substitute for active driving
involvement. It is always the driver’s responsibility to be
attentive to distance to other vehicles, people, and
objects, and most importantly brake operation to
ensure safe operation of the vehicle under all road
conditions. Your complete attention is always required
while driving to maintain safe control of your vehicle.
Failure to follow these warnings can result in a collision
or serious personal injury.
WARNING!
If you use a trailer brake controller with your trailer,
the trailer brakes may be activated and deactivated
with the brake switch. If so, there may not be enough
brake pressure to hold both the vehicle and the
trailer on a hill when the brake pedal is released. In
order to avoid rolling down an incline while resuming
acceleration, manually activate the trailer brake or
apply more vehicle brake pressure prior to releasing
the brake pedal.
HSA is not a parking brake. Always apply the parking
brake fully when exiting your vehicle. Also, be certain
to place the transmission in PARK.
Failure to follow these warnings can result in a colli -
sion or serious personal injury.
23_LD_OM_EN_USC_t.book Page 168
Page 213 of 292
IN CASE OF EMERGENCY211
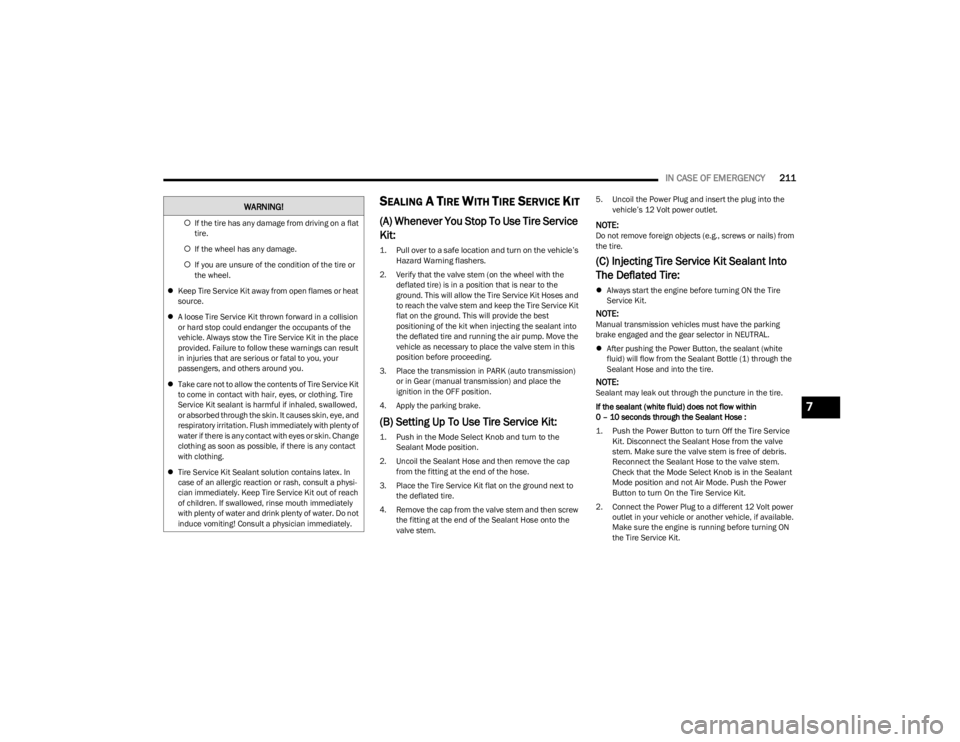
SEALING A TIRE WITH TIRE SERVICE KIT
(A) Whenever You Stop To Use Tire Service
Kit:
1. Pull over to a safe location and turn on the vehicle’s
Hazard Warning flashers.
2. Verify that the valve stem (on the wheel with the deflated tire) is in a position that is near to the
ground. This will allow the Tire Service Kit Hoses and
to reach the valve stem and keep the Tire Service Kit
flat on the ground. This will provide the best
positioning of the kit when injecting the sealant into
the deflated tire and running the air pump. Move the
vehicle as necessary to place the valve stem in this
position before proceeding.
3. Place the transmission in PARK (auto transmission) or in Gear (manual transmission) and place the
ignition in the OFF position.
4. Apply the parking brake.
(B) Setting Up To Use Tire Service Kit:
1. Push in the Mode Select Knob and turn to the Sealant Mode position.
2. Uncoil the Sealant Hose and then remove the cap from the fitting at the end of the hose.
3. Place the Tire Service Kit flat on the ground next to the deflated tire.
4. Remove the cap from the valve stem and then screw the fitting at the end of the Sealant Hose onto the
valve stem. 5. Uncoil the Power Plug and insert the plug into the
vehicle’s 12 Volt power outlet.
NOTE:Do not remove foreign objects (e.g., screws or nails) from
the tire.
(C) Injecting Tire Service Kit Sealant Into
The Deflated Tire:
Always start the engine before turning ON the Tire
Service Kit.
NOTE:Manual transmission vehicles must have the parking
brake engaged and the gear selector in NEUTRAL.
After pushing the Power Button, the sealant (white
fluid) will flow from the Sealant Bottle (1) through the
Sealant Hose and into the tire.
NOTE:Sealant may leak out through the puncture in the tire.
If the sealant (white fluid) does not flow within
0 – 10 seconds through the Sealant Hose :
1. Push the Power Button to turn Off the Tire Service
Kit. Disconnect the Sealant Hose from the valve
stem. Make sure the valve stem is free of debris.
Reconnect the Sealant Hose to the valve stem.
Check that the Mode Select Knob is in the Sealant
Mode position and not Air Mode. Push the Power
Button to turn On the Tire Service Kit.
2. Connect the Power Plug to a different 12 Volt power outlet in your vehicle or another vehicle, if available.
Make sure the engine is running before turning ON
the Tire Service Kit.
If the tire has any damage from driving on a flat
tire.
If the wheel has any damage.
If you are unsure of the condition of the tire or
the wheel.
Keep Tire Service Kit away from open flames or heat
source.
A loose Tire Service Kit thrown forward in a collision
or hard stop could endanger the occupants of the
vehicle. Always stow the Tire Service Kit in the place
provided. Failure to follow these warnings can result
in injuries that are serious or fatal to you, your
passengers, and others around you.
Take care not to allow the contents of Tire Service Kit
to come in contact with hair, eyes, or clothing. Tire
Service Kit sealant is harmful if inhaled, swallowed,
or absorbed through the skin. It causes skin, eye, and
respiratory irritation. Flush immediately with plenty of
water if there is any contact with eyes or skin. Change
clothing as soon as possible, if there is any contact
with clothing.
Tire Service Kit Sealant solution contains latex. In
case of an allergic reaction or rash, consult a physi -
cian immediately. Keep Tire Service Kit out of reach
of children. If swallowed, rinse mouth immediately
with plenty of water and drink plenty of water. Do not
induce vomiting! Consult a physician immediately.
WARNING!
7
23_LD_OM_EN_USC_t.book Page 211
Page 218 of 292

216IN CASE OF EMERGENCY
3. Ensure funnel is inserted fully to hold flapper doors
open.
4. Pour fuel into funnel opening.
5. Remove funnel from filler pipe, clean off prior to putting back in the spare tire storage area.IF YOUR ENGINE OVERHEATS
If the vehicle is overheating, it will need to be serviced by
an authorized dealer.
Potential signs of vehicle overheating:
Temperature gauge is at HOT (H)
Strong smell of coolant
White smoke coming from engine or exhaust
Coolant bottle coolant has bubbles present
In the event it is observed that the temperature gauge is
moving towards or close to the HOT (H) position, you can
reduce the potential for overheating by taking the
appropriate action.
On the highways — slow down.
In city traffic — while stopped, place the transmission in
NEUTRAL (N), but do not increase the engine idle speed
while preventing vehicle motion with the brakes.
If your Air Conditioner (A/C) is on, turn it off. The A/C
system adds heat to the engine cooling system and
turning the A/C off can help remove this heat.
You can also turn the temperature control to maximum
heat, the mode control to floor and the blower control
to high. This allows the heater core to act as a supple -
ment to the radiator and aids in removing heat from the
engine cooling system.
MANUAL PARK RELEASE–8–SPEED
TRANSMISSION
CAUTION!
To avoid fuel spillage and overfilling, do not “top off” the
fuel tank after filling.
WARNING!
Never have any smoking materials lit in or near the
vehicle when the fuel door is open or the tank is
being filled.
Never add fuel when the engine is running. This is in
violation of most state and federal fire regulations
and may cause the Malfunction Indicator Light to
turn on.
A fire may result if fuel is pumped into a portable
container that is inside of a vehicle. You could be
burned. Always place fuel containers on the ground
while filling.
WARNING!
You or others can be badly burned by hot engine
coolant (antifreeze) or steam from your radiator. If you
see or hear steam coming from under the hood, do not
open the hood until the radiator has had time to cool.
Never try to open a cooling system pressure cap when
the radiator or coolant bottle is hot.
CAUTION!
Driving with a hot cooling system could damage your
vehicle. If the temperature gauge reads HOT (H), pull
over and stop the vehicle. Idle the vehicle with the air
conditioner turned off until the pointer drops back into
the normal range. If the pointer remains on HOT (H),
and you hear continuous chimes, turn the engine off
immediately and call for service.
WARNING!
Always secure your vehicle by fully applying the parking
brake before activating the Manual Park Release. In
addition, you should be seated in the driver's seat with
your foot firmly on the brake pedal when activating the
Manual Park Release. Activating the Manual Park
Release will allow your vehicle to roll away if it is not
secured by the parking brake, or by proper connection
to a tow vehicle. Activating the Manual Park Release on
an unsecured vehicle could lead to serious injury or
death for those in or around the vehicle.
23_LD_OM_EN_USC_t.book Page 216
Page 219 of 292
IN CASE OF EMERGENCY217
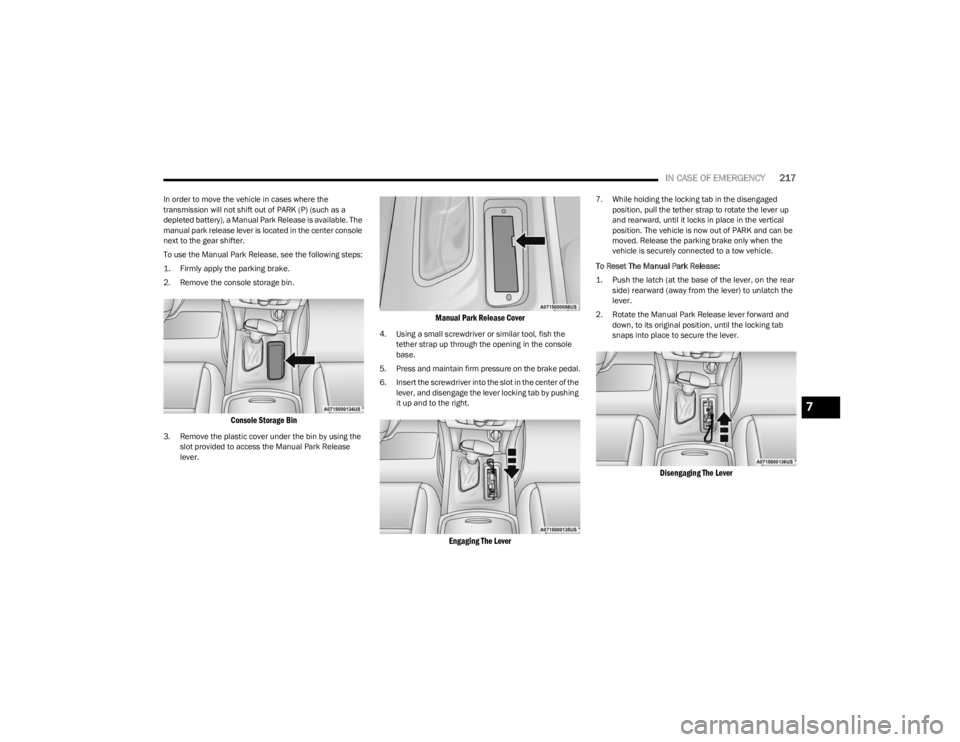
In order to move the vehicle in cases where the
transmission will not shift out of PARK (P) (such as a
depleted battery), a Manual Park Release is available. The
manual park release lever is located in the center console
next to the gear shifter.
To use the Manual Park Release, see the following steps:
1. Firmly apply the parking brake.
2. Remove the console storage bin.
Console Storage Bin
3. Remove the plastic cover under the bin by using the
slot provided to access the Manual Park Release
lever.
Manual Park Release Cover
4. Using a small screwdriver or similar tool, fish the tether strap up through the opening in the console
base.
5. Press and maintain firm pressure on the brake pedal.
6. Insert the screwdriver into the slot in the center of the lever, and disengage the lever locking tab by pushing
it up and to the right.
Engaging The Lever
7. While holding the locking tab in the disengaged position, pull the tether strap to rotate the lever up
and rearward, until it locks in place in the vertical
position. The vehicle is now out of PARK and can be
moved. Release the parking brake only when the
vehicle is securely connected to a tow vehicle.
To Reset The Manual Park Release:
1. Push the latch (at the base of the lever, on the rear side) rearward (away from the lever) to unlatch the
lever.
2. Rotate the Manual Park Release lever forward and down, to its original position, until the locking tab
snaps into place to secure the lever.
Disengaging The Lever
7
23_LD_OM_EN_USC_t.book Page 217
Page 220 of 292
218IN CASE OF EMERGENCY
3. Pull up gently on the tether strap to confirm that the
lever is locked in its stowed position.
4. Tuck the tether strap into the base of the console. Reinstall the Manual Park Release cover and the
console storage bin.
When the lever is in the release position the access cover
cannot be reinstalled.
FREEING A STUCK VEHICLE
If your vehicle becomes stuck in mud, sand, or snow, it can
often be moved using a rocking motion. Turn the steering
wheel right and left to clear the area around the front
wheels. For vehicles with automatic transmission, push
and hold the lock button on the gear selector. Then shift
back and forth between DRIVE and REVERSE (with
automatic transmission) or FIRST gear and REVERSE
(with manual transmission), while gently pressing the
accelerator. Use the least amount of accelerator pedal
pressure that will maintain the rocking motion, without
spinning the wheels or racing the engine.NOTE:For vehicles with automatic transmission: Shifts between
DRIVE and REVERSE can only be achieved at wheel
speeds of 5 mph (8 km/h) or less. Whenever the trans -
mission remains in NEUTRAL for more than two seconds,
you must press the brake pedal to engage DRIVE or
REVERSE.
Push the ESC OFF button to place the Electronic Stability
Control (ESC) system in “Partial OFF” mode, before rocking
the vehicle
Úpage 166. Once the vehicle has been freed,
push the ESC OFF button again to restore “ESC On” mode.
CAUTION!
Racing the engine or spinning the wheels may lead to
transmission overheating and failure. Allow the engine
to idle with the transmission in NEUTRAL for at least
one minute after every five rocking-motion cycles. This
will minimize overheating and reduce the risk of clutch
or transmission failure during prolonged efforts to free
a stuck vehicle.
WARNING!
Fast spinning tires can be dangerous. Forces generated
by excessive wheel speeds may cause damage, or even
failure, of the axle and tires. A tire could explode and
injure someone. Do not spin your vehicle's wheels
faster than 30 mph (48 km/h) or for longer than 30
seconds continuously without stopping when you are
stuck and do not let anyone near a spinning wheel, no
matter what the speed.
CAUTION!
Racing the engine or spinning the wheels may lead to
transmission overheating and failure. Allow the
engine to idle with the transmission in NEUTRAL for
at least one minute after every five rocking-motion
cycles. This will minimize overheating and reduce the
risk of transmission failure during prolonged efforts
to free a stuck vehicle.
When “rocking” a stuck vehicle by shifting between
DRIVE and REVERSE, do not spin the wheels faster
than 15 mph (24 km/h), or drivetrain damage may
result.
Revving the engine or spinning the wheels too fast
may lead to transmission overheating and failure. It
can also damage the tires. Do not spin the wheels
above 30 mph (48 km/h) while in gear (no transmis -
sion shifting occurring).
23_LD_OM_EN_USC_t.book Page 218
Page 281 of 292

279
BluetoothConnecting To A Particular Mobile PhoneOr Audio Device After Pairing ............................ 143
Body Mechanism Lubrication...................................... 231
B-Pillar Location ........................................................... 252
Brake Assist System .................................................... 165
Brake Control System .................................................. 165
Brake Fluid .......................................................... 236
, 272
Brake System ...................................................... 236, 267
Fluid Check..................................................... 236, 272
Master Cylinder ....................................................... 236
Parking ....................................................................... 79
Warning Light ................................................... 68
, 267
Brake/Transmission Interlock........................................81
Break-In Recommendations, New Vehicle .................... 79
Brightness, Interior Lights .............................................. 45
Bulb Replacement ....................................................... 246
Bulbs, Light.......................................................... 201
, 246
CCamera, Rear ............................................................... 100
Capacities, Fluid ........................................................... 270
Caps, Filler Oil (Engine) .............................................................. 225
Radiator (Coolant Pressure)................................... 235
Car Washes .................................................................. 265
Carbon Monoxide Warning .......................................... 201
Cargo Vehicle Loading....................................................... 102
Cargo Area Cover ............................................................60
Cargo Compartment ....................................................... 60
Cargo Net .........................................................................60
CD.................................................................................. 138
Certification Label ........................................................ 102 Chains, Tire ...................................................................262
Chart, Tire Sizing ...........................................................249
Check Engine Light (Malfunction Indicator Light) ........ 75
Checking Your Vehicle For Safety ................................ 199
Checks, Safety .............................................................. 199
Child Restraint .............................................................. 190
Child Restraints Booster Seats .......................................................... 192
Child Seat Installation ............................................. 197How To Stow An unused ALR Seat Belt .................196Infant And Child Restraints ..................................... 191
Lower Anchors And Tethers For Children............... 193
Older Children And Child Restraints....................... 191
Seating Positions ..................................................... 193
Child Safety Locks .......................................................... 24
Clean Air Gasoline ........................................................ 268
Cleaning Wheels .....................................................................260
Climate Control ............................................................... 46 Automatic ................................................................... 47
Manual ....................................................................... 49
Coin Holder ..................................................................... 53
Cold Weather Operation ................................................. 78
Compact Spare Tire ...................................................... 259
Console Floor ........................................................................... 53
Contract, Service .......................................................... 275
Controls ......................................................................... 130
Cooling Pressure Cap (Radiator Cap) ..........................235
Cooling System ............................................................. 234 Adding Coolant (Antifreeze) ....................................235
Coolant Level ................................................. 234
, 235
Cooling Capacity ...................................................... 270
Disposal Of Used Coolant ....................................... 235 Drain, Flush, And Refill............................................234 Inspection ................................................................ 235
Points To Remember .............................................. 236
Pressure Cap ........................................................... 235
Radiator Cap............................................................ 235
Selection Of Coolant (Antifreeze) ........ 234
, 270, 271
Corrosion Protection .................................................... 264
Cruise Control (Speed Control) ............................... 85
, 87
Cruise Light .............................................................. 73, 74
Customer Assistance ................................................... 273
Customer Programmable Features ............................. 112
Cybersecurity ................................................................ 111
DDaytime Running Lights ................................................. 41 Deck Lid Power Release........................................................... 59
Defroster, Windshield .................................................. 200
De-Icer, Remote Start .................................................... 18
Deleting A Phone .......................................................... 144
Deluxe Security Alarm .................................................... 19
Diagnostic System, Onboard ......................................... 74 Dimmer Switch Headlight ................................................................... 41
Dipsticks Oil (Engine) .............................................................. 227
Disabled Vehicle Towing .............................................. 219
Disc Drive ...................................................................... 138
Disconnecting ............................................................... 144
Disposal Antifreeze (Engine Coolant) .................................... 235
Disturb........................................................................... 146
Door Ajar ......................................................................... 69
Door Ajar Light ................................................................ 69
11
23_LD_OM_EN_USC_t.book Page 279
Page 284 of 292

282
ECO Mode Indicator...................................................73
Electric Power Steering Fault .................................... 69
Electronic Stability Control (ESC) Active Warning .... 71
Electronic Stability Program(ESP) Indicator ............. 70
Exterior ............................................................. 40
, 201
Fog .............................................................................. 42
Forward Collision Warning (FCW) OFF Indicator ......73
Front Fog Indicator ....................................................73
Hazard Warning Flasher ......................................... 202
Headlight Switch ........................................................40
Headlights ...........................................................40
, 42
Headlights On With Wipers .......................................42
High Beam..................................................................41
High Beam Indicator ..................................................74
High Beam/Low Beam Select ...................................41
Instrument Cluster ..................................................... 40
Intensity Control .........................................................45
Interior ........................................................................43
LaneSense Indicator...........................................73
, 74
License .................................................................... 247
Lights On Reminder ...................................................42
Low Fuel .....................................................................71
Low Washer Fluid Warning........................................71
Malfunction Indicator (Check Engine) ...................... 71
Oil Temperature Warning ..........................................70
Park ..................................................................... 42
, 73
Passing ....................................................................... 42
Reading ...................................................................... 44
Seat Belt Reminder ...................................................70
Security Alarm ............................................................70
Service ..................................................................... 246
Service Adaptive Cruise Control (ACC) Warning ......72
Service Forward Collision Warning (FCW) ................72
Service LaneSense Warning ..................................... 71
Traction Control ...................................................... 167 Transmission Temperature Warning ........................ 70
Trunk Open Warning ................................................. 70
Turn Signals ........................................41
, 43, 74, 201
Vanity Mirror .............................................................. 35
Warning Instrument Cluster Descriptions......... 70
, 74
Load Shed Battery Saver On .......................................... 67
Load Shed Electrical Load Reduction ........................... 67
Load Shed Intelligent Battery Sensor............................ 67
Loading Vehicle................................................... 102
, 103
Capacities ................................................................ 103
Tires.......................................................................... 252
Locks Auto Unlock................................................................ 23
Automatic Door.......................................................... 23
Child Protection ......................................................... 24
Power Door ................................................................ 21
Low Tire Pressure System ............................................174
Lubrication, Body .......................................................... 231
Lug Nuts/Bolts .............................................................. 267
MMaintenance ................................................................... 58 Maintenance Free Battery ...........................................228
Maintenance Schedule ...................................... 221
, 222
Malfunction Indicator Light (Check Engine) ........... 71, 75
Manual Service .....................................................................276
Media Hub....................................................................... 54
Media Mode .................................................................. 138
Memory Seat ................................................................... 27 Memory Settings............................................................. 27
Methanol ....................................................................... 269
Mirrors ............................................................................. 34 Electric Powered ........................................................ 36 Electric Remote ......................................................... 36
Heated ....................................................................... 36
Outside....................................................................... 35
Rearview .................................................... 34
, 35, 202
Vanity ......................................................................... 35
Modifications/Alterations Vehicle ..........................................................................8
Monitor, Tire Pressure System .................................... 174
Mopar Parts .................................................................. 276
MP3 Control .................................................................... 54
Multi-Function Control Lever ......................................... 41
NNew Vehicle Break-In Period ......................................... 79
OOccupant Restraints .................................................... 177
Octane Rating, Gasoline (Fuel) ........................... 268, 271
Oil Change Indicator ....................................................... 65 Reset.......................................................................... 65
Oil Filter, Change .......................................................... 229
Oil Filter, Selection ....................................................... 229
Oil Pressure Light ........................................................... 70
Oil, Engine ............................................................ 228
, 271
Capacity ................................................................... 270
Checking .................................................................. 227
Dipstick .................................................................... 227
Disposal ................................................................... 229
Filter ......................................................................... 229
Filter Disposal.......................................................... 229
Identification Logo .................................................. 229
Materials Added To ................................................. 229 Pressure Warning Light ............................................ 70
Recommendation...........................................228
, 270
23_LD_OM_EN_USC_t.book Page 282