Page 208 of 292
206IN CASE OF EMERGENCY
6. Block both the front and rear of the wheels diagonally
opposite of the jacking position using the provided
wheel chocks. For example, if changing the driver’s
front wheel, chock the passenger’s rear wheel.
Wheel Blocked Example
NOTE:
Passengers should not remain in the vehicle when the
vehicle is being lifted or raised.
JACK LOCATION/SPARE TIRE STOWAGE
The jack, tools and spare tire are stowed under the load
floor in the trunk.
Spare Tire And Jack Location
NOTE:
The spare tire must be removed in order to access the
jack.
Follow these steps to access the jack and spare tire:
1. Open the trunk.
2. Lift up the load floor by using the pull strap.
3. Rotate the fastener securing the spare tire counter -
clockwise to remove it.
Spare Tire Fastener
4. Remove the spare tire.
5. Rotate the fastener securing the jack counter -
clockwise to remove it.
Jack Fastener
23_LD_OM_EN_USC_t.book Page 206
Page 210 of 292
208IN CASE OF EMERGENCY
3. Before raising the vehicle, use the lug wrench to
loosen, but not remove, the lug nuts on the wheel
with the flat tire. Turn the lug nuts counterclockwise
one turn while the wheel is still on the ground.
Placement for the front and rear jacking locations are
critical. See the following images for proper jacking lo -
cations.
Jacking Locations
4. Place the jack underneath the lift area that is closest to the flat tire. Turn the jack screw clockwise to firmly
engage the jack saddle with the lift area of the sill
flange.
Front Lifting Point
Front Jacking Location Rear Lifting Point
Rear Jacking Location
CAUTION!
Do not attempt to raise the vehicle by jacking on
locations other than those indicated in the Jacking
Instructions for this vehicle.
23_LD_OM_EN_USC_t.book Page 208
Page 211 of 292

IN CASE OF EMERGENCY209
5. Raise the vehicle just enough to remove the flat tire
and install the spare tire.
6. Remove the lug nuts and tire.
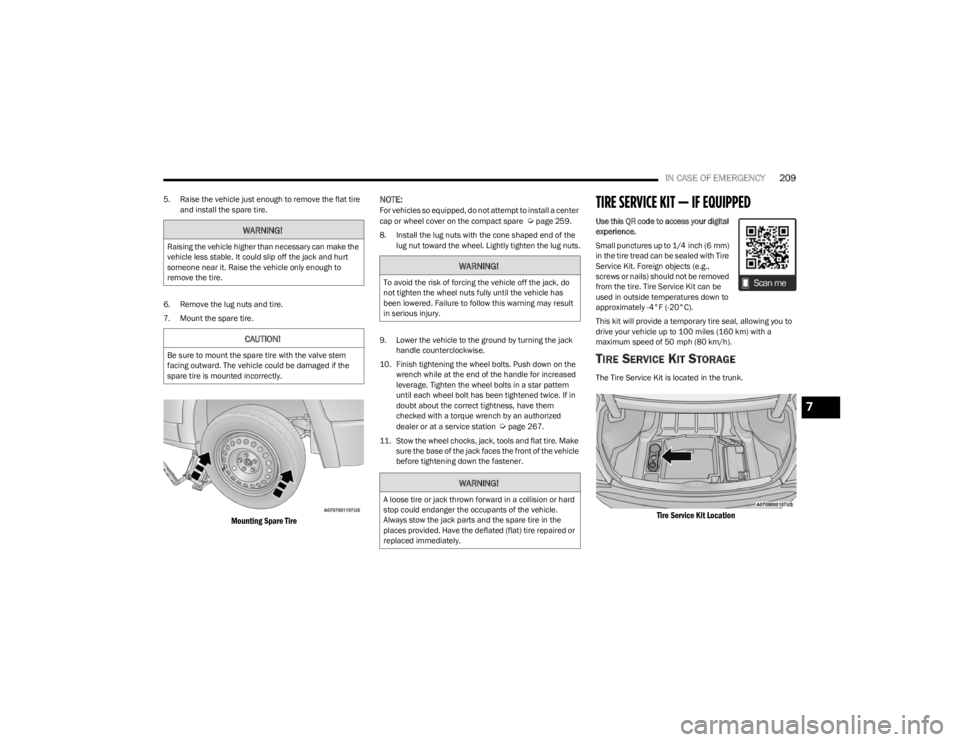
7. Mount the spare tire.
Mounting Spare Tire
NOTE:
For vehicles so equipped, do not attempt to install a center
cap or wheel cover on the compact spare Úpage 259.
8. Install the lug nuts with the cone shaped end of the lug nut toward the wheel. Lightly tighten the lug nuts.
9. Lower the vehicle to the ground by turning the jack handle counterclockwise.
10. Finish tightening the wheel bolts. Push down on the wrench while at the end of the handle for increased
leverage. Tighten the wheel bolts in a star pattern
until each wheel bolt has been tightened twice. If in
doubt about the correct tightness, have them
checked with a torque wrench by an authorized
dealer or at a service station
Úpage 267.
11. Stow the wheel chocks, jack, tools and flat tire. Make sure the base of the jack faces the front of the vehicle
before tightening down the fastener.
TIRE SERVICE KIT — IF EQUIPPED
Use this QR code to access your digital
experience.
Small punctures up to 1/4 inch (6 mm)
in the tire tread can be sealed with Tire
Service Kit. Foreign objects (e.g.,
screws or nails) should not be removed
from the tire. Tire Service Kit can be
used in outside temperatures down to
approximately -4°F (-20°C).
This kit will provide a temporary tire seal, allowing you to
drive your vehicle up to 100 miles (160 km) with a
maximum speed of 50 mph (80 km/h).
TIRE SERVICE KIT STORAGE
The Tire Service Kit is located in the trunk.
Tire Service Kit Location
WARNING!
Raising the vehicle higher than necessary can make the
vehicle less stable. It could slip off the jack and hurt
someone near it. Raise the vehicle only enough to
remove the tire.
CAUTION!
Be sure to mount the spare tire with the valve stem
facing outward. The vehicle could be damaged if the
spare tire is mounted incorrectly.
WARNING!
To avoid the risk of forcing the vehicle off the jack, do
not tighten the wheel nuts fully until the vehicle has
been lowered. Failure to follow this warning may result
in serious injury.
WARNING!
A loose tire or jack thrown forward in a collision or hard
stop could endanger the occupants of the vehicle.
Always stow the jack parts and the spare tire in the
places provided. Have the deflated (flat) tire repaired or
replaced immediately.
7
23_LD_OM_EN_USC_t.book Page 209
Page 245 of 292
SERVICING AND MAINTENANCE243
F15 40 Amp Green –HVAC Blower
F16 20 Amp Blue –Left Spot Lamp – Police
F17 20 Amp Blue –Right Spot Lamp – Police
F18 30 Amp Pink –VISM Mod (Police)
F19 ––Spare
F20 ––Spare
F21 30 Amp Pink –Fuel Pump (Non 6.2L ADR)
F22 –5 Amp TanCyber Gateway Module
F23 –10 Amp RedFuel Door SW * / Diagnostic Port
F24 –10 Amp RedIntegrated Center Stack
F25 –10 Amp RedTire Pressure Monitor
F26 –15 Amp BlueTrans Mod (Charger / 300)
F27 –25 Amp ClearAmplifier *
F31 –25 Amp BreakerPower Seats *
F32 –15 Amp BlueHVAC Module / Cluster
F33 –15 Amp BlueIGN SW / Wireless Mod / Steer Clmn
Lock Mod / Remote Start *
F34 –10 Amp RedSteering Column Module / Clock (300)
F35 –5 Amp TanBattery Sensor
F36 –15 Amp BlueActive Exhaust Valve *
F37 –20 Amp YellowRadio
F38 –20 Amp YellowMedia Hub / Console APO
Cavity Cartridge Fuse Mini-FuseDescription
* If Equipped
8
23_LD_OM_EN_USC_t.book Page 243