Page 89 of 296

87
Connect only one device at a time to
the socket (no extension or multi-way
connector).
Connect only devices with class II
insulation (shown on the device).
As a safety measure, when electrical
consumption is high and when required by
the vehicle's electrical system (particular
weather conditions, electrical overload...),
the power supply to the socket will be cut
off; the green warning lamp goes off.
F
l
ift the front armrest cover for access to its
compartment,
F
c
heck that the warning lamp is on green,
F
c
onnect your multimedia or other electrical
device (telephone charger, laptop computer,
CD-DVD player, baby food warmer, etc.).
This socket works with the engine running, as
well as in STOP mode with Stop & Start.
In the event of a fault with the socket, the green
warning lamp flashes.
Have it checked in the dealer network or by a
qualified workshop.
Storage drawers
Located under each front seat, except for the
driver's seat on versions with electric seats.
Opening
F Raise the front of the drawer and pull it open.
Do not place heavy objects in the drawer.
Removal
Avoid removing the drawer completely, as
refitting it is not easy.
F
O
pen the drawer fully.
F
P
ull the drawer upwards to disengage it.
Refitting
However, if it has been completely removed, to
refit it:
F
u
se the torch to illuminate the area under
the seat,
F
enga
ge the drawer in its runners,
F
l
ift the retaining tongues and slide the
drawer under these tongues,
F
a
t the end of its travel, press down on the
drawer to engage it.
03
Ease of use and comfort
Page 90 of 296
88
Rear fittings
12 V accessory socket
F To connect a 12 V accessory (max. power: 120 W), lift the cover and connect a suitable
adaptor.
Rear armrest
Comfort system for rear passengers. F
L
ower the rear armrest for a more
comfortable position.
This also gives access to the ski flap.
Ski flap
Mechanism for storing and transporting long
objects.
Opening
F Lower the rear armrest.
F P ull the flap handle downwards.
F
L
ower the flap.
F
L
oad the objects from inside the boot.
Boot fittings
Rear shelf
To remove the shelf:
F r elease the two cords,
F
g
ently lift the shelf, then remove it.
There are several ways of storing it:
-
ei
ther upright behind the front seats,
-
o
r flat on the bottom of the boot.
03
Ease of use and comfort
Page 91 of 296

89
Hooks
These can be used to secure shopping bags.
12 V accessory socket
F To connect a 12 V accessory (max. power: 120 W), remove the cap and connect an
appropriate adaptor.
F
T
urn the key to the ignition on position.
Portable torch
Operation
This torch operates with NiMH type
rechargeable batteries.
It has a battery life of approximately 45 minutes
and charges while you are driving.
Observe the polarities when fitting the
rechargeable batteries.
Never replace the rechargeable batteries
with normal disposable batteries.
This is a removable lamp, fitted in the boot
wall, which can be used to light the boot or as
a torch.
For more information on the Boot lamp
, refer
to the corresponding section.
Use
F Extract the torch from its location pulling it upwards.
F
P
ress the switch, located on the back, to
switch the torch on or off.
F
U
nfold the support, located on the back,
to hold up the torch, for example, when
changing a wheel.
Storage
F Put the torch back in place in its location starting with the lower part.
If you have forgotten to switch off the torch,
this switches it off automatically.
If the torch is not engaged correctly, it may
not charge and may not come on when the
boot is opened.
03
Ease of use and comfort
Page 92 of 296
90
Storage boxStowing rings
There are four stowing rings in the boot for
securing luggage:
-
t
wo are located on the boot floor,
-
t
wo are located at the lower part of the
entrance.
Boot lighting
This comes on automatically when the boot is
opened and goes off automatically when the
boot is closed.
The lighting time varies according to the
circumstances:
-
w
hen the ignition is off, approximately
ten minutes,
-
i
n energy economy mode,
approximately thirty seconds,
-
w
ith the engine running, unlimited.
F
R
aise the boot carpet for access to the
storage box.
The latter has compartments for storage of a
box of spare bulbs, a first aid kit, etc.
It also contains vehicle tools, the temporary
puncture repair kit, etc.
03
Ease of use and comfort
Page 93 of 296
LIGHTING AND VISIBILITY
04
Page 94 of 296

92
Lighting controls
System for selection and control of the various
front and rear lamps providing the vehicle's
lighting.
Main lighting
The various front and rear lamps of the vehicle
are designed to adapt the driver's visibility
progressively according to weather conditions:
-
s
idelamps, to be seen,
-
d
ipped beam headlamps to see without
dazzling other drivers,
-
m
ain beam headlamps to see clearly when
the road is clear.
In some weather conditions (e.g. low
temperature or humidity), the presence
of misting on the internal sur face of the
glass of the headlamps and rear lamps is
normal; it disappears after the lamps have
been on for a few minutes.
Additional lighting
Other lamps are provided to meet the
requirements of particular driving conditions:
-
r
ear foglamps,
Settings
You can adjust the settings of certain functions:
- a utomatic illumination of headlamps,
-
gu
ide-me-home lighting,
-
w
elcome lighting,
-
d
irectional lighting.
Travelling abroad
Halogen and xenon headlamps
If planning to use your vehicle in a country
that drives on the other side of the road,
the headlamp dipped beams must be
adjusted to avoid dazzling oncoming
drivers.
Contact the dealer network or a qualified
workshop.
Without AUTO lighting
With AUTO lighting
Selection of main lighting
mode
Turn the ring to align the desired symbol with
the marking. Lighting off (ignition off)/Daytime
running lamps (engine running).
Automatic illumination of headlamps.
-
f
ront foglamps with cornering lighting,
-
d
irectional headlamps for improved visibility
when cornering,
-
d
aytime running lamps to be more visible
during the day,
-
g
uide-me-home and welcome lighting to
facilitate access to the vehicle,
-
p
arking lamps as vehicle side markers.
04
Lighting and visibility
Page 95 of 296

93
Sidelamps.
Dipped or main beam headlamps.
Headlamp dipping
Pull the stalk towards you to switch between
dipped and main beam headlamps or to
activate automatic headlamp dipping.
In the lighting off and sidelamps modes, the
driver can switch on the main beam headlamps
temporarily ("headlamp flash"), for as long as
the stalk is kept pulled.
Displays
Illumination of the corresponding indicator
lamp in the instrument panel confirms that the
lighting selected is on.
Foglamps
Front and rear foglampsTurn the ring:
F
o
nce for wards to switch on the front
foglamps,
F
f
or wards a second time to switch on the rear
foglamps,
F
o
nce backwards to switch off the rear
foglamps,
F
b
ackwards a second time to switch off the
front foglamps.
If the lighting is switched off automatically
(version with AUTO lighting) or the dipped
beams are switched off manually, the foglamps
and sidelamps remain on.
F
T
urn the ring backwards to switch off the
foglamps; the sidelamps will then switch off.
In good or rainy weather, by both day
and night, the front foglamps and the
rear foglamps are prohibited. In these
situations, the power of their beams may
dazzle other drivers. They should only be
used in fog or falling snow.
In these weather conditions, it is your
responsibility to switch on the foglamps
and dipped headlamps manually as the
sunshine sensor may detect sufficient
light.
Switch off the front and rear foglamps
when they are no longer necessary. Switching off of the lighting when the
ignition is switched off
On switching off the ignition, all of the
lamps turn off immediately, except for
dipped beam if automatic guide-me-home
lighting is activated.
Switching on the lighting after the
ignition is switched off
To reactivate the lighting control, rotate
ring A to the 0 position – lamps off, then to
the desired position.
On opening the driver's door a temporary
audible signal warns the driver that the
lighting is on.
It will go off automatically after a period of
time that depends on the state of charge
in battery (entering energy-saving mode).
04
Lighting and visibility
Page 96 of 296

94
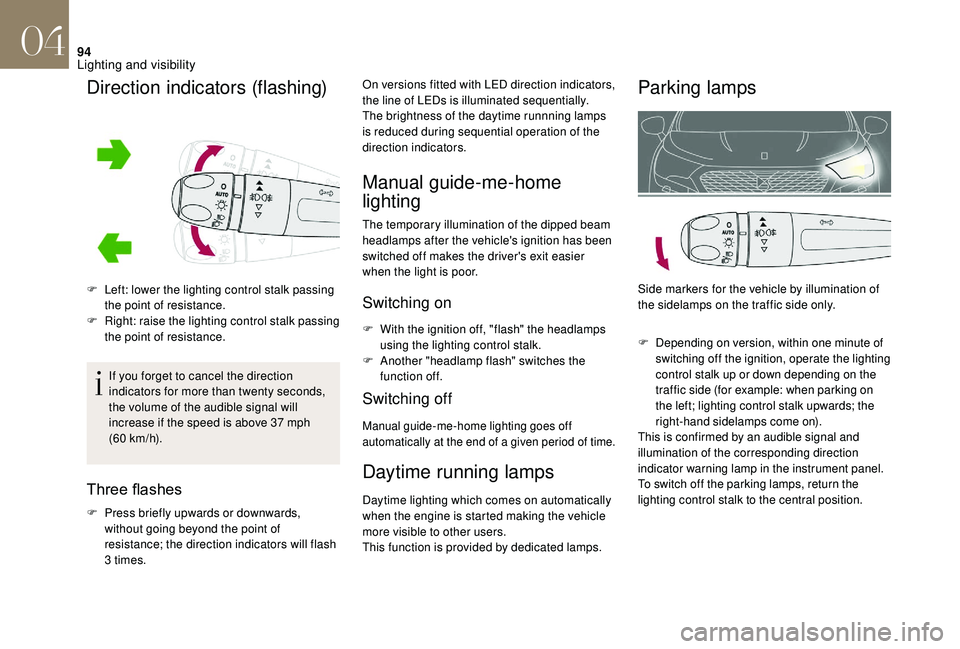
F Left: lower the lighting control stalk passing the point of resistance.
F
R
ight: raise the lighting control stalk passing
the point of resistance.
If you forget to cancel the direction
indicators for more than twenty seconds,
the volume of the audible signal will
increase if the speed is above 37 mph
(60
km/h).
Three flashes
F Press briefly upwards or downwards, without going beyond the point of
resistance; the direction indicators will flash
3 times. On versions fitted with LED direction indicators,
the line of LEDs is illuminated sequentially.
The brightness of the daytime runnning lamps
is reduced during sequential operation of the
direction indicators.
Daytime running lamps
Daytime lighting which comes on automatically
when the engine is started making the vehicle
more visible to other users.
This function is provided by dedicated lamps.
Parking lamps
Direction indicators (flashing)
Side markers for the vehicle by illumination of
the sidelamps on the traffic side only.
F Depending on version, within one minute of
switching off the ignition, operate the lighting
control stalk up or down depending on the
traffic side (for example: when parking on
the left; lighting control stalk upwards; the
right-hand sidelamps come on).
This is confirmed by an audible signal and
illumination of the corresponding direction
indicator warning lamp in the instrument panel.
To switch off the parking lamps, return the
lighting control stalk to the central position.
Manual guide-me-home
lighting
The temporary illumination of the dipped beam
headlamps after the vehicle's ignition has been
switched off makes the driver's exit easier
when the light is poor.
Switching on
F With the ignition off, "flash" the headlamps using the lighting control stalk.
F
A
nother "headlamp flash" switches the
function off.
Switching off
Manual guide-me-home lighting goes off
automatically at the end of a given period of time.
04
Lighting and visibility