2023 CHEVROLET SILVERADO 2500 ignition
[x] Cancel search: ignitionPage 298 of 441
Chevrolet Silverado 2500 HD/3500 HD Owner Manual (GMNA-Localizing-U.
S./Canada/Mexico-15546003) - 2022 - CRC - 5/5/21
Driving and Operating 297
trailer is connected. When a trailer is
connected and the ignition is off, the
Trailering App System will periodically pulse
the lighting circuits of the trailer to verify it
is still connected. The trailer lights may
periodically flash as a result of this trailer
connection detection. These flashes may be
more visible in dark ambient light
environments. The flashing or flickering
lights are a normal condition and the
Trailering App System has built-in
protections to prevent the battery from
draining. When Theft Alert is also enabled
the frequency and pattern of this flashing
will change.
Connection Problem
If any of the trailer connections are lost, a
message about the connection issue will
appear on the Driver Information Center
(DIC). The infotainment display will also
show the connection issue in the Connection
Status view.
If a trailer connection is not detected, the
Trailering App will not display the
Connection Status screen.Connection Trailer Lighting Faults Detected
The Trailering App System monitors for
electrical faults on the trailer lights.
A message about the lighting issue will
appear on the DIC. The infotainment display
will also show the lighting issue in the
Connection Status view. Repair your trailer
lights if needed. A trailer lighting issue is
not covered by your GM warranty.
Diagnose View
Touch Diagnose to see more information
about the connection problem.
This view will display the names of the
trailer connector pins, a graphic of the trailer
connector, and a graphic of the back of the
trailer.
Any connector pin that failed will be amber
color, and the location of the corresponding
connection will be highlighted on the
graphic of the back of the trailer.
The Running Lights connection may not
detect partial outages. Activate the light test
to check all trailer lamps. See
“Light Test”
following. Light Test
Touch Start Light Test to cycle the trailer
lights on and off to determine if they are
working. The test follows this sequence:
1. The running lights turn on first and remain on throughout the sequence.
2. The brake lights turn on for about two seconds.
3. The left turn signal light flashes three times.
4. The right turn signal light flashes three times.
5. The reverse lights turn on for about two seconds.
6. Steps 2–5 repeat for approximately one minute and 45 seconds, or until the
test deactivates.
Touch Stop to stop the test. The test will
automatically end after one minute and
45 seconds.
The sequence also deactivates when any of
the following occur:
.The ignition is turned off.
.The transmission is shifted out of P (Park).
.The brake pedal is pressed.
.The turn signal is activated.
Page 299 of 441
Chevrolet Silverado 2500 HD/3500 HD Owner Manual (GMNA-Localizing-U.
S./Canada/Mexico-15546003) - 2022 - CRC - 5/5/21
298 Driving and Operating
.The hazard warning lights are activated.
Tires
1. Trailer Tire Pressure/Temperature
Tire Pressure and Temperature
If the TTPMS sensor-to-vehicle learn process
was completed, the status view will display
the current tire pressure and temperature of
the trailer tires related to the active Trailer
Profile. If a tire’s pressure is low or high, the
color of the pressure value will be amber.
If a sensor malfunctions, the values are
dashed lines. If the screen displays“Service
Tire Pressure Monitoring System”, the
vehicle needs to be taken to a dealer for
service.
Maintenance
1. List of Maintenance Reminders
2. Add a New Maintenance Reminder
The Maintenance Status view displays
reminders. Touch a reminder to edit.
Touch + New Maintenance Reminder to go
to the Select New Reminder view.
The progress bar turns yellow when the
maintenance item reaches 90% complete.
The progress bar turns red when the
maintenance item reaches 100% complete.
Maintenance Notifications
.Touch Service Complete to reset the
maintenance reminder.
.Touch Remind Me Later to delay the
reminder.
.Touch X next to Upcoming Alerts (90%)
to dismiss the alert. It will not appear
again.
.Touch X next to Maintenance Due (100%)
to delay the alert to the next ignition
cycle.
Always follow all of the maintenance
instructions that came with your trailer.
Cameras
Guest Trailer Status View
Touch the Guest Trailer Profile for the status
views.
Page 301 of 441
Chevrolet Silverado 2500 HD/3500 HD Owner Manual (GMNA-Localizing-U.
S./Canada/Mexico-15546003) - 2022 - CRC - 5/5/21
300 Driving and Operating
Trailer Tire Pressure Monitoring System or
maintenance reminders cannot be set up for
the Accessory/No Trailer Profile. The
Accessory/No Trailer profile cannot be
edited.
No Trailer Connected
When there is no trailer connected, Trailer
Profiles cannot be activated but most
options can be edited.
Trailer Brake Gain Memory
The system can memorize the brake gain
setting of a Trailer Profile or a Guest Trailer
Profile. When a Trailer Profile or Guest
Trailer Profile is selected, and a brake gain
setting is set for that Trailer Profile, a quick
notice will appear to indicate that the
system has recalled that profile’s brake gain
setting.
If a Trailer Profile is already active and the
brake gain setting had been set for that
Trailer Profile, the quick notice will trigger
whenever the ignition is turned on.
If there was an error in setting the brake
gain for a Trailer Profile, there will be a
notification. This pop-up will not appear if
the Guest Trailer Profile is active or if there
is no trailer connected.Trailer brake gain should be set for a specific
trailering condition and must be adjusted
anytime vehicle loading, trailer loading,
or road surface conditions change.
Editing a Trailer Profile
Trailer Profile View
Touch to edit any of the following options
in the Trailer Profile view:
.Trailer Name
.Towing Assistance Setup, if equipped
.Tire Pressure Setup, if equipped
.Trailer Maintenance
.Edit Mileage
.Reset Average Fuel Economy
Touch Save to save the new value to the
Trailer Profile. Touching Back will still save
the previously entered information.
Trailer Name
Touch to edit the Trailer Profile’s name. Use
at least one character and no spaces.
Touch Save.
Towing Assistance Setup
A trailer should be connected to complete
this portion of profile setup. Touch to set up towing assistance features
for the Trailer Profile. See "Towing
Assistance" for details on the setup.
Tire Pressure Setup
Touch to set up the Trailer Tire Pressure
Monitoring System (TTPMS) for the Trailer
Profile. See
“Trailer Tire Pressure Setup”
previously in this section for details on the
setup. Also, touch Tire Pressure Setup if the
trailer tires were rotated or if the tire
pressure sensors in the tires were replaced
for this Trailer Profile. The vehicle will need
to relearn the tire sensors and their
locations.
If TTPMS had been set up previously, the
Select Number of Sensors screen will appear
after touching Tire Pressure Setup. If the
number of sensors has changed, select the
number and touch Next.
If a new number of sensors is selected, the
Relearn Sensors pop-up will appear. Touch
Cancel to go back or touch Relearn to
overwrite the current sensors and begin the
relearning process. See “Trailer Tire Pressure
Setup” previously in this section.
If number of sensors has not changed, touch
Next and the Learn sensors screen will
appear.
Page 304 of 441
Chevrolet Silverado 2500 HD/3500 HD Owner Manual (GMNA-Localizing-U.
S./Canada/Mexico-15546003) - 2022 - CRC - 5/5/21
Driving and Operating 303
If Tow/Haul Mode is off and this setting is
on for a Trailer Profile, each time the
ignition is turned on a reminder will appear
to turn on Tow/Haul Mode when the Trailer
Profile is active.
If Tow/Haul Mode is on and this setting is
on for a Trailer Profile, the reminder will not
appear when the Trailer Profile is active.
Trailer Length Indicator
Touch Trailer Length Indicator to view the
Trailer Length Indicator settings page. If this
setting is ON a guideline is displayed in the
side mirror camera view to indicate the rear
of the attached trailer. If this setting is OFF
the guideline will not be displayed.
This setting will default to OFF if the trailer
length indicator feature is not set up. See
"Towing Assistance" for details on the setup.
Conversions and Add-Ons
Add-On Electrical Equipment
{Warning
The Data Link Connector (DLC) is used for
vehicle service and Emission Inspection/
Maintenance testing. SeeMalfunction
Indicator Lamp (Check Engine Light) 0116.
A device connected to the DLC —such as
an aftermarket fleet or driver-behavior
tracking device —may interfere with
vehicle systems. This could affect vehicle
operation and cause a crash. Such devices
may also access information stored in the
vehicle’s systems.
Caution
Some electrical equipment can damage
the vehicle or cause components to not
work and would not be covered by the
vehicle warranty. Always check with your
dealer before adding electrical equipment.
Add-on equipment can drain the vehicle's
12-volt battery, even if the vehicle is not
operating. The vehicle has an airbag system. Before
attempting to add anything electrical to the
vehicle, see
Servicing the Airbag-Equipped
Vehicle 071 and
Adding Equipment to the Airbag-Equipped
Vehicle 071.
For information on wiring auxiliary switches,
see www.gmupfitter.com or contact your
dealer.
Adding a Snow Plow or Similar
Equipment
Caution
Do not exceed 72 km/h (45 mph) with a
snow plow mounted to the vehicle. The
vehicle could overheat and be damaged.
Before installing a snow plow on the vehicle,
follow these guidelines:
Caution
If the vehicle does not have the snow
plow prep package, RPO VYU, adding a
plow can damage the vehicle, and the
repairs would not be covered by the
vehicle warranty. Unless the vehicle was
built to carry a snow plow, do not add
(Continued)
Page 307 of 441
Chevrolet Silverado 2500 HD/3500 HD Owner Manual (GMNA-Localizing-U.
S./Canada/Mexico-15546003) - 2022 - CRC - 5/5/21
306 Vehicle Care
Vehicle Care
General Information
General Information . . . . . . . . . . . . . . . . . . . 307
California Perchlorate MaterialsRequirements . . . . . . . . . . . . . . . . . . . . . . . . 307
Accessories and Modifications . . . . . . . . . 307
Vehicle Checks
Doing Your Own Service Work . . . . . . . . 308
Hood . . . . . . . . . . . . . . . . . . . . . . . . . . . . . . . . . . 308
Engine Compartment Overview . . . . . . . . 310
Engine Oil . . . . . . . . . . . . . . . . . . . . . . . . . . . . . . 311
Engine Oil Life System . . . . . . . . . . . . . . . . . 313
Automatic Transmission Fluid . . . . . . . . . . 314
Engine Air Filter Life System . . . . . . . . . . . 314
Engine Air Cleaner/Filter . . . . . . . . . . . . . . . 315
Cooling System . . . . . . . . . . . . . . . . . . . . . . . . 316
Engine Overheating . . . . . . . . . . . . . . . . . . . . 318
Overheated Engine Protection Operating Mode . . . . . . . . . . . . . . . . . . . . . 320
Engine Fan . . . . . . . . . . . . . . . . . . . . . . . . . . . . 320
Power Steering Fluid . . . . . . . . . . . . . . . . . . 320
Washer Fluid . . . . . . . . . . . . . . . . . . . . . . . . . . 321
Brakes . . . . . . . . . . . . . . . . . . . . . . . . . . . . . . . . . 322
Brake Pad Life System . . . . . . . . . . . . . . . . . 322
Brake Fluid . . . . . . . . . . . . . . . . . . . . . . . . . . . . 323
Battery - North America . . . . . . . . . . . . . . . 324
Four-Wheel Drive . . . . . . . . . . . . . . . . . . . . . . 326
Front Axle . . . . . . . . . . . . . . . . . . . . . . . . . . . . . 326 Rear Axle . . . . . . . . . . . . . . . . . . . . . . . . . . . . . . 326
Noise Control System . . . . . . . . . . . . . . . . . 326
Starter Switch Check . . . . . . . . . . . . . . . . . . . 327
Automatic Transmission Shift Lock
Control Function Check . . . . . . . . . . . . . . 328
Ignition Transmission Lock Check . . . . . . 328
Park Brake and P (Park) Mechanism Check . . . . . . . . . . . . . . . . . . . . . . . . . . . . . . . . 328
Wiper Blade Replacement . . . . . . . . . . . . . 328
Glass Replacement . . . . . . . . . . . . . . . . . . . . 329
Windshield Replacement . . . . . . . . . . . . . . 329
Gas Strut(s) . . . . . . . . . . . . . . . . . . . . . . . . . . . 329
Headlamp Aiming
Front Headlamp Aiming . . . . . . . . . . . . . . . 330
Bulb Replacement
Bulb Replacement . . . . . . . . . . . . . . . . . . . . . 330
Halogen Bulbs . . . . . . . . . . . . . . . . . . . . . . . . . 331
LED Lighting . . . . . . . . . . . . . . . . . . . . . . . . . . . 331
Headlamps, Front Turn Signal, Sidemarker, and Parking Lamps . . . . . . 331
Taillamps, Turn Signal, Stoplamps, and Back-Up Lamps . . . . . . . . . . . . . . . . . . . . . . . 332
Center High-Mounted Stoplamp (CHMSL) and Cargo Lamp . . . . . . . . . . . . 333
License Plate Lamp . . . . . . . . . . . . . . . . . . . . 334
Electrical System
Electrical System Overload . . . . . . . . . . . . 334
Fuses and Circuit Breakers . . . . . . . . . . . . . 336 Engine Compartment Fuse Block . . . . . . 336
Instrument Panel Fuse Block (Left) . . . . 339
Instrument Panel Fuse Block (Right) . . . 341
Wheels and Tires
Tires . . . . . . . . . . . . . . . . . . . . . . . . . . . . . . . . . . 344
All-Season Tires . . . . . . . . . . . . . . . . . . . . . . . 344
Winter Tires . . . . . . . . . . . . . . . . . . . . . . . . . . . 345
All-Terrain Tires . . . . . . . . . . . . . . . . . . . . . . . . 345
Tire Sidewall Labeling . . . . . . . . . . . . . . . . . 345
Tire Designations . . . . . . . . . . . . . . . . . . . . . . 346
Tire Terminology and Definitions . . . . . . 347
Tire Pressure . . . . . . . . . . . . . . . . . . . . . . . . . . 349
Tire Pressure Monitor System . . . . . . . . . 350
Tire Pressure Monitor Operation . . . . . . . 351
Tire Inspection . . . . . . . . . . . . . . . . . . . . . . . . . 355
Tire Rotation . . . . . . . . . . . . . . . . . . . . . . . . . . 356
When It Is Time for New Tires . . . . . . . . 358
Buying New Tires . . . . . . . . . . . . . . . . . . . . . 359
Different Size Tires and Wheels . . . . . . . 360
Uniform Tire Quality Grading . . . . . . . . . 360
Wheel Alignment and Tire Balance . . . . 361
Wheel Replacement . . . . . . . . . . . . . . . . . . . 361
Tire Chains . . . . . . . . . . . . . . . . . . . . . . . . . . . . 362
If a Tire Goes Flat . . . . . . . . . . . . . . . . . . . . . 363
Tire Changing . . . . . . . . . . . . . . . . . . . . . . . . . 364
Full-Size Spare Tire . . . . . . . . . . . . . . . . . . . . 374
Jump Starting
Jump Starting - North America . . . . . . . . 374
Page 322 of 441
Chevrolet Silverado 2500 HD/3500 HD Owner Manual (GMNA-Localizing-U.
S./Canada/Mexico-15546003) - 2022 - CRC - 5/5/21
Vehicle Care 321
is heard. A fluid loss in this system could
indicate a problem. Have the system
inspected and repaired.
Wait for the power steering system to cool,
with the engine off, before checking the
fluid.
How to Check Power Steering Fluid
To check the power steering fluid:1. Set the ignition off and let the engine compartment cool down.
2. Wipe the cap and the top of the reservoir clean.
3. Unscrew the cap and wipe the dipstick with a clean rag.
4. Replace the cap and completely tighten it.
5. Remove the cap again and look at the fluid level on the dipstick.
The level should be between the ADD and
FULL marks. If necessary, add only enough
fluid to bring the level up to the hashed
area between the ADD and FULL marks, do
not overfill. To prevent contamination of brake fluid,
never check or fill the power steering
reservoir with the brake master cylinder
cover off.
What to Use
Caution
Use of the incorrect fluid may damage
the vehicle and the damages may not be
covered by the vehicle warranty. Always
use the correct fluid listed in
Recommended Fluids and Lubricants
0401.
To determine what kind of fluid to use, see
Recommended Fluids and Lubricants 0401.
Always use the proper fluid. Failure to use
the proper fluid can cause leaks and damage
hoses and seals.
Washer Fluid
What to Use
When windshield washer fluid needs to be
added, be sure to read the manufacturer's
instructions before use. Use a fluid that has
sufficient protection against freezing in an
area where the temperature may fall below
freezing.
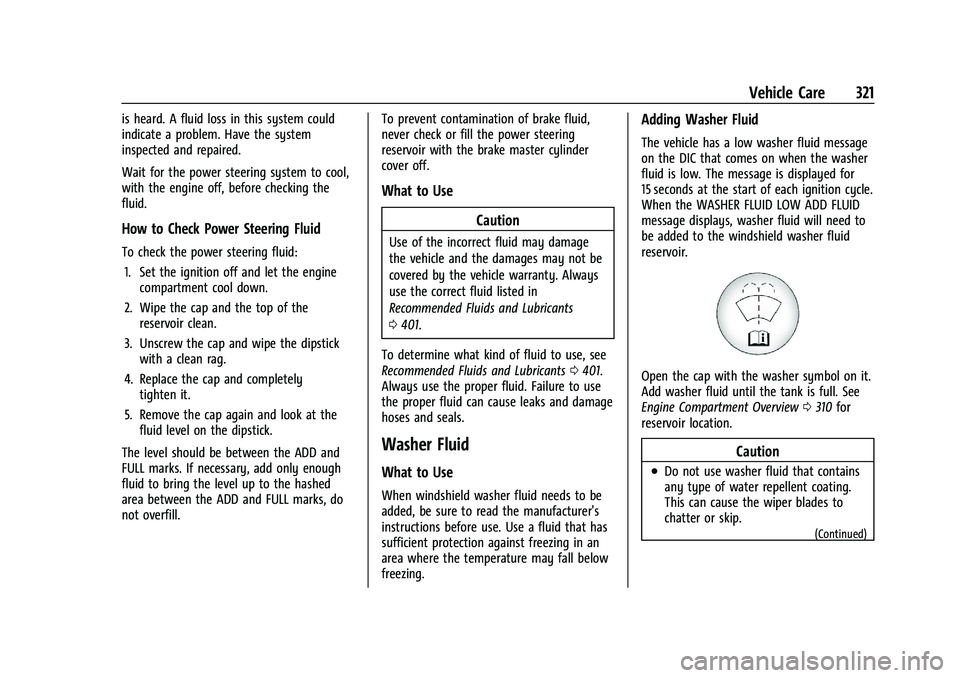
Adding Washer Fluid
The vehicle has a low washer fluid message
on the DIC that comes on when the washer
fluid is low. The message is displayed for
15 seconds at the start of each ignition cycle.
When the WASHER FLUID LOW ADD FLUID
message displays, washer fluid will need to
be added to the windshield washer fluid
reservoir.
Open the cap with the washer symbol on it.
Add washer fluid until the tank is full. See
Engine Compartment Overview 0310 for
reservoir location.
Caution
.Do not use washer fluid that contains
any type of water repellent coating.
This can cause the wiper blades to
chatter or skip.
(Continued)
Page 324 of 441
Chevrolet Silverado 2500 HD/3500 HD Owner Manual (GMNA-Localizing-U.
S./Canada/Mexico-15546003) - 2022 - CRC - 5/5/21
Vehicle Care 323
Brake pads should always be replaced as
complete axle sets.
How to Reset the Brake Pad Life System
The system will automatically detect when
significantly worn brake pads are replaced.
When the ignition is turned on after new
pads and wear sensors are installed, a
message will display. Follow the prompts to
reset the system.
The brake pad life system can also be
manually reset:1. Display Brake Pad Life on the DIC. See Driver Information Center (DIC) (Base
Level) 0124 or
Driver Information Center (DIC) (Midlevel
and Uplevel) 0125.
2. Select the Brake Pad Life menu.
3. Select front or rear pads as appropriate.
4. Select YES on the confirmation message. Repeat for pads on the other axle if they
were also replaced.
How to Disable the Brake Pad Life
System
The brake pad life system can be turned off.
This may be necessary if aftermarket brake
pads without wear sensors are installed. When the system is turned off, the front
and rear brake pad life percentages will not
display. However, the built-in wear
indicators that make a high-pitched warning
sound when the brake pads are worn can
still determine when the pads should be
replaced. See
Brakes0322.
To turn off the brake pad life system: 1. Display Brake Pad Life on the DIC. See Driver Information Center (DIC) (Base
Level) 0124 or
Driver Information Center (DIC) (Midlevel
and Uplevel) 0125.
2. Select the Brake Pad Life menu.
3. Select DISABLE.
To turn the brake pad life system back on,
follow the above steps but select ENABLE in
Step 2.
Brake Fluid
The brake master cylinder reservoir is filled
with GM approved DOT 4 brake fluid as
indicated on the reservoir cap. See Engine
Compartment Overview 0310 for the
location of the reservoir.
Checking Brake Fluid
With the vehicle in P (Park) on a level
surface, the brake fluid level should be
between the minimum and maximum marks
on the brake fluid reservoir.
There are only two reasons why the brake
fluid level in the reservoir may go down:
.Normal brake lining wear. When new
linings are installed, the fluid level goes
back up.
.A fluid leak in the brake hydraulic system.
Have the brake hydraulic system fixed.
With a leak, the brakes will not
work well.
Always clean the brake fluid reservoir cap
and the area around the cap before
removing it.
Do not top off the brake fluid. Adding fluid
does not correct a leak. If fluid is added
when the linings are worn, there will be too
much fluid when new brake linings are
Page 326 of 441
Chevrolet Silverado 2500 HD/3500 HD Owner Manual (GMNA-Localizing-U.
S./Canada/Mexico-15546003) - 2022 - CRC - 5/5/21
Vehicle Care 325
Extended Storage: Remove the black,
negative (−) cable from the battery or use a
battery trickle charger.
Negative Battery Cable Disconnection
{Warning
Before disconnecting the negative battery
cable, turn off all features, turn the
ignition off, and remove the key,
if equipped, from the vehicle. If this is
not done, you or others could be injured,
and the vehicle could be damaged.
Caution
If the battery is disconnected with the
ignition on or the vehicle in Retained
Accessory Power (RAP), the OnStar
back-up battery will be permanently
discharged and will need to be replaced.
1. Make sure the lamps, features, and accessories are turned off.
2. Turn the ignition off and remove the key, if equipped.
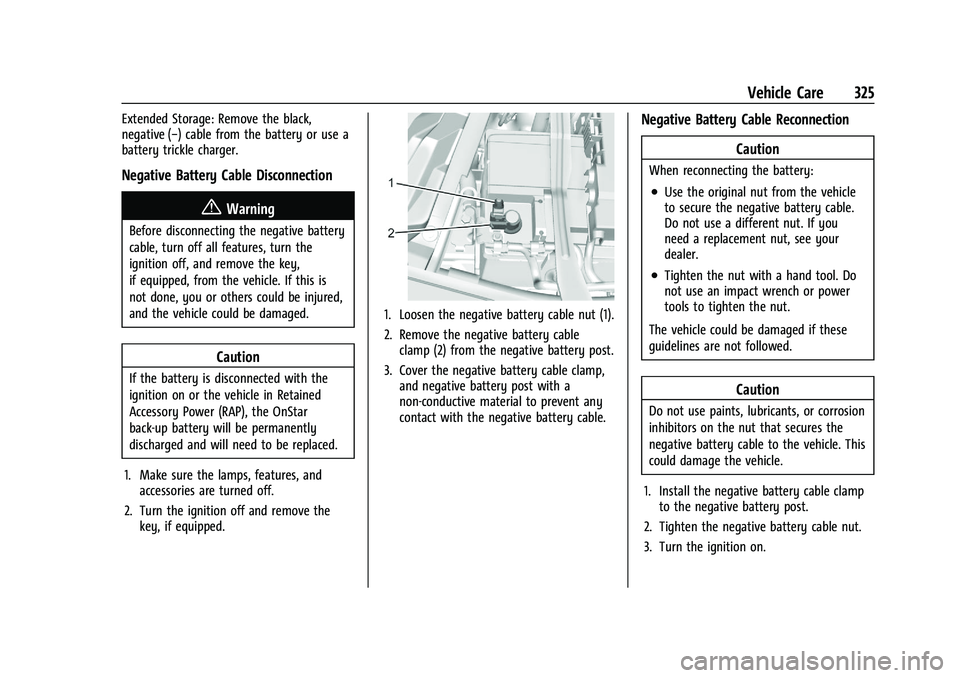
1. Loosen the negative battery cable nut (1).
2. Remove the negative battery cableclamp (2) from the negative battery post.
3. Cover the negative battery cable clamp, and negative battery post with a
non-conductive material to prevent any
contact with the negative battery cable.
Negative Battery Cable Reconnection
Caution
When reconnecting the battery:
.Use the original nut from the vehicle
to secure the negative battery cable.
Do not use a different nut. If you
need a replacement nut, see your
dealer.
.Tighten the nut with a hand tool. Do
not use an impact wrench or power
tools to tighten the nut.
The vehicle could be damaged if these
guidelines are not followed.
Caution
Do not use paints, lubricants, or corrosion
inhibitors on the nut that secures the
negative battery cable to the vehicle. This
could damage the vehicle.
1. Install the negative battery cable clamp to the negative battery post.
2. Tighten the negative battery cable nut.
3. Turn the ignition on.