2023 CHEVROLET SILVERADO 2500 ignition
[x] Cancel search: ignitionPage 188 of 441
Chevrolet Silverado 2500 HD/3500 HD Owner Manual (GMNA-Localizing-U.
S./Canada/Mexico-15546003) - 2022 - CRC - 5/5/21
Infotainment System 187
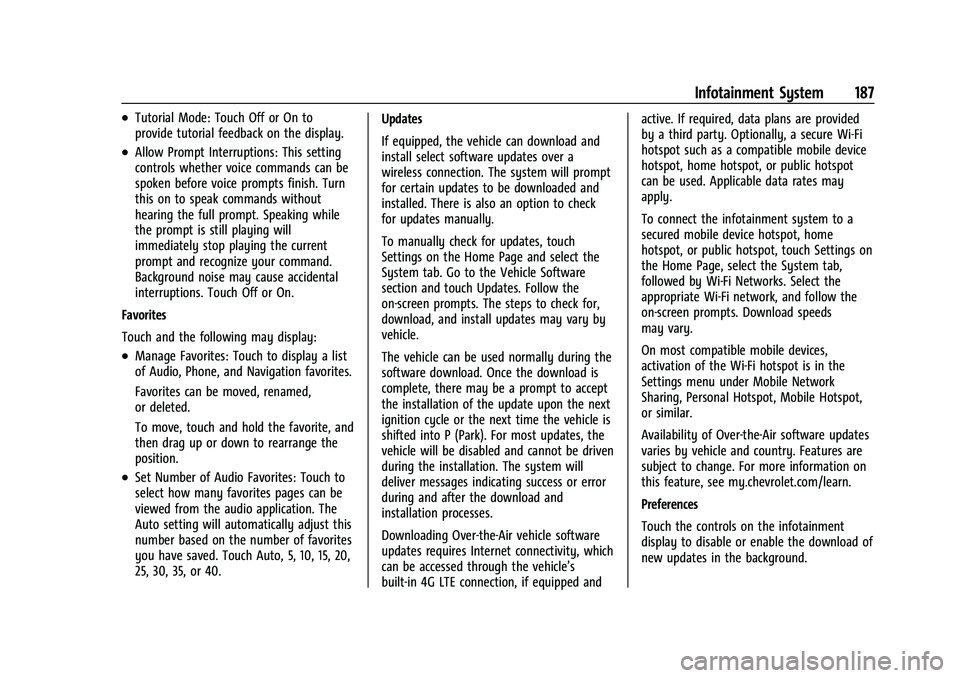
.Tutorial Mode: Touch Off or On to
provide tutorial feedback on the display.
.Allow Prompt Interruptions: This setting
controls whether voice commands can be
spoken before voice prompts finish. Turn
this on to speak commands without
hearing the full prompt. Speaking while
the prompt is still playing will
immediately stop playing the current
prompt and recognize your command.
Background noise may cause accidental
interruptions. Touch Off or On.
Favorites
Touch and the following may display:
.Manage Favorites: Touch to display a list
of Audio, Phone, and Navigation favorites.
Favorites can be moved, renamed,
or deleted.
To move, touch and hold the favorite, and
then drag up or down to rearrange the
position.
.Set Number of Audio Favorites: Touch to
select how many favorites pages can be
viewed from the audio application. The
Auto setting will automatically adjust this
number based on the number of favorites
you have saved. Touch Auto, 5, 10, 15, 20,
25, 30, 35, or 40. Updates
If equipped, the vehicle can download and
install select software updates over a
wireless connection. The system will prompt
for certain updates to be downloaded and
installed. There is also an option to check
for updates manually.
To manually check for updates, touch
Settings on the Home Page and select the
System tab. Go to the Vehicle Software
section and touch Updates. Follow the
on-screen prompts. The steps to check for,
download, and install updates may vary by
vehicle.
The vehicle can be used normally during the
software download. Once the download is
complete, there may be a prompt to accept
the installation of the update upon the next
ignition cycle or the next time the vehicle is
shifted into P (Park). For most updates, the
vehicle will be disabled and cannot be driven
during the installation. The system will
deliver messages indicating success or error
during and after the download and
installation processes.
Downloading Over-the-Air vehicle software
updates requires Internet connectivity, which
can be accessed through the vehicle’s
built-in 4G LTE connection, if equipped and active. If required, data plans are provided
by a third party. Optionally, a secure Wi-Fi
hotspot such as a compatible mobile device
hotspot, home hotspot, or public hotspot
can be used. Applicable data rates may
apply.
To connect the infotainment system to a
secured mobile device hotspot, home
hotspot, or public hotspot, touch Settings on
the Home Page, select the System tab,
followed by Wi-Fi Networks. Select the
appropriate Wi-Fi network, and follow the
on-screen prompts. Download speeds
may vary.
On most compatible mobile devices,
activation of the Wi-Fi hotspot is in the
Settings menu under Mobile Network
Sharing, Personal Hotspot, Mobile Hotspot,
or similar.
Availability of Over-the-Air software updates
varies by vehicle and country. Features are
subject to change. For more information on
this feature, see my.chevrolet.com/learn.
Preferences
Touch the controls on the infotainment
display to disable or enable the download of
new updates in the background.
Page 192 of 441

Chevrolet Silverado 2500 HD/3500 HD Owner Manual (GMNA-Localizing-U.
S./Canada/Mexico-15546003) - 2022 - CRC - 5/5/21
Infotainment System 191
limit the use of others. The Report Card will
record vehicle data about driving behavior
that can be viewed later. When the vehicle
is started with a registered key, the Driver
Information Center (DIC) displays a message
that Teen Driver is active.
To access:1. Touch Settings on the Home Page, then touch Vehicle, and then Teen Driver.
2. Create a Personal Identification Number (PIN) by choosing a four-digit PIN.
Re-enter the PIN to confirm. To change
the PIN, touch Change PIN.
The PIN is required to:
.Register or unregister keys.
.Change Teen Driver settings.
.Change or clear the Teen Driver PIN.
.Access or delete Report Card data.
Register keys to activate Teen Driver and
assign restrictions to the key:
Any vehicle key can be registered, up to a
maximum of eight keys. Label the key to
tell it apart from the other keys.
For a pushbutton start system: 1. Start the engine. 2. For automatic transmissions, the vehicle
must be in P (Park). For manual
transmissions, the vehicle must be
stopped with the parking brake set.
3. From the Settings menu, touch Vehicle and then Teen Driver.
4. Enter the PIN.
5. Place the Remote Keyless Entry (RKE) transmitter key you wish to register in
the transmitter pocket. The key does not
need to be the one that started the
vehicle. See Remote Keyless Entry (RKE)
System Operation (Key Access) 010 or
Remote Keyless Entry (RKE) System
Operation (Keyless Access) 013 for
transmitter pocket location.
6. From the Teen Driver menu, touch Setup Keys..If the transmitter key has not
previously been registered, the option
to add the key displays. Touch Add
and a confirmation message displays.
Teen Driver restrictions will be
applied whenever this key is used to
operate the vehicle.
.If the transmitter key has already
been registered, the option to
remove the key displays. If Remove is
touched, the transmitter key is no longer registered. A confirmation
message displays, and Teen Driver
restrictions will not be applied if this
transmitter key is used to operate
the vehicle.
In vehicles with a pushbutton start system,
if a Teen Driver and a non-Teen Driver key
are both present at start up, the vehicle will
recognize the non-Teen Driver key to start
the vehicle. The Teen Driver settings will not
be active.
For a keyed ignition system: 1. Start the engine.
2. For automatic transmissions, the vehicle must be in P (Park). For manual
transmissions, the vehicle must be
stopped with the parking brake set.
3. From the Settings menu, touch Vehicle and then Teen Driver.
4. Enter the PIN.
5. Touch Setup Keys. The system displays instructions for registering or
unregistering a key. A confirmation
message displays.
Page 204 of 441
Chevrolet Silverado 2500 HD/3500 HD Owner Manual (GMNA-Localizing-U.
S./Canada/Mexico-15546003) - 2022 - CRC - 5/5/21
Climate Controls 203
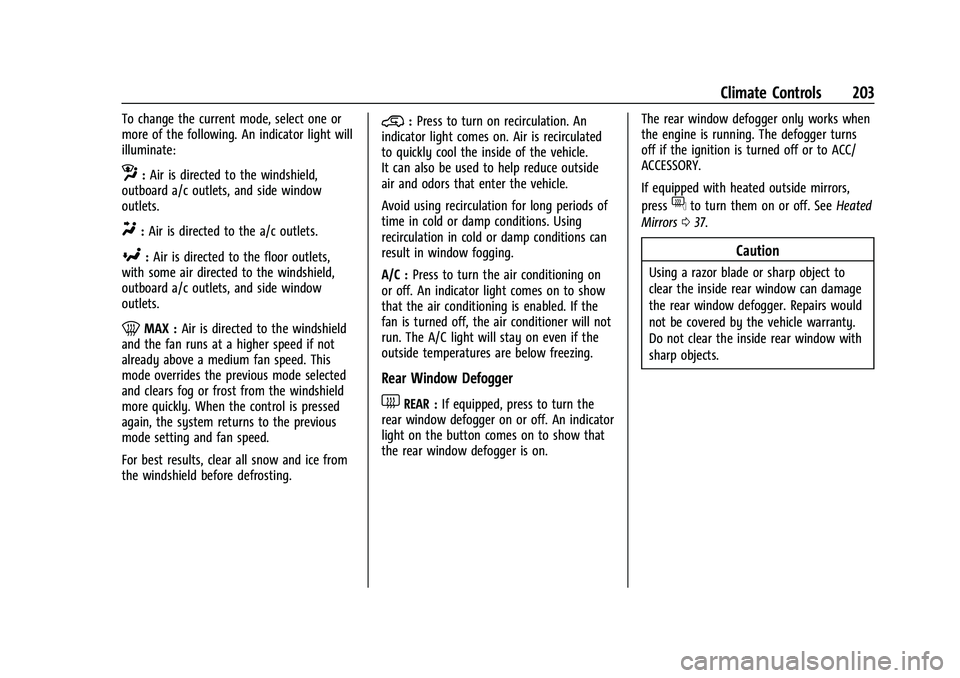
To change the current mode, select one or
more of the following. An indicator light will
illuminate:
z:Air is directed to the windshield,
outboard a/c outlets, and side window
outlets.
Y: Air is directed to the a/c outlets.
[:Air is directed to the floor outlets,
with some air directed to the windshield,
outboard a/c outlets, and side window
outlets.
0MAX : Air is directed to the windshield
and the fan runs at a higher speed if not
already above a medium fan speed. This
mode overrides the previous mode selected
and clears fog or frost from the windshield
more quickly. When the control is pressed
again, the system returns to the previous
mode setting and fan speed.
For best results, clear all snow and ice from
the windshield before defrosting.
@: Press to turn on recirculation. An
indicator light comes on. Air is recirculated
to quickly cool the inside of the vehicle.
It can also be used to help reduce outside
air and odors that enter the vehicle.
Avoid using recirculation for long periods of
time in cold or damp conditions. Using
recirculation in cold or damp conditions can
result in window fogging.
A/C : Press to turn the air conditioning on
or off. An indicator light comes on to show
that the air conditioning is enabled. If the
fan is turned off, the air conditioner will not
run. The A/C light will stay on even if the
outside temperatures are below freezing.
Rear Window Defogger
1REAR : If equipped, press to turn the
rear window defogger on or off. An indicator
light on the button comes on to show that
the rear window defogger is on. The rear window defogger only works when
the engine is running. The defogger turns
off if the ignition is turned off or to ACC/
ACCESSORY.
If equipped with heated outside mirrors,
press
fto turn them on or off. See
Heated
Mirrors 037.
Caution
Using a razor blade or sharp object to
clear the inside rear window can damage
the rear window defogger. Repairs would
not be covered by the vehicle warranty.
Do not clear the inside rear window with
sharp objects.
Page 207 of 441
Chevrolet Silverado 2500 HD/3500 HD Owner Manual (GMNA-Localizing-U.
S./Canada/Mexico-15546003) - 2022 - CRC - 5/5/21
206 Climate Controls
Changing the mode cancels the automatic
operation and the system goes into manual
mode. Press AUTO to return to automatic
operation.
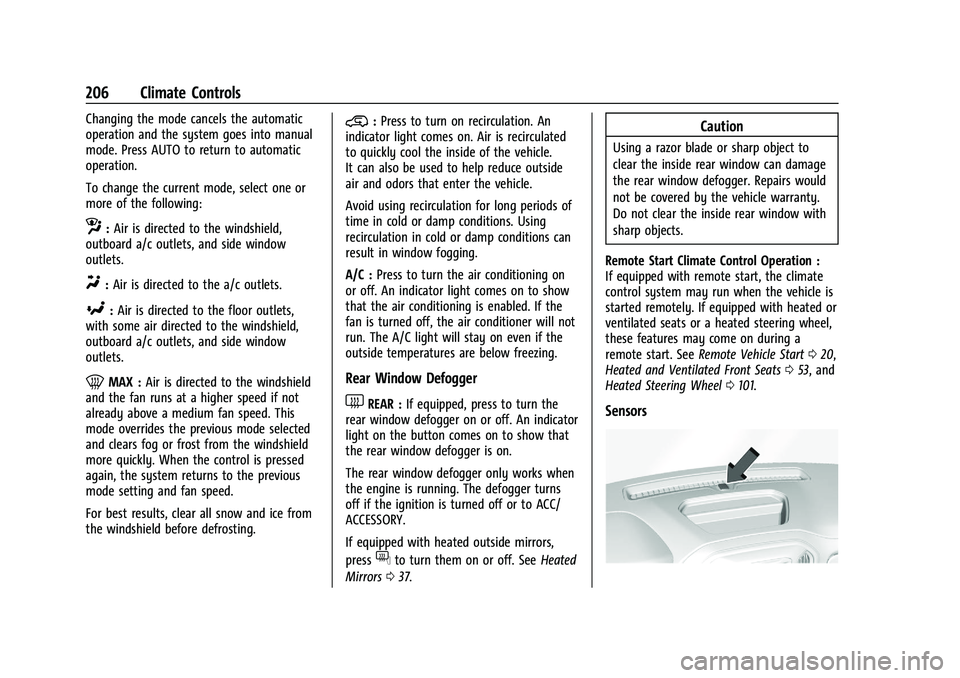
To change the current mode, select one or
more of the following:
z:Air is directed to the windshield,
outboard a/c outlets, and side window
outlets.
Y: Air is directed to the a/c outlets.
[:Air is directed to the floor outlets,
with some air directed to the windshield,
outboard a/c outlets, and side window
outlets.
0MAX : Air is directed to the windshield
and the fan runs at a higher speed if not
already above a medium fan speed. This
mode overrides the previous mode selected
and clears fog or frost from the windshield
more quickly. When the control is pressed
again, the system returns to the previous
mode setting and fan speed.
For best results, clear all snow and ice from
the windshield before defrosting.
@: Press to turn on recirculation. An
indicator light comes on. Air is recirculated
to quickly cool the inside of the vehicle.
It can also be used to help reduce outside
air and odors that enter the vehicle.
Avoid using recirculation for long periods of
time in cold or damp conditions. Using
recirculation in cold or damp conditions can
result in window fogging.
A/C : Press to turn the air conditioning on
or off. An indicator light comes on to show
that the air conditioning is enabled. If the
fan is turned off, the air conditioner will not
run. The A/C light will stay on even if the
outside temperatures are below freezing.
Rear Window Defogger
1REAR : If equipped, press to turn the
rear window defogger on or off. An indicator
light on the button comes on to show that
the rear window defogger is on.
The rear window defogger only works when
the engine is running. The defogger turns
off if the ignition is turned off or to ACC/
ACCESSORY.
If equipped with heated outside mirrors,
press
fto turn them on or off. See Heated
Mirrors 037.
Caution
Using a razor blade or sharp object to
clear the inside rear window can damage
the rear window defogger. Repairs would
not be covered by the vehicle warranty.
Do not clear the inside rear window with
sharp objects.
Remote Start Climate Control Operation :
If equipped with remote start, the climate
control system may run when the vehicle is
started remotely. If equipped with heated or
ventilated seats or a heated steering wheel,
these features may come on during a
remote start. See Remote Vehicle Start 020,
Heated and Ventilated Front Seats 053, and
Heated Steering Wheel 0101.
Sensors
Page 210 of 441
Chevrolet Silverado 2500 HD/3500 HD Owner Manual (GMNA-Localizing-U.
S./Canada/Mexico-15546003) - 2022 - CRC - 5/5/21
Driving and Operating 209
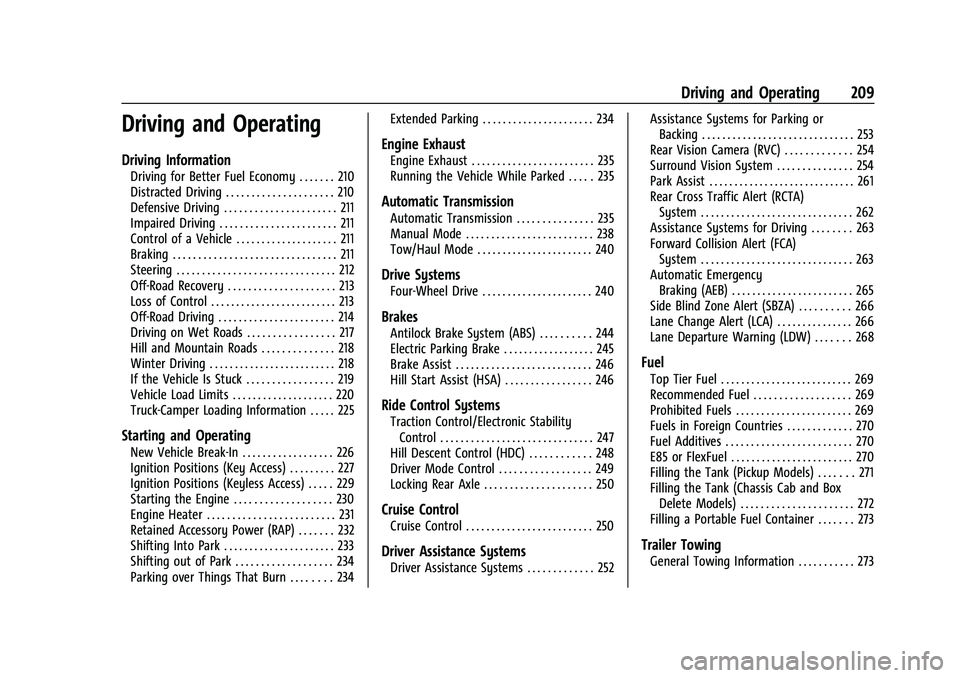
Driving and Operating
Driving Information
Driving for Better Fuel Economy . . . . . . . 210
Distracted Driving . . . . . . . . . . . . . . . . . . . . . 210
Defensive Driving . . . . . . . . . . . . . . . . . . . . . . 211
Impaired Driving . . . . . . . . . . . . . . . . . . . . . . . 211
Control of a Vehicle . . . . . . . . . . . . . . . . . . . . 211
Braking . . . . . . . . . . . . . . . . . . . . . . . . . . . . . . . . 211
Steering . . . . . . . . . . . . . . . . . . . . . . . . . . . . . . . 212
Off-Road Recovery . . . . . . . . . . . . . . . . . . . . . 213
Loss of Control . . . . . . . . . . . . . . . . . . . . . . . . . 213
Off-Road Driving . . . . . . . . . . . . . . . . . . . . . . . 214
Driving on Wet Roads . . . . . . . . . . . . . . . . . 217
Hill and Mountain Roads . . . . . . . . . . . . . . 218
Winter Driving . . . . . . . . . . . . . . . . . . . . . . . . . 218
If the Vehicle Is Stuck . . . . . . . . . . . . . . . . . 219
Vehicle Load Limits . . . . . . . . . . . . . . . . . . . . 220
Truck-Camper Loading Information . . . . . 225
Starting and Operating
New Vehicle Break-In . . . . . . . . . . . . . . . . . . 226
Ignition Positions (Key Access) . . . . . . . . . 227
Ignition Positions (Keyless Access) . . . . . 229
Starting the Engine . . . . . . . . . . . . . . . . . . . 230
Engine Heater . . . . . . . . . . . . . . . . . . . . . . . . . 231
Retained Accessory Power (RAP) . . . . . . . 232
Shifting Into Park . . . . . . . . . . . . . . . . . . . . . . 233
Shifting out of Park . . . . . . . . . . . . . . . . . . . 234
Parking over Things That Burn . . . . . . . . 234Extended Parking . . . . . . . . . . . . . . . . . . . . . . 234
Engine Exhaust
Engine Exhaust . . . . . . . . . . . . . . . . . . . . . . . . 235
Running the Vehicle While Parked . . . . . 235
Automatic Transmission
Automatic Transmission . . . . . . . . . . . . . . . 235
Manual Mode . . . . . . . . . . . . . . . . . . . . . . . . . 238
Tow/Haul Mode . . . . . . . . . . . . . . . . . . . . . . . 240
Drive Systems
Four-Wheel Drive . . . . . . . . . . . . . . . . . . . . . . 240
Brakes
Antilock Brake System (ABS) . . . . . . . . . . 244
Electric Parking Brake . . . . . . . . . . . . . . . . . . 245
Brake Assist . . . . . . . . . . . . . . . . . . . . . . . . . . . 246
Hill Start Assist (HSA) . . . . . . . . . . . . . . . . . 246
Ride Control Systems
Traction Control/Electronic Stability
Control . . . . . . . . . . . . . . . . . . . . . . . . . . . . . . 247
Hill Descent Control (HDC) . . . . . . . . . . . . 248
Driver Mode Control . . . . . . . . . . . . . . . . . . 249
Locking Rear Axle . . . . . . . . . . . . . . . . . . . . . 250
Cruise Control
Cruise Control . . . . . . . . . . . . . . . . . . . . . . . . . 250
Driver Assistance Systems
Driver Assistance Systems . . . . . . . . . . . . . 252 Assistance Systems for Parking or
Backing . . . . . . . . . . . . . . . . . . . . . . . . . . . . . . 253
Rear Vision Camera (RVC) . . . . . . . . . . . . . 254
Surround Vision System . . . . . . . . . . . . . . . 254
Park Assist . . . . . . . . . . . . . . . . . . . . . . . . . . . . . 261
Rear Cross Traffic Alert (RCTA) System . . . . . . . . . . . . . . . . . . . . . . . . . . . . . . 262
Assistance Systems for Driving . . . . . . . . 263
Forward Collision Alert (FCA) System . . . . . . . . . . . . . . . . . . . . . . . . . . . . . . 263
Automatic Emergency Braking (AEB) . . . . . . . . . . . . . . . . . . . . . . . . 265
Side Blind Zone Alert (SBZA) . . . . . . . . . . 266
Lane Change Alert (LCA) . . . . . . . . . . . . . . . 266
Lane Departure Warning (LDW) . . . . . . . 268
Fuel
Top Tier Fuel . . . . . . . . . . . . . . . . . . . . . . . . . . 269
Recommended Fuel . . . . . . . . . . . . . . . . . . . 269
Prohibited Fuels . . . . . . . . . . . . . . . . . . . . . . . 269
Fuels in Foreign Countries . . . . . . . . . . . . . 270
Fuel Additives . . . . . . . . . . . . . . . . . . . . . . . . . 270
E85 or FlexFuel . . . . . . . . . . . . . . . . . . . . . . . . 270
Filling the Tank (Pickup Models) . . . . . . . 271
Filling the Tank (Chassis Cab and Box Delete Models) . . . . . . . . . . . . . . . . . . . . . . 272
Filling a Portable Fuel Container . . . . . . . 273
Trailer Towing
General Towing Information . . . . . . . . . . . 273
Page 218 of 441
Chevrolet Silverado 2500 HD/3500 HD Owner Manual (GMNA-Localizing-U.
S./Canada/Mexico-15546003) - 2022 - CRC - 5/5/21
Driving and Operating 217
Warning (Continued)
the ice; you and your passengers could
drown. Drive your vehicle on safe
surfaces only.
Driving in Water
{Warning
Driving through rushing water can be
dangerous. Deep water can sweep your
vehicle downstream and you and your
passengers could drown. If it is only
shallow water, it can still wash away the
ground from under your tires. Traction
could be lost, and the vehicle could roll
over. Do not drive through rushing water.
Caution
Do not drive through standing water if it
is deep enough to cover the wheel hubs,
axles, or exhaust pipe. Deep water can
damage the axle and other vehicle parts.
If the standing water is not too deep, drive
through it slowly. At faster speeds, water
can get into the engine and cause it to stall.
Stalling can occur if the exhaust pipe is under water. Do not turn off the ignition
when driving through water. If the exhaust
pipe is under water, the engine will not
start. When going through water, the brakes
get wet and it may take longer to stop. See
“Driving on Wet Roads”
later in this section.
After Off-Road Driving
Remove any brush or debris that has
collected on the underbody or chassis,
or under the hood. These accumulations can
be a fire hazard. Re-install underbody air
deflector and air dam if removed.
After operation in mud or sand, have the
brake linings cleaned and checked. These
substances can cause glazing and uneven
braking. Check the body structure, driveline,
steering, suspension, wheels, tires, and
exhaust system for damage and check the
fuel lines and cooling system for any
leakage.
More frequent maintenance service is
required. See theMaintenance Schedule
0 392.
Driving on Wet Roads
Rain and wet roads can reduce vehicle
traction and affect your ability to stop and
accelerate. Always drive slower in these types of driving conditions and avoid driving
through large puddles and deep-standing or
flowing water.
{Warning
Wet brakes can cause crashes. They
might not work as well in a quick stop
and could cause pulling to one side. You
could lose control of the vehicle.
After driving through a large puddle of
water or a car/vehicle wash, lightly apply
the brake pedal until the brakes work
normally.
Flowing or rushing water creates strong
forces. Driving through flowing water
could cause the vehicle to be carried
away. If this happens, you and other
vehicle occupants could drown. Do not
ignore police warnings and be very
cautious about trying to drive through
flowing water.
Hydroplaning
Hydroplaning is dangerous. Water can build
up under the vehicle's tires so they actually
ride on the water. This can happen if the
Page 219 of 441
Chevrolet Silverado 2500 HD/3500 HD Owner Manual (GMNA-Localizing-U.
S./Canada/Mexico-15546003) - 2022 - CRC - 5/5/21
218 Driving and Operating
road is wet enough and you are going fast
enough. When the vehicle is hydroplaning, it
has little or no contact with the road.
There is no hard and fast rule about
hydroplaning. The best advice is to slow
down when the road is wet.
Other Rainy Weather Tips
Besides slowing down, other wet weather
driving tips include:
.Allow extra following distance.
.Pass with caution.
.Keep windshield wiping equipment in
good shape.
.Keep the windshield washer fluid reservoir
filled.
.Have good tires with proper tread depth.
SeeTires 0344.
.Turn off cruise control.
Hill and Mountain Roads
Driving on steep hills or through mountains
is different than driving on flat or rolling
terrain. Tips include:
.Keep the vehicle serviced and in good
shape.
.Check all fluid levels and brakes, tires,
cooling system, and transmission.
.Shift to a lower gear when going down
steep or long hills.
{Warning
Using the brakes to slow the vehicle on a
long downhill slope can cause brake
overheating, can reduce brake
performance, and could result in a loss of
braking. Shift the transmission to a lower
gear to let the engine assist the brakes
on a steep downhill slope.
{Warning
Coasting downhill in N (Neutral) or with
the ignition off is dangerous. This can
cause overheating of the brakes and loss
of steering assist. Always have the engine
running and the vehicle in gear.
.Drive at speeds that keep the vehicle in
its own lane. Do not swing wide or cross
the center line.
.Be alert on top of hills; something could
be in your lane (e.g., stalled car, crash).
.Pay attention to special road signs (e.g.,
falling rocks area, winding roads, long
grades, passing or no-passing zones) and
take appropriate action.
Winter Driving
Driving on Snow or Ice
Caution
To avoid damage to the wheels and
brake components, always clear snow and
ice from inside the wheels and
underneath the vehicle before driving.
Snow or ice between the tires and the road
creates less traction or grip, so drive
carefully. Wet ice can occur at about 0 °C
(32 °F) when freezing rain begins to fall.
Avoid driving on wet ice or in freezing rain
until roads can be treated.
For Slippery Road Driving:
.Accelerate gently. Accelerating too quickly
causes the wheels to spin and makes the
surface under the tires slick.
.Turn on Traction Control. See Traction
Control/Electronic Stability Control 0247.
.The Antilock Brake System (ABS) improves
vehicle stability during hard stops, but
the brakes should be applied sooner than
when on dry pavement. See Antilock
Brake System (ABS) 0244.
Page 228 of 441
Chevrolet Silverado 2500 HD/3500 HD Owner Manual (GMNA-Localizing-U.
S./Canada/Mexico-15546003) - 2022 - CRC - 5/5/21
Driving and Operating 227
Caution (Continued)
.Avoid making hard stops for the first
300 km (200 mi) or so. During this
time the new brake linings are not yet
broken in. Hard stops with new linings
can mean premature wear and earlier
replacement. Follow this breaking-in
guideline every time you get new
brake linings.
.Do not tow a trailer during break-in.
SeeTrailer Towing 0278 for the trailer
towing capabilities of the vehicle and
more information.
Following break-in, engine speed and load
can be gradually increased.
On new vehicles, the various mechanical and
electrical systems experience a “break-in”
period during the first 6,400 km
(4,000 miles) of routine driving. As the
vehicle is driven, the mechanical systems
adjust to provide optimal fuel economy and
transmission shift performance.
Electrical systems will adapt and calibrate
during the break-in period. A one-time
occurrence of clicks and similar vehicle
noises is normal during this process. Normal driving charges the vehicle’s battery
to achieve the best operation of the vehicle,
including fuel economy.
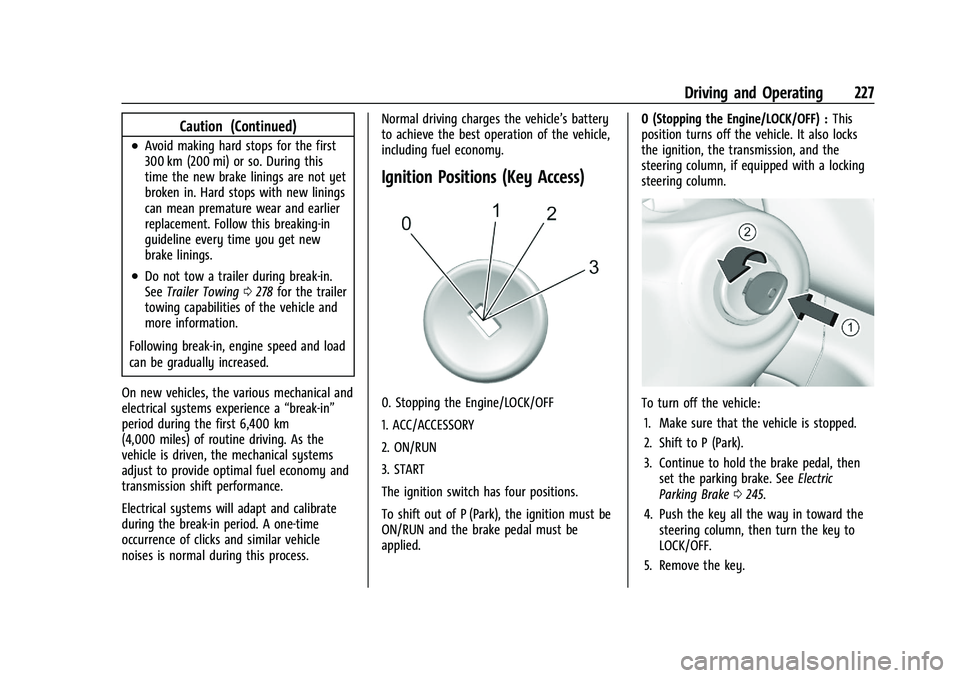
Ignition Positions (Key Access)
0. Stopping the Engine/LOCK/OFF
1. ACC/ACCESSORY
2. ON/RUN
3. START
The ignition switch has four positions.
To shift out of P (Park), the ignition must be
ON/RUN and the brake pedal must be
applied.
0 (Stopping the Engine/LOCK/OFF) :
This
position turns off the vehicle. It also locks
the ignition, the transmission, and the
steering column, if equipped with a locking
steering column.To turn off the vehicle:
1. Make sure that the vehicle is stopped.
2. Shift to P (Park).
3. Continue to hold the brake pedal, then set the parking brake. See Electric
Parking Brake 0245.
4. Push the key all the way in toward the steering column, then turn the key to
LOCK/OFF.
5. Remove the key.