2023 CHEVROLET SILVERADO 1500 seats
[x] Cancel search: seatsPage 90 of 463
Chevrolet Silverado 1500 Owner Manual (GMNA-Localizing-U.S./Canada/
Mexico/Paraguay-16515119) - 2023 - CRC - 6/2/22
Seats and Restraints 89
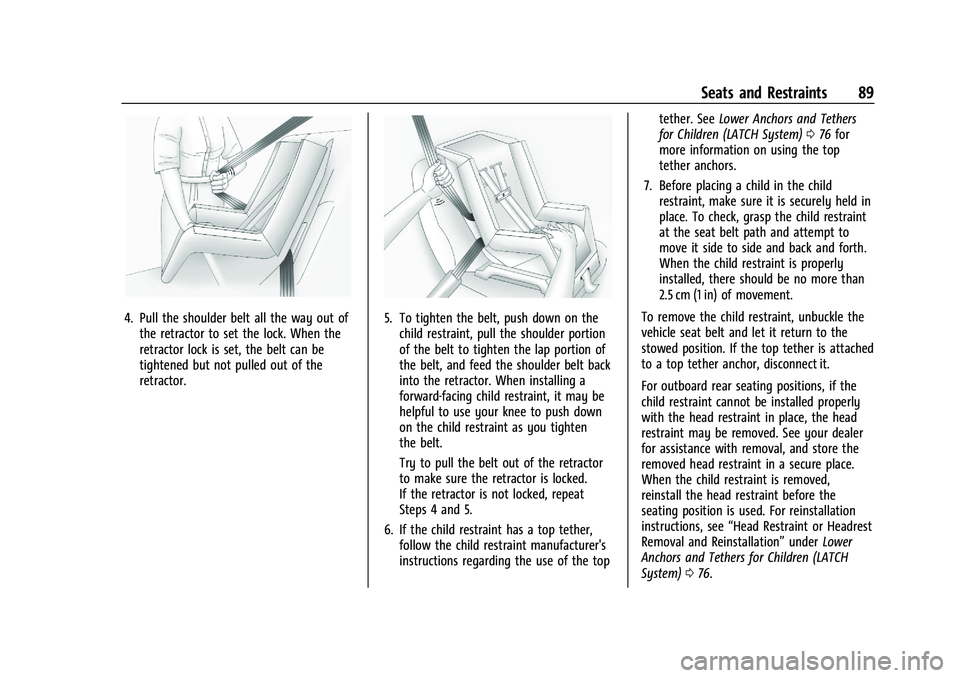
4. Pull the shoulder belt all the way out ofthe retractor to set the lock. When the
retractor lock is set, the belt can be
tightened but not pulled out of the
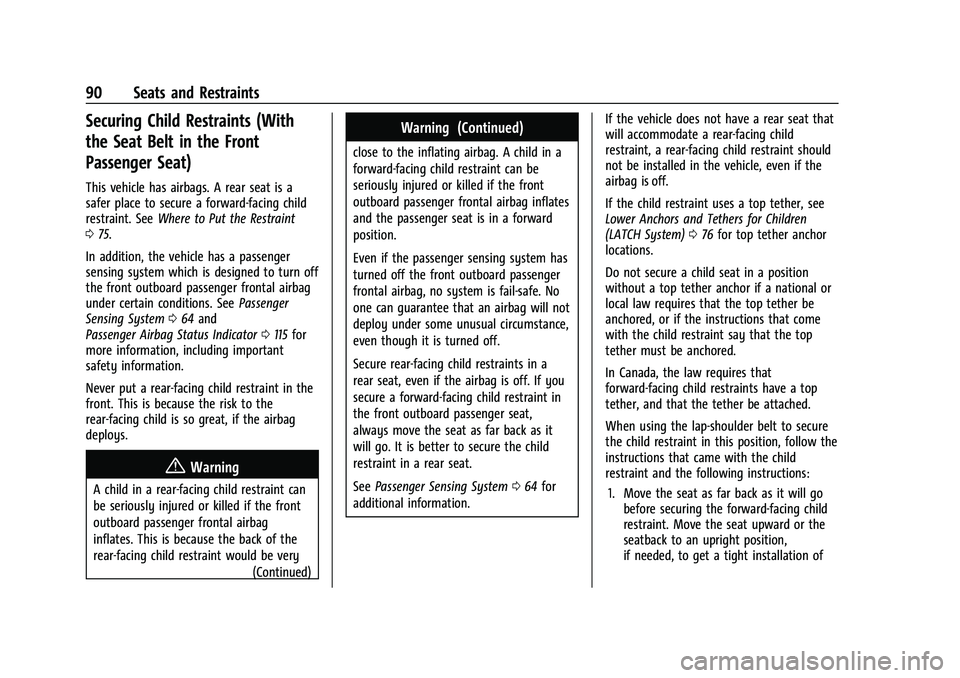
retractor.5. To tighten the belt, push down on thechild restraint, pull the shoulder portion
of the belt to tighten the lap portion of
the belt, and feed the shoulder belt back
into the retractor. When installing a
forward-facing child restraint, it may be
helpful to use your knee to push down
on the child restraint as you tighten
the belt.
Try to pull the belt out of the retractor
to make sure the retractor is locked.
If the retractor is not locked, repeat
Steps 4 and 5.
6. If the child restraint has a top tether, follow the child restraint manufacturer's
instructions regarding the use of the top tether. See
Lower Anchors and Tethers
for Children (LATCH System) 076 for
more information on using the top
tether anchors.
7. Before placing a child in the child restraint, make sure it is securely held in
place. To check, grasp the child restraint
at the seat belt path and attempt to
move it side to side and back and forth.
When the child restraint is properly
installed, there should be no more than
2.5 cm (1 in) of movement.
To remove the child restraint, unbuckle the
vehicle seat belt and let it return to the
stowed position. If the top tether is attached
to a top tether anchor, disconnect it.
For outboard rear seating positions, if the
child restraint cannot be installed properly
with the head restraint in place, the head
restraint may be removed. See your dealer
for assistance with removal, and store the
removed head restraint in a secure place.
When the child restraint is removed,
reinstall the head restraint before the
seating position is used. For reinstallation
instructions, see “Head Restraint or Headrest
Removal and Reinstallation” underLower
Anchors and Tethers for Children (LATCH
System) 076.
Page 91 of 463
Chevrolet Silverado 1500 Owner Manual (GMNA-Localizing-U.S./Canada/
Mexico/Paraguay-16515119) - 2023 - CRC - 6/2/22
90 Seats and Restraints
Securing Child Restraints (With
the Seat Belt in the Front
Passenger Seat)
This vehicle has airbags. A rear seat is a
safer place to secure a forward-facing child
restraint. SeeWhere to Put the Restraint
0 75.
In addition, the vehicle has a passenger
sensing system which is designed to turn off
the front outboard passenger frontal airbag
under certain conditions. See Passenger
Sensing System 064 and
Passenger Airbag Status Indicator 0115 for
more information, including important
safety information.
Never put a rear-facing child restraint in the
front. This is because the risk to the
rear-facing child is so great, if the airbag
deploys.
{Warning
A child in a rear-facing child restraint can
be seriously injured or killed if the front
outboard passenger frontal airbag
inflates. This is because the back of the
rear-facing child restraint would be very
(Continued)
Warning (Continued)
close to the inflating airbag. A child in a
forward-facing child restraint can be
seriously injured or killed if the front
outboard passenger frontal airbag inflates
and the passenger seat is in a forward
position.
Even if the passenger sensing system has
turned off the front outboard passenger
frontal airbag, no system is fail-safe. No
one can guarantee that an airbag will not
deploy under some unusual circumstance,
even though it is turned off.
Secure rear-facing child restraints in a
rear seat, even if the airbag is off. If you
secure a forward-facing child restraint in
the front outboard passenger seat,
always move the seat as far back as it
will go. It is better to secure the child
restraint in a rear seat.
SeePassenger Sensing System 064 for
additional information. If the vehicle does not have a rear seat that
will accommodate a rear-facing child
restraint, a rear-facing child restraint should
not be installed in the vehicle, even if the
airbag is off.
If the child restraint uses a top tether, see
Lower Anchors and Tethers for Children
(LATCH System)
076 for top tether anchor
locations.
Do not secure a child seat in a position
without a top tether anchor if a national or
local law requires that the top tether be
anchored, or if the instructions that come
with the child restraint say that the top
tether must be anchored.
In Canada, the law requires that
forward-facing child restraints have a top
tether, and that the tether be attached.
When using the lap-shoulder belt to secure
the child restraint in this position, follow the
instructions that came with the child
restraint and the following instructions:
1. Move the seat as far back as it will go before securing the forward-facing child
restraint. Move the seat upward or the
seatback to an upright position,
if needed, to get a tight installation of
Page 92 of 463
Chevrolet Silverado 1500 Owner Manual (GMNA-Localizing-U.S./Canada/
Mexico/Paraguay-16515119) - 2023 - CRC - 6/2/22
Seats and Restraints 91
the child restraint. There must be finger
clearance between the push button and
the child restraint.
When the passenger sensing system has
turned off the front outboard passenger
frontal airbag, the OFF indicator on the
passenger airbag status indicator should
light and stay lit when you start the
vehicle. SeePassenger Airbag Status
Indicator 0115.
2. Put the child restraint on the seat.
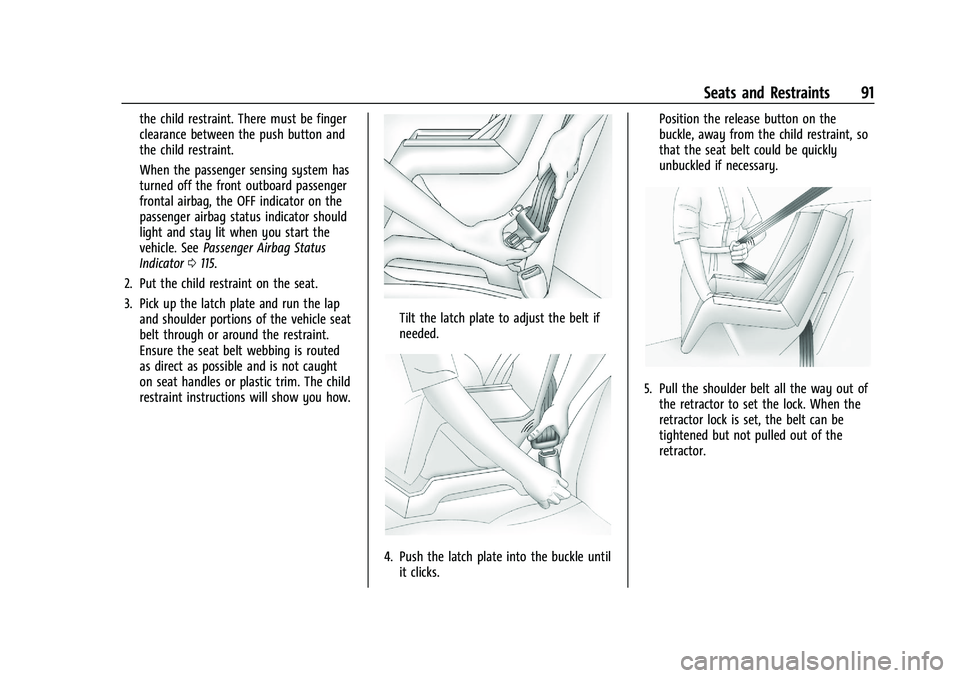
3. Pick up the latch plate and run the lap and shoulder portions of the vehicle seat
belt through or around the restraint.
Ensure the seat belt webbing is routed
as direct as possible and is not caught
on seat handles or plastic trim. The child
restraint instructions will show you how.
Tilt the latch plate to adjust the belt if
needed.
4. Push the latch plate into the buckle untilit clicks. Position the release button on the
buckle, away from the child restraint, so
that the seat belt could be quickly
unbuckled if necessary.
5. Pull the shoulder belt all the way out of
the retractor to set the lock. When the
retractor lock is set, the belt can be
tightened but not pulled out of the
retractor.
Page 93 of 463
Chevrolet Silverado 1500 Owner Manual (GMNA-Localizing-U.S./Canada/
Mexico/Paraguay-16515119) - 2023 - CRC - 6/2/22
92 Seats and Restraints
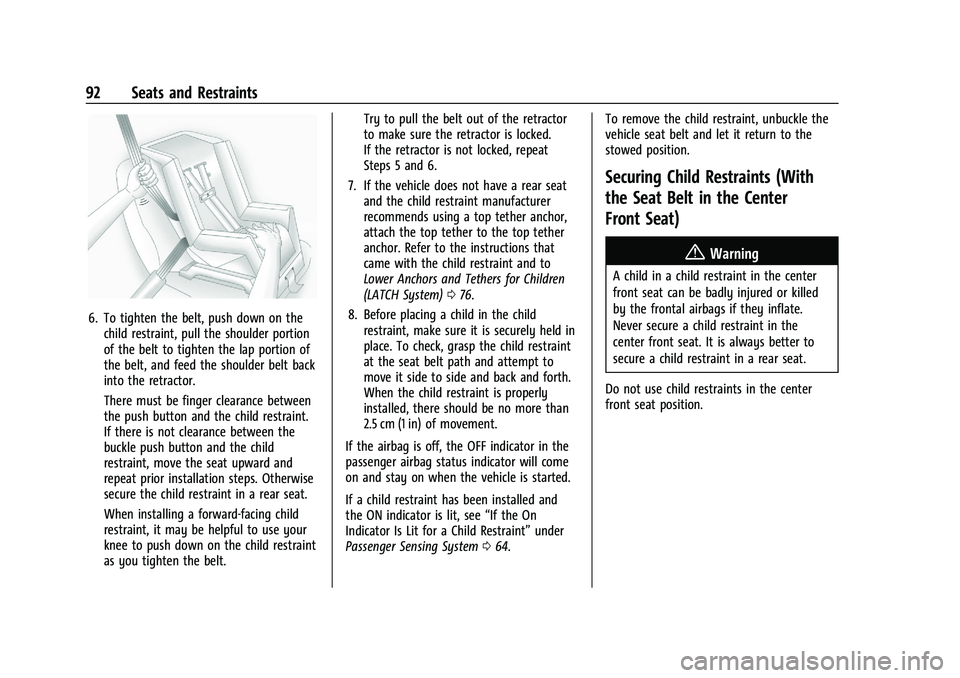
6. To tighten the belt, push down on thechild restraint, pull the shoulder portion
of the belt to tighten the lap portion of
the belt, and feed the shoulder belt back
into the retractor.
There must be finger clearance between
the push button and the child restraint.
If there is not clearance between the
buckle push button and the child
restraint, move the seat upward and
repeat prior installation steps. Otherwise
secure the child restraint in a rear seat.
When installing a forward-facing child
restraint, it may be helpful to use your
knee to push down on the child restraint
as you tighten the belt. Try to pull the belt out of the retractor
to make sure the retractor is locked.
If the retractor is not locked, repeat
Steps 5 and 6.
7. If the vehicle does not have a rear seat and the child restraint manufacturer
recommends using a top tether anchor,
attach the top tether to the top tether
anchor. Refer to the instructions that
came with the child restraint and to
Lower Anchors and Tethers for Children
(LATCH System) 076.
8. Before placing a child in the child restraint, make sure it is securely held in
place. To check, grasp the child restraint
at the seat belt path and attempt to
move it side to side and back and forth.
When the child restraint is properly
installed, there should be no more than
2.5 cm (1 in) of movement.
If the airbag is off, the OFF indicator in the
passenger airbag status indicator will come
on and stay on when the vehicle is started.
If a child restraint has been installed and
the ON indicator is lit, see “If the On
Indicator Is Lit for a Child Restraint” under
Passenger Sensing System 064. To remove the child restraint, unbuckle the
vehicle seat belt and let it return to the
stowed position.
Securing Child Restraints (With
the Seat Belt in the Center
Front Seat)
{Warning
A child in a child restraint in the center
front seat can be badly injured or killed
by the frontal airbags if they inflate.
Never secure a child restraint in the
center front seat. It is always better to
secure a child restraint in a rear seat.
Do not use child restraints in the center
front seat position.
Page 100 of 463
Chevrolet Silverado 1500 Owner Manual (GMNA-Localizing-U.S./Canada/
Mexico/Paraguay-16515119) - 2023 - CRC - 6/2/22
Instruments and Controls 99
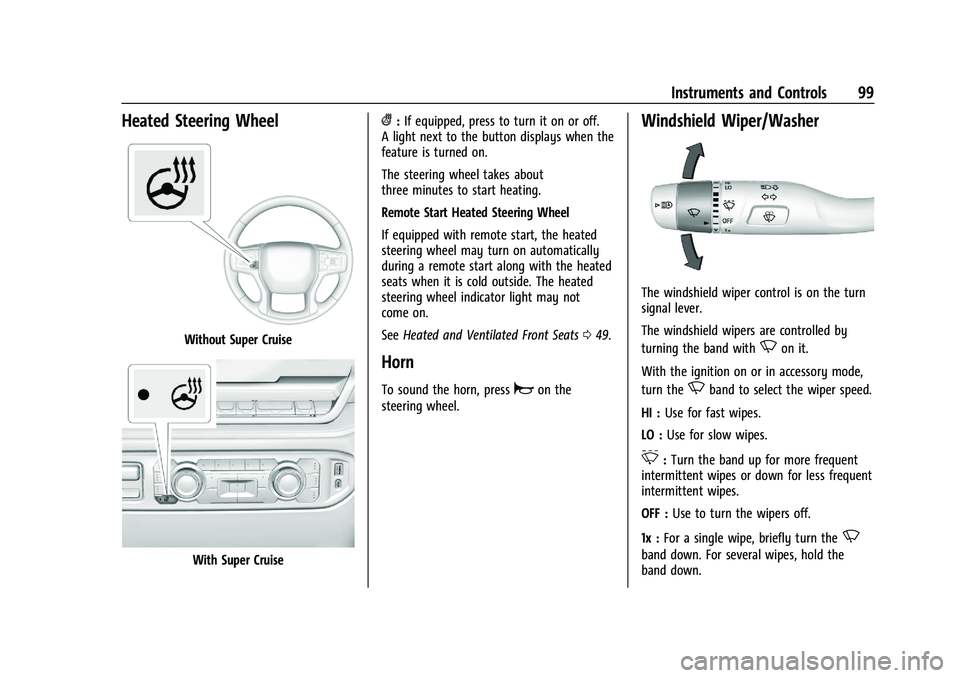
Heated Steering Wheel
Without Super Cruise
With Super Cruise
(:If equipped, press to turn it on or off.
A light next to the button displays when the
feature is turned on.
The steering wheel takes about
three minutes to start heating.
Remote Start Heated Steering Wheel
If equipped with remote start, the heated
steering wheel may turn on automatically
during a remote start along with the heated
seats when it is cold outside. The heated
steering wheel indicator light may not
come on.
See Heated and Ventilated Front Seats 049.
Horn
To sound the horn, pressaon the
steering wheel.
Windshield Wiper/Washer
The windshield wiper control is on the turn
signal lever.
The windshield wipers are controlled by
turning the band with
Non it.
With the ignition on or in accessory mode,
turn the
Nband to select the wiper speed.
HI : Use for fast wipes.
LO : Use for slow wipes.
3:Turn the band up for more frequent
intermittent wipes or down for less frequent
intermittent wipes.
OFF : Use to turn the wipers off.
1x : For a single wipe, briefly turn the
N
band down. For several wipes, hold the
band down.
Page 145 of 463
Chevrolet Silverado 1500 Owner Manual (GMNA-Localizing-U.S./Canada/
Mexico/Paraguay-16515119) - 2023 - CRC - 6/2/22
144 Lighting
Base Level Shown, Uplevel Similar
This feature adjusts the brightness of all
illuminated controls. The instrument panel
illumination control is next to the exterior
lamp control.
D: PressD+ to brighten orD− to
dim the lights.
This feature is functional at night, or when
the headlamps or parking lamps are on.
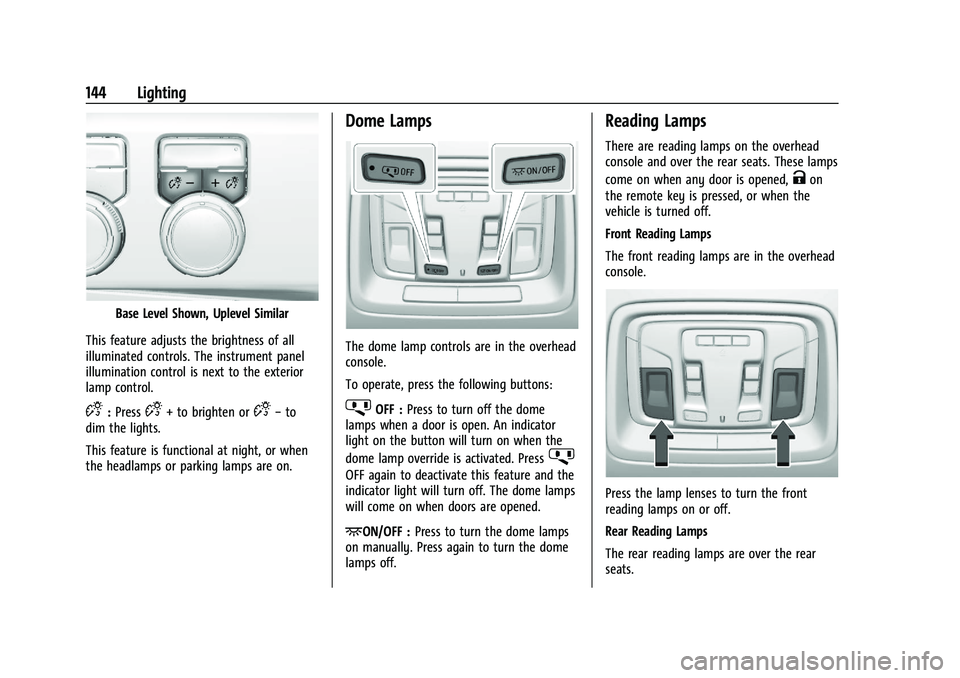
Dome Lamps
The dome lamp controls are in the overhead
console.
To operate, press the following buttons:
jOFF : Press to turn off the dome
lamps when a door is open. An indicator
light on the button will turn on when the
dome lamp override is activated. Press
j
OFF again to deactivate this feature and the
indicator light will turn off. The dome lamps
will come on when doors are opened.
+ON/OFF : Press to turn the dome lamps
on manually. Press again to turn the dome
lamps off.
Reading Lamps
There are reading lamps on the overhead
console and over the rear seats. These lamps
come on when any door is opened,
Kon
the remote key is pressed, or when the
vehicle is turned off.
Front Reading Lamps
The front reading lamps are in the overhead
console.
Press the lamp lenses to turn the front
reading lamps on or off.
Rear Reading Lamps
The rear reading lamps are over the rear
seats.
Page 147 of 463
Chevrolet Silverado 1500 Owner Manual (GMNA-Localizing-U.S./Canada/
Mexico/Paraguay-16515119) - 2023 - CRC - 6/2/22
146 Lighting
heated seats, engine cooling fans, trailer
loads, and loads plugged into accessory
power outlets.
EPM works to prevent excessive discharge of
the battery. It does this by balancing the
generator's output and the vehicle's
electrical needs. It can increase engine idle
speed to generate more power, whenever
needed. It can temporarily reduce the power
demands of some accessories.
Normally, these actions occur in steps or
levels, without being noticeable. In rare
cases at the highest levels of corrective
action, this action may be noticeable to the
driver. If so, a DIC message might be
displayed and it is recommended that the
driver reduce the electrical loads as much as
possible.
Battery Power Protection
This feature helps prevent the battery from
being drained if the interior courtesy lamps
or reading lamps are accidentally left on.
If any of these lamps are left on, they
automatically turn off after 10 minutes if the
ignition is off. The cargo lamp shuts off
after 20 minutes if the ignition is off.The lamps will not come back on again until
one of the following occurs:
.The ignition is turned on.
.The doors are closed and then re-opened.
Exterior Lighting Battery Saver
The exterior lamps turn off about 10 minutes
after the vehicle is turned off, if the parking
lamps or headlamps have been manually
left on. This protects against draining the
battery. To restart the 10-minute timer, turn
the exterior lamp control to the
Oposition
and then back to the
;or2position.
To keep the lamps on for more than
10 minutes, the vehicle must be on or in
accessory mode.
Page 191 of 463
Chevrolet Silverado 1500 Owner Manual (GMNA-Localizing-U.S./Canada/
Mexico/Paraguay-16515119) - 2023 - CRC - 6/2/22
190 Climate Controls
Remote Start Climate Control Operation :
If equipped with remote start, the climate
control system may run when the vehicle is
started remotely. If equipped with heated or
ventilated seats or a heated steering wheel,
these features may come on during a
remote start. SeeRemote Vehicle Start 018,
Heated and Ventilated Front Seats 049, and
Heated Steering Wheel 099.
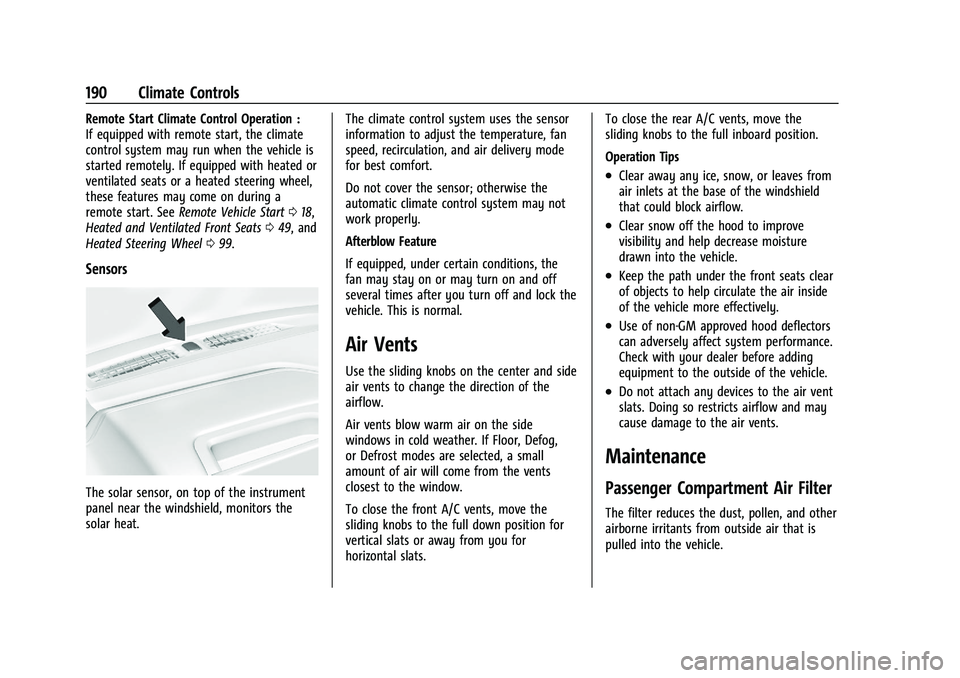
Sensors
The solar sensor, on top of the instrument
panel near the windshield, monitors the
solar heat. The climate control system uses the sensor
information to adjust the temperature, fan
speed, recirculation, and air delivery mode
for best comfort.
Do not cover the sensor; otherwise the
automatic climate control system may not
work properly.
Afterblow Feature
If equipped, under certain conditions, the
fan may stay on or may turn on and off
several times after you turn off and lock the
vehicle. This is normal.
Air Vents
Use the sliding knobs on the center and side
air vents to change the direction of the
airflow.
Air vents blow warm air on the side
windows in cold weather. If Floor, Defog,
or Defrost modes are selected, a small
amount of air will come from the vents
closest to the window.
To close the front A/C vents, move the
sliding knobs to the full down position for
vertical slats or away from you for
horizontal slats.To close the rear A/C vents, move the
sliding knobs to the full inboard position.
Operation Tips
.Clear away any ice, snow, or leaves from
air inlets at the base of the windshield
that could block airflow.
.Clear snow off the hood to improve
visibility and help decrease moisture
drawn into the vehicle.
.Keep the path under the front seats clear
of objects to help circulate the air inside
of the vehicle more effectively.
.Use of non-GM approved hood deflectors
can adversely affect system performance.
Check with your dealer before adding
equipment to the outside of the vehicle.
.Do not attach any devices to the air vent
slats. Doing so restricts airflow and may
cause damage to the air vents.
Maintenance
Passenger Compartment Air Filter
The filter reduces the dust, pollen, and other
airborne irritants from outside air that is
pulled into the vehicle.