2023 CHEVROLET SILVERADO 1500 display
[x] Cancel search: displayPage 224 of 463
Chevrolet Silverado 1500 Owner Manual (GMNA-Localizing-U.S./Canada/
Mexico/Paraguay-16515119) - 2023 - CRC - 6/2/22
Driving and Operating 223
Caution (Continued)
vehicle is stuck, do not spin the tires.
When stopping on a hill, use the brakes
to hold the vehicle in place.
Automatic Transmission (Electronic
Shifter)
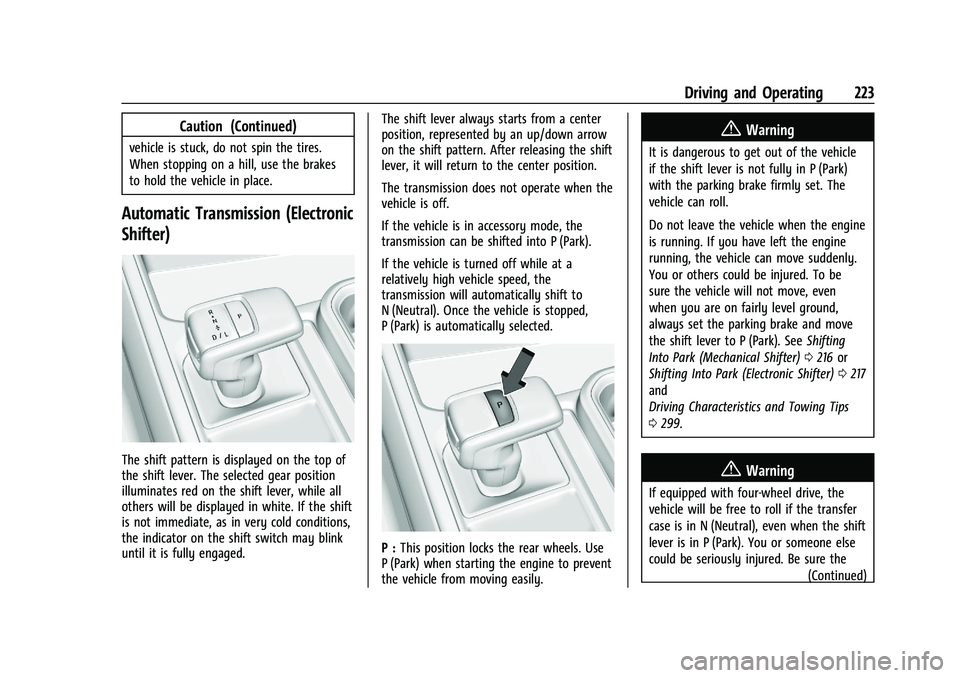
The shift pattern is displayed on the top of
the shift lever. The selected gear position
illuminates red on the shift lever, while all
others will be displayed in white. If the shift
is not immediate, as in very cold conditions,
the indicator on the shift switch may blink
until it is fully engaged.The shift lever always starts from a center
position, represented by an up/down arrow
on the shift pattern. After releasing the shift
lever, it will return to the center position.
The transmission does not operate when the
vehicle is off.
If the vehicle is in accessory mode, the
transmission can be shifted into P (Park).
If the vehicle is turned off while at a
relatively high vehicle speed, the
transmission will automatically shift to
N (Neutral). Once the vehicle is stopped,
P (Park) is automatically selected.
P :
This position locks the rear wheels. Use
P (Park) when starting the engine to prevent
the vehicle from moving easily.
{Warning
It is dangerous to get out of the vehicle
if the shift lever is not fully in P (Park)
with the parking brake firmly set. The
vehicle can roll.
Do not leave the vehicle when the engine
is running. If you have left the engine
running, the vehicle can move suddenly.
You or others could be injured. To be
sure the vehicle will not move, even
when you are on fairly level ground,
always set the parking brake and move
the shift lever to P (Park). See Shifting
Into Park (Mechanical Shifter) 0216 or
Shifting Into Park (Electronic Shifter) 0217
and
Driving Characteristics and Towing Tips
0 299.
{Warning
If equipped with four-wheel drive, the
vehicle will be free to roll if the transfer
case is in N (Neutral), even when the shift
lever is in P (Park). You or someone else
could be seriously injured. Be sure the
(Continued)
Page 227 of 463
Chevrolet Silverado 1500 Owner Manual (GMNA-Localizing-U.S./Canada/
Mexico/Paraguay-16515119) - 2023 - CRC - 6/2/22
226 Driving and Operating
3. Open the door.
4. Shift to N (Neutral).
5. Turn off the engine and release thebrake pedal.
6. The indicator should continue to show N. If it does not, repeat Steps 2–5.
7. Exit the vehicle and close the door. The vehicle is now ready for the car wash.
8. The vehicle may automatically shift to P (Park) upon re-entry.
Car Wash Mode (Engine On –Driver in
Vehicle)
To place the vehicle in N (Neutral) with the
engine on and the vehicle occupied:
1. Drive to the entrance of the car wash.
2. Apply the brake pedal.
3. Shift to N (Neutral).
4. Release the brake pedal. The vehicle is now ready for the car wash.
Car Wash Mode (Engine On –Driver Out of
Vehicle)
To place the vehicle in N (Neutral) with the
engine on and the vehicle unoccupied:
1. Drive to the entrance of the car wash.
2. Apply the brake pedal. 3. Open the door.
4. Shift to N (Neutral), then release the
brake pedal.
5. The indicator should continue to show N. If it does not, repeat Steps 2–4.
6. Exit the vehicle and close the door. The vehicle is now ready for the car wash.
7. The vehicle may automatically shift to P (Park) upon re-entry.
Caution
A transmission hot message may display
if the automatic transmission fluid is too
hot. Driving under this condition can
damage the vehicle. Stop and idle the
engine to cool the automatic
transmission fluid. This message clears
when the transmission fluid has cooled
sufficiently.
D : This position is for normal driving.
If more power is needed for passing, press
the accelerator pedal down.
To shift into D (Drive):
1. Bring the vehicle to a complete stop. 2. From the center position, move the shift
lever back.
.If the vehicle is in P (Park) press the
shift lock release button while pulling
the shift lever back.
.D will illuminate in red.
.After releasing the shift lever, it will
return to the center position.
To shift out of D (Drive): 1. Bring the vehicle to a complete stop.
2. Shift to the desired gear.
3. After releasing the shift lever, it will return to the center position.
Downshifting the transmission on a slippery
road could result in skidding. See “Skidding”
under Loss of Control 0197.
Caution
Spinning the tires or holding the vehicle
in one place on a hill using only the
accelerator pedal may damage the
transmission. The repair will not be
covered by the vehicle warranty. If the
vehicle is stuck, do not spin the tires.
When stopping on a hill, use the brakes
to hold the vehicle in place.
Page 228 of 463
Chevrolet Silverado 1500 Owner Manual (GMNA-Localizing-U.S./Canada/
Mexico/Paraguay-16515119) - 2023 - CRC - 6/2/22
Driving and Operating 227
Manual Mode (Mechanical
Shifter)
Range Selection Mode
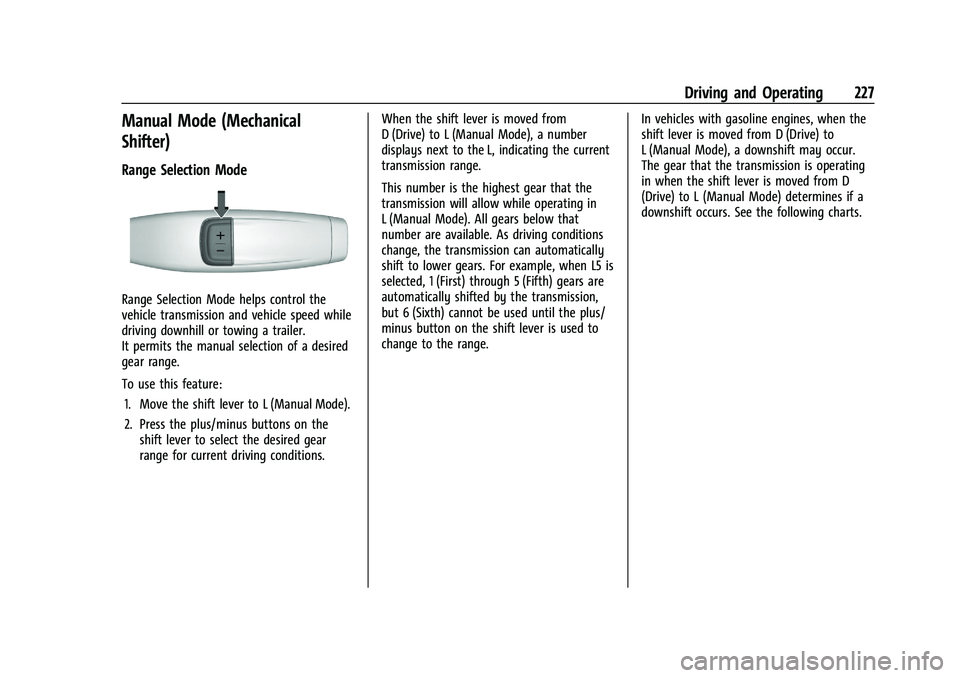
Range Selection Mode helps control the
vehicle transmission and vehicle speed while
driving downhill or towing a trailer.
It permits the manual selection of a desired
gear range.
To use this feature:1. Move the shift lever to L (Manual Mode).
2. Press the plus/minus buttons on the shift lever to select the desired gear
range for current driving conditions. When the shift lever is moved from
D (Drive) to L (Manual Mode), a number
displays next to the L, indicating the current
transmission range.
This number is the highest gear that the
transmission will allow while operating in
L (Manual Mode). All gears below that
number are available. As driving conditions
change, the transmission can automatically
shift to lower gears. For example, when L5 is
selected, 1 (First) through 5 (Fifth) gears are
automatically shifted by the transmission,
but 6 (Sixth) cannot be used until the plus/
minus button on the shift lever is used to
change to the range.
In vehicles with gasoline engines, when the
shift lever is moved from D (Drive) to
L (Manual Mode), a downshift may occur.
The gear that the transmission is operating
in when the shift lever is moved from D
(Drive) to L (Manual Mode) determines if a
downshift occurs. See the following charts.
Page 230 of 463
Chevrolet Silverado 1500 Owner Manual (GMNA-Localizing-U.S./Canada/
Mexico/Paraguay-16515119) - 2023 - CRC - 6/2/22
Driving and Operating 229
Manual Mode (Electronic Shifter)
Electronic Range Select (ERS)Caution
Driving with the engine at a high rpm
without upshifting while using Manual
Mode, could damage the vehicle. Always
upshift when necessary while using
Manual Mode.
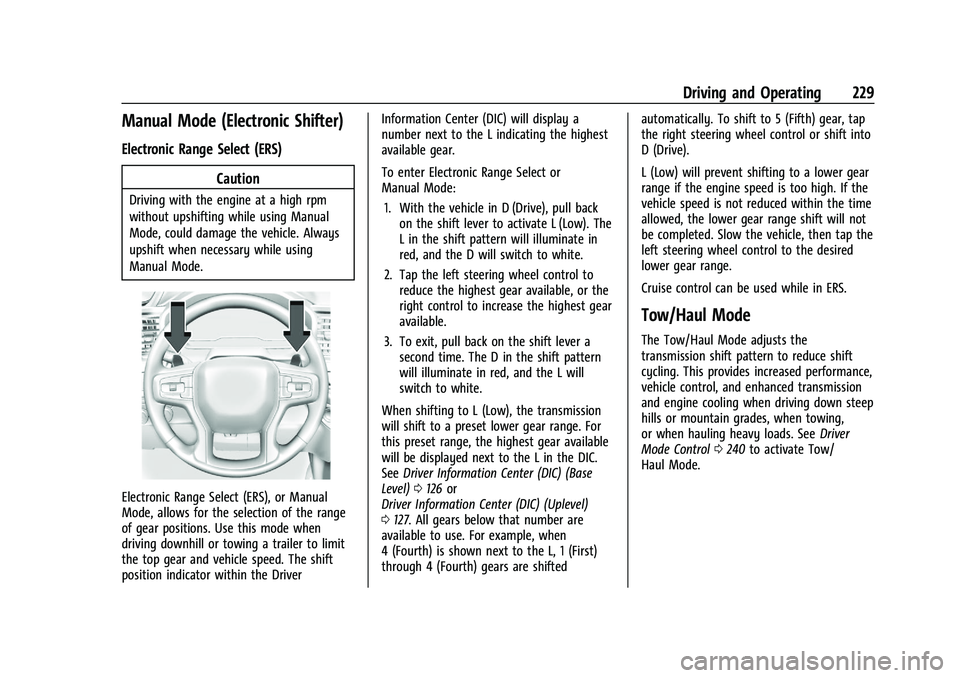
Electronic Range Select (ERS), or Manual
Mode, allows for the selection of the range
of gear positions. Use this mode when
driving downhill or towing a trailer to limit
the top gear and vehicle speed. The shift
position indicator within the Driver Information Center (DIC) will display a
number next to the L indicating the highest
available gear.
To enter Electronic Range Select or
Manual Mode:
1. With the vehicle in D (Drive), pull back on the shift lever to activate L (Low). The
L in the shift pattern will illuminate in
red, and the D will switch to white.
2. Tap the left steering wheel control to reduce the highest gear available, or the
right control to increase the highest gear
available.
3. To exit, pull back on the shift lever a second time. The D in the shift pattern
will illuminate in red, and the L will
switch to white.
When shifting to L (Low), the transmission
will shift to a preset lower gear range. For
this preset range, the highest gear available
will be displayed next to the L in the DIC.
See Driver Information Center (DIC) (Base
Level) 0126 or
Driver Information Center (DIC) (Uplevel)
0 127. All gears below that number are
available to use. For example, when
4 (Fourth) is shown next to the L, 1 (First)
through 4 (Fourth) gears are shifted automatically. To shift to 5 (Fifth) gear, tap
the right steering wheel control or shift into
D (Drive).
L (Low) will prevent shifting to a lower gear
range if the engine speed is too high. If the
vehicle speed is not reduced within the time
allowed, the lower gear range shift will not
be completed. Slow the vehicle, then tap the
left steering wheel control to the desired
lower gear range.
Cruise control can be used while in ERS.
Tow/Haul Mode
The Tow/Haul Mode adjusts the
transmission shift pattern to reduce shift
cycling. This provides increased performance,
vehicle control, and enhanced transmission
and engine cooling when driving down steep
hills or mountain grades, when towing,
or when hauling heavy loads. See
Driver
Mode Control 0240 to activate Tow/
Haul Mode.
Page 232 of 463
Chevrolet Silverado 1500 Owner Manual (GMNA-Localizing-U.S./Canada/
Mexico/Paraguay-16515119) - 2023 - CRC - 6/2/22
Driving and Operating 231
Automatic Transfer Case
Two-Speed Transfer Case
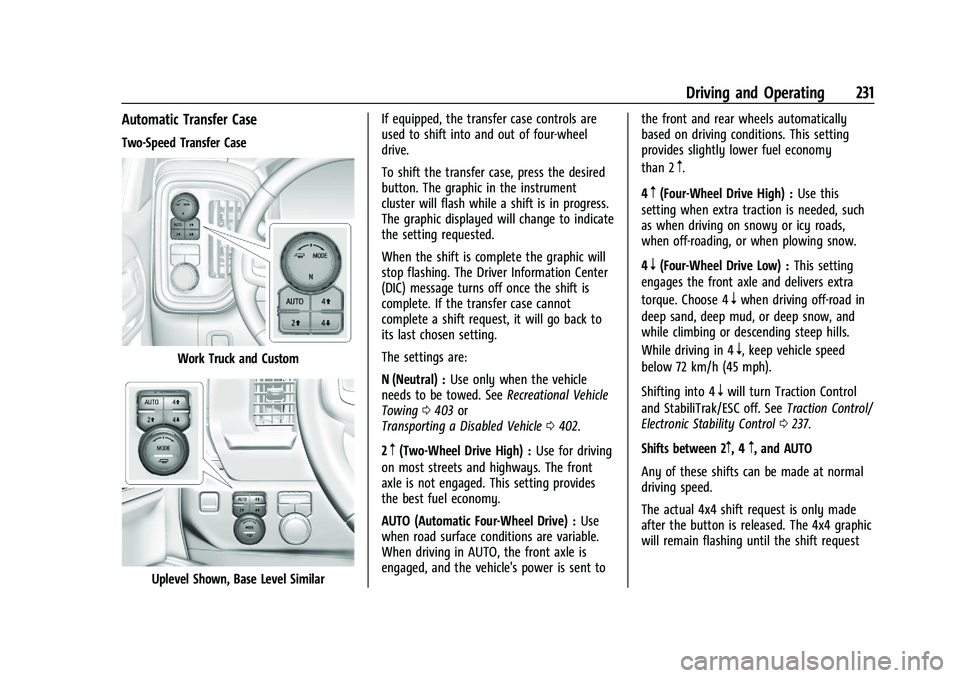
Work Truck and Custom
Uplevel Shown, Base Level SimilarIf equipped, the transfer case controls are
used to shift into and out of four-wheel
drive.
To shift the transfer case, press the desired
button. The graphic in the instrument
cluster will flash while a shift is in progress.
The graphic displayed will change to indicate
the setting requested.
When the shift is complete the graphic will
stop flashing. The Driver Information Center
(DIC) message turns off once the shift is
complete. If the transfer case cannot
complete a shift request, it will go back to
its last chosen setting.
The settings are:
N (Neutral) :
Use only when the vehicle
needs to be towed. See Recreational Vehicle
Towing 0403 or
Transporting a Disabled Vehicle 0402.
2
m(Two-Wheel Drive High) : Use for driving
on most streets and highways. The front
axle is not engaged. This setting provides
the best fuel economy.
AUTO (Automatic Four-Wheel Drive) : Use
when road surface conditions are variable.
When driving in AUTO, the front axle is
engaged, and the vehicle's power is sent to the front and rear wheels automatically
based on driving conditions. This setting
provides slightly lower fuel economy
than 2
m.
4
m(Four-Wheel Drive High) : Use this
setting when extra traction is needed, such
as when driving on snowy or icy roads,
when off-roading, or when plowing snow.
4
n(Four-Wheel Drive Low) : This setting
engages the front axle and delivers extra
torque. Choose 4
nwhen driving off-road in
deep sand, deep mud, or deep snow, and
while climbing or descending steep hills.
While driving in 4
n, keep vehicle speed
below 72 km/h (45 mph).
Shifting into 4
nwill turn Traction Control
and StabiliTrak/ESC off. See Traction Control/
Electronic Stability Control 0237.
Shifts between 2
m, 4m, and AUTO
Any of these shifts can be made at normal
driving speed.
The actual 4x4 shift request is only made
after the button is released. The 4x4 graphic
will remain flashing until the shift request
Page 233 of 463
Chevrolet Silverado 1500 Owner Manual (GMNA-Localizing-U.S./Canada/
Mexico/Paraguay-16515119) - 2023 - CRC - 6/2/22
232 Driving and Operating
has completed. A DIC message displays to
indicate that the 4x4 transfer case has been
requested to shift to the new desired state.
Once the 4x4 shift has completed, the DIC
message disappears, the 4x4 graphic stops
flashing, and the current setting is indicated.
When a shift to 2
mis completed successfully
while in P (Park), the parking brake will
engage. To resume driving, shift the
transmission to the desired gear and
manually release the parking brake or press
the accelerator pedal to begin driving. See
Electric Parking Brake 0235.
If equipped, use 4
n, AUTO, or 4mto provide
additional traction when parking on a steep
grade with poor traction such as ice, snow,
mud, or gravel.
Shifting Into 4
n
1. The ignition must be on and the vehicle must be stopped or moving less than
5 km/h (3 mph) with the transmission in
N (Neutral). It is best for the vehicle to
be moving 1.6 to 3.2 km/h (1 to 2 mph).
2. Press 4
n. The actual 4x4 shift request is
only made after the button is released.
The 4x4 graphic will remain flashing
until the shift request has completed. A DIC message displays to indicate that
the 4x4 transfer case has been requested
to shift to the new desired state.
Once the 4x4 shift has completed, the
DIC message disappears, the 4x4 graphic
stops flashing and the current setting is
indicated.
If vehicle speed is higher when shift request
occurs, a DIC message displays. Reduce
vehicle speed.
If the transmission is not in N (Neutral)
when shift request occurs, a DIC message
displays. The vehicle will allow 20 seconds
for the shift to occur. After this time, a
graphic in the instrument cluster will
indicate that the transfer case is in 4
n.
Caution
Shifting the transmission into gear before
the requested mode indicator light has
stopped flashing could damage the
transfer case.
If the transmission is not shifted into
N (Neutral) or the vehicle has not slowed to
5 km/h (3 mph) within 20 seconds, the
transfer case will remain in its original state.
This will be indicated in the instrument
cluster. With the vehicle moving less than
5 km/h (3 mph) and the transmission in
N (Neutral), attempt the shift again.
Shifting Out of 4
n
1. The vehicle must be stopped or moving
less than 5 km/h (3 mph) with the
transmission in N (Neutral) and the
ignition on. It is best for the vehicle to
be moving 1.6 to 3.2 km/h (1 to 2 mph).
2. Press 4
m, AUTO, or 2m. The actual 4x4
shift request is only made after the
button is released. The 4x4 graphic will
remain flashing until the shift request
has completed. A DIC message displays
to indicate the state of the request.
Once the 4x4 shift has completed, the
DIC message disappears, the 4x4 graphic
stops flashing, and the current setting is
indicated.
If vehicle speed is higher when shift
request occurs, a DIC message displays.
Reduce vehicle speed.
If the transmission is not in N (Neutral)
when shift request occurs, DIC messages will
display. The vehicle will allow 20 seconds for
this shift to occur. After this time, a graphic
in the instrument cluster will indicate that
the transfer case is in 4
n.
Page 235 of 463
Chevrolet Silverado 1500 Owner Manual (GMNA-Localizing-U.S./Canada/
Mexico/Paraguay-16515119) - 2023 - CRC - 6/2/22
234 Driving and Operating
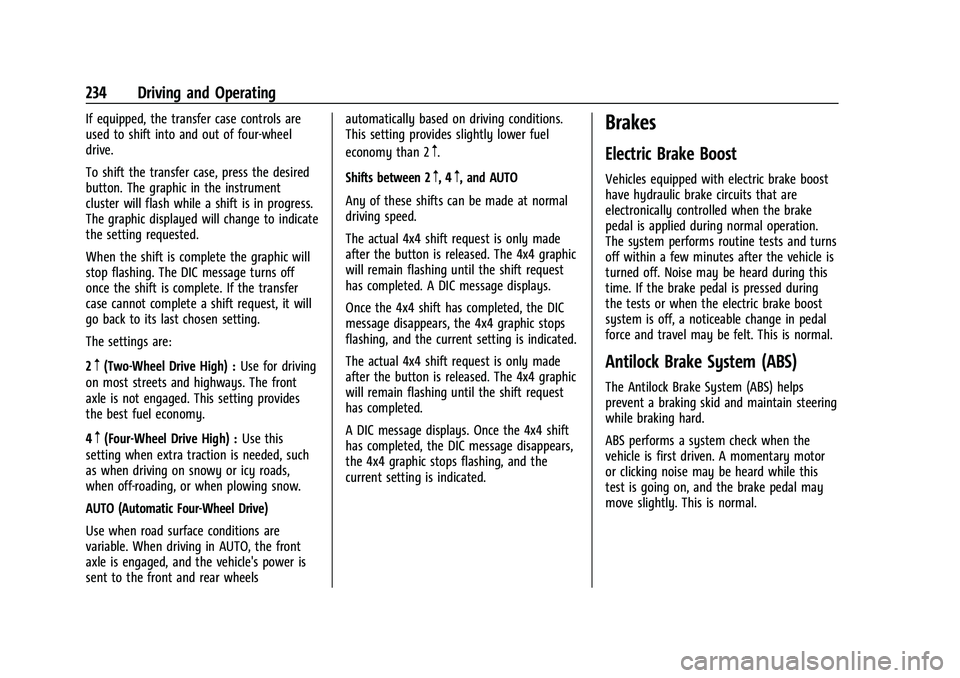
If equipped, the transfer case controls are
used to shift into and out of four-wheel
drive.
To shift the transfer case, press the desired
button. The graphic in the instrument
cluster will flash while a shift is in progress.
The graphic displayed will change to indicate
the setting requested.
When the shift is complete the graphic will
stop flashing. The DIC message turns off
once the shift is complete. If the transfer
case cannot complete a shift request, it will
go back to its last chosen setting.
The settings are:
2
m(Two-Wheel Drive High) :Use for driving
on most streets and highways. The front
axle is not engaged. This setting provides
the best fuel economy.
4
m(Four-Wheel Drive High) : Use this
setting when extra traction is needed, such
as when driving on snowy or icy roads,
when off-roading, or when plowing snow.
AUTO (Automatic Four-Wheel Drive)
Use when road surface conditions are
variable. When driving in AUTO, the front
axle is engaged, and the vehicle's power is
sent to the front and rear wheels automatically based on driving conditions.
This setting provides slightly lower fuel
economy than 2
m.
Shifts between 2
m, 4m, and AUTO
Any of these shifts can be made at normal
driving speed.
The actual 4x4 shift request is only made
after the button is released. The 4x4 graphic
will remain flashing until the shift request
has completed. A DIC message displays.
Once the 4x4 shift has completed, the DIC
message disappears, the 4x4 graphic stops
flashing, and the current setting is indicated.
The actual 4x4 shift request is only made
after the button is released. The 4x4 graphic
will remain flashing until the shift request
has completed.
A DIC message displays. Once the 4x4 shift
has completed, the DIC message disappears,
the 4x4 graphic stops flashing, and the
current setting is indicated.
Brakes
Electric Brake Boost
Vehicles equipped with electric brake boost
have hydraulic brake circuits that are
electronically controlled when the brake
pedal is applied during normal operation.
The system performs routine tests and turns
off within a few minutes after the vehicle is
turned off. Noise may be heard during this
time. If the brake pedal is pressed during
the tests or when the electric brake boost
system is off, a noticeable change in pedal
force and travel may be felt. This is normal.
Antilock Brake System (ABS)
The Antilock Brake System (ABS) helps
prevent a braking skid and maintain steering
while braking hard.
ABS performs a system check when the
vehicle is first driven. A momentary motor
or clicking noise may be heard while this
test is going on, and the brake pedal may
move slightly. This is normal.
Page 236 of 463
Chevrolet Silverado 1500 Owner Manual (GMNA-Localizing-U.S./Canada/
Mexico/Paraguay-16515119) - 2023 - CRC - 6/2/22
Driving and Operating 235
If there is a problem with ABS, this warning
light stays on. SeeAntilock Brake System
(ABS) Warning Light 0119.
ABS does not change the time needed to
get a foot on the brake pedal and does not
always decrease stopping distance. If you
get too close to the vehicle ahead, there will
not be enough time to apply the brakes if
that vehicle suddenly slows or stops. Always
leave enough room ahead to stop, even
with ABS.
Using ABS
Do not pump the brakes. Just hold the brake
pedal down firmly. Hearing or feeling ABS
operate is normal.
Braking in Emergencies
ABS allows steering and braking at the same
time. In many emergencies, steering can
help even more than braking.
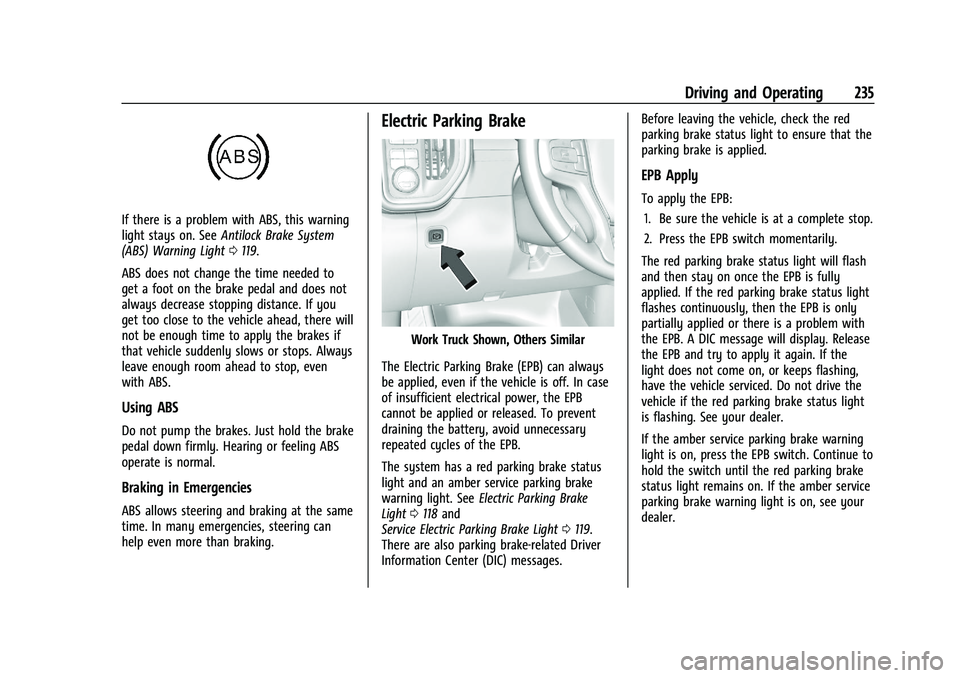
Electric Parking Brake
Work Truck Shown, Others Similar
The Electric Parking Brake (EPB) can always
be applied, even if the vehicle is off. In case
of insufficient electrical power, the EPB
cannot be applied or released. To prevent
draining the battery, avoid unnecessary
repeated cycles of the EPB.
The system has a red parking brake status
light and an amber service parking brake
warning light. See Electric Parking Brake
Light 0118 and
Service Electric Parking Brake Light 0119.
There are also parking brake-related Driver
Information Center (DIC) messages. Before leaving the vehicle, check the red
parking brake status light to ensure that the
parking brake is applied.
EPB Apply
To apply the EPB:
1. Be sure the vehicle is at a complete stop.
2. Press the EPB switch momentarily.
The red parking brake status light will flash
and then stay on once the EPB is fully
applied. If the red parking brake status light
flashes continuously, then the EPB is only
partially applied or there is a problem with
the EPB. A DIC message will display. Release
the EPB and try to apply it again. If the
light does not come on, or keeps flashing,
have the vehicle serviced. Do not drive the
vehicle if the red parking brake status light
is flashing. See your dealer.
If the amber service parking brake warning
light is on, press the EPB switch. Continue to
hold the switch until the red parking brake
status light remains on. If the amber service
parking brake warning light is on, see your
dealer.