2023 CHEVROLET SILVERADO 1500 service schedule
[x] Cancel search: service schedulePage 1 of 463

2023 Silverado 1500
Scan to Access
United States
United States and Canada
Connected Services1-888-4-ONSTAR Customer Assistance
1-800-263-3777
Canada
• Owner’s Manuals
• Warranty Information
• Connected Services
• My Chevrolet Rewards
• myChevrolet Mobile App
• How-To Videos
• Vehicle Diagnostics
• Scheduled Maintenance
• Vehicle Features
• Many Additional Resources
United States
Customer Assistance 1-800-222-1020
Roadside Assistance 1-800-243-8872
84883873 A
Silverado 1500
Owner’s Manual
Roadside Assistance1-800-268-6800
Canada
C
M
Y
CM
MY
CY
CMY
K
ai1652903499155_23_CHEV_Silverado_1500_COV_en_US_84883873 A_2022JUN14.pd\
f 1 5/18/2022 3:51:40 PM
Page 70 of 463
Chevrolet Silverado 1500 Owner Manual (GMNA-Localizing-U.S./Canada/
Mexico/Paraguay-16515119) - 2023 - CRC - 6/2/22
Seats and Restraints 69
system from properly turning off the
passenger airbag(s). SeePassenger Sensing
System 064.
If the vehicle has rollover roof-rail airbags,
see Different Size Tires and Wheels 0385 for
additional important information.
If a snow plow is added to the vehicle, the
airbags should still work properly. The
airbag systems were designed to work
properly under a wide range of conditions,
including snow plowing with vehicles that
have the optional snow plow prep package
(RPO VYU). Do not change or defeat the
snow plow's “tripping mechanism.” If you
do, it can damage the snow plow and the
vehicle, and may cause an airbag
deployment.
If the vehicle must be modified because you
have a disability and have questions about
whether the modifications will affect the
vehicle's airbag system, or if you have
questions about whether the airbag system
will be affected if the vehicle is modified for
any other reason, call Customer Assistance.
See Customer Assistance Offices 0432.Airbag System Check
The airbag system does not need regularly
scheduled maintenance or replacement.
Make sure the airbag readiness light is
working. See Airbag Readiness Light 0115.
Caution
If an airbag covering is damaged, opened,
or broken, the airbag may not work
properly. Do not open or break the airbag
coverings. If there are any opened or
broken airbag coverings, have the airbag
covering and/or airbag module replaced.
For the location of the airbags, see Where
Are the Airbags? 061. See your dealer for
service.
Replacing Airbag System Parts
after a Crash
{Warning
A crash can damage the airbag systems
in the vehicle. A damaged airbag system
may not properly protect you and your
passenger(s) in a crash, resulting in
serious injury or even death. To help (Continued)
Warning (Continued)
make sure the airbag systems are
working properly after a crash, have
them inspected and any necessary
replacements made as soon as possible.
If an airbag inflates, you will need to
replace airbag system parts. See your dealer
for service.
If the airbag readiness light stays on after
the vehicle is started or comes on when you
are driving, the airbag system may not work
properly. Have the vehicle serviced right
away. See Airbag Readiness Light 0115.
Page 113 of 463
Chevrolet Silverado 1500 Owner Manual (GMNA-Localizing-U.S./Canada/
Mexico/Paraguay-16515119) - 2023 - CRC - 6/2/22
112 Instruments and Controls
The engine oil pressure gauge shows the
engine oil pressure in kPa (kilopascals)
or psi (pounds per square inch) when the
engine is running.
Oil pressure can vary with engine speed,
outside temperature, coolant temperature,
and oil viscosity.
On some models, the oil pump will vary
engine oil pressure according to engine
needs. Oil pressure may change quickly as
the engine speed or load varies. This is
normal. If the oil pressure warning light or
Driver Information Center (DIC) message
indicates oil pressure outside the normal
operating range, check the engine oil as
soon as possible.
SeeEngine Oil 0338.
Caution
Lack of proper engine oil maintenance
can damage the engine. Driving with the
engine oil low can also damage the
engine. The repairs would not be covered
by the vehicle warranty. Check the oil
level as soon as possible. Add oil if
required, but if the oil level is within the
operating range and the oil pressure is
(Continued)
Caution (Continued)
still low, have the vehicle serviced.
Always follow the maintenance schedule
for changing engine oil.
If the vehicle has a diesel engine, see the
Duramax diesel supplement.
Uplevel
This gauge displays while the lower gauges
are configured to display four gauges. To
change gauge configurations, see “Options”
under Instrument Cluster (Base Level) 0106
or
Instrument Cluster (Uplevel) 0107.
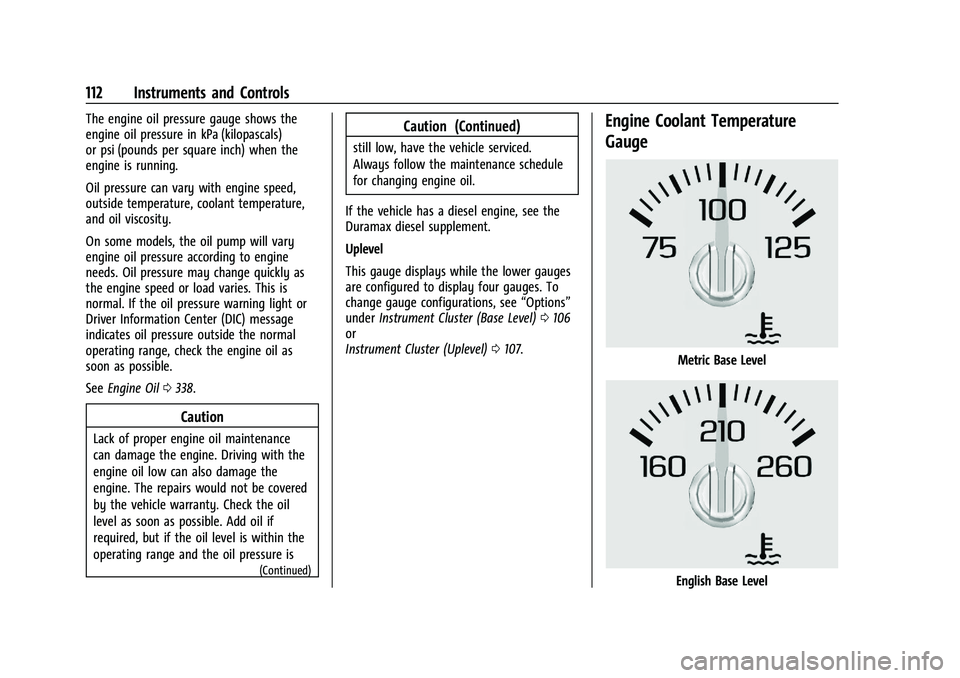
Engine Coolant Temperature
Gauge
Metric Base Level
English Base Level
Page 193 of 463
Chevrolet Silverado 1500 Owner Manual (GMNA-Localizing-U.S./Canada/
Mexico/Paraguay-16515119) - 2023 - CRC - 6/2/22
192 Climate Controls
Service
All vehicles have a label underhood that
identifies the refrigerant used in the vehicle.
The refrigerant system should only be
serviced by trained and certified technicians.
The air conditioning evaporator should never
be repaired or replaced by one from a
salvage vehicle. It should only be replaced
by a new evaporator to ensure proper and
safe operation.
During service, all refrigerants should be
reclaimed with proper equipment. Venting
refrigerants directly to the atmosphere is
harmful to the environment and may also
create unsafe conditions based on
inhalation, combustion, frostbite, or other
health-based concerns.
The air conditioning system requires periodic
maintenance. SeeMaintenance Schedule
0 417.
Page 202 of 463
Chevrolet Silverado 1500 Owner Manual (GMNA-Localizing-U.S./Canada/
Mexico/Paraguay-16515119) - 2023 - CRC - 6/2/22
Driving and Operating 201
Caution
Do not drive through standing water if it
is deep enough to cover the wheel hubs,
axles, or exhaust pipe. Deep water can
damage the axle and other vehicle parts.
If the standing water is not too deep, drive
through it slowly. At faster speeds, water
can get into the engine and cause it to stall.
Stalling can occur if the exhaust pipe is
under water. Do not turn off the ignition
when driving through water. If the exhaust
pipe is under water, the engine will not
start. When going through water, the brakes
get wet and it may take longer to stop. See
“Driving on Wet Roads” later in this section.
After Off-Road Driving
Remove any brush or debris that has
collected on the underbody or chassis,
or under the hood. These accumulations can
be a fire hazard. Reinstall underbody air
deflector and air dam if removed.
After operation in mud or sand, have the
brake linings cleaned and checked. These
substances can cause glazing and uneven
braking. Check the body structure, driveline,
steering, suspension, wheels, tires, and exhaust system for damage and check the
fuel lines and cooling system for any
leakage.
More frequent maintenance service is
required. See the
Maintenance Schedule
0 417.
Driving on Wet Roads
Rain and wet roads can reduce vehicle
traction and affect your ability to stop and
accelerate. Always drive slower in these
types of driving conditions and avoid driving
through large puddles and deep-standing or
flowing water.
{Warning
Wet brakes can cause crashes. They
might not work as well in a quick stop
and could cause pulling to one side. You
could lose control of the vehicle.
After driving through a large puddle of
water or a car/vehicle wash, lightly apply
the brake pedal until the brakes work
normally.
(Continued)
Warning (Continued)
Flowing or rushing water creates strong
forces. Driving through flowing water
could cause the vehicle to be carried
away. If this happens, you and other
vehicle occupants could drown. Do not
ignore police warnings and be very
cautious about trying to drive through
flowing water.
Hydroplaning
Hydroplaning is dangerous. Water can build
up under the vehicle's tires so they actually
ride on the water. This can happen if the
road is wet enough and you are going fast
enough. When the vehicle is hydroplaning, it
has little or no contact with the road.
There is no hard and fast rule about
hydroplaning. The best advice is to slow
down when the road is wet.
Other Rainy Weather Tips
Besides slowing down, other wet weather
driving tips include:
.Allow extra following distance.
.Pass with caution.
Page 303 of 463
Chevrolet Silverado 1500 Owner Manual (GMNA-Localizing-U.S./Canada/
Mexico/Paraguay-16515119) - 2023 - CRC - 6/2/22
302 Driving and Operating
Warning (Continued)
.Do not move the vehicle if someone is
in the path of the trailer. Some parts
of the trailer might be underwater and
not visible to people who are assisting
in launching the boat.
Disconnect the trailer wiring before backing
the trailer into the water to prevent damage
to the electrical circuits. Reconnect the
wiring to the trailer after removing the
trailer from the water. If the trailer has
electric brakes that can function when the
trailer is submerged, it might help to leave
the electrical trailer connector attached to
maintain trailer brake functionality while on
the boat ramp.
To back the trailer into the water: 1. If equipped, place the vehicle in Four-Wheel Drive High or Automatic
Four-Wheel Drive.
2. Slowly back down the boat ramp until the boat is floating, but no further than
necessary.
3. Press and hold the brake pedal, but do not shift into P (Park) yet.
4. Have someone place chocks under the front wheels of the vehicle. 5. Gradually release the brake pedal to
allow the chocks to absorb the load of
the trailer.
6. Reapply the brake pedal. Then apply the parking brake and shift into P (Park).
7. Release the brake pedal.
Pulling the Trailer from the Water
To pull the trailer out of the water: 1. Press and hold the brake pedal.
2. Start the engine and shift into gear.
3. Release the parking brake.
4. Let up on the brake pedal.
5. Drive slowly until the tires are clear of the chocks.
6. Stop and have someone pick up and store the chocks.
7. Slowly pull the trailer from the water.
8. Once the vehicle and trailer have been driven from the sloped part of the boat
ramp, the vehicle can be shifted from
four-wheel-drive high. Shift into the drive
mode that is appropriate for the road
conditions.
Caution
If the vehicle tires begin to spin and the
vehicle begins to slide toward the water,
remove your foot from the accelerator
pedal and apply the brake pedal. Seek
help to have the vehicle towed up
the ramp.
Maintenance when Trailer Towing
The vehicle needs service more often when
used to tow trailers. See Maintenance
Schedule 0417. It is especially important to
check the engine oil, axle lubricant, belts,
cooling system, and brake system before
and during each trip.
Check periodically to see that all nuts and
bolts on the trailer hitch are tight.
Engine Cooling When Trailer Towing
The cooling system may temporarily
overheat during severe operating conditions.
See Engine Overheating 0346.
Trailer Towing
If equipped with a diesel engine, see the
Duramax diesel supplement.
Page 342 of 463
Chevrolet Silverado 1500 Owner Manual (GMNA-Localizing-U.S./Canada/
Mexico/Paraguay-16515119) - 2023 - CRC - 6/2/22
Vehicle Care 341
in these vehicles. Because this procedure is
difficult, this should be done at the dealer.
Contact the dealer for additional information
or the procedure can be found in the service
manual. SeePublication Ordering
Information 0437.
Caution
Use of the incorrect automatic
transmission fluid may damage the
vehicle, and the damage may not be
covered by the vehicle warranty. Always
use the correct automatic transmission
fluid. See Recommended Fluids and
Lubricants 0421.
Change the fluid and filter at the scheduled
maintenance intervals listed in Maintenance
Schedule 0417. Be sure to use the
transmission fluid listed in Recommended
Fluids and Lubricants 0421.
Engine Air Filter Life System
If equipped, this feature provides the engine
air filter’s remaining life and best timing for
a change. The timing to change an engine
air filter depends on driving and
environmental conditions.
When to Change the Engine Air Filter
When the Driver Information Center (DIC)
displays a message to replace the engine air
filter at the next oil change, follow this
timing.
When the DIC displays a message to replace
the engine air filter soon, replace the engine
air filter at the earliest convenience.
The system must be reset after the engine
air filter is changed.
If the DIC displays a message to check the
engine air filter system, see your dealer.
How to Reset the Engine Air Filter Life
System
To reset:
1. Place the vehicle in P (Park).
2. Display the Air Filter Life on the DIC. See Driver Information Center (DIC) (Base
Level) 0126 or
Driver Information Center (DIC) (Uplevel)
0 127.
3. Press
Ton the steering wheel, or press
the trip odometer reset stem if the
vehicle does not have DIC controls, to
move to the Reset/Disable display area. Select Reset then press the thumbwheel
or press the reset stem for several
seconds.
4. Press the thumbwheel or the reset stem to confirm the reset.
Engine Air Cleaner/Filter
The engine air cleaner/filter is on the driver
side of the engine compartment. See Engine
Compartment Overview 0335.
When to Inspect the Engine Air Cleaner/
Filter
If the vehicle is not equipped with the
engine air filter life system see Maintenance
Schedule 0417 for intervals on inspecting
and replacing the engine air cleaner filter.
How to Inspect/Replace the Engine Air
Cleaner/Filter
Do not start or run the engine with the
engine air cleaner/filter housing open.
Before removing the engine air cleaner/
filter, clear any dirt and debris away from
the engine air cleaner/filter housing and
nearby components. Remove the engine air
cleaner/filter. Lightly tap and shake the
engine air cleaner/filter (away from the
vehicle), to release loose dust and dirt.
Page 356 of 463
Chevrolet Silverado 1500 Owner Manual (GMNA-Localizing-U.S./Canada/
Mexico/Paraguay-16515119) - 2023 - CRC - 6/2/22
Vehicle Care 355
foot pressure from the regular brake
pedal. Do this until the vehicle is held by
the parking brake only.
.To check the P (Park) mechanism's holding
ability: With the engine running, shift to
P (Park). Then release the parking brake
followed by the regular brake.
Contact your dealer if service is required.
Wiper Blade Replacement
Windshield wiper blades should be replaced
periodically. See Maintenance Schedule
0 417.
Replacement blades come in different types
and are removed in different ways. For
proper type and length, see Maintenance
Replacement Parts 0422.
Caution
Allowing the wiper arm to touch the
windshield when no wiper blade is
installed could damage the windshield.
Any damage that occurs would not be
covered by the vehicle warranty. Do not
allow the wiper arm to touch the
windshield.
Front Wiper Blade Replacement
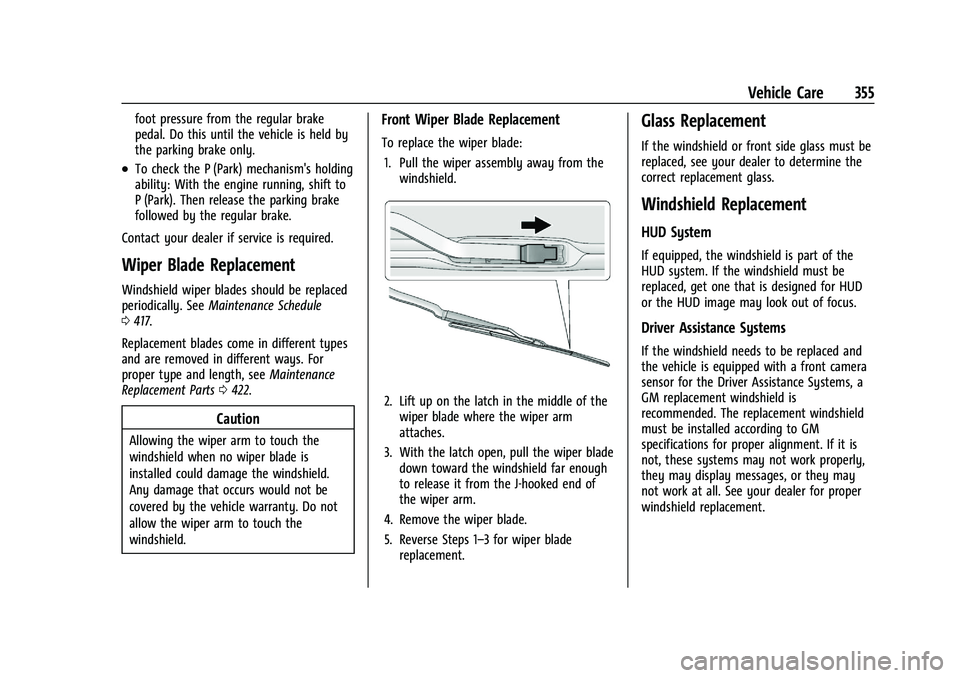
To replace the wiper blade:
1. Pull the wiper assembly away from the windshield.
2. Lift up on the latch in the middle of thewiper blade where the wiper arm
attaches.
3. With the latch open, pull the wiper blade down toward the windshield far enough
to release it from the J-hooked end of
the wiper arm.
4. Remove the wiper blade.
5. Reverse Steps 1–3 for wiper blade replacement.
Glass Replacement
If the windshield or front side glass must be
replaced, see your dealer to determine the
correct replacement glass.
Windshield Replacement
HUD System
If equipped, the windshield is part of the
HUD system. If the windshield must be
replaced, get one that is designed for HUD
or the HUD image may look out of focus.
Driver Assistance Systems
If the windshield needs to be replaced and
the vehicle is equipped with a front camera
sensor for the Driver Assistance Systems, a
GM replacement windshield is
recommended. The replacement windshield
must be installed according to GM
specifications for proper alignment. If it is
not, these systems may not work properly,
they may display messages, or they may
not work at all. See your dealer for proper
windshield replacement.