2023 CHEVROLET SILVERADO 1500 check oil
[x] Cancel search: check oilPage 19 of 463

Chevrolet Silverado 1500 Owner Manual (GMNA-Localizing-U.S./Canada/
Mexico/Paraguay-16515119) - 2023 - CRC - 6/2/22
18 Keys, Doors, and Windows
4. Pull the seal by pulling on the tab toaccess the battery.
5. Remove the old battery. Do not use a metal object.
6. Insert the new battery, positive side facing up. Replace with a CR2450 or
equivalent battery.
7. Place the seal back into the groove around the battery compartment.
8. Replace the battery cover by snapping it back into the remote key.
9. Reinsert the mechanical key.
Remote Vehicle Start
If equipped with the remote start feature,
the climate control system will come on
when the vehicle is started remotely,
depending on the outside temperature.
The rear defog and heated and ventilated
seats, if equipped, may also come on. See
Heated and Ventilated Front Seats 049. To
view available settings from the
infotainment screen, touch Settings >
Vehicle > Comfort and Convenience.
If equipped, the automatic heated steering
wheel may also come on. See Heated
Steering Wheel 099. Laws in some communities may restrict the
use of remote starters. Check local
regulations for any requirements on remote
starting of vehicles.
Do not use remote start if the vehicle is low
on fuel. The vehicle may run out of fuel.
The vehicle cannot be remote started if:
.The remote key is inside the vehicle or if
the key is in the ignition.
.The hood is not closed.
.There is an emission control system
malfunction and the lamp is on.
.The ignition is in any mode other
than off.
.The hazard warning flashers are on.
.The 30 minutes of engine run time have
been used.
.The vehicle is not in P (Park).
The engine will turn off during a remote
vehicle start if:
.The coolant temperature gets too high.
.The oil pressure gets low.
The remote key range may be reduced
while the vehicle is running.
Other conditions can affect the performance
of the remote key. See Remote Key012. Starting the Engine Using Remote Start
Press
Stwice on the remote key. The turn
signal lamps will flash. The lamps flash to
confirm the request to remote start the
vehicle has been received. During the
remote start the parking lamps will remain
on as long as the engine is running.
The engine will shut off after 15 minutes or
after the remainder of the 30 minute total
running time is used, unless you stop the
remote start before engine running has
completed or the vehicle is turned on.
Press the brake pedal and turn the ignition
on to drive the vehicle.
Total Engine Run Time
Remote start can be used for up to
30 minutes of total engine run time.
After two remote starts of 15 minutes,
or multiple shorter time starts totaling
30 minutes have been used, the vehicle
must be started and then turned off before
the remote start can be used again.
Canceling a Remote Start
To cancel a remote start, do one of the
following:
.PressS. The parking lamps will turn off.
Page 98 of 463

Chevrolet Silverado 1500 Owner Manual (GMNA-Localizing-U.S./Canada/
Mexico/Paraguay-16515119) - 2023 - CRC - 6/2/22
Instruments and Controls 97
Instruments and Controls
Controls
Steering Wheel Adjustment . . . . . . . . . . . . 98
Heated Steering Wheel . . . . . . . . . . . . . . . . . 99
Horn . . . . . . . . . . . . . . . . . . . . . . . . . . . . . . . . . . . 99
Windshield Wiper/Washer . . . . . . . . . . . . . 99
Compass . . . . . . . . . . . . . . . . . . . . . . . . . . . . . . 100
Clock . . . . . . . . . . . . . . . . . . . . . . . . . . . . . . . . . . 100
Power Outlets . . . . . . . . . . . . . . . . . . . . . . . . . 101
Wireless Charging . . . . . . . . . . . . . . . . . . . . . 103
Warning Lights, Gauges, and Indicators
Warning Lights, Gauges, andIndicators . . . . . . . . . . . . . . . . . . . . . . . . . . . . 105
Instrument Cluster (Base Level) . . . . . . . . 106
Instrument Cluster (Uplevel) . . . . . . . . . . . 107
Speedometer . . . . . . . . . . . . . . . . . . . . . . . . . . 110
Odometer . . . . . . . . . . . . . . . . . . . . . . . . . . . . . . 110
Trip Odometer . . . . . . . . . . . . . . . . . . . . . . . . . 110
Tachometer . . . . . . . . . . . . . . . . . . . . . . . . . . . . 110
Fuel Gauge . . . . . . . . . . . . . . . . . . . . . . . . . . . . 110
Engine Oil Pressure Gauge . . . . . . . . . . . . . 111
Engine Coolant Temperature Gauge . . . . 112
Transmission Temperature Gauge (Uplevel only) . . . . . . . . . . . . . . . . . . . . . . . . 113
Voltmeter Gauge . . . . . . . . . . . . . . . . . . . . . . . 113
Seat Belt Reminders . . . . . . . . . . . . . . . . . . . 114
Airbag Readiness Light . . . . . . . . . . . . . . . . . 115
Passenger Airbag Status Indicator . . . . . . 115 Charging System Light . . . . . . . . . . . . . . . . . 116
Malfunction Indicator Lamp (Check
Engine Light) . . . . . . . . . . . . . . . . . . . . . . . . . 116
Brake System Warning Light . . . . . . . . . . . 118
Electric Parking Brake Light . . . . . . . . . . . . 118
Service Electric Parking Brake Light . . . . 119
Antilock Brake System (ABS) Warning Light . . . . . . . . . . . . . . . . . . . . . . . . . . . . . . . . . 119
Four-Wheel-Drive Light . . . . . . . . . . . . . . . . . 119
Tow/Haul Mode Light . . . . . . . . . . . . . . . . . 120
Hill Descent Control Light . . . . . . . . . . . . . 120
Lane Keep Assist (LKA) Light . . . . . . . . . . . 120
Automatic Emergency Braking (AEB) Disabled Light . . . . . . . . . . . . . . . . . . . . . . . 120
Vehicle Ahead Indicator . . . . . . . . . . . . . . . . 121
Pedestrian Ahead Indicator . . . . . . . . . . . . . 121
Traction Off Light . . . . . . . . . . . . . . . . . . . . . . 121
StabiliTrak OFF Light . . . . . . . . . . . . . . . . . . . 121
Traction Control System (TCS)/ StabiliTrak Light . . . . . . . . . . . . . . . . . . . . . . 122
Engine Coolant Temperature Warning Light . . . . . . . . . . . . . . . . . . . . . . . . . . . . . . . . . 122
Driver Mode Control Light . . . . . . . . . . . . . 122
Tire Pressure Light . . . . . . . . . . . . . . . . . . . . . 123
Engine Oil Pressure Light (Uplevel Cluster) . . . . . . . . . . . . . . . . . . . . . . . . . . . . . . 123
Low Fuel Warning Light . . . . . . . . . . . . . . . 124
Security Light . . . . . . . . . . . . . . . . . . . . . . . . . . 124
High-Beam On Light . . . . . . . . . . . . . . . . . . . 124
Front Fog Lamp Light . . . . . . . . . . . . . . . . . . 125 Lamps On Reminder . . . . . . . . . . . . . . . . . . . 125
Cruise Control Light . . . . . . . . . . . . . . . . . . . . 125
Door Ajar Light . . . . . . . . . . . . . . . . . . . . . . . . 126
Information Displays
Driver Information Center (DIC) (Base
Level) . . . . . . . . . . . . . . . . . . . . . . . . . . . . . . . . 126
Driver Information Center (DIC) (Uplevel) . . . . . . . . . . . . . . . . . . . . . . . . . . . . . 127
Head-Up Display (HUD) . . . . . . . . . . . . . . . . 129
Vehicle Messages
Vehicle Messages . . . . . . . . . . . . . . . . . . . . . . 133
Engine Power Messages . . . . . . . . . . . . . . . 133
Vehicle Speed Messages . . . . . . . . . . . . . . . 134
Universal Remote System
Universal Remote System . . . . . . . . . . . . . . 134
Universal Remote System Programming . . . . . . . . . . . . . . . . . . . . . . . . 134
Universal Remote System Operation . . . 136
Page 113 of 463
Chevrolet Silverado 1500 Owner Manual (GMNA-Localizing-U.S./Canada/
Mexico/Paraguay-16515119) - 2023 - CRC - 6/2/22
112 Instruments and Controls
The engine oil pressure gauge shows the
engine oil pressure in kPa (kilopascals)
or psi (pounds per square inch) when the
engine is running.
Oil pressure can vary with engine speed,
outside temperature, coolant temperature,
and oil viscosity.
On some models, the oil pump will vary
engine oil pressure according to engine
needs. Oil pressure may change quickly as
the engine speed or load varies. This is
normal. If the oil pressure warning light or
Driver Information Center (DIC) message
indicates oil pressure outside the normal
operating range, check the engine oil as
soon as possible.
SeeEngine Oil 0338.
Caution
Lack of proper engine oil maintenance
can damage the engine. Driving with the
engine oil low can also damage the
engine. The repairs would not be covered
by the vehicle warranty. Check the oil
level as soon as possible. Add oil if
required, but if the oil level is within the
operating range and the oil pressure is
(Continued)
Caution (Continued)
still low, have the vehicle serviced.
Always follow the maintenance schedule
for changing engine oil.
If the vehicle has a diesel engine, see the
Duramax diesel supplement.
Uplevel
This gauge displays while the lower gauges
are configured to display four gauges. To
change gauge configurations, see “Options”
under Instrument Cluster (Base Level) 0106
or
Instrument Cluster (Uplevel) 0107.
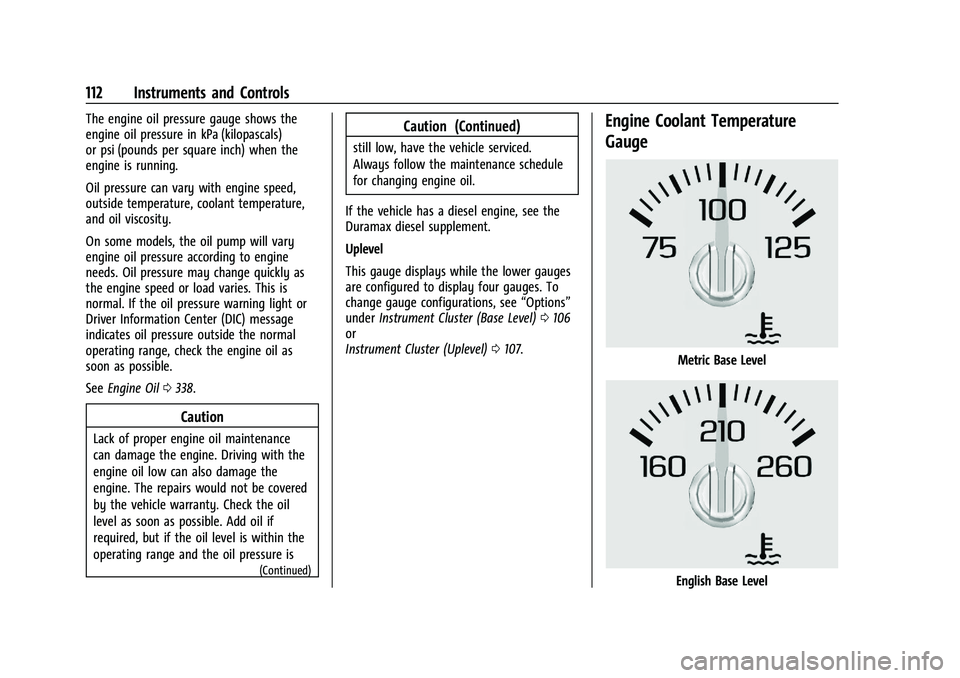
Engine Coolant Temperature
Gauge
Metric Base Level
English Base Level
Page 124 of 463
Chevrolet Silverado 1500 Owner Manual (GMNA-Localizing-U.S./Canada/
Mexico/Paraguay-16515119) - 2023 - CRC - 6/2/22
Instruments and Controls 123
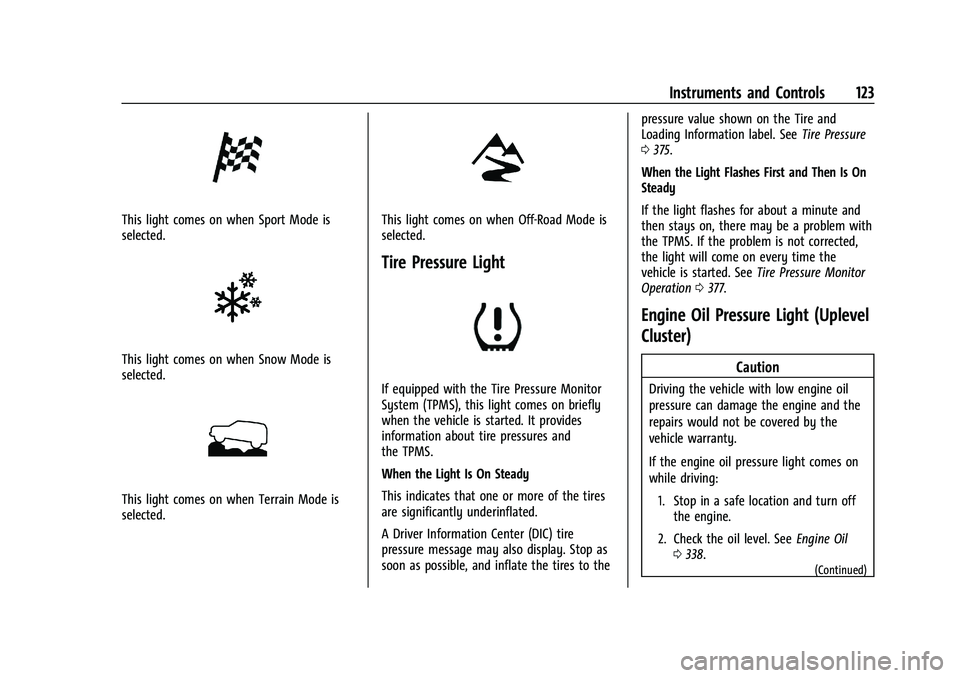
This light comes on when Sport Mode is
selected.
This light comes on when Snow Mode is
selected.
This light comes on when Terrain Mode is
selected.
This light comes on when Off-Road Mode is
selected.
Tire Pressure Light
If equipped with the Tire Pressure Monitor
System (TPMS), this light comes on briefly
when the vehicle is started. It provides
information about tire pressures and
the TPMS.
When the Light Is On Steady
This indicates that one or more of the tires
are significantly underinflated.
A Driver Information Center (DIC) tire
pressure message may also display. Stop as
soon as possible, and inflate the tires to thepressure value shown on the Tire and
Loading Information label. See
Tire Pressure
0 375.
When the Light Flashes First and Then Is On
Steady
If the light flashes for about a minute and
then stays on, there may be a problem with
the TPMS. If the problem is not corrected,
the light will come on every time the
vehicle is started. See Tire Pressure Monitor
Operation 0377.
Engine Oil Pressure Light (Uplevel
Cluster)
Caution
Driving the vehicle with low engine oil
pressure can damage the engine and the
repairs would not be covered by the
vehicle warranty.
If the engine oil pressure light comes on
while driving:
1. Stop in a safe location and turn off the engine.
2. Check the oil level. See Engine Oil
0 338.
(Continued)
Page 125 of 463
Chevrolet Silverado 1500 Owner Manual (GMNA-Localizing-U.S./Canada/
Mexico/Paraguay-16515119) - 2023 - CRC - 6/2/22
124 Instruments and Controls
Caution (Continued)
3. Add oil if the oil level is below thenormal operating range.
4. Restart the vehicle. If the engine oil pressure light stays on for more
than 10 seconds, turn the vehicle
back off. Do not restart the vehicle.
See your dealer for service.
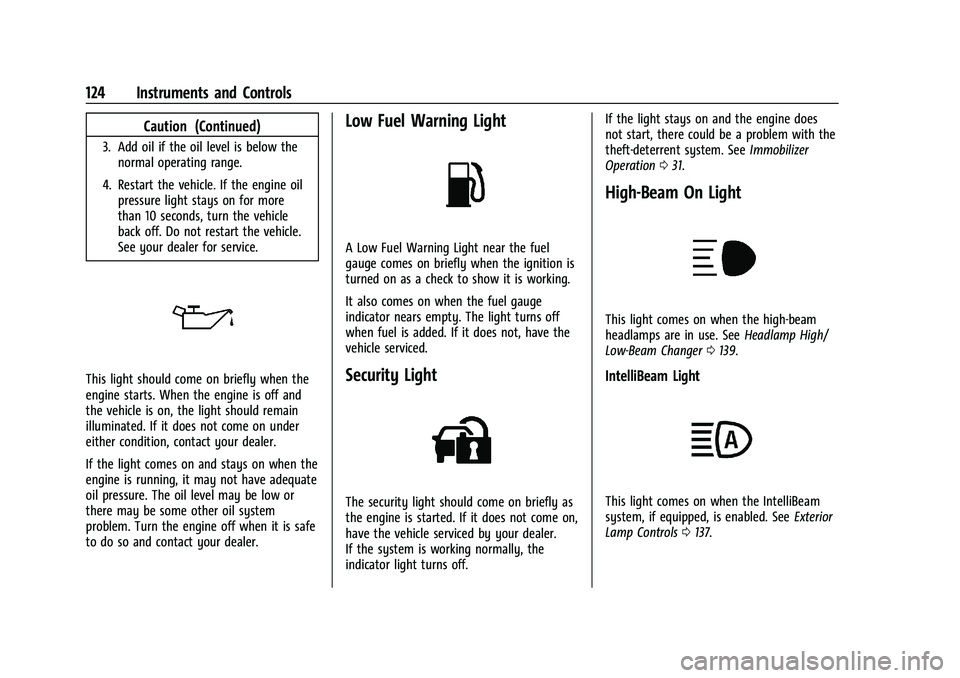
This light should come on briefly when the
engine starts. When the engine is off and
the vehicle is on, the light should remain
illuminated. If it does not come on under
either condition, contact your dealer.
If the light comes on and stays on when the
engine is running, it may not have adequate
oil pressure. The oil level may be low or
there may be some other oil system
problem. Turn the engine off when it is safe
to do so and contact your dealer.
Low Fuel Warning Light
A Low Fuel Warning Light near the fuel
gauge comes on briefly when the ignition is
turned on as a check to show it is working.
It also comes on when the fuel gauge
indicator nears empty. The light turns off
when fuel is added. If it does not, have the
vehicle serviced.
Security Light
The security light should come on briefly as
the engine is started. If it does not come on,
have the vehicle serviced by your dealer.
If the system is working normally, the
indicator light turns off. If the light stays on and the engine does
not start, there could be a problem with the
theft-deterrent system. See
Immobilizer
Operation 031.
High-Beam On Light
This light comes on when the high-beam
headlamps are in use. See Headlamp High/
Low-Beam Changer 0139.
IntelliBeam Light
This light comes on when the IntelliBeam
system, if equipped, is enabled. See Exterior
Lamp Controls 0137.
Page 127 of 463
Chevrolet Silverado 1500 Owner Manual (GMNA-Localizing-U.S./Canada/
Mexico/Paraguay-16515119) - 2023 - CRC - 6/2/22
126 Instruments and Controls
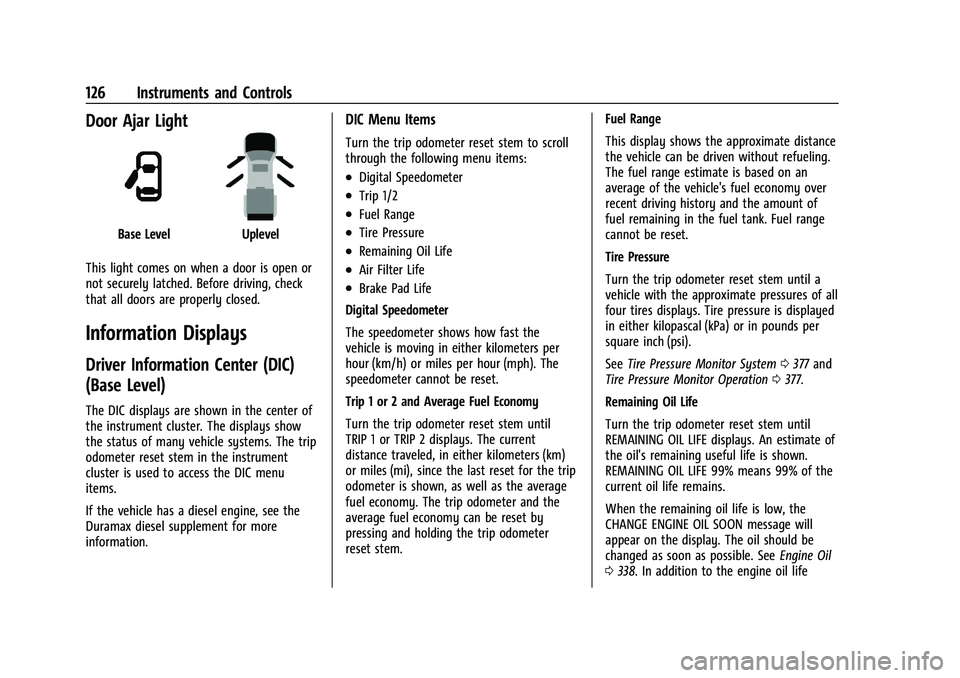
Door Ajar Light
Base LevelUplevel
This light comes on when a door is open or
not securely latched. Before driving, check
that all doors are properly closed.
Information Displays
Driver Information Center (DIC)
(Base Level)
The DIC displays are shown in the center of
the instrument cluster. The displays show
the status of many vehicle systems. The trip
odometer reset stem in the instrument
cluster is used to access the DIC menu
items.
If the vehicle has a diesel engine, see the
Duramax diesel supplement for more
information.
DIC Menu Items
Turn the trip odometer reset stem to scroll
through the following menu items:
.Digital Speedometer
.Trip 1/2
.Fuel Range
.Tire Pressure
.Remaining Oil Life
.Air Filter Life
.Brake Pad Life
Digital Speedometer
The speedometer shows how fast the
vehicle is moving in either kilometers per
hour (km/h) or miles per hour (mph). The
speedometer cannot be reset.
Trip 1 or 2 and Average Fuel Economy
Turn the trip odometer reset stem until
TRIP 1 or TRIP 2 displays. The current
distance traveled, in either kilometers (km)
or miles (mi), since the last reset for the trip
odometer is shown, as well as the average
fuel economy. The trip odometer and the
average fuel economy can be reset by
pressing and holding the trip odometer
reset stem. Fuel Range
This display shows the approximate distance
the vehicle can be driven without refueling.
The fuel range estimate is based on an
average of the vehicle's fuel economy over
recent driving history and the amount of
fuel remaining in the fuel tank. Fuel range
cannot be reset.
Tire Pressure
Turn the trip odometer reset stem until a
vehicle with the approximate pressures of all
four tires displays. Tire pressure is displayed
in either kilopascal (kPa) or in pounds per
square inch (psi).
See
Tire Pressure Monitor System 0377 and
Tire Pressure Monitor Operation 0377.
Remaining Oil Life
Turn the trip odometer reset stem until
REMAINING OIL LIFE displays. An estimate of
the oil's remaining useful life is shown.
REMAINING OIL LIFE 99% means 99% of the
current oil life remains.
When the remaining oil life is low, the
CHANGE ENGINE OIL SOON message will
appear on the display. The oil should be
changed as soon as possible. See Engine Oil
0 338. In addition to the engine oil life
Page 303 of 463
Chevrolet Silverado 1500 Owner Manual (GMNA-Localizing-U.S./Canada/
Mexico/Paraguay-16515119) - 2023 - CRC - 6/2/22
302 Driving and Operating
Warning (Continued)
.Do not move the vehicle if someone is
in the path of the trailer. Some parts
of the trailer might be underwater and
not visible to people who are assisting
in launching the boat.
Disconnect the trailer wiring before backing
the trailer into the water to prevent damage
to the electrical circuits. Reconnect the
wiring to the trailer after removing the
trailer from the water. If the trailer has
electric brakes that can function when the
trailer is submerged, it might help to leave
the electrical trailer connector attached to
maintain trailer brake functionality while on
the boat ramp.
To back the trailer into the water: 1. If equipped, place the vehicle in Four-Wheel Drive High or Automatic
Four-Wheel Drive.
2. Slowly back down the boat ramp until the boat is floating, but no further than
necessary.
3. Press and hold the brake pedal, but do not shift into P (Park) yet.
4. Have someone place chocks under the front wheels of the vehicle. 5. Gradually release the brake pedal to
allow the chocks to absorb the load of
the trailer.
6. Reapply the brake pedal. Then apply the parking brake and shift into P (Park).
7. Release the brake pedal.
Pulling the Trailer from the Water
To pull the trailer out of the water: 1. Press and hold the brake pedal.
2. Start the engine and shift into gear.
3. Release the parking brake.
4. Let up on the brake pedal.
5. Drive slowly until the tires are clear of the chocks.
6. Stop and have someone pick up and store the chocks.
7. Slowly pull the trailer from the water.
8. Once the vehicle and trailer have been driven from the sloped part of the boat
ramp, the vehicle can be shifted from
four-wheel-drive high. Shift into the drive
mode that is appropriate for the road
conditions.
Caution
If the vehicle tires begin to spin and the
vehicle begins to slide toward the water,
remove your foot from the accelerator
pedal and apply the brake pedal. Seek
help to have the vehicle towed up
the ramp.
Maintenance when Trailer Towing
The vehicle needs service more often when
used to tow trailers. See Maintenance
Schedule 0417. It is especially important to
check the engine oil, axle lubricant, belts,
cooling system, and brake system before
and during each trip.
Check periodically to see that all nuts and
bolts on the trailer hitch are tight.
Engine Cooling When Trailer Towing
The cooling system may temporarily
overheat during severe operating conditions.
See Engine Overheating 0346.
Trailer Towing
If equipped with a diesel engine, see the
Duramax diesel supplement.
Page 332 of 463
Chevrolet Silverado 1500 Owner Manual (GMNA-Localizing-U.S./Canada/
Mexico/Paraguay-16515119) - 2023 - CRC - 6/2/22
Vehicle Care 331
Vehicle Care
General Information
General Information . . . . . . . . . . . . . . . . . . . 332
California Perchlorate MaterialsRequirements . . . . . . . . . . . . . . . . . . . . . . . . 332
Accessories and Modifications . . . . . . . . . 332
Vehicle Checks
Doing Your Own Service Work . . . . . . . . . 333
Hood . . . . . . . . . . . . . . . . . . . . . . . . . . . . . . . . . . 333
Engine Compartment Overview . . . . . . . . 335
Engine Oil . . . . . . . . . . . . . . . . . . . . . . . . . . . . . 338
Engine Oil Life System . . . . . . . . . . . . . . . . 340
Automatic Transmission Fluid . . . . . . . . . 340
Engine Air Filter Life System . . . . . . . . . . . 341
Engine Air Cleaner/Filter . . . . . . . . . . . . . . . 341
Cooling System . . . . . . . . . . . . . . . . . . . . . . . . 343
Engine Overheating . . . . . . . . . . . . . . . . . . . 346
Overheated Engine Protection Operating Mode . . . . . . . . . . . . . . . . . . . . . 347
Engine Fan . . . . . . . . . . . . . . . . . . . . . . . . . . . . 348
Washer Fluid . . . . . . . . . . . . . . . . . . . . . . . . . . 348
Brakes . . . . . . . . . . . . . . . . . . . . . . . . . . . . . . . . 349
Brake Pad Life System . . . . . . . . . . . . . . . . 349
Brake Fluid . . . . . . . . . . . . . . . . . . . . . . . . . . . . 350
Battery - North America . . . . . . . . . . . . . . . 351
Four-Wheel Drive . . . . . . . . . . . . . . . . . . . . . . 353
Front Axle . . . . . . . . . . . . . . . . . . . . . . . . . . . . . 354
Rear Axle . . . . . . . . . . . . . . . . . . . . . . . . . . . . . . 354 Automatic Transmission Shift Lock
Control Function Check (Mechanical
Shifter) . . . . . . . . . . . . . . . . . . . . . . . . . . . . . . 354
Park Brake and P (Park) Mechanism Check . . . . . . . . . . . . . . . . . . . . . . . . . . . . . . . . 354
Wiper Blade Replacement . . . . . . . . . . . . . 355
Glass Replacement . . . . . . . . . . . . . . . . . . . . . 355
Windshield Replacement . . . . . . . . . . . . . . . 355
Gas Strut(s) . . . . . . . . . . . . . . . . . . . . . . . . . . . 356Headlamp Aiming
Front Headlamp Aiming . . . . . . . . . . . . . . . 356
Bulb Replacement
Bulb Replacement . . . . . . . . . . . . . . . . . . . . . 357
Halogen Bulbs . . . . . . . . . . . . . . . . . . . . . . . . . 357
LED Lighting . . . . . . . . . . . . . . . . . . . . . . . . . . . 357
Headlamps, Front Turn Signal, Sidemarker, and Parking Lamps . . . . . . 357
Taillamps, Turn Signal, Stoplamps, and Back-Up Lamps . . . . . . . . . . . . . . . . . . . . . . 358
Center High-Mounted Stoplamp (CHMSL) and Cargo Lamp . . . . . . . . . . . . 359
License Plate Lamp . . . . . . . . . . . . . . . . . . . . 359
Electrical System
Electrical System Overload . . . . . . . . . . . . 360
Fuses and Circuit Breakers . . . . . . . . . . . . . 361
Engine Compartment Fuse Block . . . . . . 362
Instrument Panel Fuse Block (Left) . . . . 365
Instrument Panel Fuse Block (Right) . . . 367
Wheels and Tires
Tires . . . . . . . . . . . . . . . . . . . . . . . . . . . . . . . . . . 369
All-Season Tires . . . . . . . . . . . . . . . . . . . . . . . 370
Winter Tires . . . . . . . . . . . . . . . . . . . . . . . . . . . 370
All-Terrain Tires . . . . . . . . . . . . . . . . . . . . . . . 370
Tire Sidewall Labeling . . . . . . . . . . . . . . . . . . 371
Tire Designations . . . . . . . . . . . . . . . . . . . . . . 372
Tire Terminology and Definitions . . . . . . 374
Tire Pressure . . . . . . . . . . . . . . . . . . . . . . . . . . 375
Tire Pressure Monitor System . . . . . . . . . 377
Tire Pressure Monitor Operation . . . . . . . 377
Tire Inspection . . . . . . . . . . . . . . . . . . . . . . . . . 381
Tire Rotation . . . . . . . . . . . . . . . . . . . . . . . . . . 382
When It Is Time for New Tires . . . . . . . . 383
Buying New Tires . . . . . . . . . . . . . . . . . . . . . 383
Different Size Tires and Wheels . . . . . . . 385
Uniform Tire Quality Grading . . . . . . . . . 385
Wheel Alignment and Tire Balance . . . . 386
Wheel Replacement . . . . . . . . . . . . . . . . . . . 386
Tire Chains . . . . . . . . . . . . . . . . . . . . . . . . . . . . 387
If a Tire Goes Flat . . . . . . . . . . . . . . . . . . . . . 387
Tire Changing . . . . . . . . . . . . . . . . . . . . . . . . . 389
Full-Size Spare Tire . . . . . . . . . . . . . . . . . . . . 399
Jump Starting
Jump Starting - North America . . . . . . . . 399
Towing the Vehicle
Transporting a Disabled Vehicle . . . . . . . 402
Recreational Vehicle Towing . . . . . . . . . . . 403