2023 CHEVROLET MALIBU reset infotainment system
[x] Cancel search: reset infotainment systemPage 111 of 332
Chevrolet Malibu Owner Manual (GMNA-Localizing-U.S./Canada-
16273584) - 2023 - CRC - 9/28/22
110 Infotainment System
Before driving:
.Become familiar with the operation,
center stack controls, steering wheel
controls, and infotainment display.
.Set up the audio by presetting favorite
stations, setting the tone, and adjusting
the speakers.
.Set up phone numbers in advance so they
can be called easily by pressing a single
control or by using a single voice
command.
See Distracted Driving 0166.
Active Noise Cancellation (ANC)
If equipped, ANC reduces engine noise in the
vehicle’s interior. ANC requires the
factory-installed audio system, radio,
speakers, amplifier (if equipped), induction
system, and exhaust system to work
properly. Deactivation is required by your
dealer if related aftermarket equipment is
installed.
Overview
Infotainment System
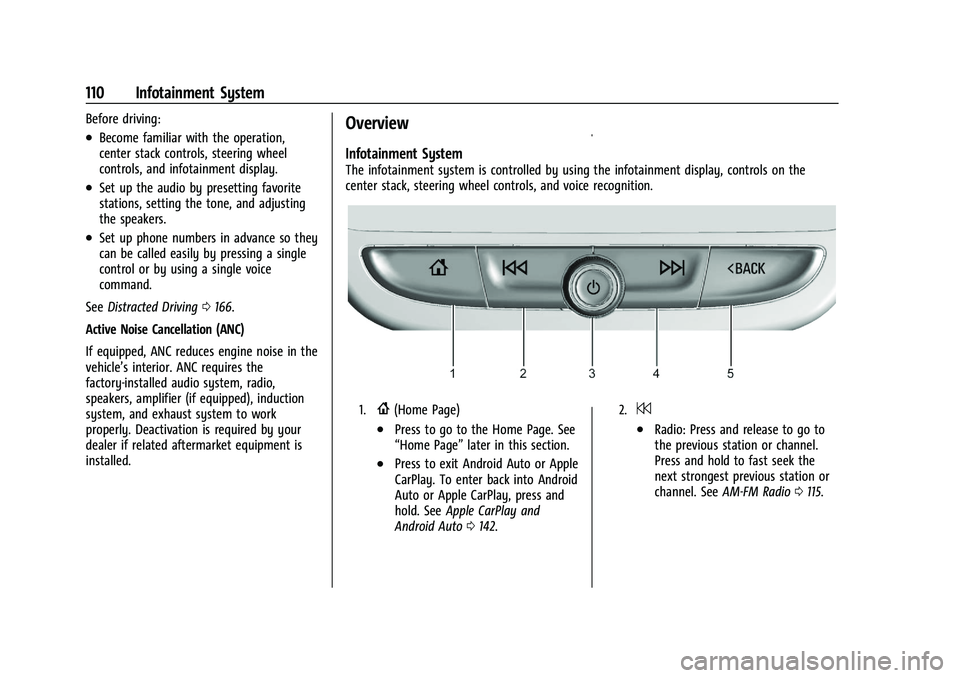
The infotainment system is controlled by using the infotainment display, controls on the
center stack, steering wheel controls, and voice recognition.
1.{(Home Page)
.Press to go to the Home Page. See
“Home Page” later in this section.
.Press to exit Android Auto or Apple
CarPlay. To enter back into Android
Auto or Apple CarPlay, press and
hold. SeeApple CarPlay and
Android Auto 0142.
2.7
.Radio: Press and release to go to
the previous station or channel.
Press and hold to fast seek the
next strongest previous station or
channel. See AM-FM Radio 0115.
Page 117 of 332
Chevrolet Malibu Owner Manual (GMNA-Localizing-U.S./Canada-
16273584) - 2023 - CRC - 9/28/22
116 Infotainment System
The keypad will gray out entries that do not
contribute to a valid frequency and will
automatically place a decimal point within
the frequency number.
Touch (X) to delete one number at a time.
Touch and hold (X) to delete all numbers.
A valid AM or FM station will automatically
tune to the new frequency but not close the
Direct Tune display. When listening to SXM
(if equipped), touch Go after entering the
channel. Touch
Son the infotainment
display or touch
zto exit out of
Direct Tune.
The tune arrows on the right side of the
Direct Tune display
7or6will tune
through the complete station or channel list
one station step at a time per touch.
A touch and hold advances through stations
or channels quickly.
If equipped, HD Radio multicast stations
cannot be tuned directly through the Direct
Tune feature. Only the analog or
HD1 station can use that feature. Use the
display arrows to adjust to the multicast
stations.
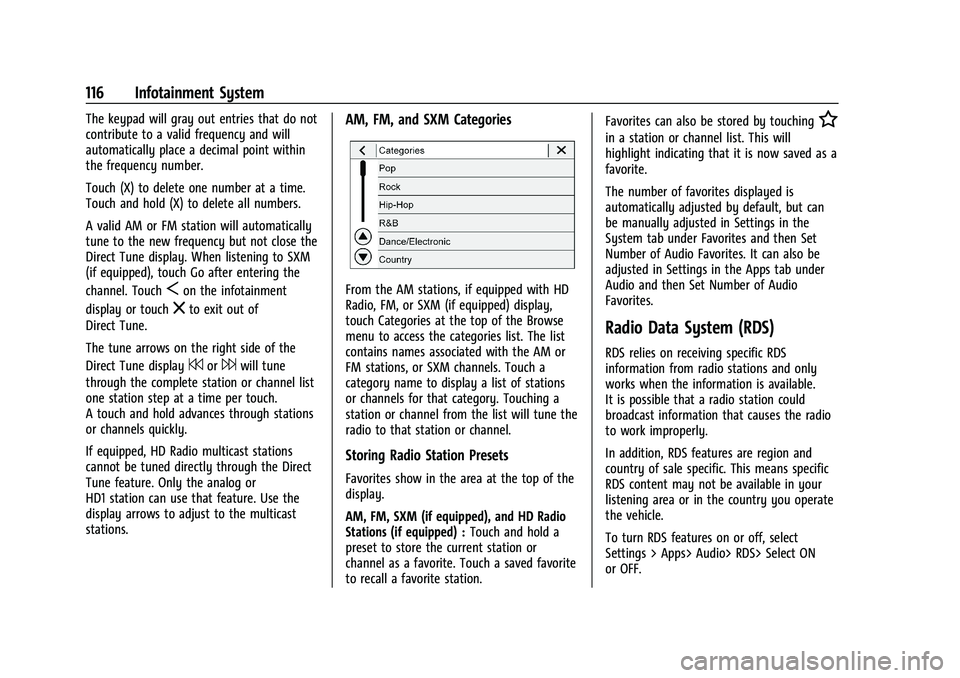
AM, FM, and SXM Categories
From the AM stations, if equipped with HD
Radio, FM, or SXM (if equipped) display,
touch Categories at the top of the Browse
menu to access the categories list. The list
contains names associated with the AM or
FM stations, or SXM channels. Touch a
category name to display a list of stations
or channels for that category. Touching a
station or channel from the list will tune the
radio to that station or channel.
Storing Radio Station Presets
Favorites show in the area at the top of the
display.
AM, FM, SXM (if equipped), and HD Radio
Stations (if equipped) : Touch and hold a
preset to store the current station or
channel as a favorite. Touch a saved favorite
to recall a favorite station. Favorites can also be stored by touching
H
in a station or channel list. This will
highlight indicating that it is now saved as a
favorite.
The number of favorites displayed is
automatically adjusted by default, but can
be manually adjusted in Settings in the
System tab under Favorites and then Set
Number of Audio Favorites. It can also be
adjusted in Settings in the Apps tab under
Audio and then Set Number of Audio
Favorites.
Radio Data System (RDS)
RDS relies on receiving specific RDS
information from radio stations and only
works when the information is available.
It is possible that a radio station could
broadcast information that causes the radio
to work improperly.
In addition, RDS features are region and
country of sale specific. This means specific
RDS content may not be available in your
listening area or in the country you operate
the vehicle.
To turn RDS features on or off, select
Settings > Apps> Audio> RDS> Select ON
or OFF.
Page 131 of 332
Chevrolet Malibu Owner Manual (GMNA-Localizing-U.S./Canada-
16273584) - 2023 - CRC - 9/28/22
130 Infotainment System
If the system has determined that the
destination has been reached, either because
the arrival view displayed or the destination
has been passed, the Resume Trip option
will not appear.
Favorites
The navigation favorites can have contacts,
addresses, or POIs that have been saved
through the favorite icon on the
details view.
Accessing Favorites
In the Nav application, view the Favorites
list by touching
Hin the search bar along
the top of the Nav map view. If the search
bar is closed, touch
}and selectH.
Saving Favorites
Favorites can be added from a number of
the system’s applications. Touch the
favorites icon to save content as a favorite.
Renaming Navigation Favorites 1. Touch the Settings icon on the Home Page and touch the System tab.
2. Touch Favorites to access the Manage Favorites option. 3. Touch a saved Navigation favorite to
access the edit icon. Touch the edit icon
to rename the favorite.
4. Touch Save to store the renamed favorite.
Recents
TouchHto access a list of recent
destinations.
Recenter Position Icon
Touch the Recenter Position arrow in the
middle of the map view to reset the map to
the current location.
Last Parked Location
The Last Parked Location is the last location
the vehicle engine was turned off. That
location is displayed in the first row of the
Recents list. Touching the last Parked
Location shows the Address Details view to
either save the address or drive to it. The
Last Parked Location can be deleted by
entering the Edit display. Once the Last
Parked Location is deleted, it no longer
appears in the Recents list, unless the
vehicle is started at that location again.
Show POI Icons
To see the POI categories, touch Options,
then touch Show on Map. Up to eight
categories of icons can be selected.
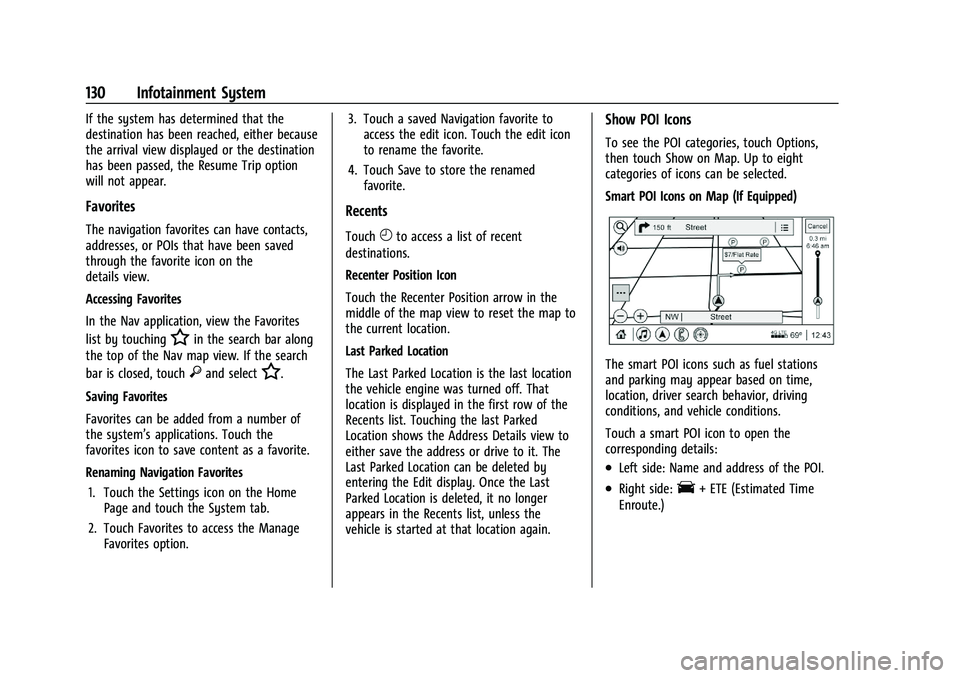
Smart POI Icons on Map (If Equipped)
The smart POI icons such as fuel stations
and parking may appear based on time,
location, driver search behavior, driving
conditions, and vehicle conditions.
Touch a smart POI icon to open the
corresponding details:
.Left side: Name and address of the POI.
.Right side:E+ ETE (Estimated Time
Enroute.)
Page 141 of 332
Chevrolet Malibu Owner Manual (GMNA-Localizing-U.S./Canada-
16273584) - 2023 - CRC - 9/28/22
140 Infotainment System
5. Select the vehicle name shown on theinfotainment display from your cell
phone’s Bluetooth Settings list.
6. Follow the instructions on the cell phone to confirm the six-digit code showing on
the infotainment display and touch Pair.
The code on the cell phone and
infotainment display will need to be
acknowledged for a successful pair.
7. Start the pairing process on the cell phone to be paired to the vehicle. See
the cell phone manufacturer's user guide
for information on this process. Once the
cell phone is paired, it will show under
Connected.
8. If the vehicle name does not appear on your cell phone, there are a few ways to
start the pairing process over:
.Turn the cell phone off and then
back on.
.Go back to the beginning of the
Phone menus on the infotainment
display and restart the pairing
process.
.Reset the cell phone, but this step
should be done as a last effort. 9. If the cell phone prompts to accept
connection or allow phone book
download, touch Always Accept and
Allow. The phone book may not be
available if not accepted.
10. Repeat Steps 1−8 to pair additional cell phones.
First to Connect Paired Phones
If multiple paired cell phones are within
range of the system, the system connects to
the paired cell phone that is set as First to
Connect. To enable a paired cell phone as
the First to Connect phone: 1. Make sure the cell phone is turned on.
2. Touch Settings, then touch System.
3. Touch Phones to access all paired and all connected cell phones and mobile
devices.
4. Touch the information icon or pencil icon to the right of the cell phone to open
the cell phone’s settings menu.
5. Touch the First to Connect option, to enable the setting for that device. Cell phones and mobile devices can be
added, removed, connected, and
disconnected. A sub-menu will display
whenever a request is made to add or
manage cell phones and mobile devices.
Listing All Paired and Connected Phones
1. Touch the Phone icon on the Home Page or the phone icon on the shortcut tray
near the bottom of the display.
2. Touch Phones.
Disconnecting a Connected Phone 1. Touch the Phone icon on the Home Page.
2. Touch Phones.
3. Touch the information icon or the pencil icon next to the connected cell phone or
mobile device to show the cell phone’s
or mobile device’s information display.
4. Touch Disconnect.
Deleting a Paired Phone 1. Touch the Phone icon on the Home Page or the phone icon on the shortcut tray
near the bottom of the display.
2. Touch Phones.
Page 146 of 332
Chevrolet Malibu Owner Manual (GMNA-Localizing-U.S./Canada-
16273584) - 2023 - CRC - 9/28/22
Infotainment System 145
Display
Allows adjustment of the infotainment
display.
Sounds
Allows adjustment of the infotainment
system sounds.
Voice
Allows adjustment of the infotainment voice
recognition features.
Favorites
Allows adjustment of the infotainment
favorite settings.
Updates
If equipped, the vehicle can download and
install select software updates over a
wireless connection. The system will prompt
for certain updates to be downloaded and
installed. There is also an option to check
for updates manually.
To manually check for updates, touch
Settings on the Home Page and select the
System tab. Go to the Vehicle Software
section and touch Updates. Follow the
on-screen prompts. The steps to check for,
download, and install updates may vary by
vehicle.The vehicle can be used normally during the
software download. Once the download is
complete, there may be a prompt to accept
the installation of the update upon the next
ignition cycle or the next time the vehicle is
shifted into P (Park). For most updates, the
vehicle will be disabled and cannot be driven
during the installation. The system will
deliver messages indicating success or error
during and after the download and
installation processes.
Downloading Over-the-Air vehicle software
updates requires Internet connectivity, which
can be accessed through the vehicle’s
built-in 4G LTE connection, if equipped and
active. If required, data plans are provided
by a third party. Optionally, a secure Wi-Fi
hotspot such as a compatible mobile device
hotspot, home hotspot, or public hotspot
can be used. Applicable data rates may
apply.
To connect the infotainment system to a
secured mobile device hotspot, home
hotspot, or public hotspot, touch Settings on
the Home Page, select the System tab,
followed by Wi-Fi Networks. Select the
appropriate Wi-Fi network, and follow the
on-screen prompts. Download speeds
may vary.
On most compatible mobile devices,
activation of the Wi-Fi hotspot is in the
Settings menu under Mobile Network
Sharing, Personal Hotspot, Mobile Hotspot,
or similar.
Availability of Over-the-Air software updates
varies by vehicle and country. Features are
subject to change. For more information on
this feature, see
Online Account0302 for
details.
Preferences
Allows the infotainment system to disable
or enable the download of new updates in
the background.
About
Shows the infotainment system software
information.
Running Applications
Shows a complete list of applications that
are currently running on the infotainment
system.
Return to Factory Settings
Allows resetting the infotainment system
settings in the vehicle.
Page 150 of 332
Chevrolet Malibu Owner Manual (GMNA-Localizing-U.S./Canada-
16273584) - 2023 - CRC - 9/28/22
Infotainment System 149
or off and choose the desired speed warning
level. The speed warning does not limit the
speed of the vehicle. On some infotainment
systems, touch Set Teen Driver Speed
Warning to set the warning speed.
Set Teen Driver Speed Warning :Choose the
desired speed warning level. The speed
warning does not limit the speed of the
vehicle.
SiriusXM Explicit Content Filter : Allows the
SiriusXM Explicit Content Filter to be turned
ON or OFF. When ON, the teen driver will
not be able to listen to SiriusXM stations
that contain explicit content, and the Explicit
Content Filter selection in the Audio Settings
will be unavailable for change.
When Teen Driver is Active:
.If equipped, the radio will mute when the
driver seat belt, and in some vehicles the
front passenger seat belt, is not buckled.
The audio from any device paired to the
vehicle will also be muted.
.An object placed on the front passenger
seat, such as a briefcase, handbag,
grocery bag, laptop, or other electronic
device, could cause the passenger sensing
system to falsely sense an unbuckled
front passenger and mute the radio. If this happens, remove the object from
the seat. See
Passenger Sensing System
0 50.
.Some safety systems, such as Automatic
Emergency Braking, if equipped, cannot
be turned off.
.The gap setting for Adaptive Cruise
Control and alert timing for Forward
Collision Alert, if equipped, cannot be
changed.
.When trying to change a safety feature
that is not configurable in Teen Driver,
the feature may be grayed out or
removed from the infotainment menu,
or the DIC will display a message
indicating that Teen Driver is active and
the action is not available.
.Super Cruise, if equipped, is not available.
.Enhanced Low Fuel Warning
(if equipped) –When the vehicle is low
on fuel, the low fuel light on the
instrument cluster flashes and the DIC
low fuel warning cannot be dismissed.
.Do not tow a trailer if equipped with
Automatic Emergency Braking. Report Card
The vehicle owner must secure the driver’s
consent to record certain vehicle data when
the vehicle is driven with a registered Teen
Driver key. There is one Report Card per
vehicle. Data is only recorded when a
registered Teen Driver key is used to
operate the vehicle.
The Report Card data is collected from the
time Teen Driver is activated or the last
time the Report Card was reset. The
following items may be recorded:
.Distance Driven
–the total distance
driven.
.Maximum Speed –the maximum vehicle
speed detected.
.Overspeed Warnings –the number of
times the speed warning setting was
exceeded.
.Wide Open Throttle –the number of
times the accelerator pedal was pressed
nearly all the way down.
.Forward Collision Alerts (if equipped) –
the number of times the driver was
notified when approaching a vehicle
ahead too quickly and at potential risk for
a crash.
Page 151 of 332
Chevrolet Malibu Owner Manual (GMNA-Localizing-U.S./Canada-
16273584) - 2023 - CRC - 9/28/22
150 Infotainment System
.Forward Automatic Braking, also called
Automatic Emergency Braking (if
equipped)–the number of times the
vehicle detected that a forward collision
was imminent and applied the brakes.
.Reverse Automatic Braking (if equipped) –
the number of times the vehicle detected
that a rearward collision was imminent
and applied the brakes.
.Traction Control –the number of times
the Traction Control System activated to
reduce wheel spin or loss of traction.
.Stability Control –the number of events
which required the use of electronic
stability control.
.Antilock Braking System Active –The
number of Antilock Brake System
activations.
.Tailgating Alerts (if equipped)– the
number of times the driver was alerted
for following a vehicle ahead too closely.
Report Card Data
Cumulative Data is saved for all trips until
the Report Card is reset or until the
maximum count is exceeded. If the
maximum count is exceeded for a Report
Card line item, that item will no longer be
updated in the Report Card until it is reset. Each item will report a maximum of
1,000 counts. The distance driven will report
a maximum of 64 374 km (40,000 mi).
To delete Report Card data, do one of the
following:
.From the Report Card display, touch
Reset.
.Touch Clear PIN and All Teen Driver Keys
from the Teen Driver menu. This will also
unregister any Teen Driver keys and
delete the PIN.
Forgotten PIN
See your dealer to reset the PIN.
Trademarks and License
Agreements
FCC Information
See Radio Frequency Statement 0308.
"Made for iPhone," means that an electronic
accessory has been designed to connect
specifically to iPhone, and has been certified
by the developer to meet Apple
performance standards. Apple is not
responsible for the operation of this device
or its compliance with safety and regulatory
standards. Please note that the use of this
accessory with iPhone may affect wireless
performance. iPhone are trademarks of
Apple Inc., registered in the U.S. and other
countries.
Trial length and service availability may vary
by model, model year or trim. Service will
automatically stop at the end of your trial
subscription period unless you decide to
continue service. If you do not wish to enjoy
your trial, you can cancel by calling the
number below. All SiriusXM services require
a subscription, each sold separately by
SiriusXM after the trial period. Service
subject to the applicable SiriusXM Customer
Agreement and Privacy Policy, visit