2023 CHEVROLET MALIBU brake fluid
[x] Cancel search: brake fluidPage 90 of 332
Chevrolet Malibu Owner Manual (GMNA-Localizing-U.S./Canada-
16273584) - 2023 - CRC - 9/28/22
Instruments and Controls 89
Emissions Inspection and Maintenance
Programs
If the vehicle requires an Emissions
Inspection/Maintenance test, the test
equipment will likely connect to the
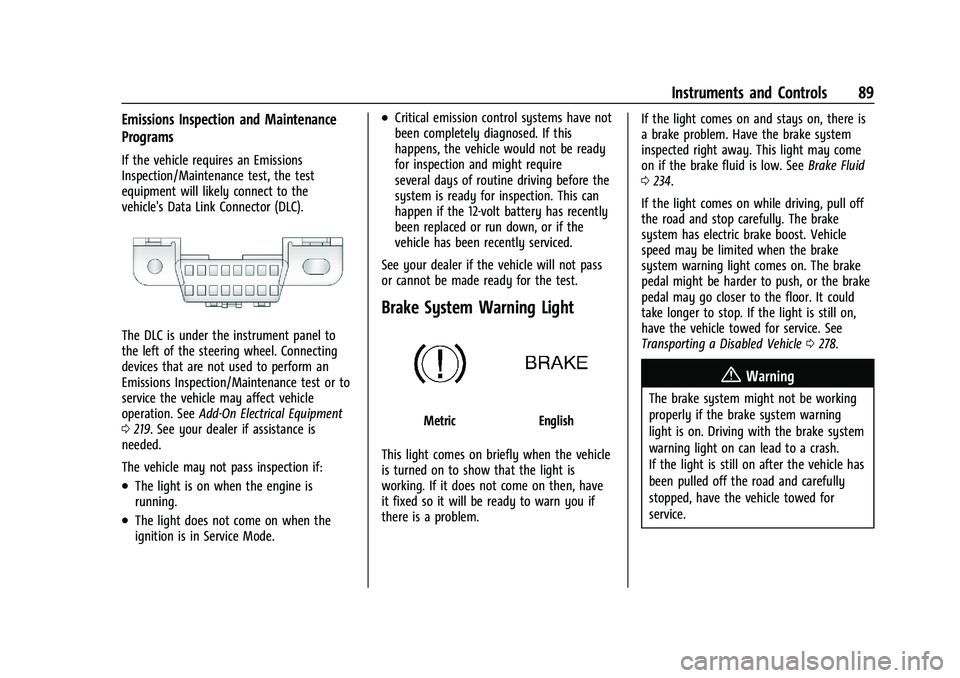
vehicle's Data Link Connector (DLC).
The DLC is under the instrument panel to
the left of the steering wheel. Connecting
devices that are not used to perform an
Emissions Inspection/Maintenance test or to
service the vehicle may affect vehicle
operation. SeeAdd-On Electrical Equipment
0 219. See your dealer if assistance is
needed.
The vehicle may not pass inspection if:
.The light is on when the engine is
running.
.The light does not come on when the
ignition is in Service Mode.
.Critical emission control systems have not
been completely diagnosed. If this
happens, the vehicle would not be ready
for inspection and might require
several days of routine driving before the
system is ready for inspection. This can
happen if the 12-volt battery has recently
been replaced or run down, or if the
vehicle has been recently serviced.
See your dealer if the vehicle will not pass
or cannot be made ready for the test.
Brake System Warning Light
MetricEnglish
This light comes on briefly when the vehicle
is turned on to show that the light is
working. If it does not come on then, have
it fixed so it will be ready to warn you if
there is a problem. If the light comes on and stays on, there is
a brake problem. Have the brake system
inspected right away. This light may come
on if the brake fluid is low. See
Brake Fluid
0 234.
If the light comes on while driving, pull off
the road and stop carefully. The brake
system has electric brake boost. Vehicle
speed may be limited when the brake
system warning light comes on. The brake
pedal might be harder to push, or the brake
pedal may go closer to the floor. It could
take longer to stop. If the light is still on,
have the vehicle towed for service. See
Transporting a Disabled Vehicle 0278.
{Warning
The brake system might not be working
properly if the brake system warning
light is on. Driving with the brake system
warning light on can lead to a crash.
If the light is still on after the vehicle has
been pulled off the road and carefully
stopped, have the vehicle towed for
service.
Page 101 of 332
Chevrolet Malibu Owner Manual (GMNA-Localizing-U.S./Canada-
16273584) - 2023 - CRC - 9/28/22
100 Instruments and Controls
Timer :This display can be used as a timer.
To start the timer, press
Vwhile this
display is active. The display will show the
amount of time that has passed since the
timer was last reset. To stop the timer,
press
Vbriefly while this display is active
and the timer is running. To reset the timer
to zero, press and hold
Vwhile this display
is active, or press
pand select reset.
Speed Limit : Shows the current speed limit
on vehicles with the navigation system. The
information for this page comes from a
roadway database.
Follow Distance : When Adaptive Cruise
Control (ACC) is not engaged, the current
follow time to the vehicle ahead is displayed
as a time value on this page. When ACC has
been engaged, the display switches to the
gap setting page. This page shows the
current gap setting along with the vehicle
ahead indicator.
Battery Voltage : Displays the current
battery voltage, if equipped. Battery voltage
changes are normal while driving. See
Charging System Light 087. If there is a
problem with the battery charging system,
the DIC will display a message. Coolant Temperature :
Shows the engine
coolant temperature in either degrees
Celsius (°C) or degrees Fahrenheit (°F).
Oil Pressure : Oil pressure is displayed in
either kilopascal (kPa) or in pounds per
square inch (psi).
Oil pressure can vary with engine speed,
outside temperature, and oil viscosity. On
some models, the oil pump will vary engine
oil pressure according to engine needs. Oil
pressure may change quickly as the engine
speed or load varies. This is normal. If the
oil pressure warning light or Driver
Information Center (DIC) message indicates
oil pressure outside the normal operating
range, check the vehicle's oil as soon as
possible.
Blank Page : Shows no information.
Vehicle Messages
Messages displayed on the DIC indicate the
status of the vehicle or some action that
may be needed to correct a condition.
Multiple messages may appear one after
another. The messages that do not require
immediate action can be acknowledged and
cleared by pressing
V. The messages that
require immediate action cannot be cleared
until that action is performed.
All messages should be taken seriously;
clearing the message does not correct the
problem.
If a SERVICE message appears, see your
dealer.
Follow the instructions given in the
messages. The system displays messages
regarding the following topics:
.Service Messages
.Fluid Levels
.Vehicle Security
.Brakes
.Steering
.Ride Control Systems
.Driver Assistance Systems
.Cruise Control
.Lighting and Bulb Replacement
.Wiper/Washer Systems
.Doors and Windows
.Seat Belts
.Airbag Systems
Page 169 of 332
Chevrolet Malibu Owner Manual (GMNA-Localizing-U.S./Canada-
16273584) - 2023 - CRC - 9/28/22
168 Driving and Operating
Variable Effort Steering
The vehicle has a steering system that
varies the amount of effort required to steer
the vehicle in relation to the speed of the
vehicle.
The amount of steering effort required is
less at slower speeds to make the vehicle
more maneuverable and easier to park. At
faster speeds, the steering effort increases
to provide a sport-like feel to the steering.
This provides maximum control and stability.
Electric Power Steering
The vehicle is equipped with an electric
power steering system, which reduces the
amount of effort needed to steer the
vehicle. It does not have power steering
fluid. Regular maintenance is not required.
If the vehicle experiences a system
malfunction and loses power steering,
greater steering effort may be required.
Power steering assist also may be reduced if
you turn the steering wheel as far as it can
turn and hold it there with force for an
extended period of time.
See your dealer if there is a problem.
Curve Tips
.Take curves at a reasonable speed.
.Reduce speed before entering a curve.
.Maintain a reasonable steady speed
through the curve.
.Wait until the vehicle is out of the curve
before accelerating gently into the
straightaway.
Steering in Emergencies
.There are some situations when steering
around a problem may be more effective
than braking.
.Holding both sides of the steering wheel
allows you to turn 180 degrees without
removing a hand.
.Antilock Brake System (ABS) allows
steering while braking.
Off-Road Recovery
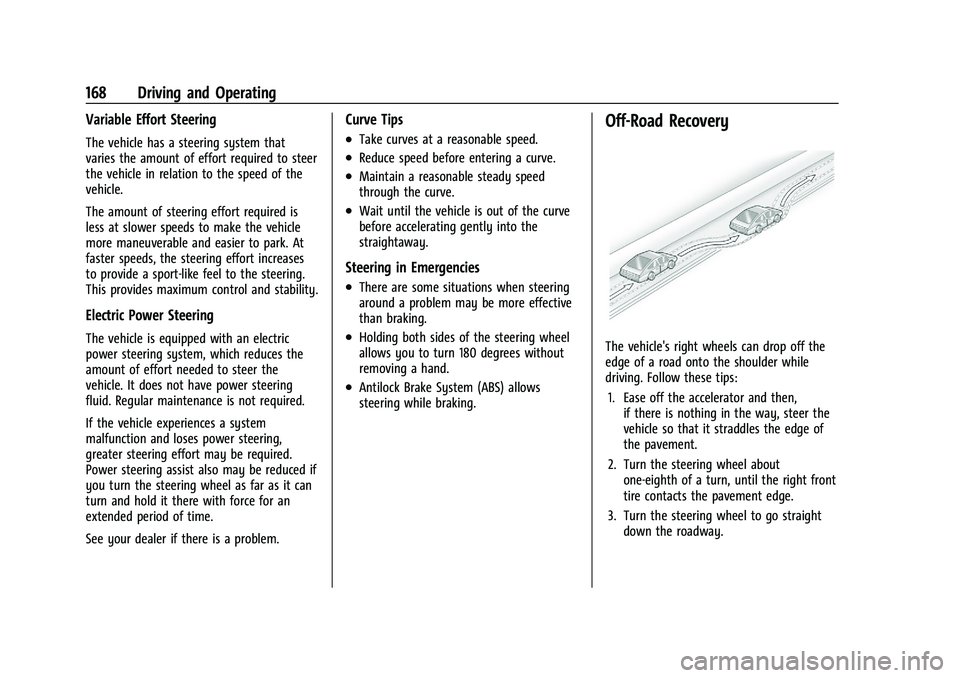
The vehicle's right wheels can drop off the
edge of a road onto the shoulder while
driving. Follow these tips:1. Ease off the accelerator and then, if there is nothing in the way, steer the
vehicle so that it straddles the edge of
the pavement.
2. Turn the steering wheel about one-eighth of a turn, until the right front
tire contacts the pavement edge.
3. Turn the steering wheel to go straight down the roadway.
Page 171 of 332
Chevrolet Malibu Owner Manual (GMNA-Localizing-U.S./Canada-
16273584) - 2023 - CRC - 9/28/22
170 Driving and Operating
Other Rainy Weather Tips
Besides slowing down, other wet weather
driving tips include:
.Allow extra following distance.
.Pass with caution.
.Keep windshield wiping equipment in
good shape.
.Keep the windshield washer fluid reservoir
filled.
.Have good tires with proper tread depth.
SeeTires 0251.
.Turn off cruise control.
Hill and Mountain Roads
Driving on steep hills or through mountains
is different than driving on flat or rolling
terrain. Tips include:
.Keep the vehicle serviced and in good
shape.
.Check all fluid levels and brakes, tires, and
cooling system.
.Shift to a lower gear when going down
steep or long hills.
{Warning
Using the brakes to slow the vehicle on a
long downhill slope can cause brake
overheating, can reduce brake
performance, and could result in a loss of
braking. Shift the transmission to a lower
gear to let the engine assist the brakes
on a steep downhill slope.
{Warning
Coasting downhill in N (Neutral) or with
the ignition off is dangerous. This can
cause overheating of the brakes and loss
of steering assist. Always have the engine
running and the vehicle in gear.
.Drive at speeds that keep the vehicle in
its own lane. Do not swing wide or cross
the center line.
.Be alert on top of hills; something could
be in your lane (e.g., stalled car, crash).
.Pay attention to special road signs (e.g.,
falling rocks area, winding roads, long
grades, passing or no-passing zones) and
take appropriate action.
Winter Driving
Driving on Snow or Ice
Caution
To avoid damage to the wheels and
brake components, always clear snow and
ice from inside the wheels and
underneath the vehicle before driving.
Snow or ice between the tires and the road
creates less traction or grip, so drive
carefully. Wet ice can occur at about 0 °C
(32 °F) when freezing rain begins to fall.
Avoid driving on wet ice or in freezing rain
until roads can be treated.
For Slippery Road Driving:
.Accelerate gently. Accelerating too quickly
causes the wheels to spin and makes the
surface under the tires slick.
.Turn on Traction Control. See Traction
Control/Electronic Stability Control 0186.
.The Antilock Brake System (ABS) improves
vehicle stability during hard stops, but
the brakes should be applied sooner than
when on dry pavement. See Antilock
Brake System (ABS) 0184.
Page 184 of 332
Chevrolet Malibu Owner Manual (GMNA-Localizing-U.S./Canada-
16273584) - 2023 - CRC - 9/28/22
Driving and Operating 183
Caution
Shifting out of P (Park) or N (Neutral) with
the engine running at high speed may
damage the transmission. The repairs
would not be covered by the vehicle
warranty. Be sure the engine is not
running at high speed when shifting the
vehicle.
Caution
A transmission hot message may display
if the automatic transmission fluid is too
hot. Driving under this condition can
damage the vehicle. Stop and idle the
engine to cool the automatic
transmission fluid. This message clears
when the transmission fluid has cooled
sufficiently.
D : This position is for normal driving.
If more power is needed for passing, press
the accelerator pedal down.
Caution
If the vehicle does not shift gears, the
transmission could be damaged. Have the
vehicle serviced right away.
If the vehicle is stopped on a hill, with your
foot off the brake pedal, the vehicle may
roll. This is normal and is due to the torque
converter designed to improve fuel economy
and performance. Use the brake to hold the
vehicle on a hill. Do not use the accelerator
pedal.
L : This position gives you access to gear
ranges. This provides more engine braking
but lower fuel economy than D (Drive). You
can use it on very steep hills, or in deep
snow or mud. See Manual Mode0183.
Operating Modes : The transmission may
operate in a lower gear than normal to
improve vehicle performance. The engine
speed may be higher and there may be an
increase in noise during the following
conditions:
.When climbing a grade
.When driving downhill
.When driving in hot temperatures, or at
high altitude
Manual Mode
Electronic Range Select (ERS) Mode
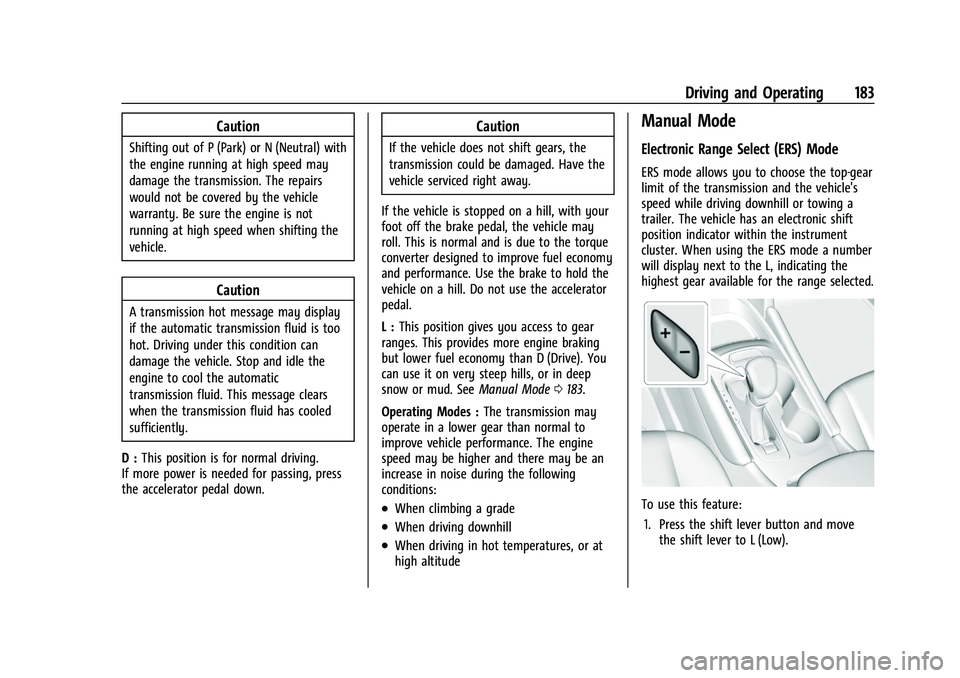
ERS mode allows you to choose the top-gear
limit of the transmission and the vehicle's
speed while driving downhill or towing a
trailer. The vehicle has an electronic shift
position indicator within the instrument
cluster. When using the ERS mode a number
will display next to the L, indicating the
highest gear available for the range selected.
To use this feature:
1. Press the shift lever button and move the shift lever to L (Low).
Page 217 of 332
Chevrolet Malibu Owner Manual (GMNA-Localizing-U.S./Canada-
16273584) - 2023 - CRC - 9/28/22
216 Driving and Operating
Parking on Hills
{Warning
To prevent serious injury or death,
always park your vehicle and trailer on a
level surface when possible.
When parking your vehicle and your trailer
on a hill: 1. Press the brake pedal, but do not shift into P (Park). Turn the wheels into the
curb if facing downhill or into traffic if
facing uphill.
2. Have someone place chocks under the trailer wheels.
3. When the wheel chocks are in place, gradually release the brake pedal to
allow the chocks to absorb the load of
the trailer.
4. Reapply the brake pedal. Then apply the parking brake and shift into P (Park).
5. Release the brake pedal.
Leaving After Parking on a Hill
1. Apply and hold the brake pedal.
.Start the engine.
.Shift into the desired gear.
.Release the parking brake. 2. Let up on the brake pedal.
3. Drive slowly until the trailer is clear of
the chocks.
4. Stop and have someone pick up and store the chocks.
Maintenance When Trailer Towing
The vehicle needs service more often when
used to tow trailers. See Maintenance
Schedule 0290. It is especially important to
check the automatic transmission fluid,
engine oil, axle lubricant, belts, cooling
system, and brake system before and during
each trip.
Check periodically that all nuts and bolts on
the trailer hitch are tight.
Engine Cooling When Trailer Towing
The cooling system may temporarily
overheat during severe operating conditions.
See Engine Overheating 0232.
Trailer Towing
Caution
Towing a trailer improperly can damage
the vehicle and result in costly repairs
not covered by the vehicle warranty. To
(Continued)
Caution (Continued)
tow a trailer correctly, follow the
directions in this section and see your
dealer for important information about
towing a trailer with the vehicle.
Trailer Weight
{Warning
Never exceed the towing capacity for
your vehicle.
Safe trailering requires monitoring the
weight, speed, altitude, road grades, outside
temperature, dimensions of the front of the
trailer, and how frequently the vehicle is
used to tow a trailer.
Before towing a trailer, always separately
weigh:
.The fully loaded vehicle and trailer
combination.
.The trailer.
.The trailer tongue.
Page 221 of 332
Chevrolet Malibu Owner Manual (GMNA-Localizing-U.S./Canada-
16273584) - 2023 - CRC - 9/28/22
220 Vehicle Care
Vehicle Care
General Information
General Information . . . . . . . . . . . . . . . . . . . 221
California Perchlorate MaterialsRequirements . . . . . . . . . . . . . . . . . . . . . . . . 221
Accessories and Modifications . . . . . . . . . 221
Vehicle Checks
Doing Your Own Service Work . . . . . . . . . 222
Hood . . . . . . . . . . . . . . . . . . . . . . . . . . . . . . . . . . 222
Engine Compartment Overview . . . . . . . . 224
Engine Oil . . . . . . . . . . . . . . . . . . . . . . . . . . . . . 225
Engine Oil Life System . . . . . . . . . . . . . . . . . 227
Automatic Transmission Fluid . . . . . . . . . 228
Engine Air Filter Life System . . . . . . . . . . 228
Engine Air Cleaner/Filter . . . . . . . . . . . . . . . 228
Cooling System . . . . . . . . . . . . . . . . . . . . . . . 229
Engine Overheating . . . . . . . . . . . . . . . . . . . . 232
Washer Fluid . . . . . . . . . . . . . . . . . . . . . . . . . . 233
Brakes . . . . . . . . . . . . . . . . . . . . . . . . . . . . . . . . . 234
Brake Fluid . . . . . . . . . . . . . . . . . . . . . . . . . . . . 234
Battery - North America . . . . . . . . . . . . . . . 235
Automatic Transmission Shift Lock Control Function Check . . . . . . . . . . . . . . 236
Park Brake and P (Park) Mechanism Check . . . . . . . . . . . . . . . . . . . . . . . . . . . . . . . . 237
Wiper Blade Replacement . . . . . . . . . . . . . 237
Windshield Replacement . . . . . . . . . . . . . . 238
Gas Strut(s) . . . . . . . . . . . . . . . . . . . . . . . . . . . 238
Headlamp Aiming
Front Headlamp Aiming . . . . . . . . . . . . . . . 239
Bulb Replacement
Bulb Replacement . . . . . . . . . . . . . . . . . . . . . 239
Halogen Bulbs . . . . . . . . . . . . . . . . . . . . . . . . . 239
LED Lighting . . . . . . . . . . . . . . . . . . . . . . . . . . . 239
Headlamps, Front Turn Signal, Sidemarker, and Parking Lamps . . . . . . 239
Taillamps, Turn Signal, Stoplamps, and Back-Up Lamps (LS and LT) . . . . . . . . . . 240
Taillamps, Turn Signal, Stoplamps, and Back-Up Lamps (LT and Premier) . . . . . 241
License Plate Lamp . . . . . . . . . . . . . . . . . . . . 242
Electrical System
High Voltage Devices and Wiring . . . . . . 242
Electrical System Overload . . . . . . . . . . . . 243
Fuses and Circuit Breakers . . . . . . . . . . . . . 244
Engine Compartment Fuse Block . . . . . . 245
Instrument Panel Fuse Block . . . . . . . . . . 249
Wheels and Tires
Tires . . . . . . . . . . . . . . . . . . . . . . . . . . . . . . . . . . . 251
All-Season Tires . . . . . . . . . . . . . . . . . . . . . . . . 251
Winter Tires . . . . . . . . . . . . . . . . . . . . . . . . . . . 252
Low-Profile Tires . . . . . . . . . . . . . . . . . . . . . . . 252
Tire Sidewall Labeling . . . . . . . . . . . . . . . . . 252
Tire Designations . . . . . . . . . . . . . . . . . . . . . . 254
Tire Terminology and Definitions . . . . . . 255
Tire Pressure . . . . . . . . . . . . . . . . . . . . . . . . . . 257 Tire Pressure for High-Speed
Operation . . . . . . . . . . . . . . . . . . . . . . . . . . . 258
Tire Pressure Monitor System . . . . . . . . . 259
Tire Pressure Monitor Operation . . . . . . 260
Tire Inspection . . . . . . . . . . . . . . . . . . . . . . . . 263
Tire Rotation . . . . . . . . . . . . . . . . . . . . . . . . . . 263
When It Is Time for New Tires . . . . . . . . 264
Buying New Tires . . . . . . . . . . . . . . . . . . . . . 265
Different Size Tires and Wheels . . . . . . . 266
Uniform Tire Quality Grading . . . . . . . . . 266
Wheel Alignment and Tire Balance . . . . 268
Wheel Replacement . . . . . . . . . . . . . . . . . . . 268
Tire Chains . . . . . . . . . . . . . . . . . . . . . . . . . . . . 268
If a Tire Goes Flat . . . . . . . . . . . . . . . . . . . . . 269
Tire Changing . . . . . . . . . . . . . . . . . . . . . . . . . 270
Compact Spare Tire . . . . . . . . . . . . . . . . . . . . 275
Jump Starting
Jump Starting - North America . . . . . . . . 275
Towing the Vehicle
Transporting a Disabled Vehicle . . . . . . . 278
Recreational Vehicle Towing . . . . . . . . . . . 279
Appearance Care
Exterior Care . . . . . . . . . . . . . . . . . . . . . . . . . . 280
Interior Care . . . . . . . . . . . . . . . . . . . . . . . . . . 284
Floor Mats . . . . . . . . . . . . . . . . . . . . . . . . . . . . 287
Page 226 of 332
Chevrolet Malibu Owner Manual (GMNA-Localizing-U.S./Canada-
16273584) - 2023 - CRC - 9/28/22
Vehicle Care 225
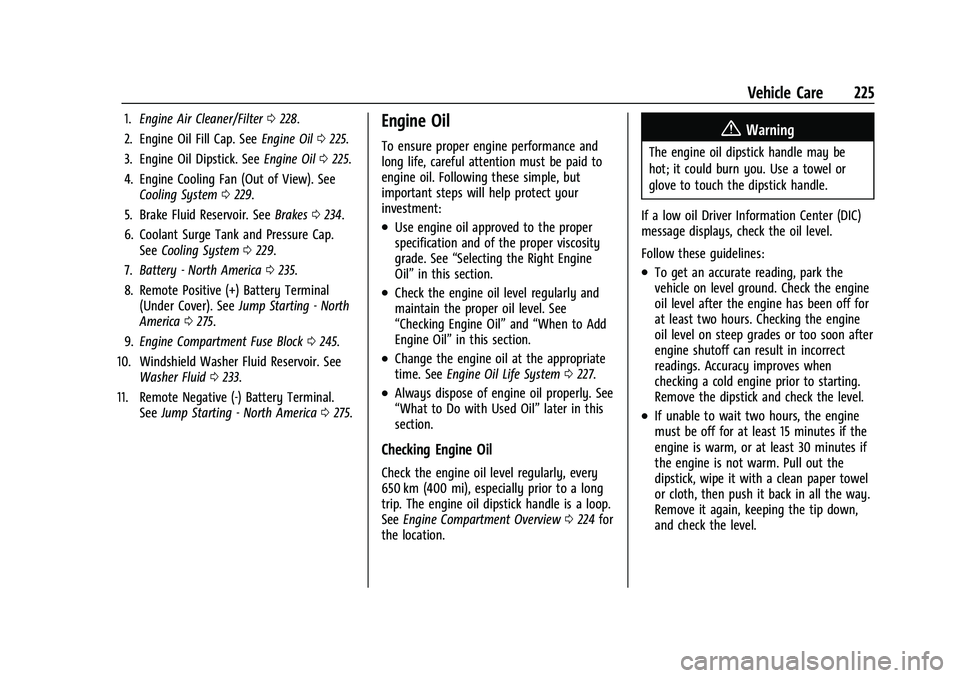
1.Engine Air Cleaner/Filter 0228.
2. Engine Oil Fill Cap. See Engine Oil0225.
3. Engine Oil Dipstick. See Engine Oil0225.
4. Engine Cooling Fan (Out of View). See Cooling System 0229.
5. Brake Fluid Reservoir. See Brakes0234.
6. Coolant Surge Tank and Pressure Cap. See Cooling System 0229.
7. Battery - North America 0235.
8. Remote Positive (+) Battery Terminal (Under Cover). See Jump Starting - North
America 0275.
9. Engine Compartment Fuse Block 0245.
10. Windshield Washer Fluid Reservoir. See Washer Fluid 0233.
11. Remote Negative (-) Battery Terminal. SeeJump Starting - North America 0275.Engine Oil
To ensure proper engine performance and
long life, careful attention must be paid to
engine oil. Following these simple, but
important steps will help protect your
investment:
.Use engine oil approved to the proper
specification and of the proper viscosity
grade. See “Selecting the Right Engine
Oil” in this section.
.Check the engine oil level regularly and
maintain the proper oil level. See
“Checking Engine Oil” and“When to Add
Engine Oil” in this section.
.Change the engine oil at the appropriate
time. SeeEngine Oil Life System 0227.
.Always dispose of engine oil properly. See
“What to Do with Used Oil” later in this
section.
Checking Engine Oil
Check the engine oil level regularly, every
650 km (400 mi), especially prior to a long
trip. The engine oil dipstick handle is a loop.
See Engine Compartment Overview 0224 for
the location.
{Warning
The engine oil dipstick handle may be
hot; it could burn you. Use a towel or
glove to touch the dipstick handle.
If a low oil Driver Information Center (DIC)
message displays, check the oil level.
Follow these guidelines:
.To get an accurate reading, park the
vehicle on level ground. Check the engine
oil level after the engine has been off for
at least two hours. Checking the engine
oil level on steep grades or too soon after
engine shutoff can result in incorrect
readings. Accuracy improves when
checking a cold engine prior to starting.
Remove the dipstick and check the level.
.If unable to wait two hours, the engine
must be off for at least 15 minutes if the
engine is warm, or at least 30 minutes if
the engine is not warm. Pull out the
dipstick, wipe it with a clean paper towel
or cloth, then push it back in all the way.
Remove it again, keeping the tip down,
and check the level.