2023 CHEVROLET MALIBU brake light
[x] Cancel search: brake lightPage 177 of 332
Chevrolet Malibu Owner Manual (GMNA-Localizing-U.S./Canada-
16273584) - 2023 - CRC - 9/28/22
176 Driving and Operating
Stopping the Engine/LOCK/OFF (No Indicator
Lights) :When the vehicle is stopped, press
ENGINE START/STOP once to turn the
engine off.
If the vehicle is in P (Park), the ignition will
turn off, and Retained Accessory Power (RAP)
will remain active. See Retained Accessory
Power (RAP) 0179.
If the vehicle is not in P (Park), the ignition
will return to accessory mode and display
the message SHIFT TO PARK in the Driver
Information Center (DIC). When the vehicle is
shifted into P (Park), the ignition will
turn off.
Do not turn the engine off when the vehicle
is moving. This will cause a loss of power
assist in the brake and steering systems and
disable the airbags.
If the vehicle must be shut off in an
emergency: 1. Brake using a firm and steady pressure. Do not pump the brakes repeatedly. This
may deplete power assist, requiring
increased brake pedal force. 2. Shift the vehicle to N (Neutral). This can
be done while the vehicle is moving.
After shifting to N (Neutral), firmly apply
the brakes and steer the vehicle to a
safe location.
3. Come to a complete stop, shift to P (Park), and turn the ignition off. The
shift lever must be in P (Park) to turn the
ignition off.
4. Set the parking brake. See Electric
Parking Brake 0185.
{Warning
Turning off the vehicle while moving may
cause loss of power assist in the brake
and steering systems and disable the
airbags. While driving, only shut the
vehicle off in an emergency.
If the vehicle cannot be pulled over and
must be shut off while driving, press and
hold ENGINE START/STOP for longer than
two seconds, or press twice in five seconds.
Accessory (Amber Indicator Light) : This
mode allows you to use some electrical
accessories when the engine is off. With the ignition off, pressing the button
one time without the brake pedal applied
will place the ignition system in
accessory mode.
The ignition will switch from accessory
mode to off after five minutes to prevent
battery run down.
ON/RUN/START (Green Indicator Light) :
This
mode is for driving and starting. With the
ignition off, and the brake pedal applied,
pressing the button once will turn the
ignition on. Once engine cranking begins,
release the button. Engine cranking will
continue until the engine starts. See Starting
the Engine 0177. The ignition will then
remain on.
Service Mode
This power mode is available for service and
diagnostics, and to verify the proper
operation of the malfunction indicator lamp
as may be required for emission inspection
purposes. With the vehicle off, and the
brake pedal not applied, pressing and
holding the button for more than
five seconds will place the vehicle in Service
Mode. The instruments and audio systems
will operate as they do with the ignition on,
but the vehicle will not be able to be driven.
Page 185 of 332
Chevrolet Malibu Owner Manual (GMNA-Localizing-U.S./Canada-
16273584) - 2023 - CRC - 9/28/22
184 Driving and Operating
2. Press + (Plus) or−(Minus) on the shift
lever to increase or decrease the gear
range available.
When you shift from D (Drive) to L (Low),
the transmission will shift to a
pre-determined lower gear range. The
highest gear available for this
pre-determined range is displayed next to
the L in the DIC. See Driver Information
Center (DIC) (Base Level) 095 or
Driver Information Center (DIC) (Uplevel)
0 98. The number displayed in the DIC is
the highest gear that the transmission will
be allowed to operate in. This means that
all gears below that number are available.
For example, when 4 (Fourth) is shown next
to the L, 1 (First) through 4 (Fourth) gears
are automatically shifted by the vehicle. The
transmission will not shift into 5 (Fifth) until
the + (Plus) button is used or you shift back
into D (Drive).
While in L (Low), the transmission will
prevent shifting to a lower gear range if the
engine speed is too high. You have a brief
period of time to slow the vehicle. If vehicle
speed is not reduced within the time
allowed, the lower gear range shift will not be completed. You must further slow the
vehicle, then press
−(Minus) to the desired
lower gear range.
Brakes
Electric Brake Boost
Vehicles equipped with electric brake boost
have hydraulic brake circuits that are
electronically controlled when the brake
pedal is applied during normal operation.
The system performs routine tests and turns
off within a few minutes after the vehicle is
shutdown. Noise may be heard during this
time. If the brake pedal is pressed during
the tests or when the electric brake boost
system is off, a noticeable change in pedal
force and travel may be felt. This is normal.
Antilock Brake System (ABS)
The Antilock Brake System (ABS) helps
prevent a braking skid and maintain steering
while braking hard.
ABS performs a system check when the
vehicle is first driven. A momentary motor
or clicking noise may be heard while this
test is going on, and the brake pedal may
move slightly. This is normal.
If there is a problem with ABS, this warning
light stays on. See Antilock Brake System
(ABS) Warning Light 090.
ABS does not change the time needed to
get a foot on the brake pedal and does not
always decrease stopping distance. If you
get too close to the vehicle ahead, there will
not be enough time to apply the brakes if
that vehicle suddenly slows or stops. Always
leave enough room ahead to stop, even
with ABS.
Using ABS
Do not pump the brakes. Just hold the brake
pedal down firmly. Hearing or feeling ABS
operate is normal.
Braking in Emergencies
ABS allows steering and braking at the same
time. In many emergencies, steering can
help even more than braking.
Page 186 of 332
Chevrolet Malibu Owner Manual (GMNA-Localizing-U.S./Canada-
16273584) - 2023 - CRC - 9/28/22
Driving and Operating 185
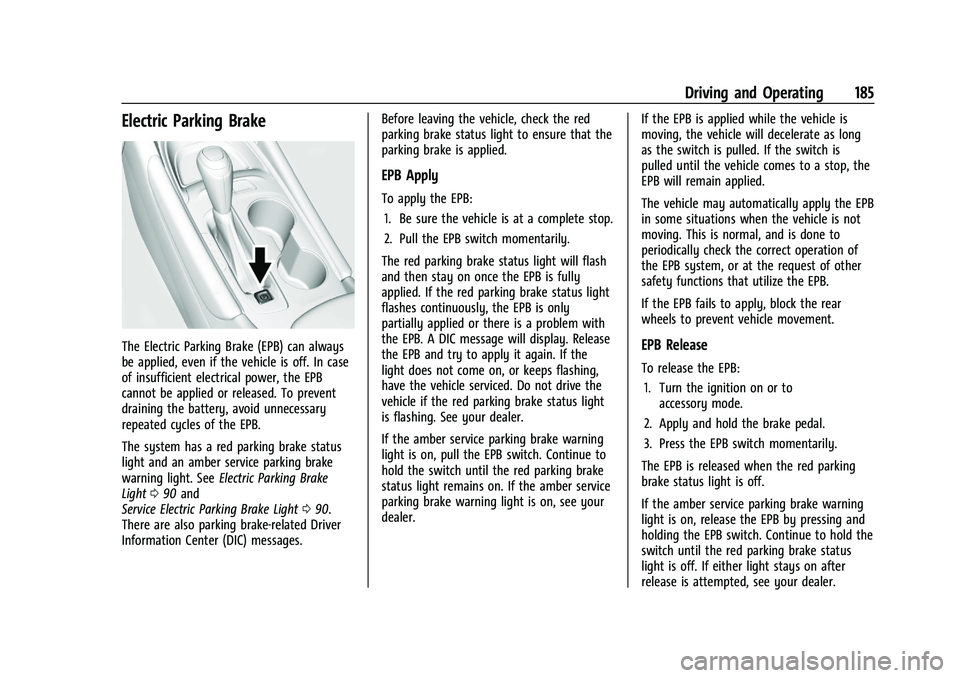
Electric Parking Brake
The Electric Parking Brake (EPB) can always
be applied, even if the vehicle is off. In case
of insufficient electrical power, the EPB
cannot be applied or released. To prevent
draining the battery, avoid unnecessary
repeated cycles of the EPB.
The system has a red parking brake status
light and an amber service parking brake
warning light. SeeElectric Parking Brake
Light 090 and
Service Electric Parking Brake Light 090.
There are also parking brake-related Driver
Information Center (DIC) messages. Before leaving the vehicle, check the red
parking brake status light to ensure that the
parking brake is applied.
EPB Apply
To apply the EPB:
1. Be sure the vehicle is at a complete stop.
2. Pull the EPB switch momentarily.
The red parking brake status light will flash
and then stay on once the EPB is fully
applied. If the red parking brake status light
flashes continuously, the EPB is only
partially applied or there is a problem with
the EPB. A DIC message will display. Release
the EPB and try to apply it again. If the
light does not come on, or keeps flashing,
have the vehicle serviced. Do not drive the
vehicle if the red parking brake status light
is flashing. See your dealer.
If the amber service parking brake warning
light is on, pull the EPB switch. Continue to
hold the switch until the red parking brake
status light remains on. If the amber service
parking brake warning light is on, see your
dealer. If the EPB is applied while the vehicle is
moving, the vehicle will decelerate as long
as the switch is pulled. If the switch is
pulled until the vehicle comes to a stop, the
EPB will remain applied.
The vehicle may automatically apply the EPB
in some situations when the vehicle is not
moving. This is normal, and is done to
periodically check the correct operation of
the EPB system, or at the request of other
safety functions that utilize the EPB.
If the EPB fails to apply, block the rear
wheels to prevent vehicle movement.
EPB Release
To release the EPB:
1. Turn the ignition on or to accessory mode.
2. Apply and hold the brake pedal.
3. Press the EPB switch momentarily.
The EPB is released when the red parking
brake status light is off.
If the amber service parking brake warning
light is on, release the EPB by pressing and
holding the EPB switch. Continue to hold the
switch until the red parking brake status
light is off. If either light stays on after
release is attempted, see your dealer.
Page 187 of 332
Chevrolet Malibu Owner Manual (GMNA-Localizing-U.S./Canada-
16273584) - 2023 - CRC - 9/28/22
186 Driving and Operating
Caution
Driving with the parking brake on can
overheat the brake system and cause
premature wear or damage to brake
system parts. Make sure that the parking
brake is fully released and the brake
warning light is off before driving.
If you are towing a trailer and parking on a
hill, see Driving Characteristics and Towing
Tips 0213.
Automatic EPB Release
The EPB will automatically release if the
vehicle is running, placed into gear, and an
attempt is made to drive away. Avoid rapid
acceleration when the EPB is applied, to
preserve parking brake lining life.
Brake Assist
Brake Assist detects rapid brake pedal
applications due to emergency braking
situations and provides additional braking to
activate the Antilock Brake System (ABS) if
the brake pedal is not pushed hard enough
to activate ABS normally. Minor noise, brake
pedal pulsation, and/or pedal movement
during this time may occur. Continue to apply the brake pedal as the driving
situation dictates. Brake Assist disengages
when the brake pedal is released.
Hill Start Assist (HSA)
{Warning
Do not rely on the HSA feature. HSA does
not replace the need to pay attention
and drive safely. You may not hear or
feel alerts or warnings provided by this
system. Failure to use proper care when
driving may result in injury, death,
or vehicle damage. See
Defensive Driving
0 166.
When the vehicle is stopped on a grade, Hill
Start Assist (HSA) prevents the vehicle from
rolling in an unintended direction during the
transition from brake pedal release to
accelerator pedal apply. The brakes release
when the accelerator pedal is applied. If the
accelerator pedal is not applied within a few
minutes, the Electric Parking Brake will
apply. The brakes may also release under
other conditions. Do not rely on HSA to hold
the vehicle. HSA is available when the vehicle is facing
uphill in a forward gear, or when facing
downhill in R (Reverse). The vehicle must
come to a complete stop on a grade for HSA
to activate.
Ride Control Systems
Traction Control/Electronic
Stability Control
System Operation
The vehicle has a Traction Control System
(TCS) and StabiliTrak/Electronic Stability
Control (ESC). These systems help limit
wheel slip and assist the driver in
maintaining control, especially on slippery
road conditions.
TCS activates if it senses that any of the
drive wheels are spinning or beginning to
lose traction. When this happens, TCS
applies the brakes to the spinning wheels
and reduces engine power to limit
wheel spin.
StabiliTrak/ESC activates when the vehicle
senses a difference between the intended
path and the direction the vehicle is actually
traveling. StabiliTrak/ESC selectively applies
Page 188 of 332
Chevrolet Malibu Owner Manual (GMNA-Localizing-U.S./Canada-
16273584) - 2023 - CRC - 9/28/22
Driving and Operating 187
braking pressure to any one of the vehicle
wheel brakes to assist the driver in keeping
the vehicle on the intended path.
If cruise control is being used and traction
control or StabiliTrak/ESC begins to limit
wheel spin, cruise control will disengage.
Cruise control may be turned back on when
road conditions allow.
Both systems come on automatically when
the vehicle is started and begins to move.
The systems may be heard or felt while
they are operating or while performing
diagnostic checks. This is normal and does
not mean there is a problem with the
vehicle.
It is recommended to leave both systems on
for normal driving conditions, but it may be
necessary to turn TCS off if the vehicle gets
stuck in sand, mud, ice, or snow. SeeIf the
Vehicle Is Stuck 0171 and “Turning the
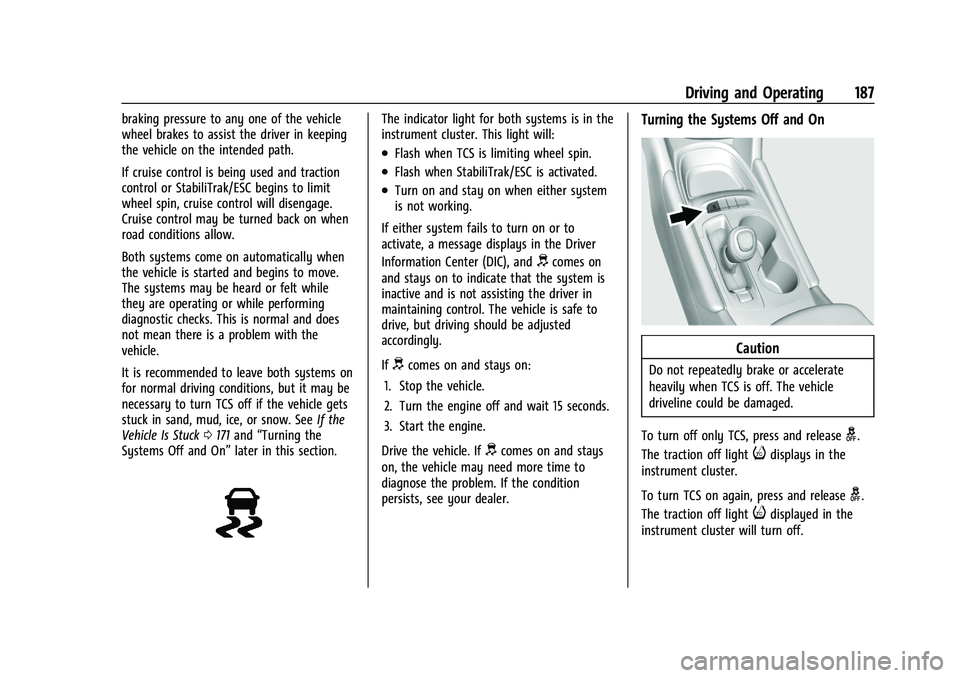
Systems Off and On” later in this section.The indicator light for both systems is in the
instrument cluster. This light will:
.Flash when TCS is limiting wheel spin.
.Flash when StabiliTrak/ESC is activated.
.Turn on and stay on when either system
is not working.
If either system fails to turn on or to
activate, a message displays in the Driver
Information Center (DIC), and
dcomes on
and stays on to indicate that the system is
inactive and is not assisting the driver in
maintaining control. The vehicle is safe to
drive, but driving should be adjusted
accordingly.
If
dcomes on and stays on:
1. Stop the vehicle.
2. Turn the engine off and wait 15 seconds.
3. Start the engine.
Drive the vehicle. If
dcomes on and stays
on, the vehicle may need more time to
diagnose the problem. If the condition
persists, see your dealer.
Turning the Systems Off and On
Caution
Do not repeatedly brake or accelerate
heavily when TCS is off. The vehicle
driveline could be damaged.
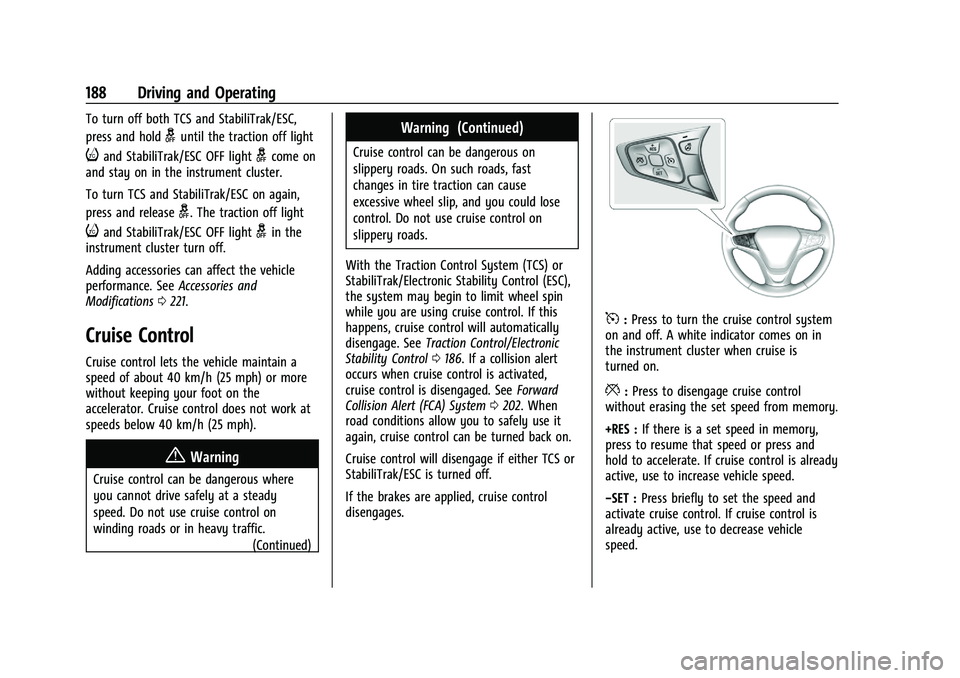
To turn off only TCS, press and release
g.
The traction off light
idisplays in the
instrument cluster.
To turn TCS on again, press and release
g.
The traction off light
idisplayed in the
instrument cluster will turn off.
Page 189 of 332
Chevrolet Malibu Owner Manual (GMNA-Localizing-U.S./Canada-
16273584) - 2023 - CRC - 9/28/22
188 Driving and Operating
To turn off both TCS and StabiliTrak/ESC,
press and hold
guntil the traction off light
iand StabiliTrak/ESC OFF lightgcome on
and stay on in the instrument cluster.
To turn TCS and StabiliTrak/ESC on again,
press and release
g. The traction off light
iand StabiliTrak/ESC OFF lightgin the
instrument cluster turn off.
Adding accessories can affect the vehicle
performance. See Accessories and
Modifications 0221.
Cruise Control
Cruise control lets the vehicle maintain a
speed of about 40 km/h (25 mph) or more
without keeping your foot on the
accelerator. Cruise control does not work at
speeds below 40 km/h (25 mph).
{Warning
Cruise control can be dangerous where
you cannot drive safely at a steady
speed. Do not use cruise control on
winding roads or in heavy traffic.
(Continued)
Warning (Continued)
Cruise control can be dangerous on
slippery roads. On such roads, fast
changes in tire traction can cause
excessive wheel slip, and you could lose
control. Do not use cruise control on
slippery roads.
With the Traction Control System (TCS) or
StabiliTrak/Electronic Stability Control (ESC),
the system may begin to limit wheel spin
while you are using cruise control. If this
happens, cruise control will automatically
disengage. See Traction Control/Electronic
Stability Control 0186. If a collision alert
occurs when cruise control is activated,
cruise control is disengaged. See Forward
Collision Alert (FCA) System 0202. When
road conditions allow you to safely use it
again, cruise control can be turned back on.
Cruise control will disengage if either TCS or
StabiliTrak/ESC is turned off.
If the brakes are applied, cruise control
disengages.
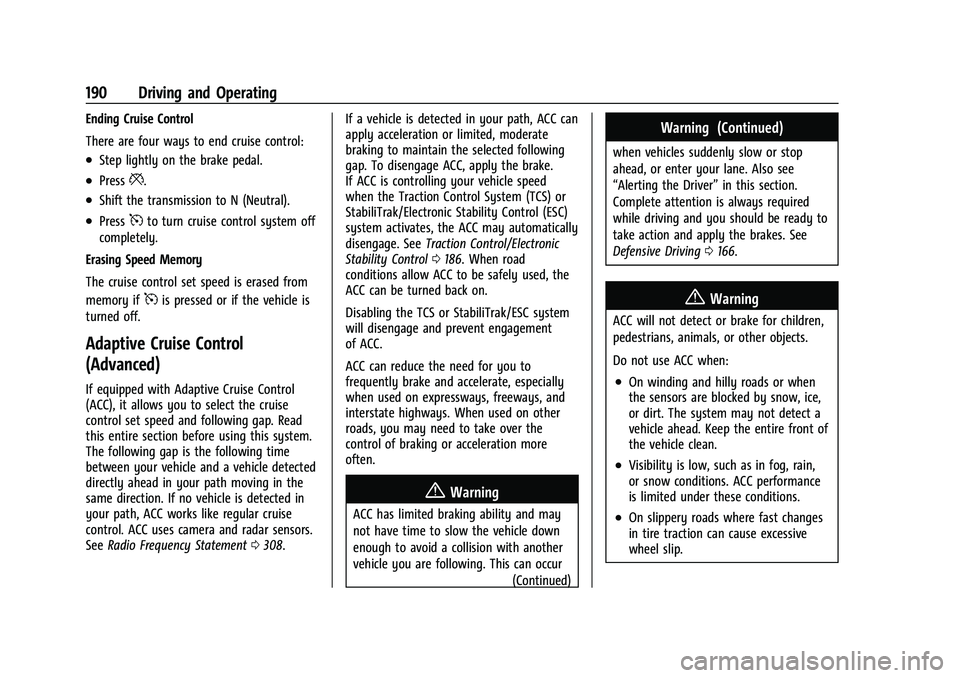
5: Press to turn the cruise control system
on and off. A white indicator comes on in
the instrument cluster when cruise is
turned on.
*: Press to disengage cruise control
without erasing the set speed from memory.
+RES : If there is a set speed in memory,
press to resume that speed or press and
hold to accelerate. If cruise control is already
active, use to increase vehicle speed.
−SET : Press briefly to set the speed and
activate cruise control. If cruise control is
already active, use to decrease vehicle
speed.
Page 191 of 332
Chevrolet Malibu Owner Manual (GMNA-Localizing-U.S./Canada-
16273584) - 2023 - CRC - 9/28/22
190 Driving and Operating
Ending Cruise Control
There are four ways to end cruise control:
.Step lightly on the brake pedal.
.Press*.
.Shift the transmission to N (Neutral).
.Press5to turn cruise control system off
completely.
Erasing Speed Memory
The cruise control set speed is erased from
memory if
5is pressed or if the vehicle is
turned off.
Adaptive Cruise Control
(Advanced)
If equipped with Adaptive Cruise Control
(ACC), it allows you to select the cruise
control set speed and following gap. Read
this entire section before using this system.
The following gap is the following time
between your vehicle and a vehicle detected
directly ahead in your path moving in the
same direction. If no vehicle is detected in
your path, ACC works like regular cruise
control. ACC uses camera and radar sensors.
See Radio Frequency Statement 0308. If a vehicle is detected in your path, ACC can
apply acceleration or limited, moderate
braking to maintain the selected following
gap. To disengage ACC, apply the brake.
If ACC is controlling your vehicle speed
when the Traction Control System (TCS) or
StabiliTrak/Electronic Stability Control (ESC)
system activates, the ACC may automatically
disengage. See
Traction Control/Electronic
Stability Control 0186. When road
conditions allow ACC to be safely used, the
ACC can be turned back on.
Disabling the TCS or StabiliTrak/ESC system
will disengage and prevent engagement
of ACC.
ACC can reduce the need for you to
frequently brake and accelerate, especially
when used on expressways, freeways, and
interstate highways. When used on other
roads, you may need to take over the
control of braking or acceleration more
often.
{Warning
ACC has limited braking ability and may
not have time to slow the vehicle down
enough to avoid a collision with another
vehicle you are following. This can occur
(Continued)
Warning (Continued)
when vehicles suddenly slow or stop
ahead, or enter your lane. Also see
“Alerting the Driver”in this section.
Complete attention is always required
while driving and you should be ready to
take action and apply the brakes. See
Defensive Driving 0166.
{Warning
ACC will not detect or brake for children,
pedestrians, animals, or other objects.
Do not use ACC when:
.On winding and hilly roads or when
the sensors are blocked by snow, ice,
or dirt. The system may not detect a
vehicle ahead. Keep the entire front of
the vehicle clean.
.Visibility is low, such as in fog, rain,
or snow conditions. ACC performance
is limited under these conditions.
.On slippery roads where fast changes
in tire traction can cause excessive
wheel slip.
Page 194 of 332
Chevrolet Malibu Owner Manual (GMNA-Localizing-U.S./Canada-
16273584) - 2023 - CRC - 9/28/22
Driving and Operating 193
.To increase vehicle speed in larger
increments, briefly press and hold +RES.
For each press, the vehicle goes 5 km/h
(5 mph) faster.
When it is determined that there is no
vehicle ahead inside the selected following
gap, then the vehicle speed will increase to
the set speed.
Reducing Speed While ACC is at a Set Speed
If ACC is already activated, do one of the
following:
.Use the brake to get to the desired lower
speed. Release the brake and press -SET.
The vehicle will now cruise at the lower
speed.
.Press and hold -SET until the desired
lower speed is reached, then release it.
.To decrease the vehicle speed in smaller
increments, press -SET down briefly. For
each press, the vehicle goes about 1 km/h
(1 mph) slower.
.To decrease vehicle speed in larger
increments, briefly press and hold -SET.
For each press, the vehicle goes 5 km/h
(5 mph) slower. Selecting the Follow Distance
When a slower moving vehicle is detected
ahead within the selected following gap,
ACC will adjust the vehicle's speed and
attempt to maintain the follow distance gap
selected.
Press
[on the steering wheel to adjust
the following gap. When pressed, the
current gap setting displays briefly on the
instrument cluster. Subsequent presses cycle
the gap button through three settings: Far,
Medium, or Near. The gap setting will be
maintained until it is changed.
Since each gap setting corresponds to a
following time (Far, Medium, or Near), the
following distance will vary based on vehicle
speed. The faster the vehicle speed, the
further back your vehicle will follow a
vehicle detected ahead. Consider traffic and
weather conditions when selecting the
following gap. The range of selectable gaps
may not be appropriate for all drivers and
driving conditions.
Changing the gap setting automatically
changes the alert timing sensitivity (Far,
Medium, or Near) for the Forward Collision
Alert (FCA) feature. See Forward Collision
Alert (FCA) System 0202. Alerting the Driver
If ACC is engaged, driver action may be
required when ACC cannot apply sufficient
braking because of approaching a vehicle
too rapidly.
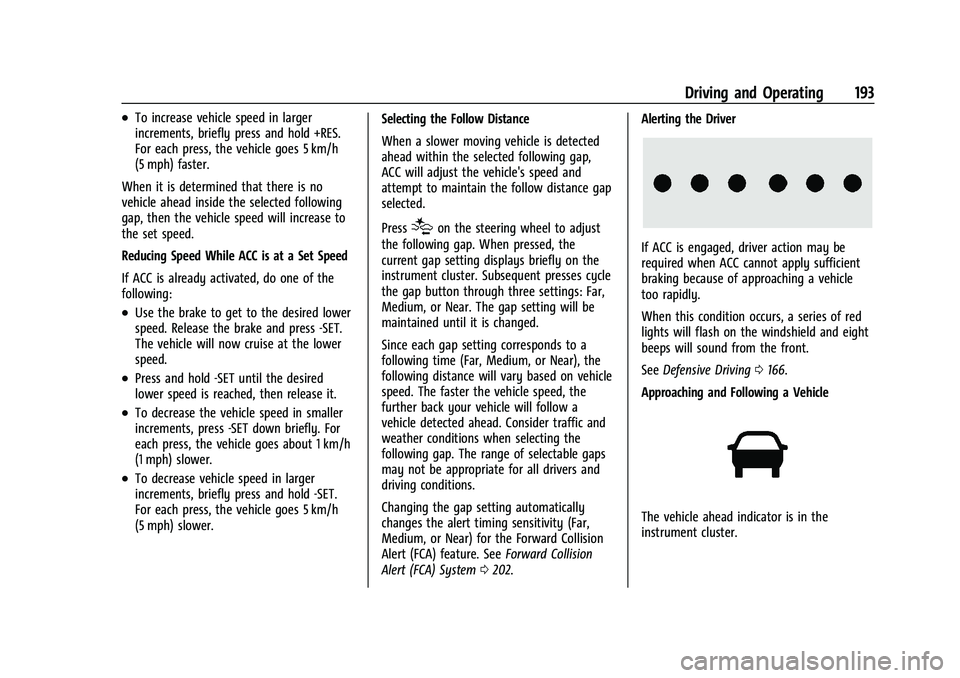
When this condition occurs, a series of red
lights will flash on the windshield and eight
beeps will sound from the front.
See
Defensive Driving 0166.
Approaching and Following a Vehicle
The vehicle ahead indicator is in the
instrument cluster.