2023 CHEVROLET CORVETTE tire rotation
[x] Cancel search: tire rotationPage 82 of 351
Chevrolet Corvette Owner Manual (GMNA-Localizing-U.S./Canada/Mexico-
16287457) - 2023 - CRC - 3/10/22
Instruments and Controls 81
driver may delete that stored location using
the
S, or dismiss the display by pressing
the thumbwheel.
See Front Lift System 0214.
Audio
Use the thumbwheel to scroll through audio
presets.
Options
Use the thumbwheel to scroll through items
in the Options menu.
Units
Press the thumbwheel while Units is
displayed to enter the Units menu. Choose
US or metric units by pressing the
thumbwheel while the desired item is
highlighted. A selected mark will be
displayed next to the selected item.
Display Themes
Press the thumbwheel to enter the Display
menu. There are seven instrument cluster
display configurations to choose from. Sport,
Tour, Track, Weather, My Mode, Z-Mode,
and Stealth. The style of the cluster will
change depending on the theme selected. Default is linked to Driver mode. Other
display themes can be set
If in Z-Mode or My Mode then those
displays plus HUD (if equipped) can be set.
Stealth Mode is enabled when the
Instrument Panel Illumination Control is set
to the minimum level. See
Instrument Panel
Illumination Control 0105.
.Sport/Z-Mode: Displays Coolant
Temperature, Fuel Gauge, Compass, Drive
Mode Indicator, Odometer, Speed,
Tachometer, Electronic Transmission
Range, Current Gear, Active Fuel
Management (AFM), Peak Performance,
Performance Shift Lights, Speed Limit, Info
Area, and Interaction Area.
.Tour/Weather/My Mode: Displays Coolant
Temperature, Fuel Gauge, Compass, Drive
Mode Indicator, Odometer, Speed,
Tachometer, Electronic Transmission
Range, Current Gear, Active Fuel
Management (AFM), Peak Performance,
Speed Limit, Info Area, and
Interaction Area.
.Track: Displays Coolant Temperature, Fuel
Gauge, Performance Traction
Management, Drive Mode Indicator, Speed, Tachometer, Electronic
Transmission Range, Current Gear, Info
Area, and Interactive Area.
.Stealth: Displays Coolant Temperature,
Fuel Gauge, and Digital Speed.
Preset info tiles shown on each layout:
Sport : G-Force, Oil Temperature
Track : Oil Pressure, Transmissions Fluid
Temperature, Tire Pressure & Tire
Temperature, Oil Temperature
Tour : Time & Outside Air Temperature, Oil
Pressure
Weather : Time & Outside Air Temperature,
Tire Status
Z-Mode : Oil Temperature, G-Force
My Mode : Economy Trend, Oil Pressure
Stealth : None
Head-Up Display (HUD) Rotation
Press the thumbwheel while Adjust Rotation
is highlighted to enter Adjust Mode. Scroll
to adjust the angle of the HUD display.
Press the thumbwheel to confirm and save
the setting. This feature may only be
available in P (Park).
Page 172 of 351
Chevrolet Corvette Owner Manual (GMNA-Localizing-U.S./Canada/Mexico-
16287457) - 2023 - CRC - 3/10/22
Driving and Operating 171
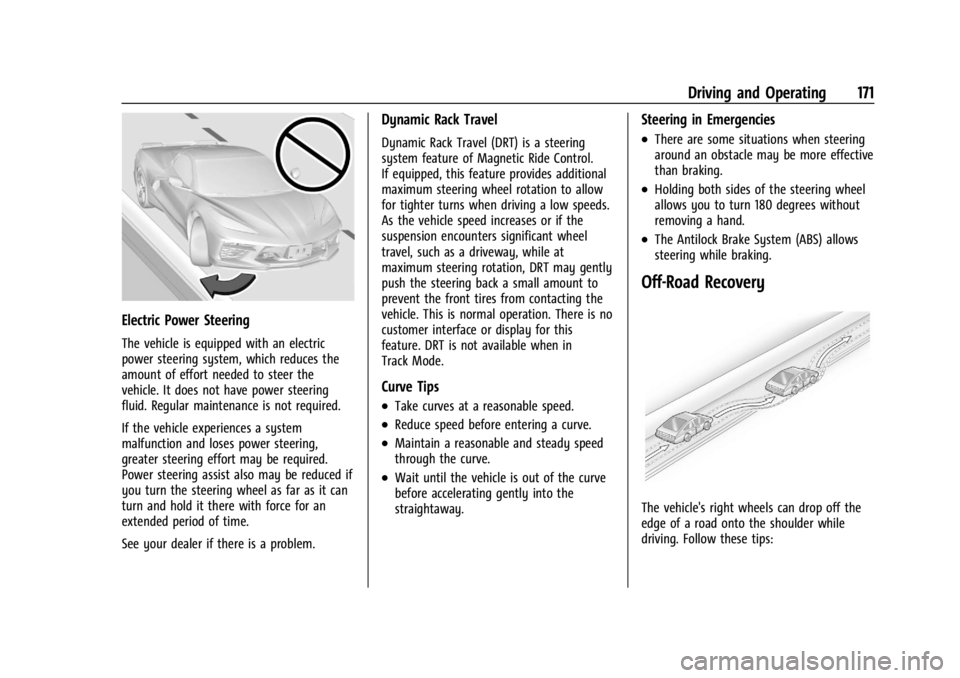
Electric Power Steering
The vehicle is equipped with an electric
power steering system, which reduces the
amount of effort needed to steer the
vehicle. It does not have power steering
fluid. Regular maintenance is not required.
If the vehicle experiences a system
malfunction and loses power steering,
greater steering effort may be required.
Power steering assist also may be reduced if
you turn the steering wheel as far as it can
turn and hold it there with force for an
extended period of time.
See your dealer if there is a problem.
Dynamic Rack Travel
Dynamic Rack Travel (DRT) is a steering
system feature of Magnetic Ride Control.
If equipped, this feature provides additional
maximum steering wheel rotation to allow
for tighter turns when driving a low speeds.
As the vehicle speed increases or if the
suspension encounters significant wheel
travel, such as a driveway, while at
maximum steering rotation, DRT may gently
push the steering back a small amount to
prevent the front tires from contacting the
vehicle. This is normal operation. There is no
customer interface or display for this
feature. DRT is not available when in
Track Mode.
Curve Tips
.Take curves at a reasonable speed.
.Reduce speed before entering a curve.
.Maintain a reasonable and steady speed
through the curve.
.Wait until the vehicle is out of the curve
before accelerating gently into the
straightaway.
Steering in Emergencies
.There are some situations when steering
around an obstacle may be more effective
than braking.
.Holding both sides of the steering wheel
allows you to turn 180 degrees without
removing a hand.
.The Antilock Brake System (ABS) allows
steering while braking.
Off-Road Recovery
The vehicle's right wheels can drop off the
edge of a road onto the shoulder while
driving. Follow these tips:
Page 232 of 351

Chevrolet Corvette Owner Manual (GMNA-Localizing-U.S./Canada/Mexico-
16287457) - 2023 - CRC - 3/10/22
Vehicle Care 231
Vehicle Care
General Information
General Information . . . . . . . . . . . . . . . . . . . 232
California Perchlorate MaterialsRequirements . . . . . . . . . . . . . . . . . . . . . . . . 232
Accessories and Modifications . . . . . . . . . 232
Lifting the Vehicle . . . . . . . . . . . . . . . . . . . . . 232
Vehicle Checks
Doing Your Own Service Work . . . . . . . . 234
Underhood Compartment Overview . . . 234
Engine Compartment Overview . . . . . . . . 235
Engine Oil (5.5L LT6 Engine) . . . . . . . . . . . 242
Engine Oil (6.2L LT2 Engine) . . . . . . . . . . . 245
Engine Oil Life System . . . . . . . . . . . . . . . . 248
Dual Clutch Transmission Fluid . . . . . . . . 249
Dual Clutch Transmission Fluid Life System . . . . . . . . . . . . . . . . . . . . . . . . . . . . . . 249
Engine Air Filter Life System . . . . . . . . . . 250
Engine Air Cleaner/Filter . . . . . . . . . . . . . . . 251
Cooling System . . . . . . . . . . . . . . . . . . . . . . . . 252
Engine Overheating . . . . . . . . . . . . . . . . . . . . 255
Washer Fluid . . . . . . . . . . . . . . . . . . . . . . . . . . 256
Brakes . . . . . . . . . . . . . . . . . . . . . . . . . . . . . . . . . 257
Brake Pad Life System (If Equipped) . . . 259
Brake Fluid . . . . . . . . . . . . . . . . . . . . . . . . . . . . 260
Battery - North America . . . . . . . . . . . . . . . 261
Park Brake and P (Park) Mechanism Check . . . . . . . . . . . . . . . . . . . . . . . . . . . . . . . . 262 Wiper Blade Replacement . . . . . . . . . . . . . 262
Windshield Replacement . . . . . . . . . . . . . . 263
Gas Strut(s) . . . . . . . . . . . . . . . . . . . . . . . . . . . 263
Headlamp Aiming
Front Headlamp Aiming . . . . . . . . . . . . . . . 264
Bulb Replacement
LED Lighting . . . . . . . . . . . . . . . . . . . . . . . . . . . 264
Electrical System
Electrical System Overload . . . . . . . . . . . . 264
Fuses and Circuit Breakers . . . . . . . . . . . . 266
Instrument Panel Fuse Block . . . . . . . . . . 266
Rear Compartment Fuse Block . . . . . . . . . 268
Wheels and Tires
Tires . . . . . . . . . . . . . . . . . . . . . . . . . . . . . . . . . . . 271
All-Season Tires . . . . . . . . . . . . . . . . . . . . . . . . 272
Winter Tires . . . . . . . . . . . . . . . . . . . . . . . . . . . 272
Run-Flat Tires . . . . . . . . . . . . . . . . . . . . . . . . . . 272
Low-Profile Tires . . . . . . . . . . . . . . . . . . . . . . . 273
Competition Oriented Tires . . . . . . . . . . . . 273
Summer Tires . . . . . . . . . . . . . . . . . . . . . . . . . 274
Tire Sidewall Labeling . . . . . . . . . . . . . . . . . 274
Tire Designations . . . . . . . . . . . . . . . . . . . . . . 275
Tire Terminology and Definitions . . . . . . 276
Tire Pressure . . . . . . . . . . . . . . . . . . . . . . . . . . 278
Tire Pressure for High-Speed
Operation . . . . . . . . . . . . . . . . . . . . . . . . . . . 279
Tire Pressure Monitor System . . . . . . . . . 280
Tire Pressure Monitor Operation . . . . . . . 281 Tire Inspection . . . . . . . . . . . . . . . . . . . . . . . . 283
Tire Rotation . . . . . . . . . . . . . . . . . . . . . . . . . . 283
When It Is Time for New Tires . . . . . . . . 285
Buying New Tires . . . . . . . . . . . . . . . . . . . . . 285
Different Size Tires and Wheels . . . . . . . 286
Uniform Tire Quality Grading . . . . . . . . . . 287
Wheel Alignment and Tire Balance . . . . 288
Wheel Replacement . . . . . . . . . . . . . . . . . . . 288
Tire Chains . . . . . . . . . . . . . . . . . . . . . . . . . . . . 289
If a Tire Goes Flat . . . . . . . . . . . . . . . . . . . . . 290
Jump Starting
Jump Starting - North America . . . . . . . . 290
Towing the Vehicle
Transporting a Disabled Vehicle . . . . . . . 293
Recreational Vehicle Towing . . . . . . . . . . . 296
Appearance Care
Exterior Care . . . . . . . . . . . . . . . . . . . . . . . . . . 296
Interior Care . . . . . . . . . . . . . . . . . . . . . . . . . . . 301
Floor Mats . . . . . . . . . . . . . . . . . . . . . . . . . . . . 304
Page 282 of 351

Chevrolet Corvette Owner Manual (GMNA-Localizing-U.S./Canada/Mexico-
16287457) - 2023 - CRC - 3/10/22
Vehicle Care 281
sequence will continue upon subsequent
vehicle start-ups as long as the malfunction
exists.
When the malfunction indicator is
illuminated, the system may not be able to
detect or signal low tire pressure as
intended. TPMS malfunctions may occur for
a variety of reasons, including the
installation of replacement or alternate tires
or wheels on the vehicle that prevent the
TPMS from functioning properly. Always
check the TPMS malfunction telltale after
replacing one or more tires or wheels on
your vehicle to ensure that the replacement
or alternate tires and wheels allow the
TPMS to continue to function properly.
SeeTire Pressure Monitor Operation 0281.
See Radio Frequency Statement 0327.
Tire Pressure Monitor Operation
This vehicle may have a Tire Pressure
Monitor System (TPMS). The TPMS is
designed to warn the driver when a low tire
pressure condition exists. TPMS sensors are
mounted onto each tire and wheel
assembly, excluding the spare tire and
wheel assembly. The TPMS sensors monitor the air pressure in the tires and transmit the
tire pressure readings to a receiver located
in the vehicle.
When a low tire pressure condition is
detected, the TPMS illuminates the low tire
pressure warning light located on the
instrument cluster. If the warning light
comes on, stop as soon as possible and
inflate the tires to the recommended
pressure shown on the Tire and Loading
Information label. See
Vehicle Load Limits
0 186.
A message to check the pressure in a
specific tire displays in the Driver
Information Center (DIC). The low tire
pressure warning light and the DIC warning
message come on each time the vehicle is
turned on until the tires are inflated to the
correct inflation pressure. If the vehicle has
DIC buttons, tire pressure levels can be
viewed. For additional information and
details about the DIC operation and displays,
see Driver Information Center (DIC) 092. The low tire pressure warning light may
come on in cool weather when the vehicle is
first started, and then turn off as the vehicle
is driven. This could be an early indicator
that the air pressure is getting low and
needs to be inflated to the proper pressure.
A Tire and Loading Information label shows
the size of the original equipment tires and
the correct inflation pressure for the tires
when they are cold. See
Vehicle Load Limits
0 186, for an example of the Tire and
Loading Information label and its location.
Also see Tire Pressure 0278.
The TPMS can warn about a low tire
pressure condition but it does not replace
normal tire maintenance. See Tire Inspection
0 283, Tire Rotation 0283, and Tires0271.
Caution
Tire sealant materials are not all the
same. A non-approved tire sealant could
damage the TPMS sensors. TPMS sensor
damage caused by using an incorrect tire
sealant is not covered by the vehicle
warranty. Always use only the GM
approved tire sealant available through
your dealer or included in the vehicle.
Page 284 of 351

Chevrolet Corvette Owner Manual (GMNA-Localizing-U.S./Canada/Mexico-
16287457) - 2023 - CRC - 3/10/22
Vehicle Care 283
while the turn signal lamp is still flashing,
briefly press the center of the valve stem.
When the recommended pressure is reached,
the horn sounds once.
If the turn signal lamp does not flash within
15 seconds after starting to inflate the tire,
the tire fill alert has not been activated or is
not working.
If the hazard warning flashers are on, the
tire fill alert visual feedback will not work
properly.
The TPMS will not activate the tire fill alert
properly under the following conditions:
.There is interference from an external
device or transmitter.
.The air pressure from the inflation device
is not sufficient to inflate the tire.
.There is a malfunction in the TPMS.
.There is a malfunction in the horn or turn
signal lamps.
.The identification code of the TPMS
sensor is not registered to the system.
.The battery of the TPMS sensor is low.If the tire fill alert does not operate due to
TPMS interference, move the vehicle about
1 m (3 ft) back or forward and try again.
If the tire fill alert feature is not working,
use a tire pressure gauge.
TPMS Sensor Matching Process
—Auto
Learn Function
Each TPMS sensor has a unique
identification code. The identification code
needs to be matched to a new tire/wheel
position after rotating the tires or replacing
one or more of the TPMS sensors. When a
tire is installed, the vehicle must be
stationary for about 20 minutes before the
system recalculates. The following relearn
process takes up to 10 minutes, driving at a
minimum speed of 20 km/h (12 mph).
A dash (-) or pressure value will display in
the DIC. See Driver Information Center (DIC)
0 92. A warning message displays in the DIC
if a problem occurs during the relearn
process.
Tire Inspection
We recommend that the tires, including
the spare tire, if the vehicle has one, be
inspected for signs of wear or damage
at least once a month. Replace the tire if:
.The indicators at three or more
places around the tire can be seen.
.There is cord or fabric showing
through the tire's rubber.
.The tread or sidewall is cracked, cut,
or snagged deep enough to show
cord or fabric.
.The tire has a bump, bulge, or split.
.The tire has a puncture, cut, or other
damage that cannot be repaired well
because of the size or location of the
damage.
Tire Rotation
Tires should be rotated according to the
interval listed in the maintenance
schedule. See
Maintenance Schedule
0 306.
Tires are rotated to achieve uniform
wear for all tires. The first rotation is
the most important.
Anytime unusual wear is noticed, rotate
the tires as soon as possible, check for
proper tire inflation pressure, and check
Page 285 of 351

Chevrolet Corvette Owner Manual (GMNA-Localizing-U.S./Canada/Mexico-
16287457) - 2023 - CRC - 3/10/22
284 Vehicle Care
for damaged tires or wheels. If the
unusual wear continues after the
rotation, check the wheel alignment.
SeeWhen It Is Time for New Tires
0 285 and
Wheel Replacement 0288.
Different tire sizes should not be
rotated front to rear.
Use this rotation pattern if the vehicle
has different size tires on the front
and rear. Caution
Wheels will become scratched if not
handled properly. When laying a tire and
wheel assembly flat on the ground, place
it face up with a towel underneath it.
Move the assembly by rolling it on the
tires. Do not drag it.
Adjust the front and rear tires to the
recommended inflation pressure on the
Tire and Loading Information label after
the tires have been rotated. See
Tire
Pressure 0278 and
Vehicle Load Limits 0186.
Reset the Tire Pressure Monitor System.
See Tire Pressure Monitor Operation
0 281.
Check that all wheel nuts are properly
tightened. See “Wheel Nut Torque”
under Capacities and Specifications
0 315.
{Warning
Rust or dirt on a wheel, or on the
parts to which it is fastened, can
cause wheel nuts to become loose
over time. The wheel could come off
and cause a crash. When changing a
wheel, remove any rust or dirt from
places where the wheel attaches to
the vehicle. In an emergency, a cloth
or paper towel can be used; however,
use a scraper or wire brush later to
remove all rust or dirt.
Lightly coat the inner diameter of the
wheel hub opening with wheel bearing
grease after a wheel change or tire
rotation to prevent corrosion or rust
buildup.
{Warning
Do not apply grease to the wheel
mounting surface, wheel conical
seats, or the wheel nuts or bolts.
Grease applied to these areas could
cause a wheel to become loose or
come off, resulting in a crash.
Page 286 of 351
Chevrolet Corvette Owner Manual (GMNA-Localizing-U.S./Canada/Mexico-
16287457) - 2023 - CRC - 3/10/22
Vehicle Care 285
When It Is Time for New Tires
Factors, such as maintenance, temperatures,
driving speeds, vehicle loading, and road
conditions affect the wear rate of the tires.
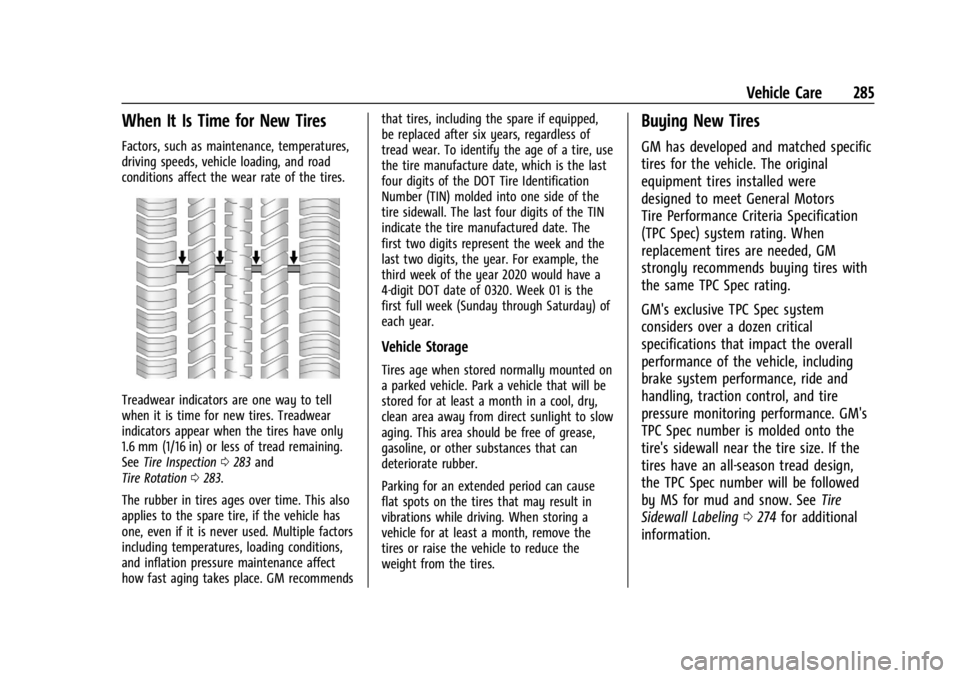
Treadwear indicators are one way to tell
when it is time for new tires. Treadwear
indicators appear when the tires have only
1.6 mm (1/16 in) or less of tread remaining.
SeeTire Inspection 0283 and
Tire Rotation 0283.
The rubber in tires ages over time. This also
applies to the spare tire, if the vehicle has
one, even if it is never used. Multiple factors
including temperatures, loading conditions,
and inflation pressure maintenance affect
how fast aging takes place. GM recommends that tires, including the spare if equipped,
be replaced after six years, regardless of
tread wear. To identify the age of a tire, use
the tire manufacture date, which is the last
four digits of the DOT Tire Identification
Number (TIN) molded into one side of the
tire sidewall. The last four digits of the TIN
indicate the tire manufactured date. The
first two digits represent the week and the
last two digits, the year. For example, the
third week of the year 2020 would have a
4-digit DOT date of 0320. Week 01 is the
first full week (Sunday through Saturday) of
each year.
Vehicle Storage
Tires age when stored normally mounted on
a parked vehicle. Park a vehicle that will be
stored for at least a month in a cool, dry,
clean area away from direct sunlight to slow
aging. This area should be free of grease,
gasoline, or other substances that can
deteriorate rubber.
Parking for an extended period can cause
flat spots on the tires that may result in
vibrations while driving. When storing a
vehicle for at least a month, remove the
tires or raise the vehicle to reduce the
weight from the tires.
Buying New Tires
GM has developed and matched specific
tires for the vehicle. The original
equipment tires installed were
designed to meet General Motors
Tire Performance Criteria Specification
(TPC Spec) system rating. When
replacement tires are needed, GM
strongly recommends buying tires with
the same TPC Spec rating.
GM's exclusive TPC Spec system
considers over a dozen critical
specifications that impact the overall
performance of the vehicle, including
brake system performance, ride and
handling, traction control, and tire
pressure monitoring performance. GM's
TPC Spec number is molded onto the
tire's sidewall near the tire size. If the
tires have an all-season tread design,
the TPC Spec number will be followed
by MS for mud and snow. See
Tire
Sidewall Labeling 0274 for additional
information.
Page 287 of 351
Chevrolet Corvette Owner Manual (GMNA-Localizing-U.S./Canada/Mexico-
16287457) - 2023 - CRC - 3/10/22
286 Vehicle Care
GM recommends replacing worn tires in
complete sets of four. Uniform tread
depth on all tires will help to maintain
the performance of the vehicle. Braking
and handling performance may be
adversely affected if all the tires are not
replaced at the same time. If proper
rotation and maintenance have been
done, all four tires should wear out at
about the same time. However, if it is
necessary to replace only one axle set
of worn tires, place the new tires on
the rear axle. SeeTire Rotation0283.
{Warning
Tires could explode during improper
service. Attempting to mount or
dismount a tire could cause injury or
death. Only your dealer or authorized
tire service center should mount or
dismount the tires.
{Warning
Mixing tires of different sizes (other
than those originally installed on the
vehicle), brands, tread patterns,
or types may cause loss of vehicle
control, resulting in a crash or other
vehicle damage. Use the correct size,
brand, and type of tire on all wheels.
{Warning
Using bias-ply tires on the vehicle
may cause the wheel rim flanges to
develop cracks after many miles of
driving. A tire and/or wheel could fail
suddenly and cause a crash. Use only
radial-ply tires with the wheels on
the vehicle.
Winter tires with the same speed rating
as the original equipment tires may not
be available for H, V, W, Y and ZR
speed rated tires. Never exceed the
winter tires’ maximum speed capability
when using winter tires with a lower
speed rating. If the vehicle tires must be replaced
with a tire that does not have a TPC
Spec number, make sure they are the
same size, load range, speed rating, and
construction (radial) as the original
tires.
The Tire and Loading Information label
indicates the original equipment tires
on the vehicle. See
Vehicle Load Limits
0 186.Different Size Tires and Wheels
If wheels or tires are installed that are a
different size than the original equipment
wheels and tires, vehicle performance,
including its braking, ride and handling
characteristics, stability, and resistance to
rollover may be affected. If the vehicle has
electronic systems such as antilock brakes,
rollover airbags, traction control,
or electronic stability control, the
performance of these systems can also be
affected.