2023 CHEVROLET CORVETTE battery location
[x] Cancel search: battery locationPage 8 of 351

Chevrolet Corvette Owner Manual (GMNA-Localizing-U.S./Canada/Mexico-
16287457) - 2023 - CRC - 3/10/22
Keys, Doors, and Windows 7
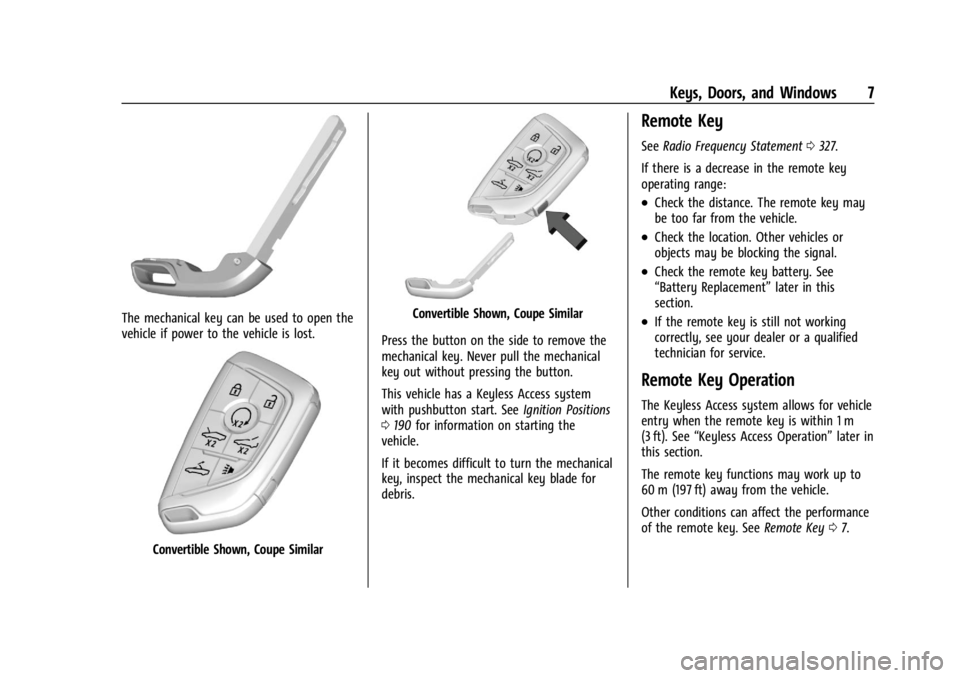
The mechanical key can be used to open the
vehicle if power to the vehicle is lost.
Convertible Shown, Coupe Similar
Convertible Shown, Coupe Similar
Press the button on the side to remove the
mechanical key. Never pull the mechanical
key out without pressing the button.
This vehicle has a Keyless Access system
with pushbutton start. See Ignition Positions
0 190 for information on starting the
vehicle.
If it becomes difficult to turn the mechanical
key, inspect the mechanical key blade for
debris.
Remote Key
See Radio Frequency Statement 0327.
If there is a decrease in the remote key
operating range:
.Check the distance. The remote key may
be too far from the vehicle.
.Check the location. Other vehicles or
objects may be blocking the signal.
.Check the remote key battery. See
“Battery Replacement” later in this
section.
.If the remote key is still not working
correctly, see your dealer or a qualified
technician for service.
Remote Key Operation
The Keyless Access system allows for vehicle
entry when the remote key is within 1 m
(3 ft). See “Keyless Access Operation” later in
this section.
The remote key functions may work up to
60 m (197 ft) away from the vehicle.
Other conditions can affect the performance
of the remote key. See Remote Key07.
Page 81 of 351

Chevrolet Corvette Owner Manual (GMNA-Localizing-U.S./Canada/Mexico-
16287457) - 2023 - CRC - 3/10/22
80 Instruments and Controls
Performance
Press the thumbwheel to enter the
Performance menu. Scroll through the
available items.
G-force :Gives the driver an indication of
the vehicle performance in cornering. The
G-force gauge will show as an info tile on
the left side of the cluster, if selected.
Friction Bubble : A four quadrant visual
display, indicative of the four corners of the
car, with a “bubble”showing where the
most inertia is being exerted on the vehicle.
Launch Control : If equipped, the Launch
Control display allows the driver to adjust
the parameters of the Launch Control
System. See Track Events and Competitive
Driving 0172.
Performance Timer : Press the thumbwheel
to enter the setup menu, then select Set
Start Speed. Scroll to desired Start Speed,
then press the thumbwheel to save it. While
on this menu, to change the End Speed,
scroll to End Speed and use the thumbwheel
to scroll to desired End Speed. Press the
thumbwheel to save it. On the next
acceleration, the performance timer will record the time. Pressing the thumbwheel
while the timer is running will cancel the
timer if done before reaching the End Speed.
Lap Timer (without PDR) :
Press
Twhen
Lap Timer is displayed to start, stop, or reset
the lap timer. Press the thumbwheel while
the Lap Timer page is active to start the
timer. If the lap timer is active, pressing the
thumbwheel will stop the current lap timer
and start a new lap. Pressing the
thumbwheel within 10 seconds after
completing the last lap (Stop Lap Timer
option is displayed), the Lap Timer will stop.
Lap Timer (with PDR) : The lap times
recorded with the PDR system will
automatically be displayed in this window.
This only happens if a track has been
selected in the PDR system and a video
recording is started. See Performance Data
Recorder (PDR) 0138.
Oil Temperature : Shows the current oil
temperature in either degrees Celsius (°C) or
degrees Fahrenheit (°F).
Oil Pressure : Shows the current oil pressure
in either kilopascal (kPa) or in pounds per
square inch (psi).
Battery Voltage : Shows the current battery
voltage. Transmission Fluid Temperature :
Shows the
temperature of the transmission fluid in
either degrees Celsius (°C) or degrees
Fahrenheit (°F).
Tire Status : Shows individual tire pressures
and overall temperature as either Cold, Cool,
Normal, Warm, or Hot. Normal is typical for
normal driving while Warm is typical for
aggressive driving. Unknown may be
displayed if tire temperature information is
unavailable.
eLSD : If equipped, displays the amount of
rear differential coupling when the Electronic
Limited-Slip Differential (eLSD) is active and
functioning during vehicle operation.
A reading of 1% is an open differential and
100% is locked. It is normal for the value to
make small or large changes due to driving
conditions and driver inputs. See Limited-Slip
Differential (Stingray Models Without Z51
Performance Package) 0218 or
Limited-Slip Differential (Stingray With Z51
Performance Package and Z06 model) 0219.
Front Lift : During a driver requested Front
Lift (if equipped), the driver may
"remember" using the
S, or dismiss the
display by pressing the thumbwheel. When
the Front Lift is Raised due to location, the
Page 192 of 351

Chevrolet Corvette Owner Manual (GMNA-Localizing-U.S./Canada/Mexico-
16287457) - 2023 - CRC - 3/10/22
Driving and Operating 191
2. Shift into N (Neutral). This can be donewhile the vehicle is moving. After
shifting into N (Neutral), firmly apply the
brakes and steer the vehicle to a safe
location.
3. Come to a complete stop. Shift into P (Park).
4. Set the parking brake. See Electric
Parking Brake 0204. Press ENGINE
START/STOP to turn the vehicle off.
{Warning
Turning off the vehicle while moving may
cause loss of power assist in the brake
and steering systems and disable the
airbags. While driving, only shut the
vehicle off in an emergency.
If the vehicle cannot be pulled over and
must be turned off while driving, press and
hold ENGINE START/STOP for more than
two seconds, or press twice within
five seconds.
Accessory (Amber Indicator Light) : This
mode allows the use of some electrical
accessories when the engine is off. With the ignition off, pressing the button
one time without the brake pedal applied
will place the ignition system in accessory.
The ignition will switch from accessory to
OFF after five minutes to prevent battery
rundown.
ON/RUN/START (Green Indicator Light) :
This
mode is for driving and starting. With the
ignition off and the brake pedal applied,
pressing the button once will place the
ignition in ON/RUN/START. Once engine
cranking begins, release the button. Engine
cranking will continue until the engine
starts. See Starting the Engine 0191. The
ignition will then remain in ON/RUN.
Service Mode
This power mode is available for service and
diagnostics, and to verify the proper
operation of the malfunction indicator lamp
as may be required for emission inspection
purposes. With the vehicle off and the brake
pedal not applied, pressing and holding
ENGINE START/STOP for more than
five seconds will place the vehicle in Service
Mode. The instruments and audio systems
will operate as they do in ON/RUN, but the
vehicle will not be able to be driven. The engine will not start in Service Mode. Press
ENGINE START/STOP again to turn the
vehicle off.
Starting the Engine
Caution
If you add electrical parts or accessories,
you could change the way the engine
operates. Any resulting damage would
not be covered by the vehicle warranty.
See
Add-On Electrical Equipment 0230.
Caution
Do not try to shift to P (Park) if the
vehicle is moving. If you do, you could
damage the transmission. Shift to P (Park)
only when the vehicle is stopped.
Place the transmission in P (Park) or
N (Neutral). To restart the vehicle when it is
already moving, use N (Neutral) only.
Starting the Vehicle
The remote key must be inside the vehicle
for the ignition to work.
Page 284 of 351

Chevrolet Corvette Owner Manual (GMNA-Localizing-U.S./Canada/Mexico-
16287457) - 2023 - CRC - 3/10/22
Vehicle Care 283
while the turn signal lamp is still flashing,
briefly press the center of the valve stem.
When the recommended pressure is reached,
the horn sounds once.
If the turn signal lamp does not flash within
15 seconds after starting to inflate the tire,
the tire fill alert has not been activated or is
not working.
If the hazard warning flashers are on, the
tire fill alert visual feedback will not work
properly.
The TPMS will not activate the tire fill alert
properly under the following conditions:
.There is interference from an external
device or transmitter.
.The air pressure from the inflation device
is not sufficient to inflate the tire.
.There is a malfunction in the TPMS.
.There is a malfunction in the horn or turn
signal lamps.
.The identification code of the TPMS
sensor is not registered to the system.
.The battery of the TPMS sensor is low.If the tire fill alert does not operate due to
TPMS interference, move the vehicle about
1 m (3 ft) back or forward and try again.
If the tire fill alert feature is not working,
use a tire pressure gauge.
TPMS Sensor Matching Process
—Auto
Learn Function
Each TPMS sensor has a unique
identification code. The identification code
needs to be matched to a new tire/wheel
position after rotating the tires or replacing
one or more of the TPMS sensors. When a
tire is installed, the vehicle must be
stationary for about 20 minutes before the
system recalculates. The following relearn
process takes up to 10 minutes, driving at a
minimum speed of 20 km/h (12 mph).
A dash (-) or pressure value will display in
the DIC. See Driver Information Center (DIC)
0 92. A warning message displays in the DIC
if a problem occurs during the relearn
process.
Tire Inspection
We recommend that the tires, including
the spare tire, if the vehicle has one, be
inspected for signs of wear or damage
at least once a month. Replace the tire if:
.The indicators at three or more
places around the tire can be seen.
.There is cord or fabric showing
through the tire's rubber.
.The tread or sidewall is cracked, cut,
or snagged deep enough to show
cord or fabric.
.The tire has a bump, bulge, or split.
.The tire has a puncture, cut, or other
damage that cannot be repaired well
because of the size or location of the
damage.
Tire Rotation
Tires should be rotated according to the
interval listed in the maintenance
schedule. See
Maintenance Schedule
0 306.
Tires are rotated to achieve uniform
wear for all tires. The first rotation is
the most important.
Anytime unusual wear is noticed, rotate
the tires as soon as possible, check for
proper tire inflation pressure, and check
Page 332 of 351

Chevrolet Corvette Owner Manual (GMNA-Localizing-U.S./Canada/Mexico-
16287457) - 2023 - CRC - 3/10/22
OnStar 331
OnStar
OnStar Overview
OnStar Overview . . . . . . . . . . . . . . . . . . . . . . . 331
OnStar Services
Emergency . . . . . . . . . . . . . . . . . . . . . . . . . . . . 332
Security . . . . . . . . . . . . . . . . . . . . . . . . . . . . . . . 332
OnStar Additional Information
OnStar Additional Information . . . . . . . . . 333
OnStar Overview
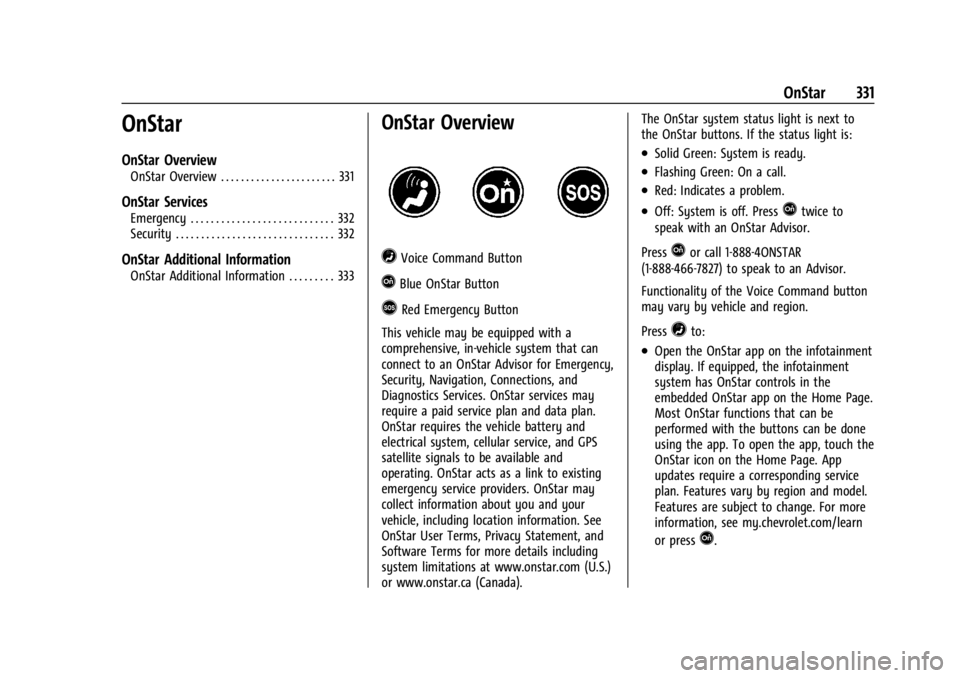
=Voice Command Button
QBlue OnStar Button
>Red Emergency Button
This vehicle may be equipped with a
comprehensive, in-vehicle system that can
connect to an OnStar Advisor for Emergency,
Security, Navigation, Connections, and
Diagnostics Services. OnStar services may
require a paid service plan and data plan.
OnStar requires the vehicle battery and
electrical system, cellular service, and GPS
satellite signals to be available and
operating. OnStar acts as a link to existing
emergency service providers. OnStar may
collect information about you and your
vehicle, including location information. See
OnStar User Terms, Privacy Statement, and
Software Terms for more details including
system limitations at www.onstar.com (U.S.)
or www.onstar.ca (Canada). The OnStar system status light is next to
the OnStar buttons. If the status light is:
.Solid Green: System is ready.
.Flashing Green: On a call.
.Red: Indicates a problem.
.Off: System is off. PressQtwice to
speak with an OnStar Advisor.
Press
Qor call 1-888-4ONSTAR
(1-888-466-7827) to speak to an Advisor.
Functionality of the Voice Command button
may vary by vehicle and region.
Press
=to:
.Open the OnStar app on the infotainment
display. If equipped, the infotainment
system has OnStar controls in the
embedded OnStar app on the Home Page.
Most OnStar functions that can be
performed with the buttons can be done
using the app. To open the app, touch the
OnStar icon on the Home Page. App
updates require a corresponding service
plan. Features vary by region and model.
Features are subject to change. For more
information, see my.chevrolet.com/learn
or press
Q.
Page 333 of 351

Chevrolet Corvette Owner Manual (GMNA-Localizing-U.S./Canada/Mexico-
16287457) - 2023 - CRC - 3/10/22
332 OnStar
Or
.Give OnStar Turn-by-Turn Navigation voice
commands.
.Obtain and customize the Wi-Fi hotspot
name or SSID and password, if equipped.
Press
Qto connect to an Advisor to:
.Verify account information or update
contact information.
.Get driving directions.
.Receive a Diagnostic check of the vehicle's
key operating systems.
.Receive Roadside Assistance.
.Manage Wi-Fi Settings, if equipped.
Press
>to get a priority connection to an
OnStar Advisor available 24/7 to:
.Get help for an emergency.
.Be a Good Samaritan or respond to an
AMBER Alert.
.Get assistance in severe weather or other
crisis situations and find evacuation
routes.
OnStar Services
Emergency
Emergency Services require an active safety
and security plan. With Automatic Crash
Response, built-in sensors can automatically
alert a specially trained OnStar Advisor who
is immediately connected in to the vehicle
to help.
Press
>for a priority connection to an
OnStar Advisor who can contact emergency
service providers, direct them to your exact
location, and relay important information.
With OnStar Crisis Assist, specially trained
Advisors are available 24 hours a day, 7 days
a week, to provide a central point of
contact, assistance, and information during a
crisis.
With Roadside Assistance, Advisors can
locate a nearby service provider to help with
a flat tire, a battery jump, or an empty
gas tank.
Security
If equipped, OnStar provides these services:
.With Stolen Vehicle Assistance, OnStar
Advisors can use GPS to pinpoint the
vehicle and help authorities quickly
recover it.
.With Remote Ignition Block, if equipped,
OnStar can block the vehicle from being
restarted.
.With Stolen Vehicle Slowdown,
if equipped, OnStar can work with law
enforcement to gradually slow the
vehicle down.
Theft Alarm Notification
If equipped, if the doors are locked and the
vehicle alarm sounds, a notification by text,
e-mail, or phone call will be sent. If the
vehicle is stolen, an OnStar Advisor can work
with authorities to recover the vehicle.