2023 CHEVROLET CORVETTE light
[x] Cancel search: lightPage 128 of 351
Chevrolet Corvette Owner Manual (GMNA-Localizing-U.S./Canada/Mexico-
16287457) - 2023 - CRC - 3/10/22
Infotainment System 127
If the vehicle passes the waypoint or gets
out of the current route, the system will
automatically reroute back to this waypoint.
At the same time, it will show a Drive to
icon along with the next waypoint address
so the current waypoint can be skipped and
guidance can resume to the next waypoint
or destination.
Editing a Waypoint
When waypoints are added during active
guidance, the system allows a stop to be
deleted or the order to be changed. To edit
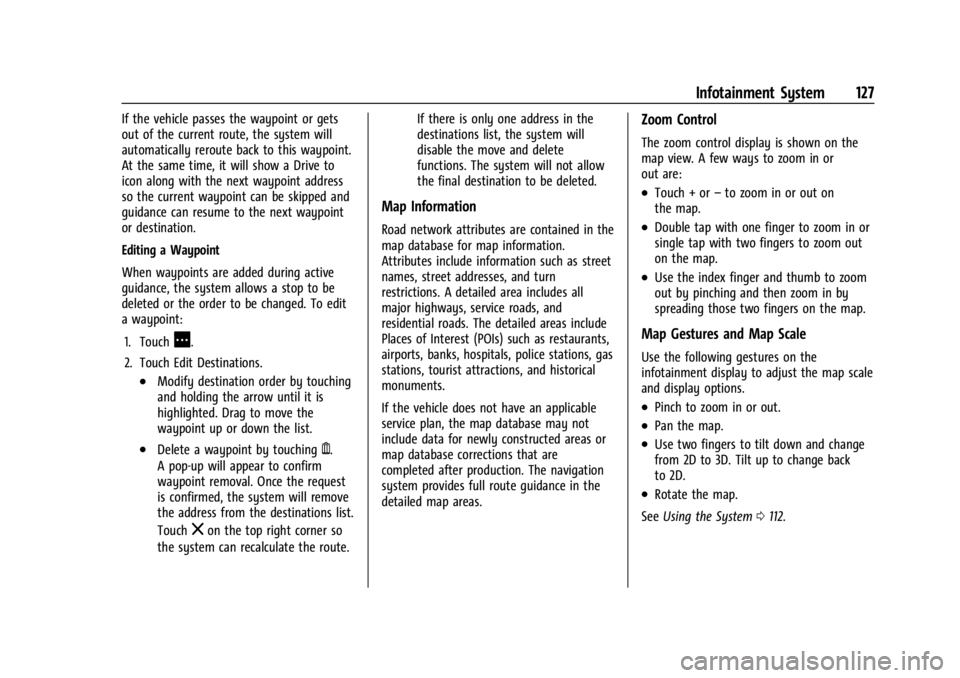
a waypoint:1. Touch
A.
2. Touch Edit Destinations.
.Modify destination order by touching
and holding the arrow until it is
highlighted. Drag to move the
waypoint up or down the list.
.Delete a waypoint by touchingY.
A pop-up will appear to confirm
waypoint removal. Once the request
is confirmed, the system will remove
the address from the destinations list.
Touch
zon the top right corner so
the system can recalculate the route. If there is only one address in the
destinations list, the system will
disable the move and delete
functions. The system will not allow
the final destination to be deleted.
Map Information
Road network attributes are contained in the
map database for map information.
Attributes include information such as street
names, street addresses, and turn
restrictions. A detailed area includes all
major highways, service roads, and
residential roads. The detailed areas include
Places of Interest (POIs) such as restaurants,
airports, banks, hospitals, police stations, gas
stations, tourist attractions, and historical
monuments.
If the vehicle does not have an applicable
service plan, the map database may not
include data for newly constructed areas or
map database corrections that are
completed after production. The navigation
system provides full route guidance in the
detailed map areas.
Zoom Control
The zoom control display is shown on the
map view. A few ways to zoom in or
out are:
.Touch + or
–to zoom in or out on
the map.
.Double tap with one finger to zoom in or
single tap with two fingers to zoom out
on the map.
.Use the index finger and thumb to zoom
out by pinching and then zoom in by
spreading those two fingers on the map.
Map Gestures and Map Scale
Use the following gestures on the
infotainment display to adjust the map scale
and display options.
.Pinch to zoom in or out.
.Pan the map.
.Use two fingers to tilt down and change
from 2D to 3D. Tilt up to change back
to 2D.
.Rotate the map.
See Using the System 0112.
Page 153 of 351
Chevrolet Corvette Owner Manual (GMNA-Localizing-U.S./Canada/Mexico-
16287457) - 2023 - CRC - 3/10/22
152 Infotainment System
Return to Factory Settings
Allows resetting the infotainment system
settings in the vehicle.
Apps
The menu may contain the following:
Android Auto
Allows interacting directly with a mobile
device on the infotainment display. See
Apple CarPlay and Android Auto0148.
Apple CarPlay
This feature allows you to interact directly
with your mobile device on the infotainment
display. See Apple CarPlay and Android Auto
0 148.
Apps
Shows app settings and information.
Audio
Adjusts different audio settings.
Climate
Adjusts different climate settings.
Navigation
Adjusts different navigation settings.
See Using the Navigation System 0122. Phone
Adjusts different phone settings.
Vehicle
The menu may contain the following:
Buckle to Drive
This feature can prevent shifting out of Park
when the driver, and if applicable the front
passenger, seat belt is not buckled. See
Buckle To Drive
045.
Driver Mode Customization
See “Driver Mode Customization” inDriver
Mode Control 0208.
Climate and Air Quality
Adjusts different climate settings.
Collision/Detection Systems
Adjusts different driver assistance system
settings.
Comfort and Convenience
Adjusts different comfort and convenience
settings.
Lighting
Adjusts different lighting settings. Power Door Locks
Adjusts different door lock settings.
Remote Lock, Unlock, and Start
Adjusts different remote lock settings.
Ride Height
See
Front Lift System 0214.
Seating Position
Adjusts different seat settings.
Teen Driver
See Teen Driver 0153.
Valet Mode
This will lock the infotainment system and
steering wheel controls. It may also limit
access to vehicle storage locations,
if equipped.
To enable valet mode: 1. Enter a four-digit code on the keypad.
2. Select Enter to go to the confirmation screen.
3. Re-enter the four-digit code.
Touch Lock or Unlock to lock or unlock the
system. Touch Back to go back to the
previous menu.
Page 156 of 351
Chevrolet Corvette Owner Manual (GMNA-Localizing-U.S./Canada/Mexico-
16287457) - 2023 - CRC - 3/10/22
Infotainment System 155
Teen Driver Speed Limiter :Limits the
maximum speed of the vehicle. When the
speed limiter is turned on and the vehicle is
started with a Teen Driver key, the DIC
displays a message that the top speed is
limited.
On certain vehicles, when the Speed Limiter
is turned ON, the vehicle’s maximum
acceleration will be limited. The DIC will
display a message that the acceleration is
limited.
Teen Driver Speed Warning : Displays a
warning in the DIC when exceeding a
selectable speed. Turn the speed warning on
or off and choose the desired speed warning
level. The speed warning does not limit the
speed of the vehicle. On some infotainment
systems, touch Set Teen Driver Speed
Warning to set the warning speed.
Set Teen Driver Speed Warning : Choose the
desired speed warning level. The speed
warning does not limit the speed of the
vehicle.
SiriusXM Explicit Content Filter : Allows the
SiriusXM Explicit Content Filter to be turned
ON or OFF. When ON, the teen driver will
not be able to listen to SiriusXM stations that contain explicit content, and the Explicit
Content Filter selection in the Audio Settings
will be unavailable for change.
When Teen Driver is Active:
.If equipped, the radio will mute when the
driver seat belt, and in some vehicles the
front passenger seat belt, is not buckled.
The audio from any device paired to the
vehicle will also be muted.
.An object placed on the front passenger
seat, such as a briefcase, handbag,
grocery bag, laptop, or other electronic
device, could cause the passenger sensing
system to falsely sense an unbuckled
front passenger and mute the radio.
If this happens, remove the object from
the seat. See
Passenger Sensing System
0 56.
.Some safety systems, such as Automatic
Emergency Braking, if equipped, cannot
be turned off.
.The gap setting for Adaptive Cruise
Control and alert timing for Forward
Collision Alert, if equipped, cannot be
changed.
.When trying to change a safety feature
that is not configurable in Teen Driver,
the feature may be grayed out or
removed from the infotainment menu, or the DIC will display a message
indicating that Teen Driver is active and
the action is not available.
.Super Cruise, if equipped, is not available.
.Enhanced Low Fuel Warning
(if equipped)
–When the vehicle is low
on fuel, the low fuel light on the
instrument cluster flashes and the DIC
low fuel warning cannot be dismissed.
.Do not tow a trailer if equipped with
Automatic Emergency Braking.
Report Card
The vehicle owner must secure the driver’s
consent to record certain vehicle data when
the vehicle is driven with a registered Teen
Driver key. There is one Report Card per
vehicle. Data is only recorded when a
registered Teen Driver key is used to
operate the vehicle.
The Report Card data is collected from the
time Teen Driver is activated or the last
time the Report Card was reset. The
following items may be recorded:
.Distance Driven –the total distance
driven.
.Maximum Speed –the maximum vehicle
speed detected.
Page 166 of 351
Chevrolet Corvette Owner Manual (GMNA-Localizing-U.S./Canada/Mexico-
16287457) - 2023 - CRC - 3/10/22
Climate Controls 165
For automatic operation:1. Press AUTO.
2. Set the temperature. Allow the system time to stabilize. Adjust the temperature
as needed for best comfort.
Manual Operation
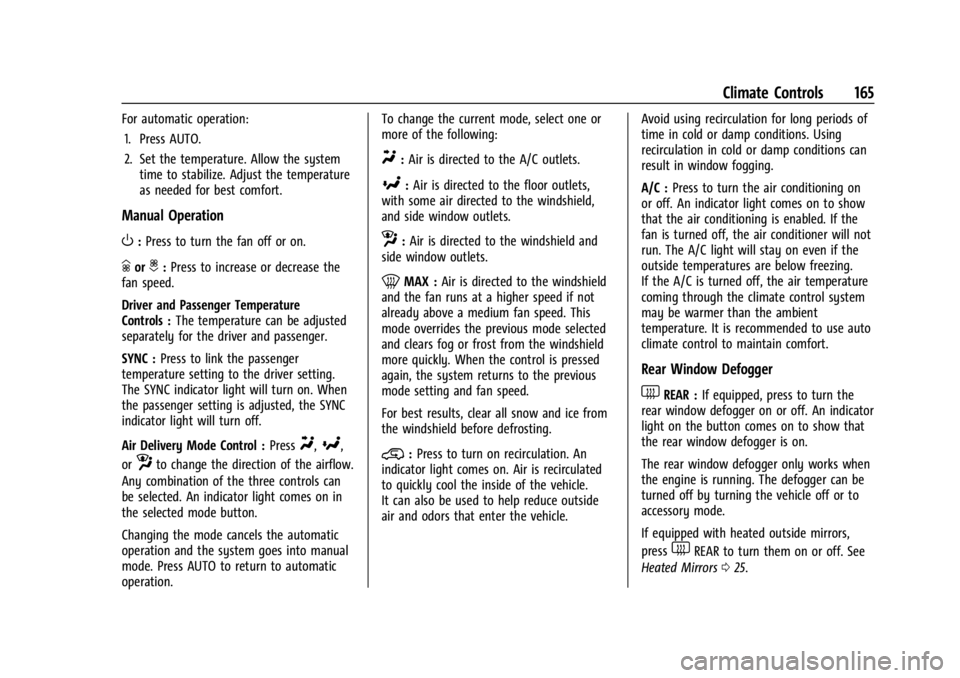
O:Press to turn the fan off or on.
hori:Press to increase or decrease the
fan speed.
Driver and Passenger Temperature
Controls : The temperature can be adjusted
separately for the driver and passenger.
SYNC : Press to link the passenger
temperature setting to the driver setting.
The SYNC indicator light will turn on. When
the passenger setting is adjusted, the SYNC
indicator light will turn off.
Air Delivery Mode Control : Press
Y,[,
or
zto change the direction of the airflow.
Any combination of the three controls can
be selected. An indicator light comes on in
the selected mode button.
Changing the mode cancels the automatic
operation and the system goes into manual
mode. Press AUTO to return to automatic
operation. To change the current mode, select one or
more of the following:
Y:
Air is directed to the A/C outlets.
[:Air is directed to the floor outlets,
with some air directed to the windshield,
and side window outlets.
z: Air is directed to the windshield and
side window outlets.
0MAX : Air is directed to the windshield
and the fan runs at a higher speed if not
already above a medium fan speed. This
mode overrides the previous mode selected
and clears fog or frost from the windshield
more quickly. When the control is pressed
again, the system returns to the previous
mode setting and fan speed.
For best results, clear all snow and ice from
the windshield before defrosting.
@: Press to turn on recirculation. An
indicator light comes on. Air is recirculated
to quickly cool the inside of the vehicle.
It can also be used to help reduce outside
air and odors that enter the vehicle. Avoid using recirculation for long periods of
time in cold or damp conditions. Using
recirculation in cold or damp conditions can
result in window fogging.
A/C :
Press to turn the air conditioning on
or off. An indicator light comes on to show
that the air conditioning is enabled. If the
fan is turned off, the air conditioner will not
run. The A/C light will stay on even if the
outside temperatures are below freezing.
If the A/C is turned off, the air temperature
coming through the climate control system
may be warmer than the ambient
temperature. It is recommended to use auto
climate control to maintain comfort.
Rear Window Defogger
1REAR : If equipped, press to turn the
rear window defogger on or off. An indicator
light on the button comes on to show that
the rear window defogger is on.
The rear window defogger only works when
the engine is running. The defogger can be
turned off by turning the vehicle off or to
accessory mode.
If equipped with heated outside mirrors,
press
1REAR to turn them on or off. See
Heated Mirrors 025.
Page 176 of 351
Chevrolet Corvette Owner Manual (GMNA-Localizing-U.S./Canada/Mexico-
16287457) - 2023 - CRC - 3/10/22
Driving and Operating 175
Brake System Flushing and Bleeding
The J55, J56, and J57 brake systems require
specific processes for bleeding and fluid
flushing. These can be found in the service
manual.
Properly bleeding the brake system is
required for proper operation of the
hydraulic brake system.
Brake Leak Detection
The hydraulic braking system has advanced
diagnostic capability to help detect hydraulic
leaks, trapped air, and other performance
issues. These diagnostics are active when
the hydraulic system is powered. To avoid
inadvertently setting a leak DTC, disconnect
the battery before servicing the brake
system.
If the vehicle sets a DTC related to a brake
system leak, the Brake System Warning
Light will come on and vehicle speed may
be limited to 100 kph (62 mph). Any time a
leak DTC is set, the vehicle should be
inspected carefully for evidence of a leak
and should be repaired immediately. See
your dealer.Brake Fade Warning Assist
The Brake Fade Warning Assist system
monitors brake system performance. If the
system detects brake fade, or if the brake
fluid is near the boiling point, the driver will
be alerted.
The Brake Fade Warning Assist system is
designed for use with the factory-installed
brake pads or GM approved replacement
pads. If the brake pads on the vehicle need
to be replaced, use GM approved brake
pads. If this is not done, the brake fade
warning system may not function properly.
Stage 1 :
The Driver Information Center (DIC)
displays a “Reduce Braking to Avoid
Overheating” message, a chime sounds and
brake pedal effort and travel is increased.
When the message displays, the driver
should back up braking points and reduce
brake usage in order to reduce brake
temperature. This will allow for continued
lapping with no speed limitations. Stage 2 :
The Driver Information Center
(DIC) displays a “Brakes Overheated Service
Now” message, a chime sounds, and brake
pedal effort and travel is further increased.
This code indicates that the brake fluid
temperature is excessive and is about to
boil. The system limits vehicle speed to
100KPH/62MPH. The driver should
immediately start a cool down lap if on the
track. If this message displays, the vehicle
needs to be serviced. The brake system
needs to cool down, and the brake fluid
must be immediately flushed with DOT4 for
street use, or to a qualified DOT4 race fluid
for track use. Boiled brake fluid is
compromised and must be replaced.
Brake Burnishing
Caution
Performing the brake burnish procedure
on a base brake system can result in
brake damage.
Page 178 of 351
Chevrolet Corvette Owner Manual (GMNA-Localizing-U.S./Canada/Mexico-
16287457) - 2023 - CRC - 3/10/22
Driving and Operating 177
2. Apply the brakes 20 times starting at100 km/h (60 mph) to 25 km/h (15 mph)
while decelerating at 0.8 g. This is a
hard brake application. Drive for at least
1.6 km (1.0 mi) between applications.
3. Apply the brakes 12 times starting at 100 km/h (60 mph) to 8 km/h (5 mph)
while decelerating at 0.8 g. This is a
hard brake application. Accelerate as
rapidly as possible without activating
traction control between applications.
4. Cool down: Drive at 100 km/h (60 mph) for approximately 15 km (10 mi) without
using the brakes.
As with all high performance brake systems,
some amount of brake squeal is normal.
Alternative Closed Course Brake Burnishing
Procedure for J55 (Stingray with Z51), J56
(Z06 Standard), and J57 (Z06 Carbon Ceramic)
Brakes
This brake burnish procedure should be run
on vehicles with the Z51 with J55, Z06 with
J56, or Z06 with J57 factory equipped brake
systems. This procedure should only be run on a
track and only on dry pavement. Brake
pedal fade will occur during this track
burnish procedure and can cause brake pedal
travel and force to increase. This could
extend stopping distance until the brakes
are fully burnished.
1. Start track lapping at lower speeds and lower braking efforts for three minutes
of driving. Allow for increased braking
distances due to reduced brake output.
2. After Step 1, increase speed and braking effort for the next six minutes of
lapping, gradually ending up at 90%
effort. Continue to allow for increased
braking distance due to reduced brake
output.
3. Cool the brakes by lapping with minimal light braking for six minutes. Brake Cooling Kit
Before any track event, high speed driving
event, or competitive driving, the following
should be completed:
.Ensure all brake cooling parts are
correctly and securely installed.
.Install the rear lower control arm cooling
ducts per the instructions included with
the kit. After any track event or
competitive driving, remove the rear
lower control arm cooling ducts. These
parts are for track use only. Removing the
ducts helps prevent debris from being
channeled into the rear brakes during
regular use of the vehicle.
.Inspect for and remove any blockage in
the ducts.
.Inspect and replace any duct that has
damage.
Page 184 of 351
Chevrolet Corvette Owner Manual (GMNA-Localizing-U.S./Canada/Mexico-
16287457) - 2023 - CRC - 3/10/22
Driving and Operating 183
Rear (per corner)
.Caster: 0 degrees
.Camber: -2.0 degrees
.Toe (total): 0.1 degrees toe in
.Thrust Angle: 0 degrees
Z06 with Z07 Performance Package Equipped
With Carbon Fiber Wheels (RPOs ROY
and ROZ)
When participating in Track Events or
Competitive Driving with these wheels, a
proper cool down without hot soaking the
wheels is critical.
.On a typical road course 3.2–6.5 km
(2-4 miles) long per lap, one cool down
lap without using the brakes will suffice.
If the track being driven is shorter than
3.2 km (2 mi), perform two cool down
laps without using the brakes.
.If adequate cool down without using the
brakes cannot be achieved (i.e., red flag
on track, have to stop unexpectedly, etc.),
the key is to not have one area of the
wheels exposed to the "chimney effect"
of the heat that rises off of a stationary
hot brake rotor. This can be prevented by
very low speed driving of the car such
that the entire circumference of the wheel is exposed to the heat. Rolling the
car back and forth in a small space is
better than sitting still with hot brakes.
Driving on Wet Roads
Rain and wet roads can reduce vehicle
traction and affect your ability to stop and
accelerate. Always drive slower in these
types of driving conditions and avoid driving
through large puddles and deep-standing or
flowing water.
{Warning
Wet brakes can cause crashes. They
might not work as well in a quick stop
and could cause pulling to one side. You
could lose control of the vehicle.
After driving through a large puddle of
water or a car/vehicle wash, lightly apply
the brake pedal until the brakes work
normally.
Flowing or rushing water creates strong
forces. Driving through flowing water
could cause the vehicle to be carried
away. If this happens, you and other
vehicle occupants could drown. Do not
(Continued)
Warning (Continued)
ignore police warnings and be very
cautious about trying to drive through
flowing water.
Caution
Driving through deep puddles or standing
water can cause water to come in
through the engine air intake and
damage the engine. If deep puddles or
standing water cannot be avoided,
proceed with caution and do not exceed
8 km/h (5 mph). Do not drive through
water that may come close to or cover
the vehicle’s underbody.
Hydroplaning
Hydroplaning is dangerous. Water can build
up under the vehicle's tires so they actually
ride on the water. This can happen if the
road is wet enough and you are going fast
enough. When the vehicle is hydroplaning, it
has little or no contact with the road.
There is no hard and fast rule about
hydroplaning. The best advice is to slow
down when the road is wet.
Page 186 of 351

Chevrolet Corvette Owner Manual (GMNA-Localizing-U.S./Canada/Mexico-
16287457) - 2023 - CRC - 3/10/22
Driving and Operating 185
.Allow greater following distance and
watch for slippery spots. Icy patches can
occur on otherwise clear roads in shaded
areas. The surface of a curve or an
overpass can remain icy when the
surrounding roads are clear. Avoid sudden
steering maneuvers and braking while
on ice.
.Turn off cruise control.
.Turn on Weather Mode. SeeDriver Mode
Control 0208.
Cold Weather Mode
In very low temperatures, a cold weather
message may display on the Driver
Information Center (DIC). The engine speed,
transmission shift patterns, and cabin fan
speed may operate differently to enable the
vehicle to warm up quicker. You can
manually override the cabin fan speed in
cold weather mode.
Blizzard Conditions
Stop the vehicle in a safe place and signal
for help. Stay with the vehicle unless there
is help nearby. If possible, use Roadside
Assistance. See Roadside Assistance Program
0 322. To get help and keep everyone in the
vehicle safe:
.Turn on the hazard warning flashers.
.Tie a red cloth to an outside mirror.
{Warning
Snow can trap engine exhaust under the
vehicle. This may cause exhaust gases to
get inside. Engine exhaust contains
carbon monoxide (CO), which cannot be
seen or smelled. It can cause
unconsciousness and even death.
If the vehicle is stuck in snow:
.Clear snow from the base of the
vehicle, especially any blocking the
exhaust pipe.
.Open a window about 5 cm (2 in) on
the vehicle side that is away from the
wind, to bring in fresh air.
.Fully open the air outlets on or under
the instrument panel.
.Adjust the climate control system to
circulate the air inside the vehicle and
set the fan speed to the highest
setting. See “Climate Control Systems.”
For more information about CO, see
Engine Exhaust 0194. To save fuel, run the engine for short
periods to warm the vehicle and then shut
the engine off and partially close the
window. Moving about to keep warm also
helps.
If it takes time for help to arrive, when
running the engine, push the accelerator
pedal slightly so the engine runs faster than
the idle speed. This keeps the battery
charged to restart the vehicle and to signal
for help with the headlamps. Do this as
little as possible, to save fuel.
If the Vehicle Is Stuck
Slowly and cautiously spin the wheels to
free the vehicle when stuck in sand, mud,
ice, or snow.
If stuck too severely for the traction system
to free the vehicle, turn the traction system
off and use the rocking method. See
Traction Control/Electronic Stability Control
0
206.
{Warning
If the vehicle's tires spin at high speed,
they can explode, and you or others
could be injured. The vehicle can
(Continued)