2023 CHEVROLET CORVETTE stop start
[x] Cancel search: stop startPage 37 of 351
Chevrolet Corvette Owner Manual (GMNA-Localizing-U.S./Canada/Mexico-
16287457) - 2023 - CRC - 3/10/22
36 Keys, Doors, and Windows
.If the vehicle battery is low, the top
operation may be disabled. Try to start
the vehicle. A DIC message displays.
.If the battery has recently been
reconnected or if the vehicle has been
jump started, the top may not operate
until the power windows have been
programmed. Complete the power
window programming procedure. See
Power Windows028.
Other features may be affected while
operating the convertible top:
.If you start the vehicle while using the
remote key to open the convertible top,
the convertible top will halt the motion.
After starting the vehicle, use the
convertible top switch inside the vehicle
to continue the top motion.
.The windows cannot close while the top
is moving.
.When driving with the top not fully
secured, chimes can be heard above
50 km/h (31 mph).
.The Rear Camera Mirror will not work
with the convertible top down. Use the
tab to switch to the standard mirror
display. If the vehicle battery has been disconnected
and reconnected, if the fuses were pulled or
replaced, or if a jump start was performed, a
message indicating the top is not secure
may display. Press and release
Kand then
quickly press and hold
Mon the remote
key, or press and hold
Mon the driver
door switch to open the top, or pull and
hold
Mon the driver door switch to close
the top until this message clears.
Partial Top Cycling
If the convertible top operation is stopped
before completion, the top will temporarily
hold its position. Over time, the tonneau
may drift to a near closed position.
Opening the Tonneau Cover —Engine Access
{Warning
When opening or closing the tonneau
cover, people can be injured by the
moving parts of the tonneau cover.
Maintain visual contact with the tonneau
cover when it is in motion and keep
hands and objects away from the moving
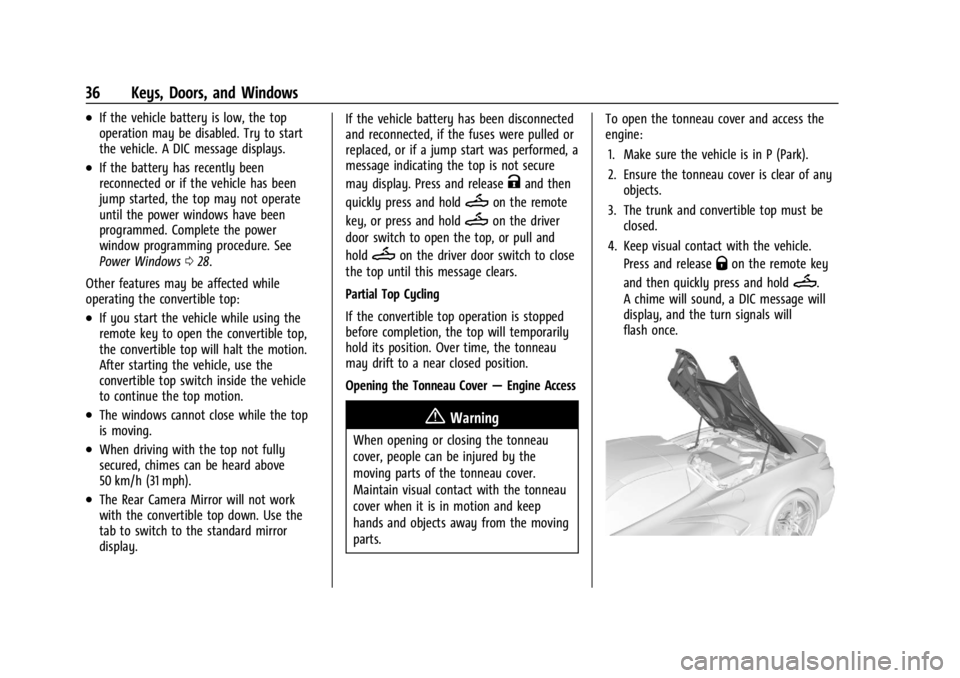
parts. To open the tonneau cover and access the
engine:
1. Make sure the vehicle is in P (Park).
2. Ensure the tonneau cover is clear of any objects.
3. The trunk and convertible top must be closed.
4. Keep visual contact with the vehicle. Press and release
Qon the remote key
and then quickly press and hold
M.
A chime will sound, a DIC message will
display, and the turn signals will
flash once.
Page 45 of 351
Chevrolet Corvette Owner Manual (GMNA-Localizing-U.S./Canada/Mexico-
16287457) - 2023 - CRC - 3/10/22
44 Seats and Restraints
If equipped with a heated steering wheel,
the auto heated steering wheel activation
will follow the heated seat auto activation
and the heated wheel indicator will follow
the state of the steering wheel heat.
Remote Start Heated and Ventilated Seats
During a remote start (if equipped), the
heated or ventilated seats can be turned on
automatically. When it is cold outside, the
heated seats turn on, and when it is hot
outside the ventilated seats turn on. The
heated and ventilated seat indicators and
heated steering wheel indicator may come
on during this operation. The heated or
ventilated seats are canceled when the
vehicle is turned on. Press the heated or
ventilated seat button to use the heated or
ventilated seats after the vehicle is started.
The temperature performance of an
unoccupied seat may be reduced. This is
normal.
To enable or disable remote start heated or
ventilated seats, select Settings > Vehicle >
Remote Lock, Unlock, and Start > Remote
Start Auto Heat Seats or Remote Start Auto
Cool Seats > ON or OFF. SeeRemote Vehicle
Start 012.Seat Belts
This section describes how to use seat belts
properly, and some things not to do.
{Warning
Do not let anyone ride where a seat belt
cannot be worn properly. In a crash,
if you or your passenger(s) are not
wearing seat belts, injuries can be much
worse than if you are wearing seat belts.
You can be seriously injured or killed by
hitting things inside the vehicle harder or
by being ejected from the vehicle. In
addition, anyone who is not buckled up
can strike other passengers in the vehicle.
It is extremely dangerous to ride in a
cargo area, inside or outside of a vehicle.
In a collision, passengers riding in these
areas are more likely to be seriously
injured or killed. Do not allow passengers
to ride in any area of the vehicle that is
not equipped with seats and seat belts.
Always wear a seat belt, and check that
all passenger(s) are restrained
properly too. This vehicle has indicators as a reminder to
buckle the seat belts. See
Seat Belt
Reminders 084.
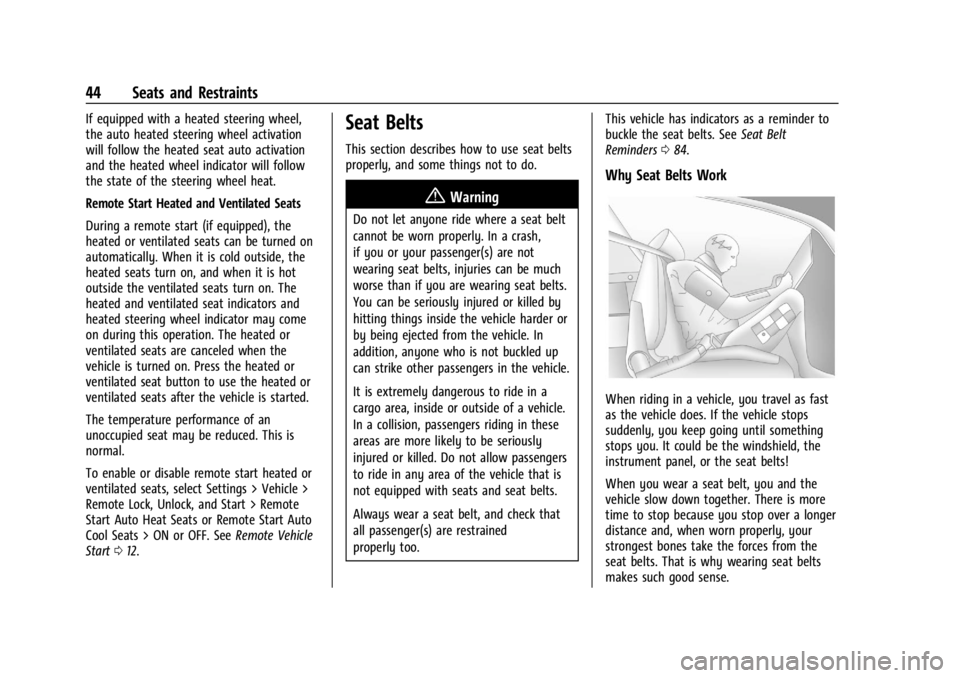
Why Seat Belts Work
When riding in a vehicle, you travel as fast
as the vehicle does. If the vehicle stops
suddenly, you keep going until something
stops you. It could be the windshield, the
instrument panel, or the seat belts!
When you wear a seat belt, you and the
vehicle slow down together. There is more
time to stop because you stop over a longer
distance and, when worn properly, your
strongest bones take the forces from the
seat belts. That is why wearing seat belts
makes such good sense.
Page 75 of 351
Chevrolet Corvette Owner Manual (GMNA-Localizing-U.S./Canada/Mexico-
16287457) - 2023 - CRC - 3/10/22
74 Instruments and Controls
1X :For a single wipe, briefly move the
wiper lever down. For several wipes, hold
the wiper lever down.
f: Pull the windshield wiper lever
toward you to spray washer fluid and
activate the wipers. The wipers will continue
until the lever is released or the maximum
wash time is reached. When the lever is
released, additional wipes may occur
depending on how long the windshield
washer had been activated. See Washer
Fluid 0256 for information on filling the
windshield washer fluid reservoir.
Clear snow and ice from the wiper blades
and windshield before using them. If frozen
to the windshield, carefully loosen or thaw
them. Damaged blades should be replaced.
See Wiper Blade Replacement 0262.
Heavy snow or ice can overload the wiper
motor.
{Warning
In freezing weather, do not use the
washer until the windshield is warmed.
Otherwise the washer fluid can form ice
on the windshield, blocking your vision.
{Warning
Before driving the vehicle, always clear
snow and ice from the hood, windshield,
washer nozzles, roof, and rear of the
vehicle, including all lamps and windows.
Reduced visibility from snow and ice
buildup could lead to a crash.
Wiper Parking
If the ignition is turned off while the wipers
are on LO, HI, or INT, they will
immediately stop.
If the windshield wiper lever is then moved
to OFF before the driver door is opened or
within 10 minutes, the wipers will restart
and move to the base of the windshield.
If the ignition is turned off while the wipers
are performing wipes due to windshield
washing, the wipers continue to run until
they reach the base of the windshield.
Compass
The vehicle may have a compass display on
the center stack. The compass receives its
heading and other information from the
Global Positioning System (GPS) antenna,
Electronic Stability Control, and vehicle
speed information.
The compass system is designed to operate
for a certain number of miles or degrees of
turn before needing a signal from the GPS
satellites. When the compass display shows
CAL, drive the vehicle for a short distance in
an open area where it can receive a GPS
signal. The compass system will
automatically determine when a GPS signal
is restored and provide a heading again.
Clock
Set the time and date using the
infotainment system. See "Time/Date" under
Settings 0150.
Page 81 of 351
Chevrolet Corvette Owner Manual (GMNA-Localizing-U.S./Canada/Mexico-
16287457) - 2023 - CRC - 3/10/22
80 Instruments and Controls
Performance
Press the thumbwheel to enter the
Performance menu. Scroll through the
available items.
G-force :Gives the driver an indication of
the vehicle performance in cornering. The
G-force gauge will show as an info tile on
the left side of the cluster, if selected.
Friction Bubble : A four quadrant visual
display, indicative of the four corners of the
car, with a “bubble”showing where the
most inertia is being exerted on the vehicle.
Launch Control : If equipped, the Launch
Control display allows the driver to adjust
the parameters of the Launch Control
System. See Track Events and Competitive
Driving 0172.
Performance Timer : Press the thumbwheel
to enter the setup menu, then select Set
Start Speed. Scroll to desired Start Speed,
then press the thumbwheel to save it. While
on this menu, to change the End Speed,
scroll to End Speed and use the thumbwheel
to scroll to desired End Speed. Press the
thumbwheel to save it. On the next
acceleration, the performance timer will record the time. Pressing the thumbwheel
while the timer is running will cancel the
timer if done before reaching the End Speed.
Lap Timer (without PDR) :
Press
Twhen
Lap Timer is displayed to start, stop, or reset
the lap timer. Press the thumbwheel while
the Lap Timer page is active to start the
timer. If the lap timer is active, pressing the
thumbwheel will stop the current lap timer
and start a new lap. Pressing the
thumbwheel within 10 seconds after
completing the last lap (Stop Lap Timer
option is displayed), the Lap Timer will stop.
Lap Timer (with PDR) : The lap times
recorded with the PDR system will
automatically be displayed in this window.
This only happens if a track has been
selected in the PDR system and a video
recording is started. See Performance Data
Recorder (PDR) 0138.
Oil Temperature : Shows the current oil
temperature in either degrees Celsius (°C) or
degrees Fahrenheit (°F).
Oil Pressure : Shows the current oil pressure
in either kilopascal (kPa) or in pounds per
square inch (psi).
Battery Voltage : Shows the current battery
voltage. Transmission Fluid Temperature :
Shows the
temperature of the transmission fluid in
either degrees Celsius (°C) or degrees
Fahrenheit (°F).
Tire Status : Shows individual tire pressures
and overall temperature as either Cold, Cool,
Normal, Warm, or Hot. Normal is typical for
normal driving while Warm is typical for
aggressive driving. Unknown may be
displayed if tire temperature information is
unavailable.
eLSD : If equipped, displays the amount of
rear differential coupling when the Electronic
Limited-Slip Differential (eLSD) is active and
functioning during vehicle operation.
A reading of 1% is an open differential and
100% is locked. It is normal for the value to
make small or large changes due to driving
conditions and driver inputs. See Limited-Slip
Differential (Stingray Models Without Z51
Performance Package) 0218 or
Limited-Slip Differential (Stingray With Z51
Performance Package and Z06 model) 0219.
Front Lift : During a driver requested Front
Lift (if equipped), the driver may
"remember" using the
S, or dismiss the
display by pressing the thumbwheel. When
the Front Lift is Raised due to location, the
Page 87 of 351

Chevrolet Corvette Owner Manual (GMNA-Localizing-U.S./Canada/Mexico-
16287457) - 2023 - CRC - 3/10/22
86 Instruments and Controls
If a short distance must be driven with the
light on, be sure to turn off all accessories,
such as the radio and air conditioner. Find a
safe place to stop the vehicle.
Malfunction Indicator Lamp
(Check Engine Light)
This light is part of the vehicle’s emission
control on-board diagnostic system. If this
light is on while the engine is running, a
malfunction has been detected and the
vehicle may require service. The light should
come on to show that it is working when
the ignition is in Service Mode. SeeIgnition
Positions 0190.
Malfunctions are often indicated by the
system before any problem is noticeable.
Being aware of the light and seeking service
promptly when it comes on may prevent
damage.
Caution
If the vehicle is driven continually with
this light on, the emission control system
may not work as well, the fuel economy
may be lower, and the vehicle may not
run smoothly. This could lead to costly
repairs that might not be covered by the
vehicle warranty.
Caution
Modifications to the engine, transmission,
exhaust, intake, or fuel system, or the
use of replacement tires that do not
meet the original tire specifications, can
cause this light to come on. This could
lead to costly repairs not covered by the
vehicle warranty. This could also affect
the vehicle’s ability to pass an Emissions
Inspection/Maintenance test. See
Accessories and Modifications 0232.
If the light is flashing : A malfunction has
been detected that could damage the
emission control system and increase vehicle
emissions. Diagnosis and service may be
required. To help prevent damage, reduce vehicle
speed and avoid hard accelerations and
uphill grades.
If the light continues to flash, find a safe
place to park. Turn the vehicle off and wait
at least 10 seconds before restarting the
engine. If the light is still flashing, follow
the previous guidelines and see your dealer
for service as soon as possible.
If the light is on steady :
A malfunction has
been detected. Diagnosis and service may be
required.
Check the following:
.If fuel has been added to the vehicle
using the capless funnel adapter, make
sure that it has been removed. See
“Filling the Tank with a Portable Gas Can”
under Filling the Tank 0228. The
diagnostic system can detect if the
adapter has been left installed in the
vehicle, allowing fuel to evaporate into
the atmosphere. A few driving trips with
the adapter removed may turn off the
light.
.Poor fuel quality can cause inefficient
engine operation and poor driveability,
which may go away once the engine is
warmed up. If this occurs, change the fuel
Page 92 of 351

Chevrolet Corvette Owner Manual (GMNA-Localizing-U.S./Canada/Mexico-
16287457) - 2023 - CRC - 3/10/22
Instruments and Controls 91
Tire Pressure Light
If equipped with the Tire Pressure Monitor
System (TPMS), this light comes on briefly
when the vehicle is started. It provides
information about tire pressures and
the TPMS.
When the Light Is On Steady
This indicates that one or more of the tires
are significantly underinflated.
A Driver Information Center (DIC) tire
pressure message may also display. Stop as
soon as possible, and inflate the tires to the
pressure value shown on the Tire and
Loading Information label. SeeTire Pressure
0 278.
When the Light Flashes First and Then Is On
Steady
If the light flashes for about a minute and
then stays on, there may be a problem with
the TPMS. If the problem is not corrected, the light will come on every time the
vehicle is started. See
Tire Pressure Monitor
Operation 0281.
Engine Oil Pressure Light
Caution
Driving the vehicle with low engine oil
pressure can damage the engine and the
repairs would not be covered by the
vehicle warranty.
If the engine oil pressure light comes on
while driving:
1. Stop in a safe location and turn off the engine.
2. Check the oil level. See Engine Oil
(5.5L LT6 Engine) 0242 or
Engine Oil (6.2L LT2 Engine) 0245.
3. Add oil if the oil level is below the normal operating range.
4. Restart the vehicle. If the engine oil pressure light stays on for more
than 10 seconds, turn the vehicle
back off. Do not restart the vehicle.
See your dealer for service.This light should come on briefly when the
engine starts. When the engine is off and
the vehicle is on, the light should remain
illuminated. If it does not come on under
either condition, contact your dealer.
If the light comes on and stays on when the
engine is running, it may not have adequate
oil pressure. The oil level may be low or
there may be some other oil system
problem. Turn the engine off when it is safe
to do so and contact your dealer.
Security Light
Page 95 of 351
Chevrolet Corvette Owner Manual (GMNA-Localizing-U.S./Canada/Mexico-
16287457) - 2023 - CRC - 3/10/22
94 Instruments and Controls
Transmission Fluid Life :Displays an
estimate of the fluid's remaining useful life.
If REMAINING FLUID LIFE 99% is displayed,
that means 99% of the current fluid life
remains.
When the remaining fluid life is low, the
CHANGE TRANSMISSION FLUID SOON
message will appear on the display. The
fluid should be changed as soon as possible.
See Dual Clutch Transmission Fluid Life
System 0249. In addition to the
Transmission Fluid Life system monitoring
the fluid life, additional maintenance is
recommended in the Maintenance Schedule.
See Maintenance Schedule 0306.
The Fluid Life display must be reset after
each fluid change. It will not reset itself. Do
not reset the Fluid Life display accidentally
at any time other than when the fluid has
just been changed. It cannot be reset
accurately until the next fluid change. To
reset, see Dual Clutch Transmission Fluid Life
System 0249.
Transmission Filter Life : Displays an
estimate of the filter’s remaining useful life.
If REMAINING FILTER LIFE 99% is displayed,
that means 99% of the current filter life
remains. When the remaining filter life is low, the
REPLACE TRANSMISSION FILTER SOON
message will appear on the display. The
external canister filter should be replaced as
soon as possible. See
Dual Clutch
Transmission Fluid Life System 0249. In
addition to the Transmission Filter Life
system monitoring the filter life, additional
maintenance is recommended in the
Maintenance Schedule. See Maintenance
Schedule 0306.
The Transmission Filter Life display must be
reset after each filter replacement. It will
not reset itself. Do not reset the
Transmission Filter Life display accidentally
at any time other than when the filter has
just been replaced. It cannot be reset
accurately until the next filter change. To
reset, see Dual Clutch Transmission Fluid Life
System 0249.
Fuel Economy : Displays the average fuel
economy, the best fuel economy over the
selected distance, and a bar graph showing
instantaneous fuel economy. Pressing the
thumbwheel will open a menu to change
the selected distance or reset the current
values. Timer/Fuel Used :
This display can be used
as a timer. To start/stop the timer, press the
thumbwheel while this display is active and
then select the start/stop the timer. The
display will show the amount of time that
has passed since the timer was last reset. To
reset the timer to zero, press the
thumbwheel to access the menu while this
display is active.
Fuel Used displays the approximate liters (L)
or gallons (gal) of fuel that have been used
since last reset. The fuel used can be reset
by pressing the thumbwheel and selecting
Reset Fuel Used in the menu.
Economy Trend : Shows the instantaneous
fuel economy and current gas mileage.
Speed Limit : Displays sign information,
which comes from a roadway database in
the on-board navigation.
Engine Hours/Lifetime Revs : Displays the
total number of hours the engine has run.
It also shows total engine revolutions
divided by 10,000.
Page 100 of 351
Chevrolet Corvette Owner Manual (GMNA-Localizing-U.S./Canada/Mexico-
16287457) - 2023 - CRC - 3/10/22
Instruments and Controls 99
driven. The vehicle may be driven while this
message is on, but maximum acceleration
and speed may be reduced. Anytime this
message stays on, or displays repeatedly,
the vehicle should be taken to your dealer
for service as soon as possible.
Under certain operating conditions,
propulsion will be disabled. Try restarting
after the ignition has been off for
two minutes.
Vehicle Speed Messages
SPEED LIMITED TO XXX KM/H (MPH)
This message shows that the vehicle speed
has been limited to the speed displayed. The
limited speed is a protection for various
propulsion and vehicle systems, such as
lubrication, thermal, brakes, suspension,
Teen Driver if equipped, or tires.
Universal Remote System
SeeRadio Frequency Statement 0327.
The FCC Grant of Equipment Authorization
Certificate number is NZLSAHL5B.
The Canadian Registration ID number is
4112A-SAHL5B.
Universal Remote System
Programming
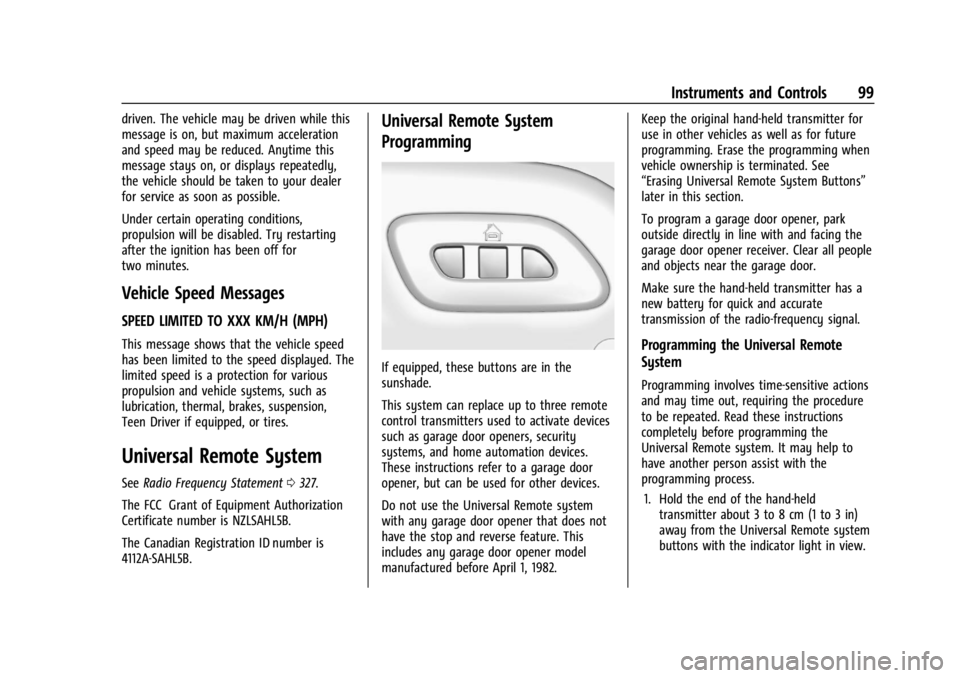
If equipped, these buttons are in the
sunshade.
This system can replace up to three remote
control transmitters used to activate devices
such as garage door openers, security
systems, and home automation devices.
These instructions refer to a garage door
opener, but can be used for other devices.
Do not use the Universal Remote system
with any garage door opener that does not
have the stop and reverse feature. This
includes any garage door opener model
manufactured before April 1, 1982. Keep the original hand-held transmitter for
use in other vehicles as well as for future
programming. Erase the programming when
vehicle ownership is terminated. See
“Erasing Universal Remote System Buttons”
later in this section.
To program a garage door opener, park
outside directly in line with and facing the
garage door opener receiver. Clear all people
and objects near the garage door.
Make sure the hand-held transmitter has a
new battery for quick and accurate
transmission of the radio-frequency signal.
Programming the Universal Remote
System
Programming involves time-sensitive actions
and may time out, requiring the procedure
to be repeated. Read these instructions
completely before programming the
Universal Remote system. It may help to
have another person assist with the
programming process.
1. Hold the end of the hand-held transmitter about 3 to 8 cm (1 to 3 in)
away from the Universal Remote system
buttons with the indicator light in view.