2023 ALFA ROMEO GIULIA center console
[x] Cancel search: center consolePage 11 of 248

9
EXTERIOR LIGHTS ....................................42
Headlight Switch .................................... 42
Daytime Running Lights (DRLs) ............ 43
High Beam Headlights ........................... 43
Automatic Headlights ........................... 43
Flash-To-Pass ......................................... 43
Automatic High Beam Headlights —
If Equipped ............................................. 44 Parking Lights ........................................ 44
Headlight Off Delay ................................ 44
Rear Fog Light ........................................ 44
Adaptive Frontlight System
(AFS Function) — If Equipped ................ 45 Turn Signals ........................................... 45
Lane Change Assist ............................... 45
Static Bending Light Function
(SBL) — If Equipped ............................... 45
INTERIOR LIGHTS .....................................45
Front Map Reading Lights ..................... 45
Interior Ambient Lighting ....................... 46
Rear Overhead Light .............................. 46
Instrument Panel Dimmer Control ....... 46
WINDSHIELD WIPERS AND WASHERS....47
Windshield Wiper Operation ................. 47
Rain Sensing Wipers.............................. 48
Headlight Washers — If Equipped......... 48
CLIMATE CONTROL .................................48
Automatic Dual-Zone Climate Control
System ................................................... 49
INTERIOR STORAGE AND EQUIPMENT....55
Glove Compartment .............................. 55
Center Console ...................................... 55
Power Outlet........................................... 56
Wireless Charging Pad — If Equipped... 57
POWER WINDOWS................................... 57
Power Window Controls .........................57
Auto-Up Feature With Anti-Pinch
Protection ............................................... 58 Power Window System Initialization .....58
Wind Buffeting .......................................58
POWER SUNROOF —
IF EQUIPPED ............................................ 58
Power Sunroof ........................................ 58
Opening And Closing The Sunroof ........59
Venting Sunroof......................................59
Sunshade Operation ..............................59
Pinch Protect Feature ............................59
Re-Initialization Procedure ....................59
Sunroof Maintenance ............................60
HOOD ...................................................... 60
Opening The Hood ................................. 60
Closing The Hood ...................................61
TRUNK ...................................................... 61
Opening...................................................61
Closing ....................................................62
Trunk Re-Initialization ............................62
Trunk Specifications .............................62
ENVIRONMENTAL PROTECTION
SYSTEMS ................................................. 63
ACTIVE AERODYNAMIC SPOILER
(QUADRIFOGLIO VEHICLES) .................... 63
Carbon Fiber Active Aero Front
Spoiler .....................................................63
GETTING TO KNOW YOUR
INSTRUMENT PANEL
INSTRUMENT PANEL FEATURES ............ 64
Instrument Cluster ................................ 64
Tachometer............................................ 65
Engine Oil Temperature Gauge ............ 65
Fuel Level Gauge ................................... 66
Speedometer ......................................... 66
INSTRUMENT CLUSTER DISPLAY ........... 66
Instrument Cluster Display
Description ............................................. 66 Reconfigurable Instrument Cluster
Display .................................................... 66 Reconfigurable Display Items ............... 66
Customer Programmable Settings ....... 69
WARNING LIGHTS AND MESSAGES
ON THE INSTRUMENT PANEL ................. 70
Red Warning Lights ............................... 71
Amber Warning Lights ........................... 72
Green Indicator Lights........................... 74
Blue Indicator Lights ............................. 74
Red Symbols .......................................... 74
Amber Symbols ...................................... 76
Green Symbols ...................................... 79
Blue Symbols ......................................... 79
ONBOARD DIAGNOSTIC SYSTEM ........... 79
Onboard Diagnostic System (OBD II)
Cybersecurity ......................................... 80
EMISSIONS INSPECTION AND
MAINTENANCE PROGRAMS .................... 80
23_GA_OM_EN_USC_t.book Page 9
Page 24 of 248

GETTING TO KNOW YOUR VEHICLE
22
IGNITION SWITCH
KEYLESS PUSH BUTTON IGNITION
This feature allows the driver to operate the
ignition switch with the push of a button as long
as the key fob is in the passenger compartment.
The START/STOP ignition button has several
operating modes. These modes are OFF, ACC,
and ON/RUN.START/STOP Ignition Button
The push button ignition can be placed in the
following modes:
OFF
The engine is stopped
Steering is locked
Some electrical devices (e.g. central locking,
alarm, etc.) are still available
ACC
Engine is not started
Some electrical devices are available (e.g.
power windows) ON/RUN
The engine will start (when foot is on the brake
pedal)
All electrical devices are available (e.g. climate
controls, etc.)
If the ignition switch does not change the mode
by pushing the button, the key fob may have a low
or depleted battery. In this situation, a backup
method can be used to operate the ignition
switch. Proceed as follows:
1. Lift the front armrest.
2. Lay the key fob on the indicated spot in the bottom of the center console, positioning the
key fob as shown in the following image,
while pushing the START/STOP ignition
button to start the ignition.
Key Fob Placement Location
NOTE:
For more information on proper engine
starting procedures, see
Ú
page 81.
With the keyless ignition in the ACC position, if
30 minutes pass with the gear selector in
PARK and the engine off, the ignition will
automatically reset to the OFF position.
When opening the driver's door with the
ignition in the ACC position (engine not
running), a chime will sound to remind you to
place the ignition in the OFF position. In
addition to the chime, the message will display
“Ignition Or Accessory On” in the cluster.
WARNING!
When exiting the vehicle, always make sure
the ignition is in the OFF position, remove the
key fob from the vehicle, and lock your
vehicle.
Never leave children alone in a vehicle, or
with access to an unlocked vehicle.
Allowing children to be in a vehicle
unattended is dangerous for a number of
reasons. A child or others could be seriously
or fatally injured. Children should be warned
not to touch the parking brake, brake pedal
or the gear selector.
Do not leave the key fob in or near the
vehicle, or in a location accessible to
children, and do not leave the keyless push
button ignition in the ON/RUN position. A
child could operate power windows, other
controls, or move the vehicle.
Do not leave children or animals inside
parked vehicles in hot weather. Interior heat
buildup may cause serious injury or death.
CAUTION!
An unlocked vehicle is an invitation for thieves.
Always remove key fob from the vehicle and lock
all doors when leaving the vehicle unattended.
23_GA_OM_EN_USC_t.book Page 22
Page 38 of 248

GETTING TO KNOW YOUR VEHICLE
36
Rear Heated Seats — If Equipped
If equipped with rear heated seats, the
controls can be found on the rear of the
center console and will function the
same as the front heated seat controls.Rear Heated Seat Buttons
NOTE:
To preserve the battery charge, this function
cannot be activated when the engine is off.
HEAD RESTRAINTS
Head restraints are designed to reduce the risk of
injury by restricting head movement in the event
of a rear impact. Head restraints should be
adjusted so that the top of the head restraint is
located above the top of your ear.
Sparco Racing Seat Head Restraints
(Quadrifoglio Vehicles) — If Equipped
Head restraints on Sparco Racing Seats (front
seats) are non-adjustable and non-removable.
The non-adjustable head restraints consist of a
trimmed foam covering over the upper structure
of the seatbacks and are intended to help protect
you and the passenger from neck injury.
Adjust the seatbacks to their upright, on-road
positions so that the head restraint is positioned
as close as possible to the back of your head.
Front Head Restraints
The front head restraints may be height- adjustable.
To raise the head restraint, pull up on the head
restraint until it clicks into place.
To lower the head restraint, push in the
adjustment button and lower the head restraint
to the desired height while holding the button.
Then, release the adjustment button.
NOTE:
To allow maximum visibility for the driver, if the
head restraints are not in use, lower the head
restraint all the way.
WARNING!
A loose head restraint thrown forward in a
collision or hard stop could cause serious
injury or death to occupants of the vehicle.
Always securely stow removed head
restraints in a location outside the occupant
compartment.
ALL the head restraints MUST be reinstalled
in the vehicle to properly protect the
occupants. Follow the preceding reinstal -
lation instructions prior to operating the
vehicle or occupying a seat.
WARNING!
All occupants, including the driver, should
not operate a vehicle or sit in a vehicle’s seat
until the head restraints are placed in their
proper positions in order to minimize the risk
of neck injury in the event of a crash.
Head restraints should never be adjusted
while the vehicle is in motion. Driving a
vehicle with the head restraints improperly
adjusted or removed could cause serious
injury or death in the event of a collision.
23_GA_OM_EN_USC_t.book Page 36
Page 47 of 248

45
ADAPTIVE FRONTLIGHT SYSTEM
(AFS F
UNCTION) — IF EQUIPPED
This is a system combined with Xenon headlights
(Bi-Xenon 35 W headlamp if equipped) which
directs the headlights horizontally, and contin -
uously and automatically adapts them to the
driving conditions around bends or when
cornering.
The system directs the headlights to light up the
road in the best way, taking into account the
speed of the vehicle and the bend or corner
angle, as well as the speed at which the steering
wheel is turned.
The adaptive lights are automatically activated
when the vehicle is started.
TURN SIGNALS
Move the multifunction lever up or down to
activate the turn signals. The arrows on each side
of the instrument cluster flash to show proper
operation.
The or turn signal will blink on the
instrument panel.
LANE CHANGE ASSIST
Lightly push the lever up or down once, without
moving beyond the detent, and the turn signal will
flash five times then automatically turn off.
To turn off the flashing before the end of the
cycle, move the lever in the opposite direction
until the first click (about half way).
STATIC BENDING LIGHT FUNCTION
(SBL) — IF EQUIPPED
The SBL function utilizes Light Emitting Diodes
(LEDs) in order to better illuminate the street and
increase the light angle while turning. This
function is enabled by rotating the light switch to
position (on) or (AUTO). The SBL LEDs
activate when the speed is below 25 mph
(40 km/h) and the steering radius is below
0.3 miles (500 m).
This function can be activated/deactivated on the
radio system by selecting the following functions
in sequence on the main menu:
1. Settings
2. Lights
3. Cornering Lights
INTERIOR LIGHTS
Courtesy lights are turned on when the front
doors are opened or when the dimmer control is
rotated to its farthest upward position. The glove
compartment light turns on automatically when
the glove compartment is opened and turn off
when it is closed. The door courtesy lights
illuminate when one of the front doors is opened,
and turn off when it is closed. The trunk courtesy
lights turn on automatically when the trunk is
opened and turn off when it is closed. All of these
lights turn on and off regardless of the ignition
status.
FRONT MAP READING LIGHTS
The front map/reading and overhead lights are
mounted in the overhead console. Each light can
be turned on by pushing the corresponding switch on the console. These switches are backlit for
night time visibility. To turn the lights off, push the
switch a second time.
Overhead Console
NOTE:
Before getting out of the vehicle, ensure that the
overhead lights are off. This will prevent the
battery level from being drained once the doors
are closed. If a light is left on accidentally, the
overhead lights turn off automatically approxi -
mately 15 minutes after the engine has been
turned off.
1 — Driver’s Reading/Map Light Switch
2 — Rear Overhead Lights Switch
3 — Overhead Lights Switch
4 — Front Map Reading Lights Switch
5 — Passenger’s Reading/Map Light Switch
6 — Passenger’s Reading/Map Light
7 — Center Reading/Map Light
8 — Driver’s Reading/Map Light
23_GA_OM_EN_USC_t.book Page 45
Page 57 of 248

55
With the Stop/Start system on (engine is off), air
flow is reduced to keep the compartment comfort
conditions for longer.
Until the temperature drastically changes within
the cabin, the climate control system will
continue to maintain the temperature while the
engine is off. By deactivating the Stop/Start
system with the button (located by the
headlight switch), the climate control system
operates normally according to the settings.
NOTE:
In harsh climate conditions, limit the use of the
Stop/Start system to prevent the compressor
from continuously switching on and off. This
will prevent rapid misting of the windows and
the accumulation of humidity in the passenger
compartment.
When the Stop/Start system is on, the climate
control system will always take air in from
outside, reducing the probability of the
windows fogging up.
System Maintenance
In winter months, the Climate Control system
must be turned on at least once a month for
approximately ten minutes.
Have the system inspected at an authorized
dealer before the summer.
INTERIOR STORAGE AND
EQUIPMENT
GLOVE COMPARTMENT
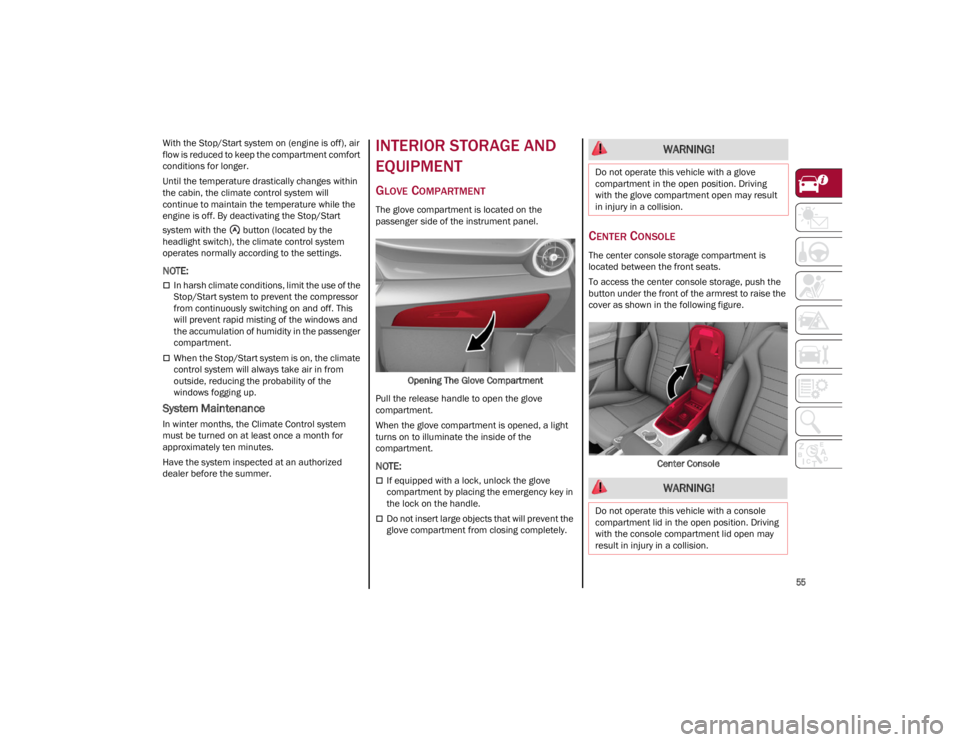
The glove compartment is located on the
passenger side of the instrument panel.Opening The Glove Compartment
Pull the release handle to open the glove
compartment.
When the glove compartment is opened, a light
turns on to illuminate the inside of the
compartment.
NOTE:
If equipped with a lock, unlock the glove
compartment by placing the emergency key in
the lock on the handle.
Do not insert large objects that will prevent the
glove compartment from closing completely.
CENTER CONSOLE
The center console storage compartment is
located between the front seats.
To access the center console storage, push the
button under the front of the armrest to raise the
cover as shown in the following figure.
Center Console
WARNING!
Do not operate this vehicle with a glove
compartment in the open position. Driving
with the glove compartment open may result
in injury in a collision.
WARNING!
Do not operate this vehicle with a console
compartment lid in the open position. Driving
with the console compartment lid open may
result in injury in a collision.
23_GA_OM_EN_USC_t.book Page 55
Page 58 of 248

GETTING TO KNOW YOUR VEHICLE
56
POWER OUTLET
Your vehicle is equipped with a 12 Volt (15 Amp)
power outlet that can be used to power cellular
phones, small electronics and other low powered
electrical accessories. The power outlet is labeled
with a key symbol to indicate how the outlet is
powered. Power outlets labeled with a key are
powered when the ignition is in the ON/RUN or
ACC position.
NOTE:
All accessories connected to powered outlets
should be removed or turned off when the vehicle
is not in use to protect the battery against
discharge.
115 Volt Power Inverter — If Equipped
The Power Inverter is located inside of the center
console. It can be used for small battery-powered
electrical appliances with powers up to 150 W
(e.g. cameras, video camera, tablets, razors,
etc.).
NOTE:
Do not connect devices with powers higher than
150 W to the socket. Do not damage the socket
by using unsuitable adapters.Center Console Power Outlet
WARNING!
To avoid serious injury or death:
Only devices designed for use in this type of
outlet should be inserted into any 12 Volt
outlet.
Do not touch with wet hands.
Close the lid when not in use and while
driving the vehicle.
If this outlet is mishandled, it may cause an
electric shock and failure.
CAUTION!
Power outlets are designed for accessory
plugs only. Do not insert any other object in
the power outlets as this will damage the
outlet and blow the fuse. Improper use of the
power outlet can cause damage not covered
by your New Vehicle Limited Warranty.
Many accessories that can be plugged in
draw power from the vehicle's battery, even
when not in use (i.e., cellular phones, etc.).
Eventually, if plugged in long enough, the
vehicle's battery will discharge sufficiently to
degrade battery life and/or prevent the
engine from starting.
Accessories that draw higher power (i.e.,
coolers, vacuum cleaners, lights, etc.) will
degrade the battery even more quickly. Only
use these intermittently and with greater
caution.
After the use of high power draw
accessories, or long periods of the vehicle
not being started (with accessories still
plugged in), the vehicle must be driven a
sufficient length of time to allow the
generator to recharge the vehicle's battery.
23_GA_OM_EN_USC_t.book Page 56
Page 59 of 248

57
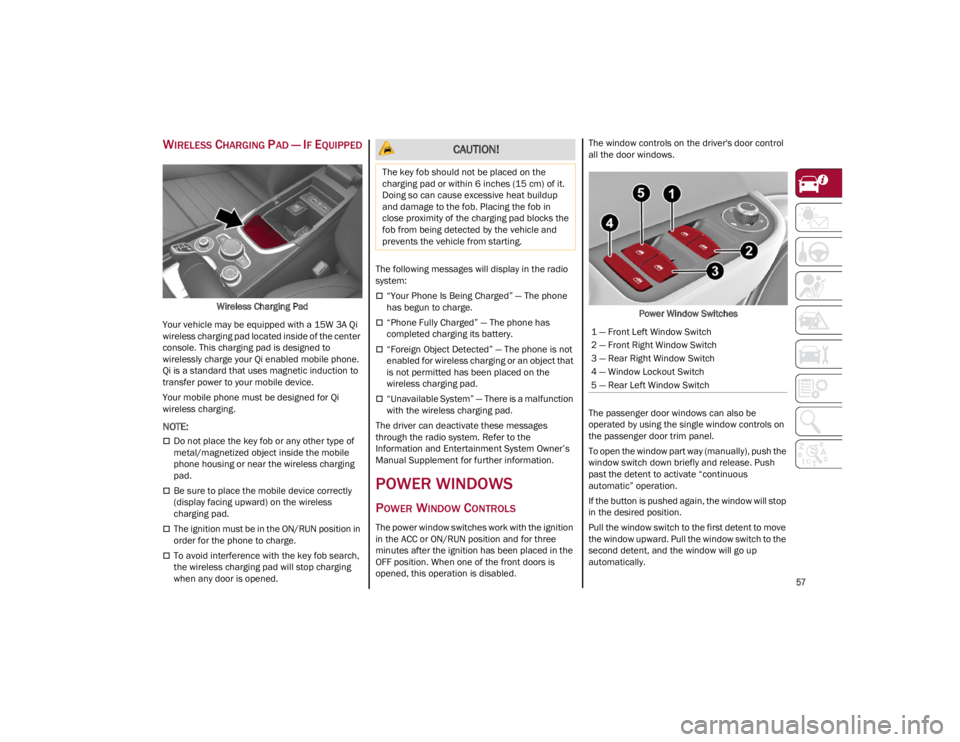
WIRELESS CHARGING PAD — IF EQUIPPED
Wireless Charging Pad
Your vehicle may be equipped with a 15W 3A Qi
wireless charging pad located inside of the center
console. This charging pad is designed to
wirelessly charge your Qi enabled mobile phone.
Qi is a standard that uses magnetic induction to
transfer power to your mobile device.
Your mobile phone must be designed for Qi
wireless charging.
NOTE:
Do not place the key fob or any other type of
metal/magnetized object inside the mobile
phone housing or near the wireless charging
pad.
Be sure to place the mobile device correctly
(display facing upward) on the wireless
charging pad.
The ignition must be in the ON/RUN position in
order for the phone to charge.
To avoid interference with the key fob search,
the wireless charging pad will stop charging
when any door is opened. The following messages will display in the radio
system:
“Your Phone Is Being Charged” — The phone
has begun to charge.
“Phone Fully Charged” — The phone has
completed charging its battery.
“Foreign Object Detected” — The phone is not
enabled for wireless charging or an object that
is not permitted has been placed on the
wireless charging pad.
“Unavailable System” — There is a malfunction
with the wireless charging pad.
The driver can deactivate these messages
through the radio system. Refer to the
Information and Entertainment System Owner’s
Manual Supplement for further information.
POWER WINDOWS
POWER WINDOW CONTROLS
The power window switches work with the ignition
in the ACC or ON/RUN position and for three
minutes after the ignition has been placed in the
OFF position. When one of the front doors is
opened, this operation is disabled. The window controls on the driver's door control
all the door windows.
Power Window Switches
The passenger door windows can also be
operated by using the single window controls on
the passenger door trim panel.
To open the window part way (manually), push the
window switch down briefly and release. Push
past the detent to activate “continuous
automatic” operation.
If the button is pushed again, the window will stop
in the desired position.
Pull the window switch to the first detent to move
the window upward. Pull the window switch to the
second detent, and the window will go up
automatically.
CAUTION!
The key fob should not be placed on the
charging pad or within 6 inches (15 cm) of it.
Doing so can cause excessive heat buildup
and damage to the fob. Placing the fob in
close proximity of the charging pad blocks the
fob from being detected by the vehicle and
prevents the vehicle from starting.
1 — Front Left Window Switch
2 — Front Right Window Switch
3 — Rear Right Window Switch
4 — Window Lockout Switch
5 — Rear Left Window Switch
23_GA_OM_EN_USC_t.book Page 57
Page 86 of 248

STARTING AND OPERATING
84
ENGINE BREAK-IN
RECOMMENDATIONS
ENGINE BREAK-IN
For both engines, use the following engine
break-in recommendations:
NOTE:
A new engine may consume some oil during its
first few thousand miles (kilometers) of opera-
tion. This should be considered a normal part of
the break-in period and not interpreted as an indi -
cation of a problem. Please monitor your oil level
during the break-in period and add oil as
required.
It is recommended for the operator to observe the
following driving behaviors during the new vehicle
break-in period:
0 to 100 miles (0 to 160 km):
Do not allow the engine to operate at idle for
an extended period of time.
Press the accelerator pedal slowly and not
more than halfway to avoid rapid acceleration.
Avoid aggressive braking.
Drive with the engine speed less than
3,500 RPM.
Maintain vehicle speed below 55 mph
(88 km/h) and observe local speed limits. 100 to 300 miles (160 to 483 km):
Press the accelerator pedal slowly and not
more than halfway to avoid rapid acceleration
in lower gears (FIRST to THIRD gears).
Avoid aggressive braking.
Drive with the engine speed less than
5,000 RPM.
Maintain vehicle speed below 70 mph
(112 km/h) and observe local speed limits.
300 to 500 miles (483 to 805 km):
Exercise the full engine RPM range, shifting
manually (paddles or gear shift) at higher RPM
when possible.
Do not perform sustained operation with the
accelerator pedal at wide open throttle.
Maintain vehicle speed below 85 mph
(136 km/h) and observe local speed limits.
For the first 1,500 miles (2,414 km):
Do not participate in track events, sport driving
schools, or similar activities during the first
1,500 miles (2,414 km).
NOTE:
Monitor engine oil with every refueling and add if
necessary. Oil and fuel consumption may be
higher through the first oil change interval.
ELECTRIC PARK BRAKE
(EPB)
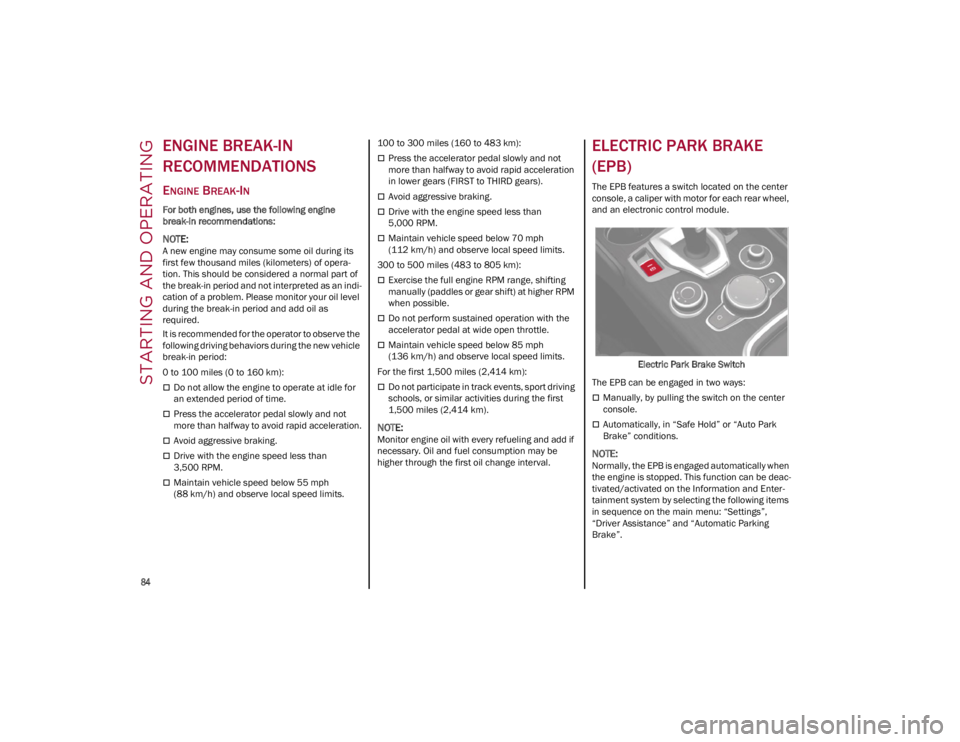
The EPB features a switch located on the center
console, a caliper with motor for each rear wheel,
and an electronic control module.
Electric Park Brake Switch
The EPB can be engaged in two ways:
Manually, by pulling the switch on the center
console.
Automatically, in “Safe Hold” or “Auto Park
Brake” conditions.
NOTE:
Normally, the EPB is engaged automatically when
the engine is stopped. This function can be deac -
tivated/activated on the Information and Enter -
tainment system by selecting the following items
in sequence on the main menu: “Settings”,
“Driver Assistance” and “Automatic Parking
Brake”.
23_GA_OM_EN_USC_t.book Page 84