2022 TOYOTA VENZA HYBRID warning lights
[x] Cancel search: warning lightsPage 106 of 548
1062-1. Instrument cluster
temporarily suspended.
• When a warning message appears on the multi-information
display
• When the vehicle begins to move
●Settings for functions not
equipped to the vehicle are not
displayed.
●When a function is turned off, the
related settings for that function
are not selectable.
Select to display warning mes-
sages and measures to be
taken if a malfunction is
detected. ( P.449)
Displays suggestions to the
driver in the following situations.
To select a response to a dis- played suggestion, use the
meter control switches.
■Suggestion to enable the
power back door
If the power back door system is
disabled (setting on set to
off) and the power back door
switch on the instrument panel
is operated, a suggestion mes-
sage will be displayed asking if
you wish to enable the power
back door system. To enable
the power back door system,
select “Yes”.
After enabling the power back door
system, press the power back door
switch again to op en or close the
power back door.
■Suggestion to turn on the
headlights
If the headlight turn off, and the
vehicle speed is 3 mph (5 km/h)
or higher for a certain amount of
time when the surroundings are
dark, a suggestion message will
be displayed.
■Suggestion to turn off the
headlights
If the headlights are left on for a
certain amount of time after the
power switch has been turned
off, a suggestion message will
be displayed.
When the headlight switch is in
the AUTO position: The mes-
sage asking if you wish to turn
the headlights off is displayed.
To turn the headlights off, select
WARNING
■Cautions during setting up
the display
As the hybrid system needs to be
operating during setting up the
display, ensure that the vehicle is
parked in a place with adequate
ventilation. In a closed area such
as a garage, exhaust gases
including harmful carbon monox-
ide (CO) may collect and enter
the vehicle. This may lead to
death or a seri ous health hazard.
NOTICE
■During setting up the display
To prevent 12-vo lt battery dis-
charge, ensure that the hybrid
system is operating while setting
up the display features.
Warning message display
Suggestion function
Page 117 of 548
1172-1. Instrument cluster
2
Vehicle status information and indicators
Select to display warning mes-
sages and measures to be
taken if a malfunction is
detected. (P.449)
Displays suggestions to the
driver in the following situations.
To select a response to a dis-
played suggestion, use the
meter control switches.
■Suggestion to enable the
power back door
If the power back door system is
disabled (setting on set to
off) and the power back door
switch on the instrument panel
is operated, a suggestion mes- sage will be displayed asking if
you wish to enable the power
back door system. To enable
the power back door system,
select “Yes”.
After enabling the power back door
system, press the power back door
switch again to op
en or close the
power back door.
■Suggestion to turn on the
headlights
If the headlight turn off, and the
vehicle speed is 3 mph (5 km/h)
or higher for a certain amount of
time when the surroundings are
dark, a suggestion message will
be displayed.
■Suggestion to turn off the
headlights
If the headlights are left on for a
certain amount of time after the
power switch has been turned
off, a suggestion message will
be displayed.
When the headlight switch is in
the AUTO position: The mes-
sage asking if you wish to turn
the headlights off is displayed.
To turn the headlights off, select
“Yes”.
If the driver’s door is opened after
the power switch is turned off, this
suggestion message will not be dis-
played.
■Suggestion to close the
power windows (Driving at
high speeds)
If the vehicle speed exceeds a
WARNING
■Cautions during setting up
the display
As the hybrid system needs to be
operating during setting up the
display, ensure that the vehicle is
parked in a place with adequate
ventilation. In a closed area such
as a garage, exhaust gases
including harmful carbon monox-
ide (CO) may collect and enter
the vehicle. This may lead to
death or a seri ous health hazard.
NOTICE
■During setting up the display
To prevent 12-vo lt battery dis-
charge, ensure that the hybrid
system is operating while setting
up the display features.
Warning message display
Suggestion function
Page 166 of 548
1653-4. Adjusting the steering wheel and mirrors
3
Before driving
*: If equipped
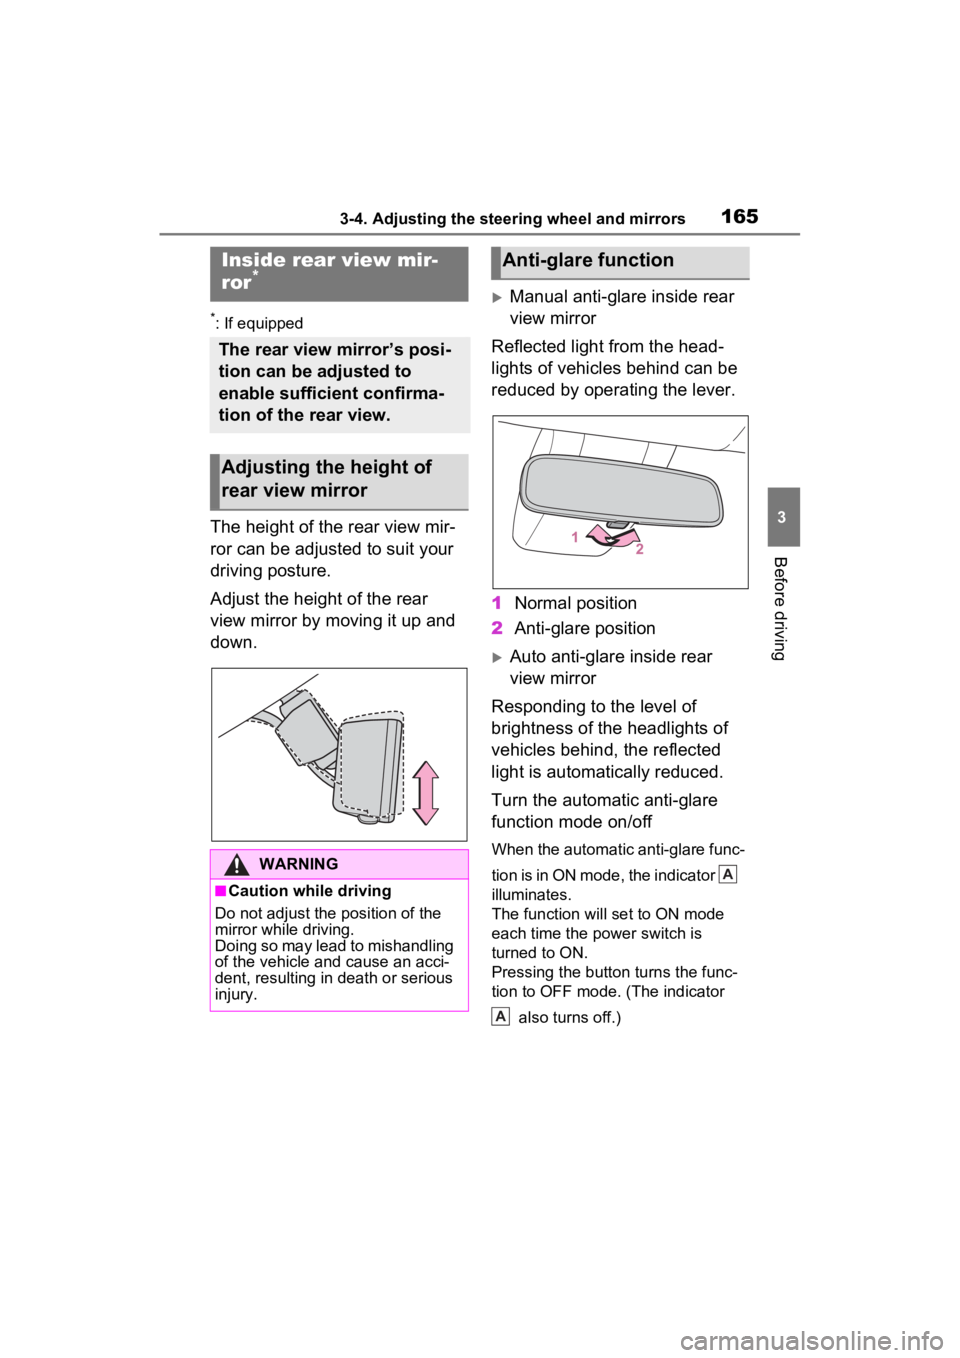
The height of the rear view mir-
ror can be adjusted to suit your
driving posture.
Adjust the height of the rear
view mirror by moving it up and
down.
Manual anti-glare inside rear
view mirror
Reflected light from the head-
lights of vehicles behind can be
reduced by operating the lever.
1 Normal position
2 Anti-glare position
Auto anti-glare inside rear
view mirror
Responding to the level of
brightness of the headlights of
vehicles behind, the reflected
light is automatically reduced.
Turn the automatic anti-glare
function mode on/off
When the automatic anti-glare func-
tion is in ON mode, the indicator
illuminates.
The function will set to ON mode
each time the power switch is
turned to ON.
Pressing the button turns the func-
tion to OFF mode. (The indicator
also turns off.)
Inside rear view mir-
ror*
The rear view mirror’s posi-
tion can be adjusted to
enable sufficient confirma-
tion of the rear view.
Adjusting the height of
rear view mirror
WARNING
■Caution while driving
Do not adjust the position of the
mirror while driving.
Doing so may lead to mishandling
of the vehicle and cause an acci-
dent, resulting in death or serious
injury.
Anti-glare function
A
A
Page 168 of 548
1673-4. Adjusting the steering wheel and mirrors
3
Before driving
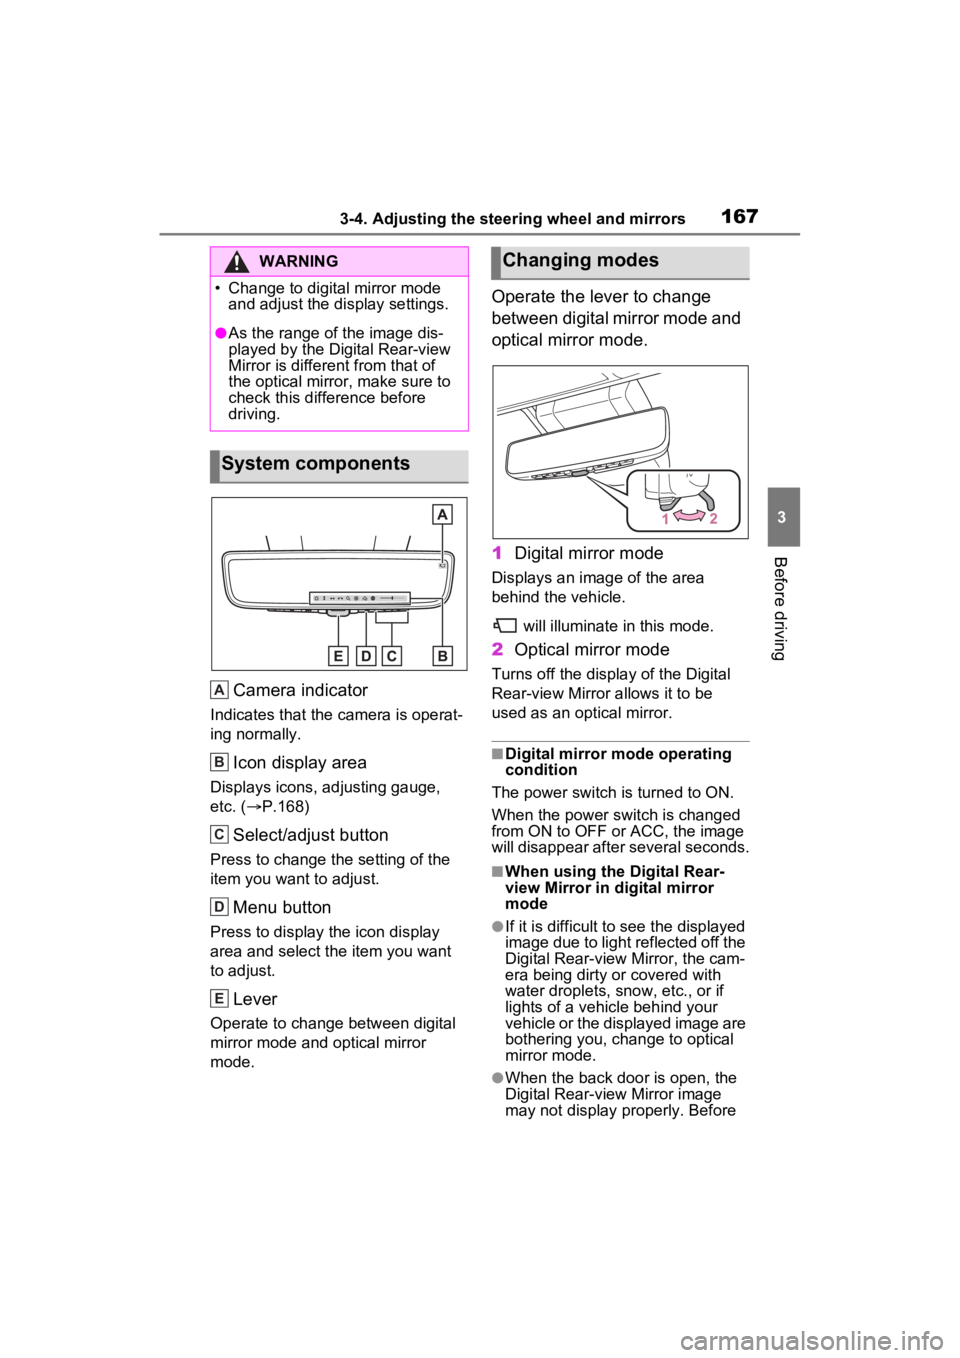
Camera indicator
Indicates that the camera is operat-
ing normally.
Icon display area
Displays icons, adjusting gauge,
etc. ( P.168)
Select/adjust button
Press to change the setting of the
item you want to adjust.
Menu button
Press to display the icon display
area and select the item you want
to adjust.
Lever
Operate to change between digital
mirror mode and optical mirror
mode.
Operate the lever to change
between digital mirror mode and
optical mirror mode.
1 Digital mirror mode
Displays an ima ge of the area
behind the vehicle.
will illuminate in this mode.
2Optical mirror mode
Turns off the display of the Digital
Rear-view Mirror allows it to be
used as an optical mirror.
■Digital mirror mode operating
condition
The power switch is turned to ON.
When the power switch is changed
from ON to OFF or ACC, the image
will disappear after several seconds.
■When using the Digital Rear-
view Mirror in d igital mirror
mode
●If it is difficult to see the displayed
image due to light reflected off the
Digital Rear-view Mirror, the cam-
era being dirty or covered with
water droplets, snow, etc., or if
lights of a vehicle behind your
vehicle or the displayed image are
bothering you, change to optical
mirror mode.
●When the back door is open, the
Digital Rear-view Mirror image
may not display properly. Before
WARNING
Page 218 of 548
2184-3. Operating the lights and wipers
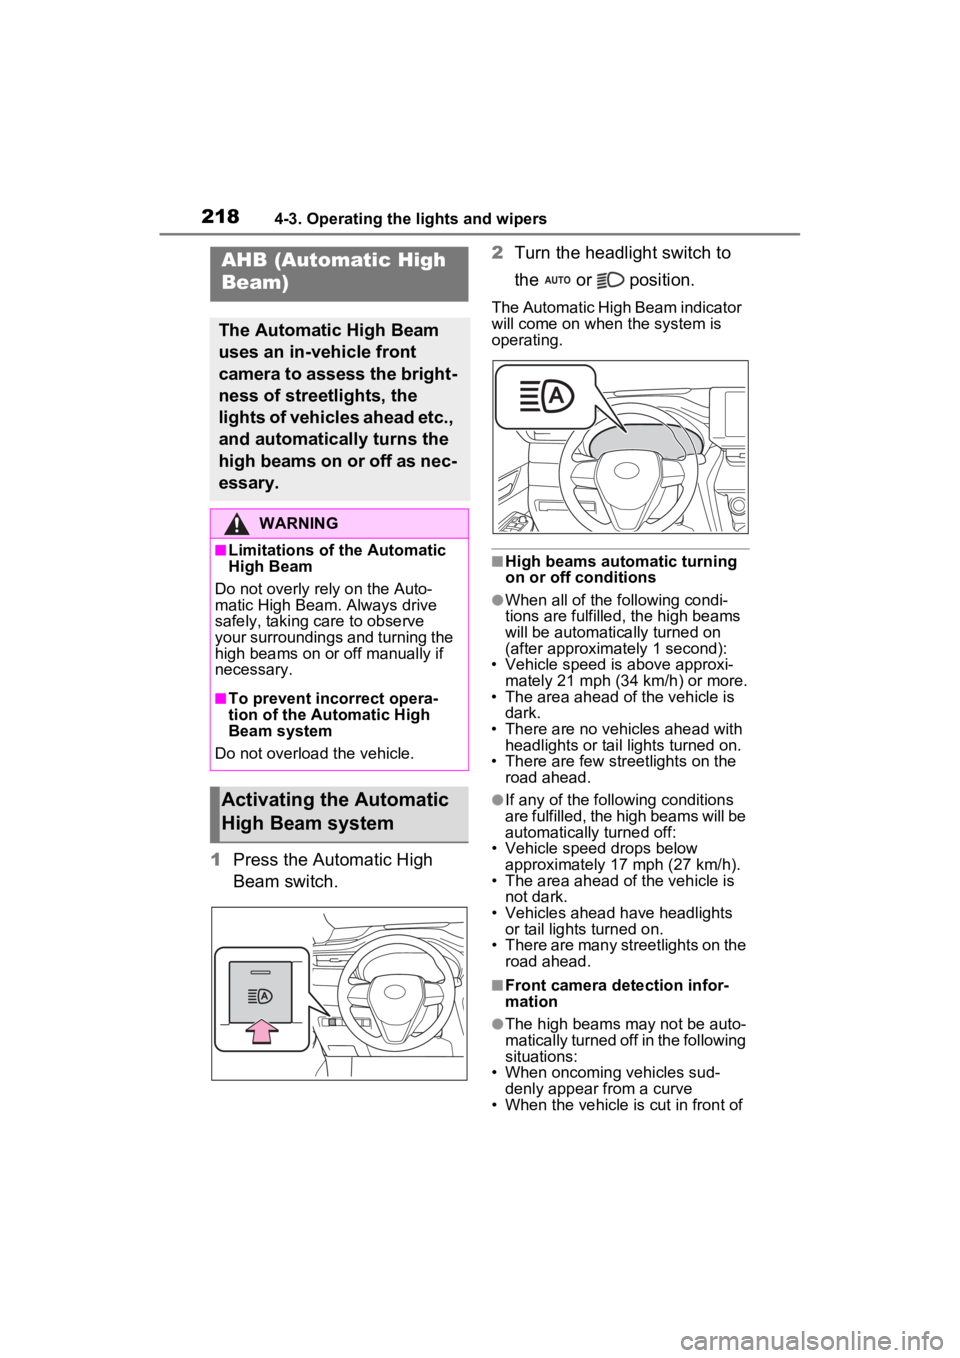
1Press the Automatic High
Beam switch. 2
Turn the headlight switch to
the or position.
The Automatic High Beam indicator
will come on when the system is
operating.
■High beams automatic turning
on or off conditions
●When all of the following condi-
tions are fulfilled, the high beams
will be automatically turned on
(after approximately 1 second):
• Vehicle speed is above approxi-
mately 21 mph (34 km/h) or more.
• The area ahead of the vehicle is dark.
• There are no vehicles ahead with headlights or tail lights turned on.
• There are few str eetlights on the
road ahead.
●If any of the following conditions
are fulfilled, the high beams will be
automatically turned off:
• Vehicle speed drops below
approximately 17 mph (27 km/h).
• The area ahead of the vehicle is not dark.
• Vehicles ahead have headlights or tail lights turned on.
• There are many streetlights on the
road ahead.
■Front camera detection infor-
mation
●The high beams m ay not be auto-
matically turned off in the following
situations:
• When oncoming vehicles sud-
denly appear from a curve
• When the vehicle is cut in front of
AHB (Automatic High
Beam)
The Automatic High Beam
uses an in-vehicle front
camera to assess the bright-
ness of streetlights, the
lights of vehicles ahead etc.,
and automatically turns the
high beams on or off as nec-
essary.
WARNING
■Limitations of the Automatic
High Beam
Do not overly rely on the Auto-
matic High Beam. Always drive
safely, taking care to observe
your surroundings and turning the
high beams on or off manually if
necessary.
■To prevent incorrect opera-
tion of the Automatic High
Beam system
Do not overload the vehicle.
Activating the Automatic
High Beam system
Page 224 of 548
2244-3. Operating the lights and wipers
mode will not switch.)
Vehicles with rain-sensing wind-
shield wipers
With low speed windshield wiper
operation selected, wiper operation
will be switched from low speed to
intermittent wiper operation when
the vehicle is stationary. (However,
when the sensor s ensitivity is
adjusted to the highest level, the
mode will not switch.)
■Raindrop sensor (vehicles with
rain-sensing windshield wipers)
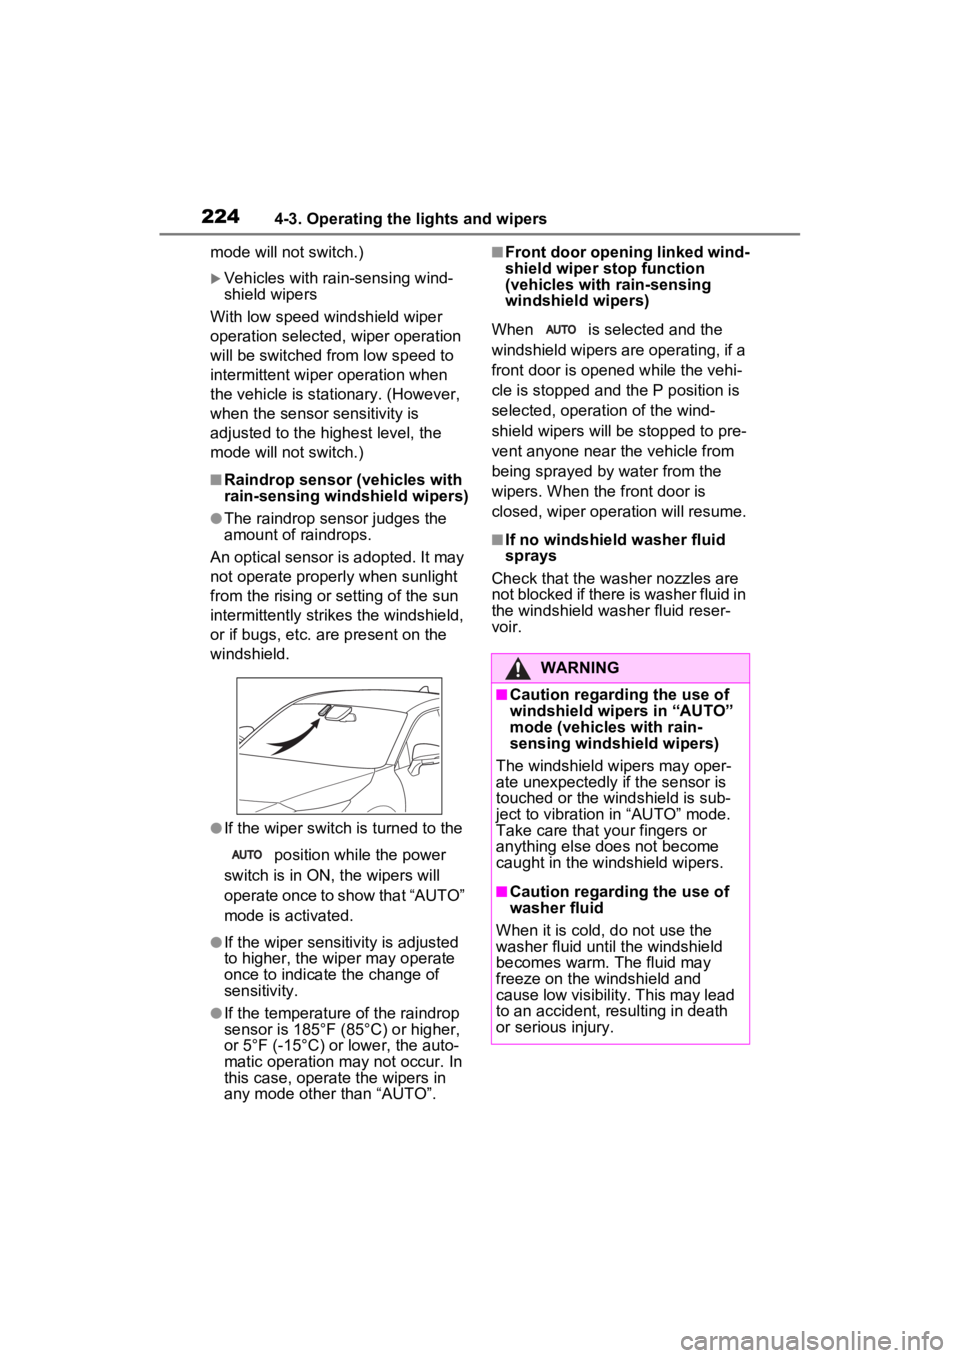
●The raindrop sensor judges the
amount of raindrops.
An optical sensor is adopted. It may
not operate properly when sunlight
from the rising or setting of the sun
intermittently strikes the windshield,
or if bugs, etc. are present on the
windshield.
●If the wiper switch is turned to the
position while the power
switch is in ON, the wipers will
operate once to show that “AUTO”
mode is activated.
●If the wiper sensitivity is adjusted
to higher, the wip er may operate
once to indicate the change of
sensitivity.
●If the temperature of the raindrop
sensor is 185°F (85°C) or higher,
or 5°F (-15°C) or lower, the auto-
matic operation m ay not occur. In
this case, operate the wipers in
any mode other than “AUTO”.
■Front door opening linked wind-
shield wiper stop function
(vehicles with rain-sensing
windshield wipers)
When is selected and the
windshield wipers are operating, if a
front door is opened while the vehi-
cle is stopped and the P position is
selected, operation of the wind-
shield wipers will be stopped to pre-
vent anyone near the vehicle from
being sprayed by water from the
wipers. When the front door is
closed, wiper opera tion will resume.
■If no windshield washer fluid
sprays
Check that the washer nozzles are
not blocked if there is washer fluid in
the windshield washer fluid reser-
voir.
WARNING
■Caution regarding the use of
windshield wipe rs in “AUTO”
mode (vehicles with rain-
sensing windshield wipers)
The windshield wipers may oper-
ate unexpectedly if the sensor is
touched or the windshield is sub-
ject to vibration in “AUTO” mode.
Take care that your fingers or
anything else does not become
caught in the windshield wipers.
■Caution regarding the use of
washer fluid
When it is cold, do not use the
washer fluid unt il the windshield
becomes warm. The fluid may
freeze on the windshield and
cause low visibility. This may lead
to an accident, resulting in death
or serious injury.
Page 232 of 548
2324-5. Using the driving support systems
WARNING
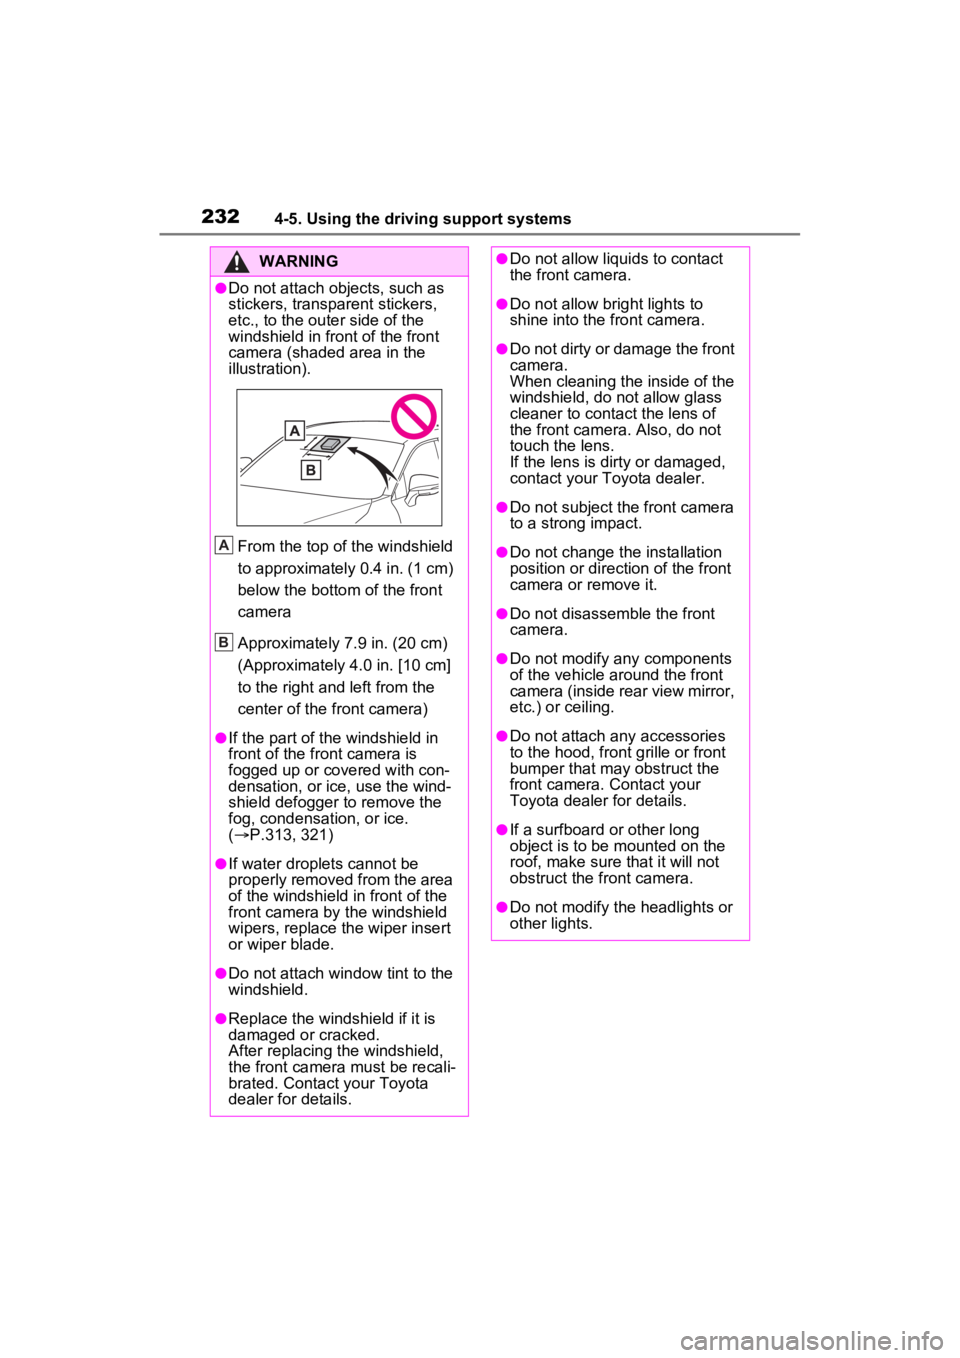
●Do not attach objects, such as
stickers, transparent stickers,
etc., to the outer side of the
windshield in fr ont of the front
camera (shaded area in the
illustration).
From the top of the windshield
to approximately 0.4 in. (1 cm)
below the bottom of the front
camera
Approximately 7.9 in. (20 cm)
(Approximately 4.0 in. [10 cm]
to the right and left from the
center of the front camera)
●If the part of the windshield in
front of the front camera is
fogged up or covered with con-
densation, or ice, use the wind-
shield defogger to remove the
fog, condensation, or ice.
( P.313, 321)
●If water droplets cannot be
properly removed from the area
of the windshield in front of the
front camera by the windshield
wipers, replace the wiper insert
or wiper blade.
●Do not attach win dow tint to the
windshield.
●Replace the windshield if it is
damaged or cracked.
After replacing the windshield,
the front camera must be recali-
brated. Contact your Toyota
dealer for details.
A
B
●Do not allow liquids to contact
the front camera.
●Do not allow bright lights to
shine into the front camera.
●Do not dirty or damage the front
camera.
When cleaning the inside of the
windshield, do not allow glass
cleaner to contact the lens of
the front camera . Also, do not
touch the lens.
If the lens is dirty or damaged,
contact your Toyota dealer.
●Do not subject the front camera
to a strong impact.
●Do not change the installation
position or direction of the front
camera or remove it.
●Do not disassemble the front
camera.
●Do not modify any components
of the vehicle around the front
camera (inside rear view mirror,
etc.) or ceiling.
●Do not attach any accessories
to the hood, front grille or front
bumper that may obstruct the
front camera. Contact your
Toyota dealer for details.
●If a surfboard or other long
object is to be mounted on the
roof, make sure that it will not
obstruct the front camera.
●Do not modify the headlights or
other lights.
Page 245 of 548
2454-5. Using the driving support systems
4
Driving
WARNING
●Vehicle is driven in a construc-
tion zone.
●A spare tire, tire chains, etc. are
equipped.
●When the tires have been
excessively worn, or when the
tire inflation pressure is low.
●During emergency towing
■Preventing LTA system mal-
functions and operations per-
formed by mistake
●Do not modify the headlights or
place stickers, etc. on the sur-
face of the lights.
●Do not modify the suspension
etc. If the suspension etc. needs
to be replaced, contact your
Toyota dealer.
●Do not install or place anything
on the hood or grille. Also, do
not install a grille guard (bull
bars, kangaroo bar, etc.).
●If your windshield needs
repairs, contact your Toyota
dealer.
■Conditions in which functions
may not operate properly
In the following situations, the
functions may not operate prop-
erly and the vehicle may depart
from its lane. Drive safely by
always paying careful attention to
your surroundings and operate
the steering wheel to correct the
path of the vehicle without relying
solely on the functions.
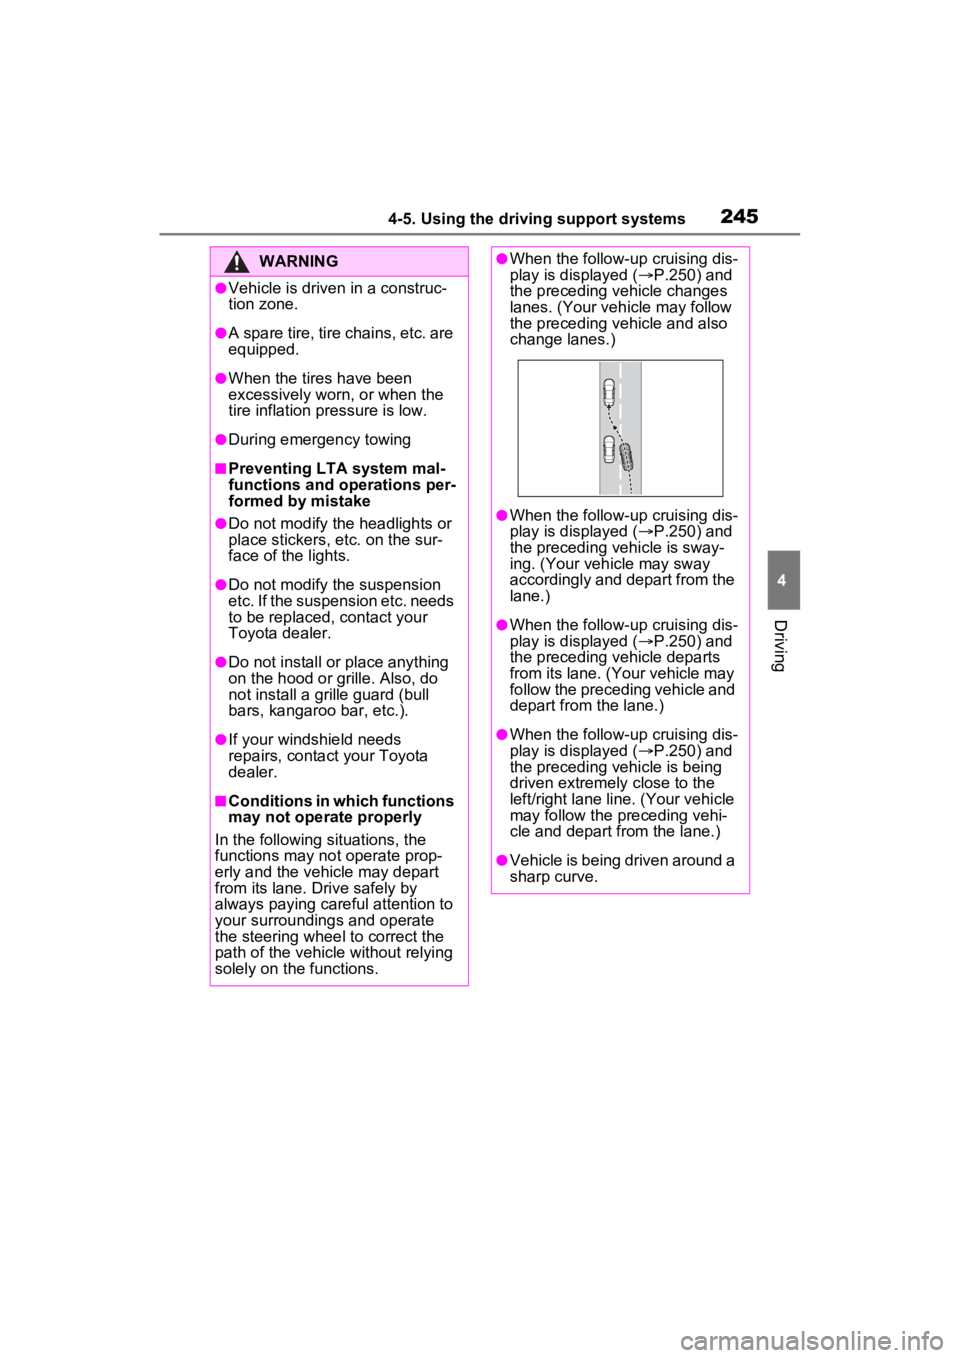
●When the follow-up cruising dis-
play is displayed ( P.250) and
the preceding vehicle changes
lanes. (Your veh icle may follow
the preceding vehicle and also
change lanes.)
●When the follow-up cruising dis-
play is displayed ( P.250) and
the preceding vehicle is sway-
ing. (Your vehicle may sway
accordingly and depart from the
lane.)
●When the follow-up cruising dis-
play is displayed ( P.250) and
the preceding vehicle departs
from its lane. (Your vehicle may
follow the preceding vehicle and
depart from the lane.)
●When the follow-up cruising dis-
play is displayed ( P.250) and
the preceding vehicle is being
driven extremely close to the
left/right lane line. (Your vehicle
may follow the preceding vehi-
cle and depart from the lane.)
●Vehicle is being driven around a
sharp curve.