2022 TOYOTA TUNDRA HYBRID low beam
[x] Cancel search: low beamPage 89 of 618
892-1. Instrument cluster
Owners Manual_USA_M0C031_en
2
Vehicle status information and indicators
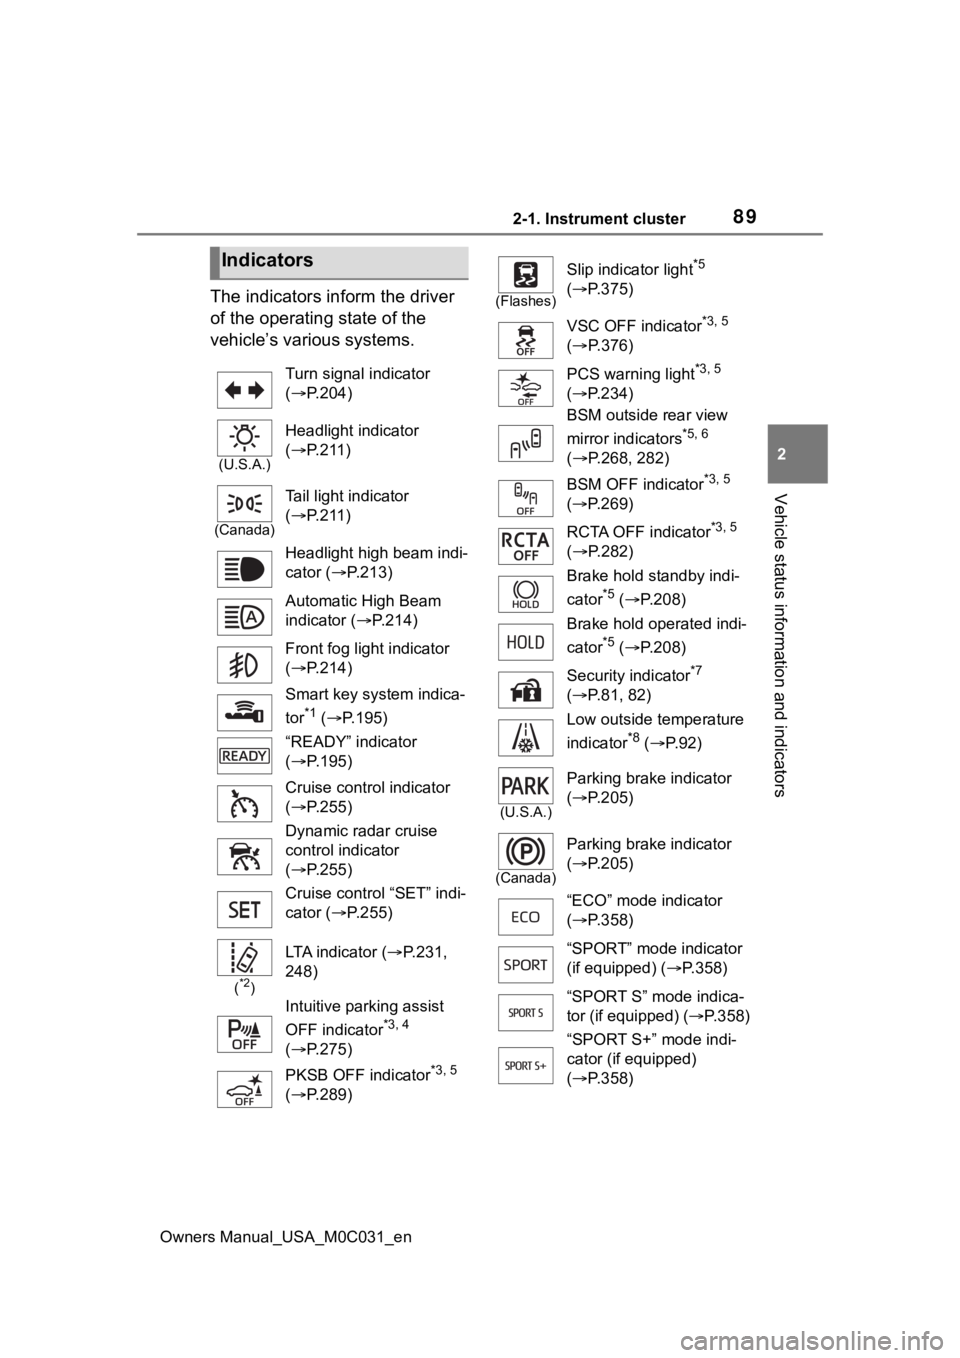
The indicators inform the driver
of the operating state of the
vehicle’s various systems.
Indicators
Turn signal indicator
( P.204)
(U.S.A.)
Headlight indicator
( P.211)
(Canada)
Tail light indicator
( P.211)
Headlight high beam indi-
cator ( P.213)
Automatic High Beam
indicator ( P.214)
Front fog light indicator
( P.214)
Smart key system indica-
tor
*1 ( P.195)
“READY” indicator
( P.195)
Cruise control indicator
( P.255)
Dynamic radar cruise
control indicator
( P.255)
Cruise control “SET” indi-
cator ( P.255)
(*2)
LTA indicator ( P.231,
248)
Intuitive parking assist
OFF indicator
*3, 4
( P.275)
PKSB OFF indicator
*3, 5
( P.289)
(Flashes)
Slip indicator light*5
( P.375)
VSC OFF indicator
*3, 5
( P.376)
PCS warning light
*3, 5
( P.234)
BSM outside rear view
mirror indicators
*5, 6
( P.268, 282)
BSM OFF indicator
*3, 5
( P.269)
RCTA OFF indicator
*3, 5
( P.282)
Brake hold standby indi-
cator
*5 ( P.208)
Brake hold operated indi-
cator
*5 ( P.208)
Security indicator
*7
( P.81, 82)
Low outside temperature
indicator
*8 ( P. 9 2 )
(U.S.A.)
Parking brake indicator
( P.205)
(Canada)
Parking brake indicator
( P.205)
“ECO” mode indicator
( P.358)
“SPORT” mode indicator
(if equipped) ( P.358)
“SPORT S” mode indica-
tor (if equipped) ( P.358)
“SPORT S+” mode indi-
cator (if equipped)
( P.358)
Page 213 of 618
2134-3. Operating the lights and wipers
Owners Manual_USA_M0C031_en
4
Driving
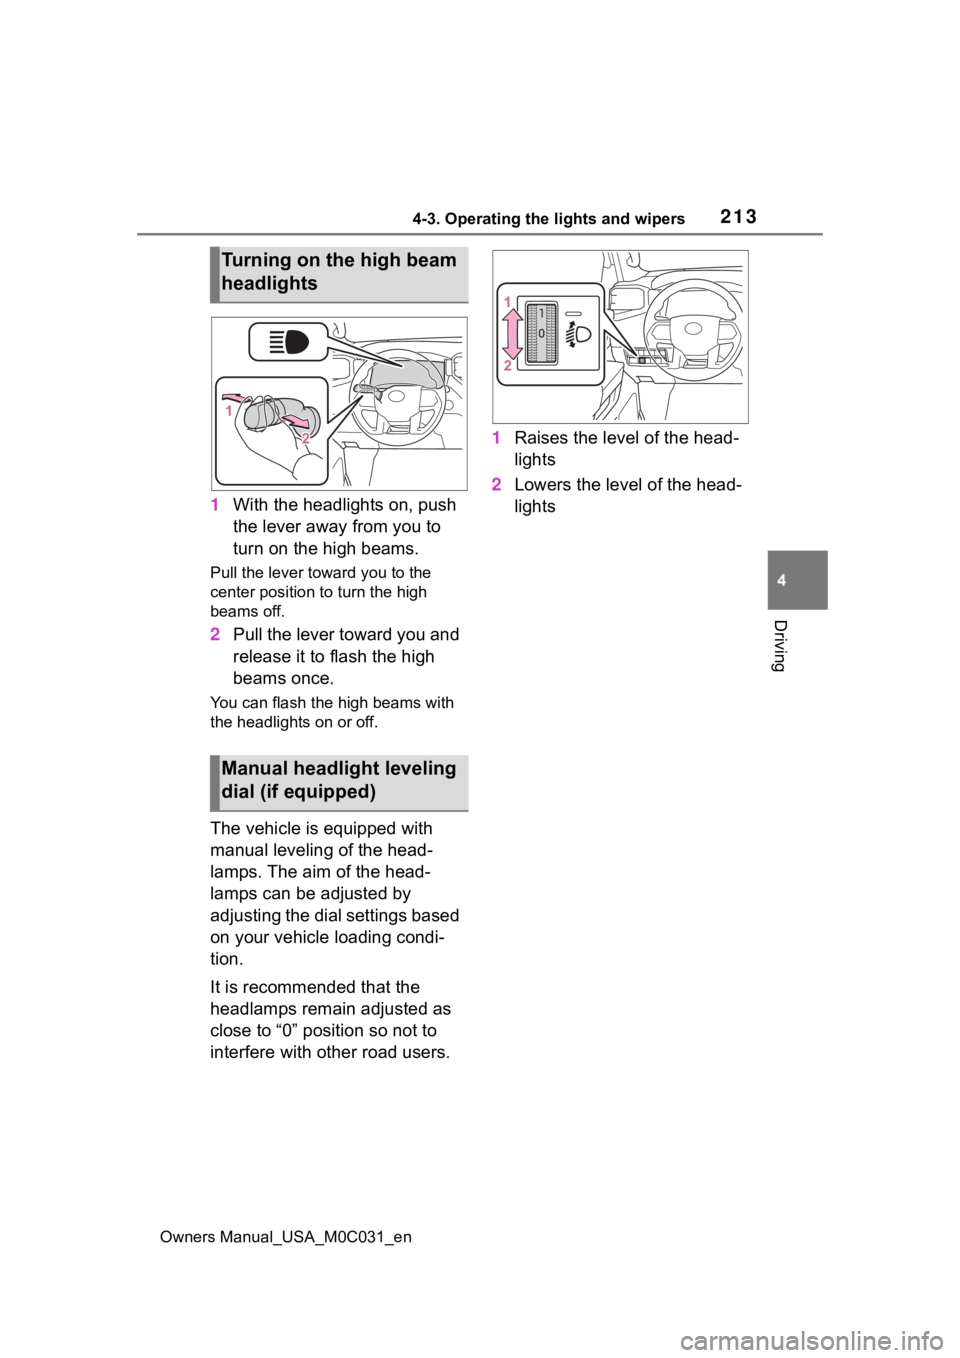
1 With the headlights on, push
the lever away from you to
turn on the high beams.
Pull the lever to ward you to the
center position to turn the high
beams off.
2 Pull the lever toward you and
release it to flash the high
beams once.
You can flash the high beams with
the headlights on or off.
The vehicle is equipped with
manual leveling of the head-
lamps. The aim of the head-
lamps can be adjusted by
adjusting the dial settings based
on your vehicle loading condi-
tion.
It is recommended that the
headlamps remain adjusted as
close to “0” position so not to
interfere with other road users. 1
Raises the level of the head-
lights
2 Lowers the level of the head-
lights
Turning on the high beam
headlights
Manual headlight leveling
dial (if equipped)
Page 214 of 618
2144-3. Operating the lights and wipers
Owners Manual_USA_M0C031_en
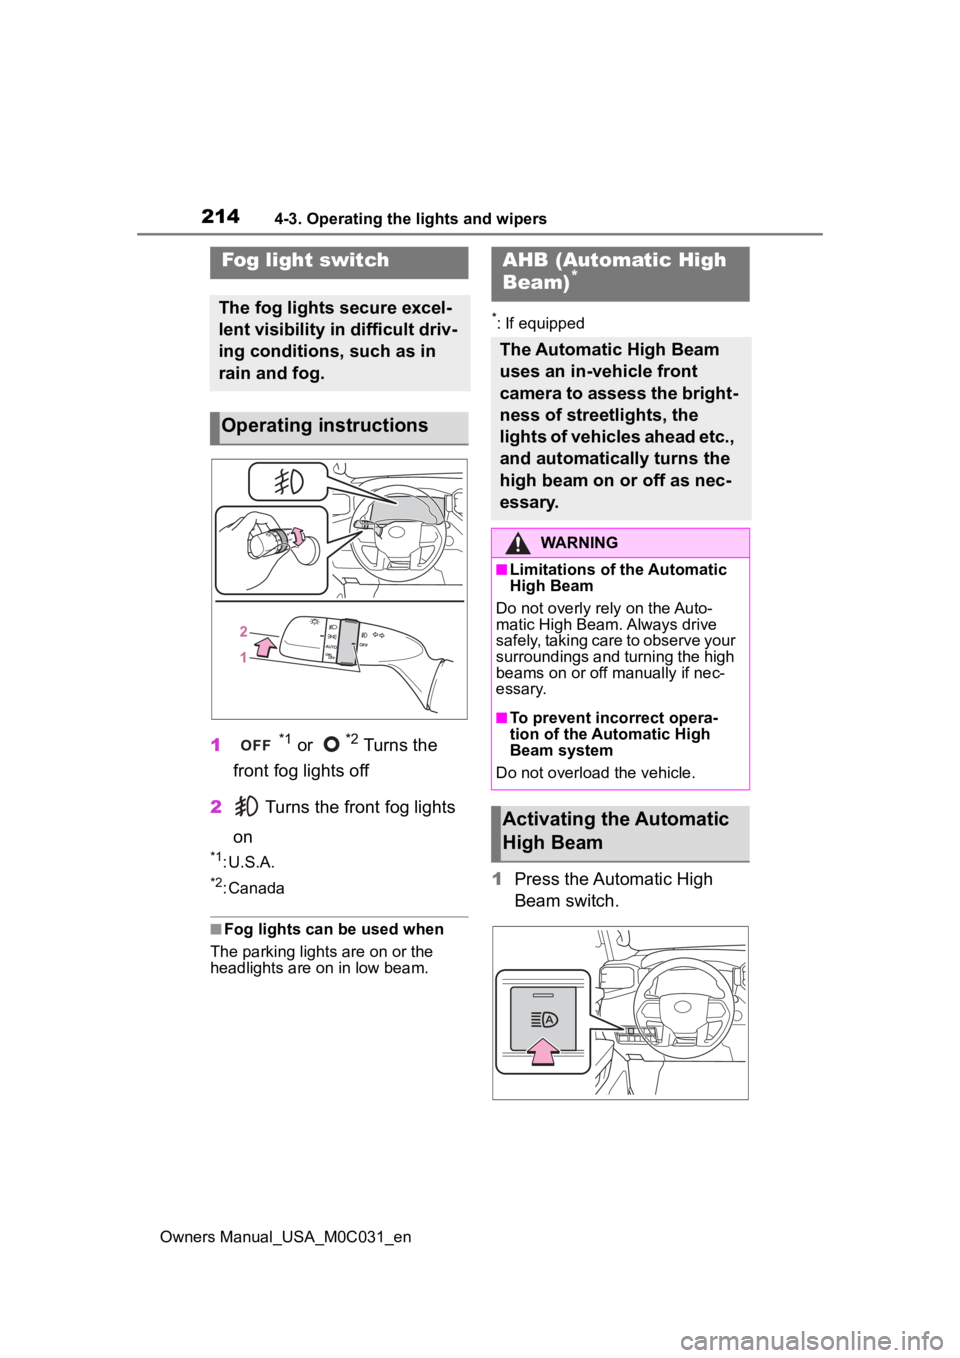
1*1 or *2 Turns the
front fog lights off
2 Turns the front fog lights
on
*1: U.S.A.
*2: Canada
■Fog lights can be used when
The parking lights are on or the
headlights are on in low beam.
*: If equipped
1 Press the Automatic High
Beam switch.
Fog light switch
The fog lights secure excel-
lent visibility in difficult driv-
ing conditions, such as in
rain and fog.
Operating instructions
AHB (Automatic High
Beam)*
The Automatic High Beam
uses an in-vehicle front
camera to assess the bright-
ness of streetlights, the
lights of vehicles ahead etc.,
and automatically turns the
high beam on or off as nec-
essary.
WARNING
■Limitations of the Automatic
High Beam
Do not overly rely on the Auto-
matic High Beam. Always drive
safely, taking care to observe your
surroundings and turning the high
beams on or off manually if nec-
essary.
■To prevent inc orrect opera-
tion of the Automatic High
Beam system
Do not overload the vehicle.
Activating the Automatic
High Beam
Page 215 of 618
2154-3. Operating the lights and wipers
Owners Manual_USA_M0C031_en
4
Driving
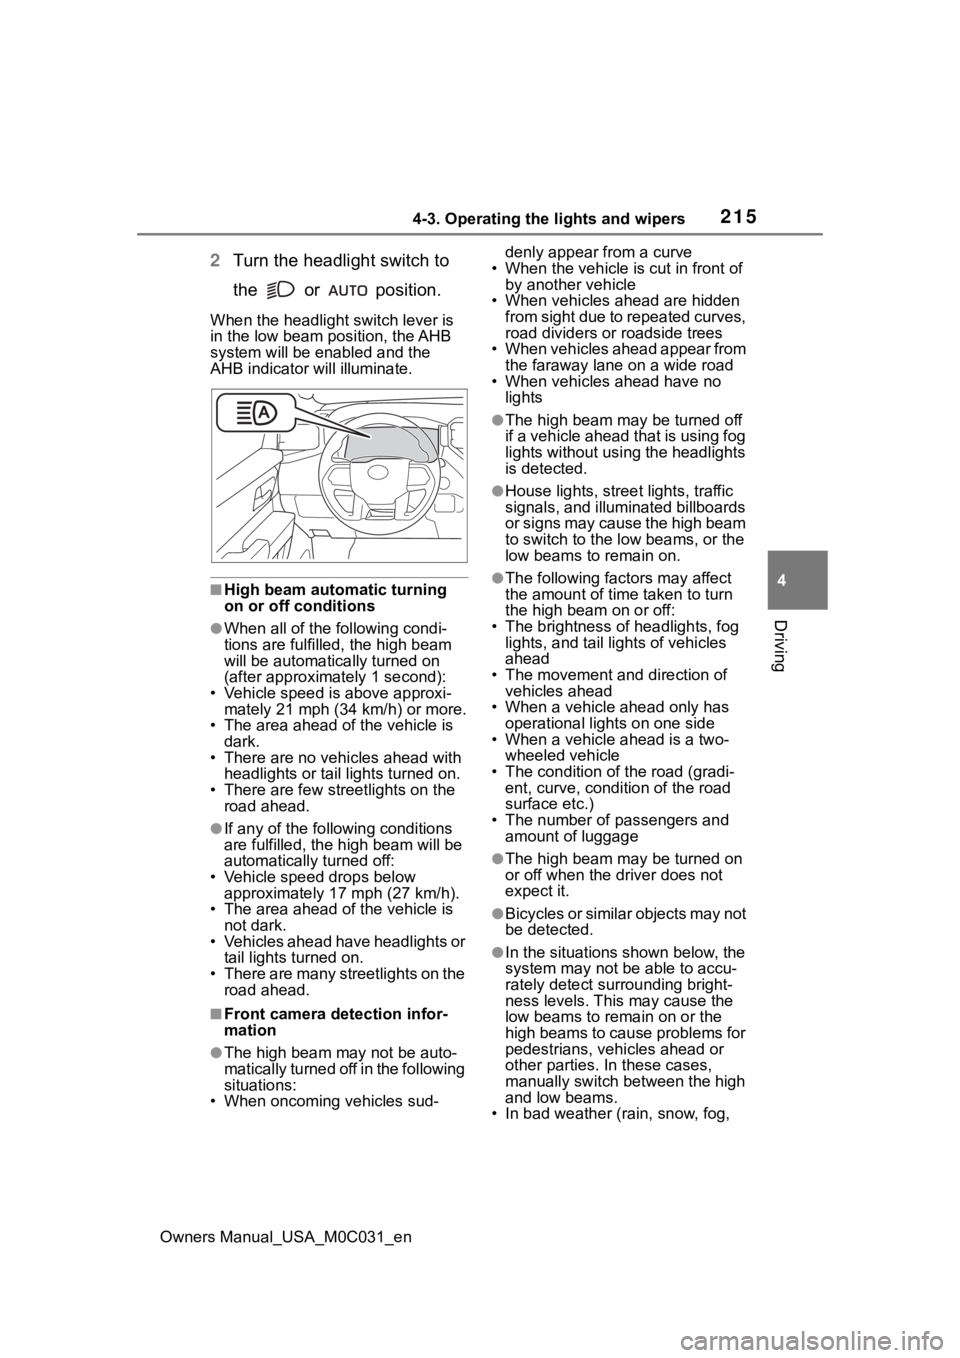
2 Turn the headlight switch to
the or position.
When the headlight switch lever is
in the low beam position, the AHB
system will be enabled and the
AHB indicator will illuminate.
■High beam automatic turning
on or off conditions
●When all of the following condi-
tions are fulfille d, the high beam
will be automatica lly turned on
(after approximately 1 second):
• Vehicle speed is above approxi- mately 21 mph (34 km/h) or more.
• The area ahead of the vehicle is
dark.
• There are no vehicles ahead with headlights or tail lights turned on.
• There are few streetlights on the road ahead.
●If any of the following conditions
are fulfilled, the h igh beam will be
automatically turned off:
• Vehicle speed drops below approximately 17 mph (27 km/h).
• The area ahead of the vehicle is
not dark.
• Vehicles ahead have headlights or tail lights turned on.
• There are many streetlights on the road ahead.
■Front camera detection infor-
mation
●The high beam may not be auto-
matically turned off in the following
situations:
• When oncoming vehicles sud- denly appear from a curve
• When the vehicle is cut in front of by another vehicle
• When vehicles ahead are hidden from sight due to repeated curves,
road dividers or roadside trees
• When vehicles ahead appear from the faraway lane on a wide road
• When vehicles ahead have no
lights
●The high beam ma y be turned off
if a vehicle ahead that is using fog
lights without using the headlights
is detected.
●House lights, street lights, traffic
signals, and illuminated billboards
or signs may cause the high beam
to switch to the low beams, or the
low beams to remain on.
●The following fact ors may affect
the amount of time taken to turn
the high beam on or off:
• The brightness of headlights, fog lights, and tail lig hts of vehicles
ahead
• The movement and direction of vehicles ahead
• When a vehicle ahead only has
operational lights on one side
• When a vehicle ahead is a two-
wheeled vehicle
• The condition of the road (gradi- ent, curve, condition of the road
surface etc.)
• The number of passengers and amount of luggage
●The high beam ma y be turned on
or off when the driver does not
expect it.
●Bicycles or similar objects may not
be detected.
●In the situations shown below, the
system may not be able to accu-
rately detect surrounding bright-
ness levels. This may cause the
low beams to remain on or the
high beams to cause problems for
pedestrians, vehicles ahead or
other parties. In these cases,
manually switch between the high
and low beams.
• In bad weather (r ain, snow, fog,
Page 216 of 618

2164-3. Operating the lights and wipers
Owners Manual_USA_M0C031_ensandstorms, etc.)
• The windshield is obscured by fog, mist, ice, dirt, etc.
• The windshield is cracked or dam- aged
• The front camera is deformed or
dirty
• When the temperature of the front camera is extremely high
• Surrounding brightness levels are equal to those of h eadlights, tail
lights or fog lights
• When headlights or tail lights of vehicles ahead are turned off,
dirty, changing color, or not aimed
properly
• When the vehicle is hit by water, snow, dust, etc. from a preceding
vehicle
• When driving thr ough an area of
intermittently changing brightness
and darkness
• When frequently and repeatedly driving ascending/descending
roads, or roads with rough, bumpy
or uneven surfaces (such as
stone-paved roads, gravel roads,
etc.)
• When frequently and repeatedly taking curves or driving on a wind-
ing road
• There is a highly reflective object
ahead of the vehicle, such as a
sign or mirror
• The back of a vehicle ahead is highly reflective, such as a con-
tainer on a truck
• The vehicle’s headlights are dam- aged or dirty, or are not aimed
properly
• The vehicle is listing or titling due to a flat tire, a trailer being towed,
etc.
• The high beam and low beam are repeatedly being switched
between in an abnormal manner
• The driver believes that the high beam may be causing problems
or distress to other drivers or
pedestrians nearby
■Temporarily lowering sensor
sensitivity
The sensitivity of the sensor can be temporarily lowered.
1
Turn the power s witch off while
the following conditions are met.
●The headlight switch is in or
.
●The headlight switch lever is in
low beam position.
●Automatic High Beam switch is
on.
2 Turn the power switch to ON.
3 Within 60 seconds after step 2,
repeat pushing the headlight
switch lever to the high beam
position then pulling it to the orig-
inal position quickly 10 times,
then leave the lever in the origi-
nal position.
4 If the sensitivity is changed, the
AHB indicator is turn on and off 3
times.
Automatic High Beam (headlights)
may turn on even when the vehicle
is stopped.
■Switching to the high
beams
Push the lever away from you.
The AHB indicator will turn off and
the high beam indi cator will turn on.
Pull the lever to its original position
to activate the Automatic High
Beam system.
Turning the high beams
on/off manually
Page 217 of 618
2174-3. Operating the lights and wipers
Owners Manual_USA_M0C031_en
4
Driving
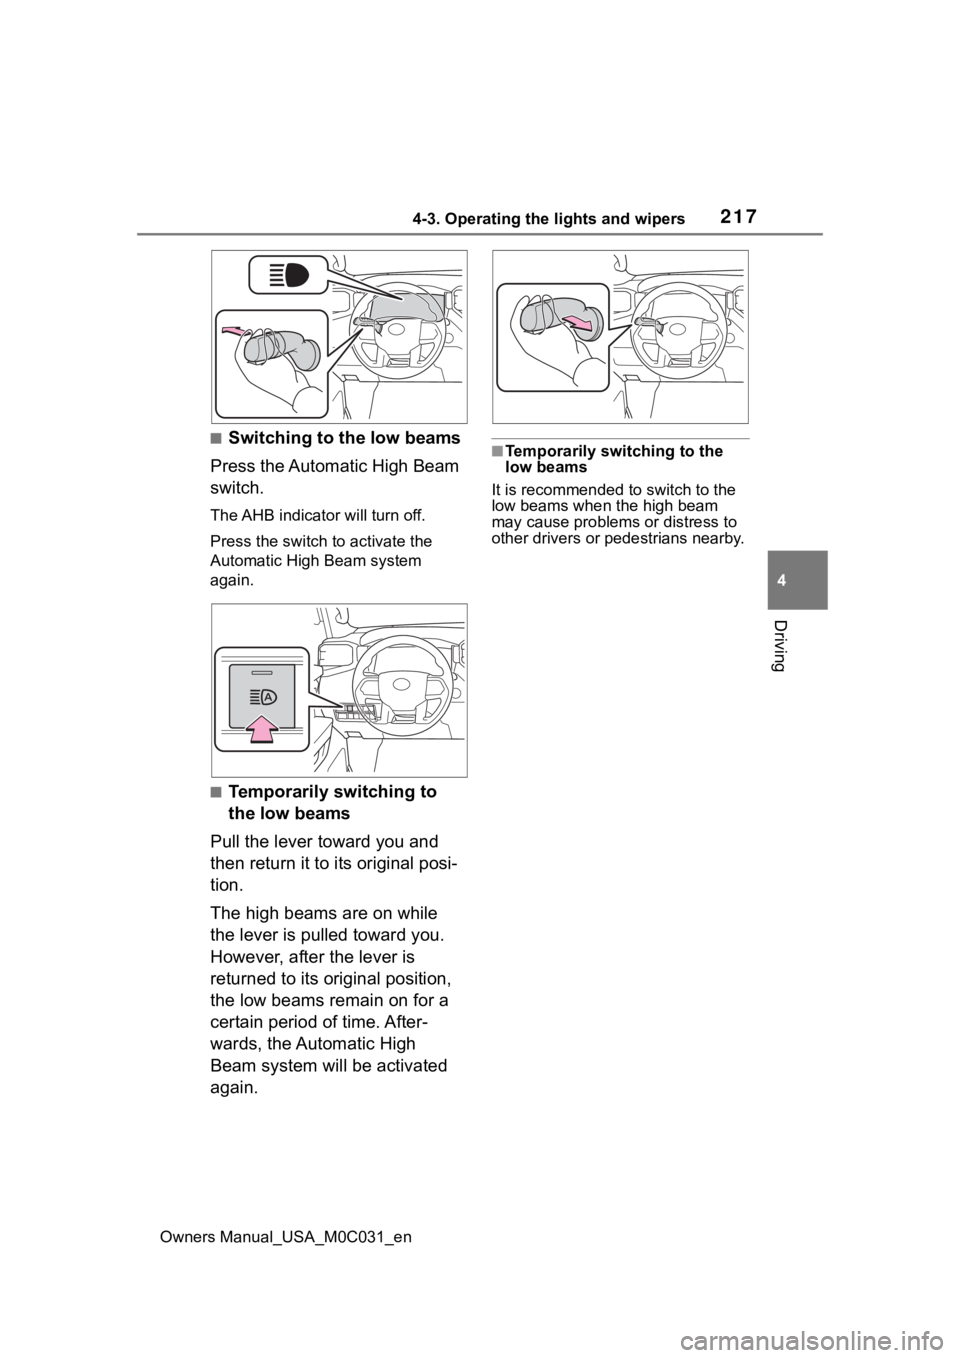
■Switching to the low beams
Press the Automatic High Beam
switch.
The AHB indicator will turn off.
Press the switch to activate the
Automatic High Beam system
again.
■Temporarily switching to
the low beams
Pull the lever toward you and
then return it to its original posi-
tion.
The high beams are on while
the lever is pulled toward you.
However, after the lever is
returned to its original position,
the low beams remain on for a
certain period of time. After-
wards, the Automatic High
Beam system will be activated
again.
■Temporarily switching to the
low beams
It is recommended to switch to the
low beams when the high beam
may cause problems or distress to
other drivers or pedestrians nearby.
Page 218 of 618
2184-3. Operating the lights and wipers
Owners Manual_USA_M0C031_en
*: If equipped
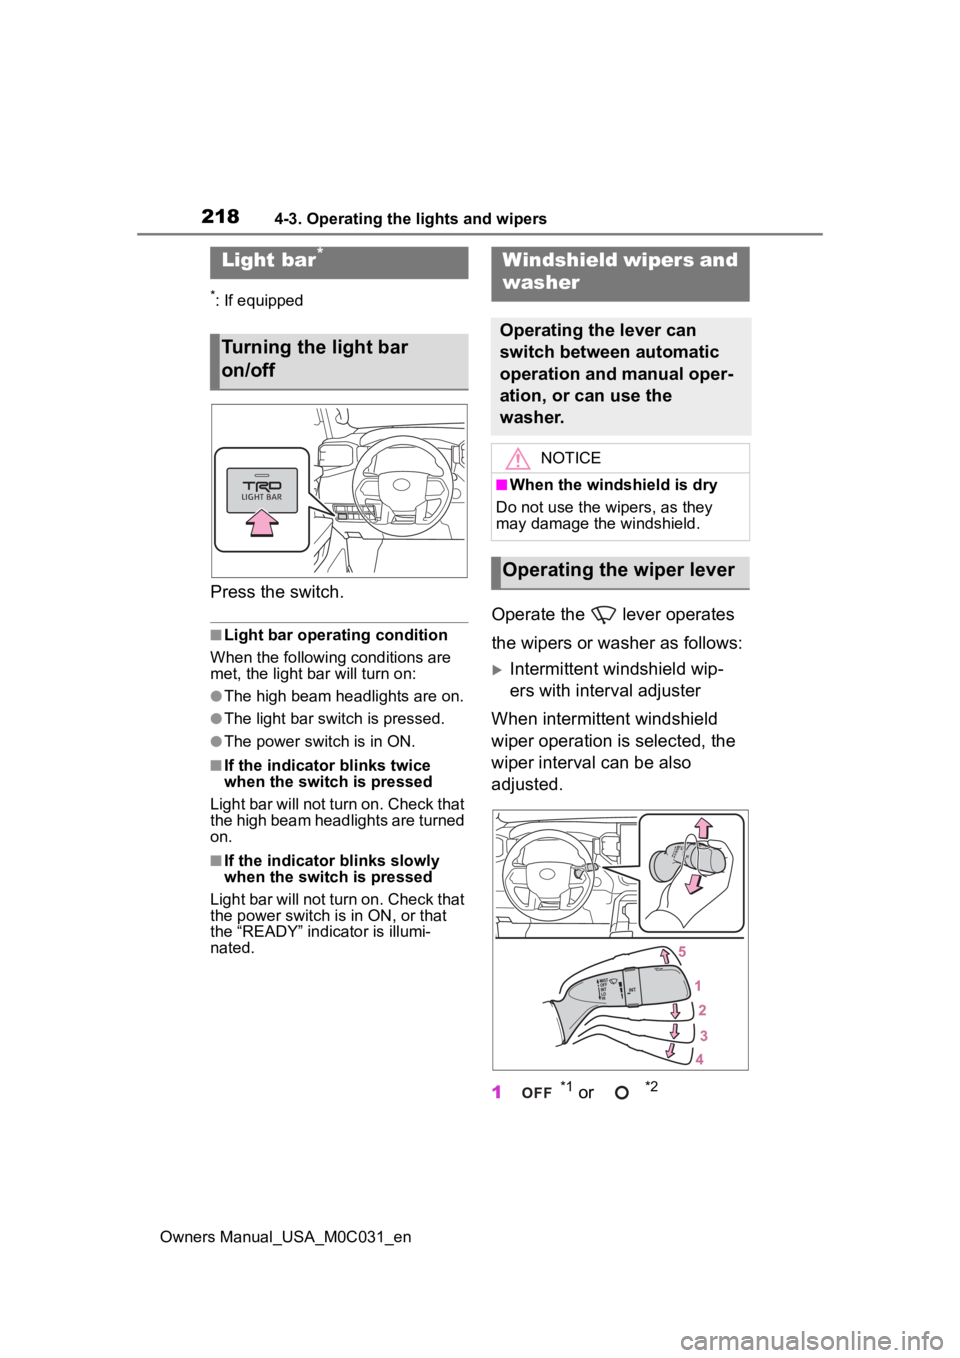
Press the switch.
■Light bar operating condition
When the following conditions are
met, the light bar will turn on:
●The high beam headlights are on.
●The light bar switch is pressed.
●The power switch is in ON.
■If the indicator blinks twice
when the switch is pressed
Light bar will not turn on. Check that
the high beam headlights are turned
on.
■If the indicator blinks slowly
when the switch is pressed
Light bar will not turn on. Check that
the power switch is in ON, or that
the “READY” indicator is illumi-
nated.
Operate the lever operates
the wipers or washer as follows:
Intermittent windshield wip-
ers with interval adjuster
When intermittent windshield
wiper operation is selected, the
wiper interval can be also
adjusted.
1
*1 or *2
Light bar*
Turning the light bar
on/off
Windshield wipers and
washer
Operating the lever can
switch between automatic
operation and manual oper-
ation, or can use the
washer.
NOTICE
■When the windshield is dry
Do not use the wipers, as they
may damage the windshield.
Operating the wiper lever
Page 225 of 618

2254-5. Using the driving support systems
Owners Manual_USA_M0C031_en
4
Driving
4-5.Using the driving support systems
■PCS (Pre-Collision System)
P.230
■LTA (Lane Tracing Assist)
P.242
■AHB (Automatic High
Beam)
P.214
■RSA (Road Sign Assist)*
P.252
*: If equipped
■Dynamic radar cruise con-
trol with full-speed range
P.255 Two types of sensors, located
behind the front grille and wind-
shield, detect information neces-
sary to operate the drive assist
systems.
Radar sensor
Front camera
Toyota Safety Sense
2.5
The Toyota Safety Sense 2.5
consists of the following
drive assist systems and
contributes to a safe and
comfortable driving experi-
ence:
Driving assist system
WARNING
■Toyota Safety Sense 2.5
The Toyota Safety Sense 2.5 is
designed to operate under the
assumption that the driver will
drive safely, and is designed to
help reduce the impact to the
occupants and the vehicle in the
case of a collision or assist the
driver in normal driving condi-
tions.
As there is a limit to the degree of
recognition accuracy and control
performance that this system can
provide, do not overly rely on this
system. The driver is always
responsible for paying attention to
the vehicle’s su rroundings and
driving safely.
Sensors