2022 TOYOTA SIENNA HYBRID change time
[x] Cancel search: change timePage 361 of 600
3615-1. Using the air conditioning system and defogger
5
Interior features
*: If equipped
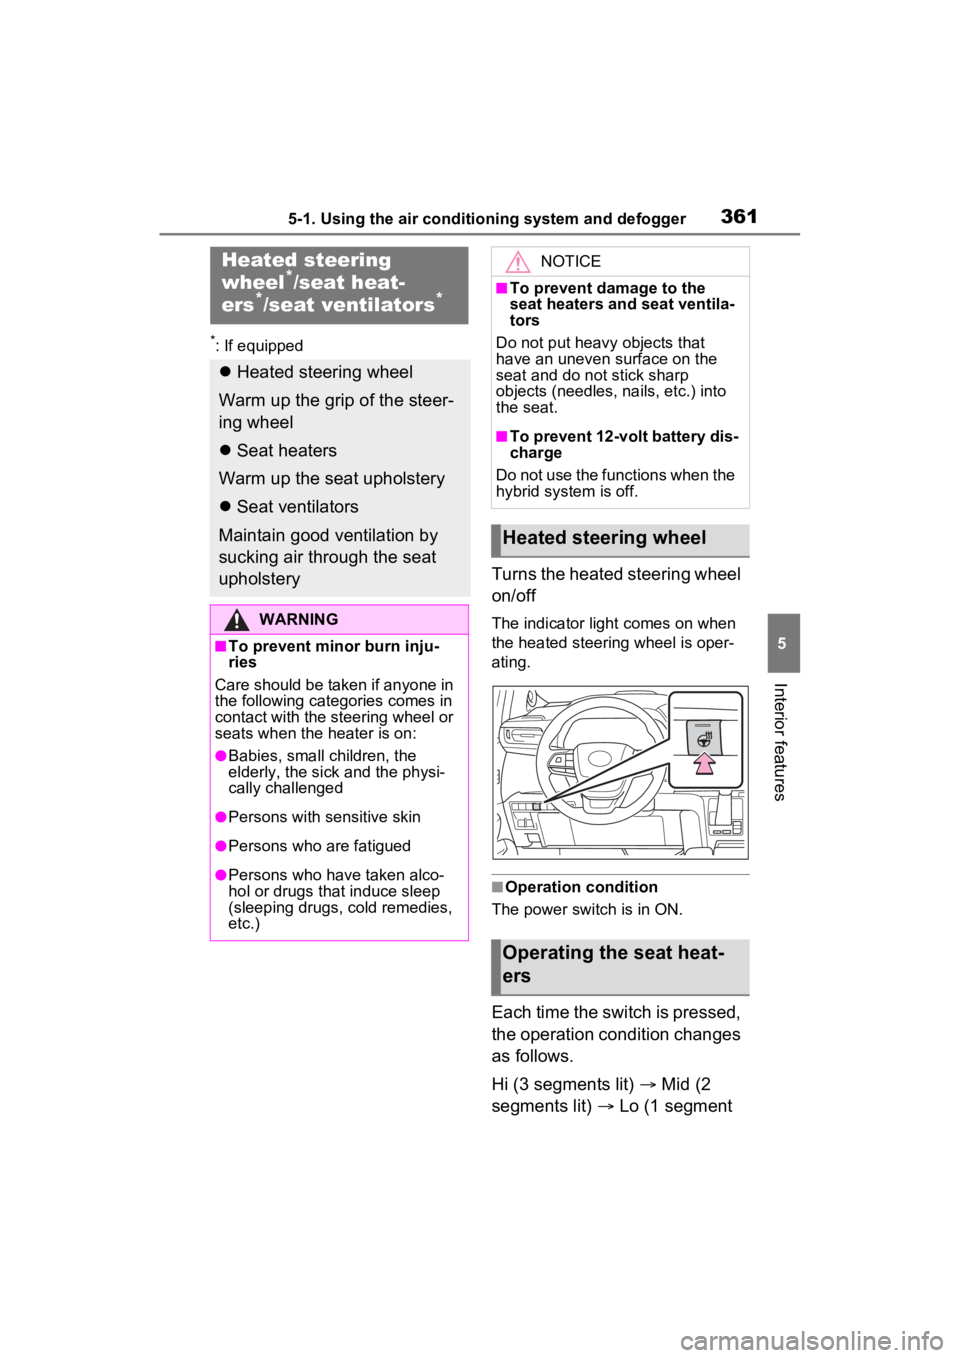
Turns the heated steering wheel
on/off
The indicator light comes on when
the heated steering wheel is oper-
ating.
■Operation condition
The power switch is in ON.
Each time the switch is pressed,
the operation condition changes
as follows.
Hi (3 segments lit) Mid (2
segments lit) Lo (1 segment
Heated steering
wheel*/seat heat-
ers*/seat ventilators*
Heated steering wheel
Warm up the grip of the steer-
ing wheel
Seat heaters
Warm up the seat upholstery
Seat ventilators
Maintain good ventilation by
sucking air through the seat
upholstery
WARNING
■To prevent minor burn inju-
ries
Care should be taken if anyone in
the following categories comes in
contact with the steering wheel or
seats when the heater is on:
●Babies, small children, the
elderly, the sick and the physi-
cally challenged
●Persons with sensitive skin
●Persons who are fatigued
●Persons who have taken alco-
hol or drugs that induce sleep
(sleeping drugs, cold remedies,
etc.)
NOTICE
■To prevent damage to the
seat heaters and seat ventila-
tors
Do not put heavy objects that
have an uneven surface on the
seat and do not stick sharp
objects (needles, nails, etc.) into
the seat.
■To prevent 12-volt battery dis-
charge
Do not use the functions when the
hybrid system is off.
Heated steering wheel
Operating the seat heat-
ers
Page 362 of 600
3625-1. Using the air conditioning system and defogger
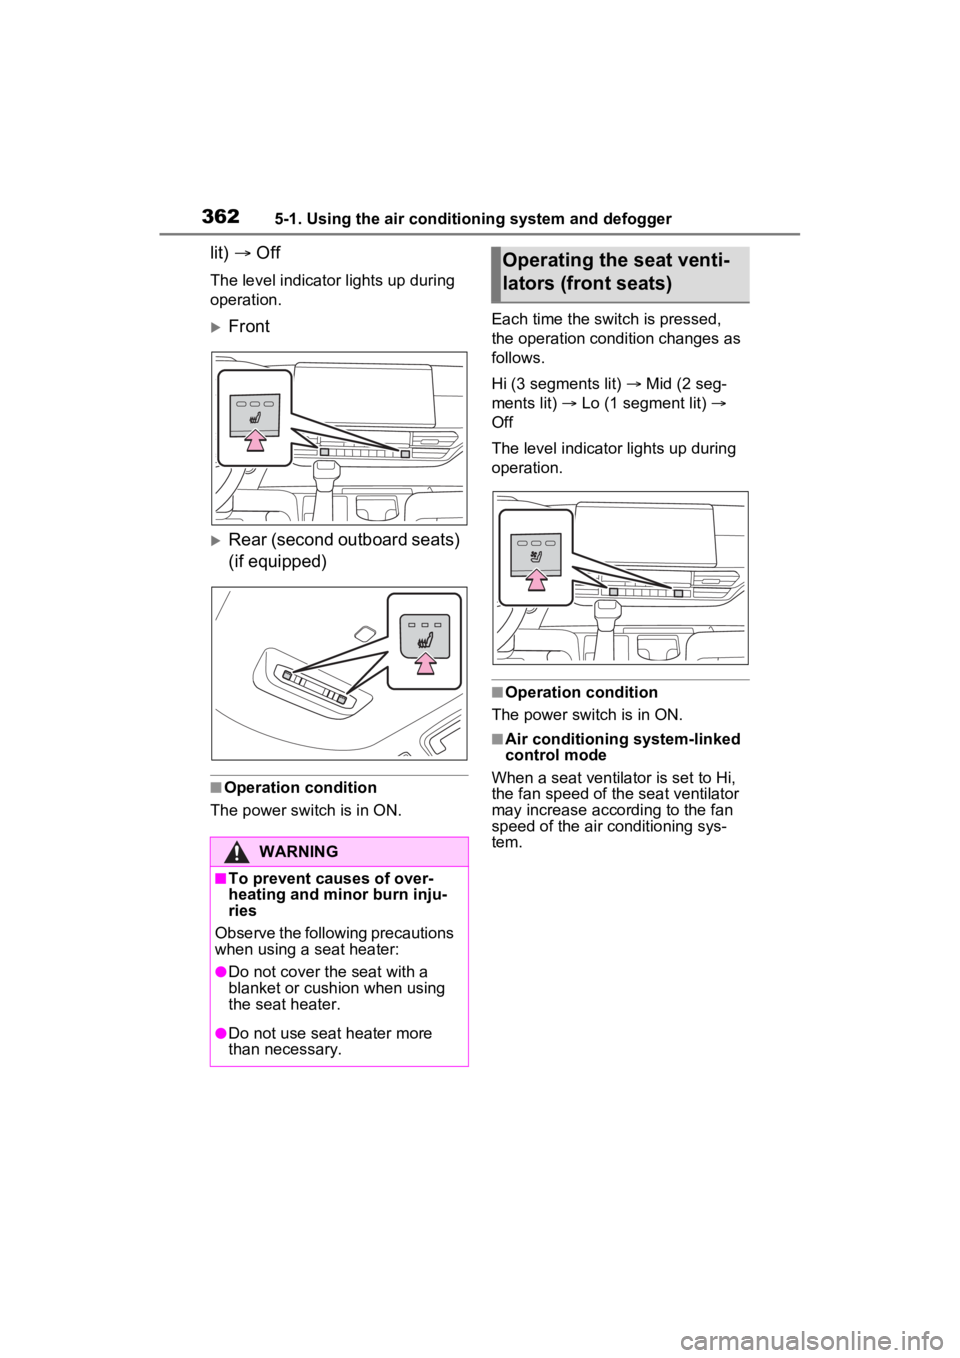
lit) Off
The level indicato r lights up during
operation.
Front
Rear (second outboard seats)
(if equipped)
■Operation condition
The power swit ch is in ON. Each time the switch is pressed,
the operation condition changes as
follows.
Hi (3 segments lit)
Mid (2 seg-
ments lit) Lo (1 segment lit)
Off
The level indicato r lights up during
operation.
■Operation condition
The power switch is in ON.
■Air conditioning system-linked
control mode
When a seat ventilator is set to Hi,
the fan speed of the seat ventilator
may increase according to the fan
speed of the air conditioning sys-
tem.
WARNING
■To prevent causes of over-
heating and minor burn inju-
ries
Observe the following precautions
when using a seat heater:
●Do not cover the seat with a
blanket or cushion when using
the seat heater.
●Do not use seat heater more
than necessary.
Operating the seat venti-
lators (front seats)
Page 365 of 600

3655-2. Using the interior lights
5
Interior features
together the front interior lights.
When a door is opened while the
front and rear interior light door
position is on, the lights turn on.
2Turns the light on
■Illuminated entry system
The lights automati cally turn on/off
according to the power switch
mode, the presence of the elec-
tronic key, whether the doors are
locked/unlocked, and whether the
doors are opened/closed.
■To prevent the 12-volt battery
from being discharged
If the interior lights remain on when
the power switch is turned to OFF,
the lights will go off automatically
after 20 minutes.
■The interior lights will turn on
automatically when
If any of the SRS airbags deploy
(inflate) or in the event of a strong
rear impact, the interior lights will
turn on automatically.
The interior lights will turn off auto-
matically after approximately 20
minutes.
The interior lights can be turned off
manually. However, in order to help
prevent further collisions, it is rec-
ommended that they be left on until
safety can be ensured.
(The interior lights may not turn on
automatically depending on the
force of the impact and conditions of
the collision.)
■Customization
Setting (e.g. the time elapsed before
the lights turn off) can be changed.
(Customizable features: P.549)
NOTICE
■To prevent 12-volt battery dis-
charge
Do not leave the lights on longer
than necessary when the hybrid
system is off.
Page 383 of 600
3835-4. Using the other interior features
5
Interior features
every second (Orange)
• Repeatedly flashes 3 times continuously (Orange)
• Repeatedly flashes 4 times continuously (Orange)
■The wireless charger can be
operated when
The power switch is in ACC or ON.
■Usable portable devices
Qi standard wireless charge stan-
dard can be used on compatible
devices.
However, not all Qi standard
devices and compat ibility are guar-
anteed.
Starting with mobile phones and
smartphones, it is aimed for low
power electrically supplied portable
devices of no more than 5W.
■When covers and accessories
are attached to portable devices
Do not charge in situations where
cover and accessories not able to
handle Qi are attached to the porta-
ble device. Depending on the type
of cover and acce ssory, it may not
be possible to charge. When
charging is not performed even with
the portable devic e placed on the
charge area, remove the cover and
accessories.
■While charging, noise enters
the AM radio
Turn off the wireless charger and
confirm that the noise has
decreased. If the noise decreases,
continuously pushing the power
supply switch of the wireless char-
ger for 2 seconds, the frequency of
the charger can be changed and the
noise can be reduced.Also, on that
occasion, the operation indicator
light will flash or ange 2 times.
Suspected
causesHandling method
Vehicle to char-
ger communica-
tion failure.
If the power
switch is in ACC:
Turn the power
switch to ON.
If the power
switch is in ON:
Turn the power
switch off and
then back to ON.
If the operation
indicator light still
blinks after per-
forming the
above proce-
dure, contact
your Toyota
dealer.
Suspected causesHandling method
A foreign sub-
stance is
between the por-
table device and
charge area.Remove the for-
eign substance
from between
portable device
and the charge
area.
The portable
device is out of
sync due to the
device being
shifted from the
center of the
charge area.
Place the porta-
ble device near
the center of the
charge area.
Suspected causesHandling method
Temperature ris-
ing within the
wireless charger.Stop charging at
once and start
charging again
after for a while.
Page 426 of 600
4266-3. Do-it-yourself maintenance
large display, airpo rt or other facil-
ity that generates strong radio
waves or electrical noise
• When carrying a portable radio, cellular phone, cordless phone or
other wireless communication
device
If tire position information is not cor-
rectly displayed due to the radio
wave conditions, the display may be
corrected by driving and changing
the radio wave conditions.
●When the vehicle is parked, the
time taken for the warning to start
or go off could be extended.
●When tire inflation pressure
declines rapidly for example when
a tire has burst, the warning may
not function.
■Warning performance of the tire
pressure warning system
The warning of the tire pressure
warning system will change in
accordance with th e conditions
under which it was initialized. For
this reason, the system may give a
warning even if the tire pressure
does not reach a low enough level,
or if the pressure is higher than the
pressure that was adjusted to when
the system was initialized.
When replacing tires or wheels,
tire pressure warning valves and
transmitters must also be
installed.
When new tire pressure warning
valves and transmitters are
installed, new ID codes must be
registered in the tire pressure
warning computer and the tire pressure warning system must
be initialized. (
P.430)
■When replacing the tires and
wheels
If the ID code of the tire pressure
warning valve and tr ansmitter is not
registered, the tire pressure warning
system will not work properly. After
driving for about 20 minutes, the tire
pressure warning light blinks for 1
minute and stays on to indicate a
system malfunction.
Installing tire pressure
warning valves and trans-
mitters
NOTICE
■Repairing or replacing tires,
wheels, tire pressure warn-
ing valves, transmitters and
tire valve caps
●When removing or fitting the
wheels, tires or the tire pressure
warning valves and transmit-
ters, contact your Toyota dealer
as the tire pressure warning
valves and transmitters may be
damaged if not handled cor-
rectly.
●Make sure to install the tire
valve caps. If the tire valve caps
are not installed, water could
enter the tire pressure warning
valves and the tire pressure
warning valves could be bound.
●When replacing tire valve caps,
do not use tire valve caps other
than those specified.
The cap may become stuck.
Page 430 of 600
4306-3. Do-it-yourself maintenance
performing initialization, the tire
pressure warning light blinks for
approximately 1 minute and then
illuminates.
If the inflation pressure of each tire
is still not displayed, have the vehi-
cle inspected by your Toyota dealer.
Every tire pressure warning
valve and transmitter has a
unique ID code. When replacing
a tire pressure warning valve
and transmitter, it is necessary
to register the ID code.
When registering the ID codes,
perform the following procedure.
With 4.2-inch display
1 Park the vehicle in a safe
place, wait for approximately
20 minutes, and then start
the hybrid system.
2 Press or of the meter
control switches on the steer-
ing wheel and select .
3 Press or of the meter
control switches and select “Vehicle Settings”, and then
press and hold “OK”.
4 Press or of the meter
control switches and select
“TPWS Setting”, and then
press “OK”.
5 Press or of the meter
control switches and select
“Identifying Each Wheel &
Position”. Then press and
hold “OK” until the tire pres-
sure warning light starts
slowly blinking 3 times.
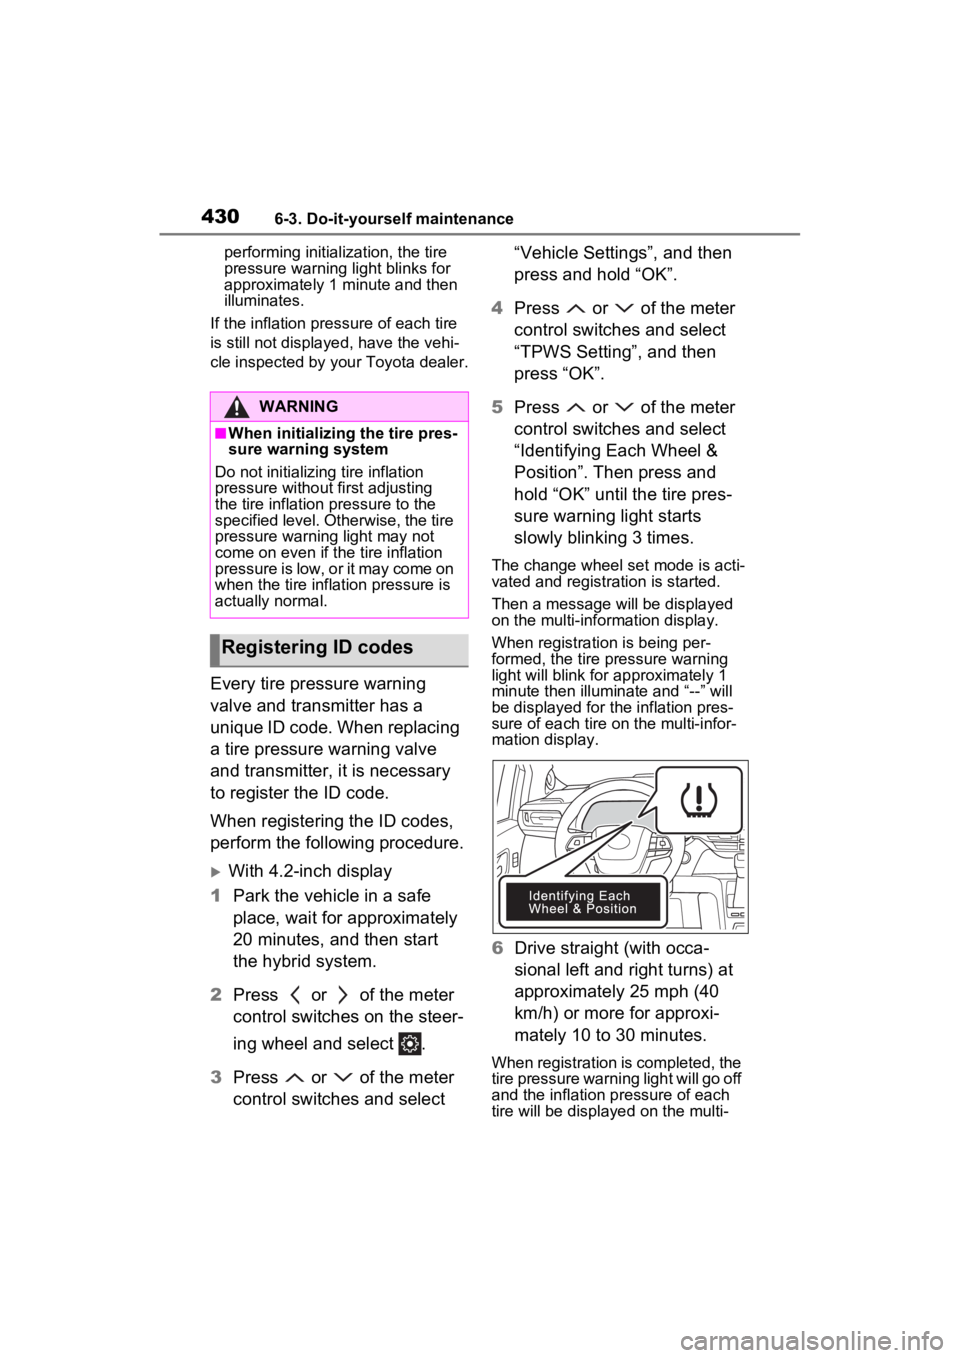
The change wheel set mode is acti-
vated and registra tion is started.
Then a message will be displayed
on the multi-information display.
When registration is being per-
formed, the tire pressure warning
light will blink for approximately 1
minute then illuminate and “--” will
be displayed for the inflation pres-
sure of each tire on the multi-infor-
mation display.
6 Drive straight (with occa-
sional left and right turns) at
approximately 25 mph (40
km/h) or more for approxi-
mately 10 to 30 minutes.
When registration is completed, the
tire pressure warning light will go off
and the inflation pressure of each
tire will be displayed on the multi-
WARNING
■When initializing the tire pres-
sure warning system
Do not initializing tire inflation
pressure without first adjusting
the tire inflation pressure to the
specified level. Otherwise, the tire
pressure warning light may not
come on even if the tire inflation
pressure is low, or it may come on
when the tire inflation pressure is
actually normal.
Registering ID codes
Page 431 of 600

4316-3. Do-it-yourself maintenance
6
Maintenance and care
information display.
Even if the vehicle is not driven at
approximately 25 mph (40 km/h) or
more, registration can be com-
pleted by driving for a long time.
However, if registration does not
complete after driving for 1 hour or
more, perform the procedure again
from the beginning.
7Initialize the tire pressure
warning system. ( P.427)
With 7-inch display
1 Park the vehicle in a safe
place, wait for approximately
20 minutes, and then start
the hybrid system.
2 Press or of the meter
control switches on the steer-
ing wheel and select .
3 Press or of the meter
control switches and select
, and then press and hold
“OK”.
4 Press or of the meter
control switches and select
“TPWS Setting”, and then
press “OK”.
5 Press or of the meter
control switches and select
“Identifying Each Wheel &
Position”. Then press and
hold “OK” until the tire pres-
sure warning light starts
slowly blinking 3 times.
The change wheel set mode is acti-
vated and registration is started.
Then a message w ill be displayed
on the multi-info rmation display.
When registration is being per- formed, the tire pressure warning
light will blink for
approximately 1
minute then illumi nate and “--” will
be displayed for the inflation pres-
sure of each tire o n the multi-infor-
mation display.
6 Drive straight (with occa-
sional left and right turns) at
approximately 25 mph (40
km/h) or more for approxi-
mately 10 to 30 minutes.
When registration is completed, the
tire pressure warning light will go off
and the inflation pressure of each
tire will be displaye d on the multi-
information display.
Even if the vehicle is not driven at
approximately 25 mph (40 km/h) or
more, registration can be com-
pleted by driving for a long time.
However, if registr ation does not
complete after driving for 1 hour or
more, perform the p rocedure again
from the beginning.
7 Initialize the tire pressure
warning system. ( P.427)
■When registering ID codes
●ID code registrati on is performed
while driving at a vehicle speed of
approximately 25 mph (40 km/h)
or more.
●Before performing ID code regis-
tration, make sure that no wheels
with tire pressure warning valve
and transmitters installed are near
the vehicle.
Page 433 of 600

4336-3. Do-it-yourself maintenance
6
Maintenance and care
with the function to have ID
codes registered for a second
wheel set, for example a winter
set. You can register a second
wheel set by yourself or your
Toyota dealer.
After registration of a second
wheel set, either of these two
wheel sets can be selected for
usage with the tire pressure
warning system.
■Operating conditions for
the function
This function will perform the
change of wheel set only if a
second wheel set has been
registered. If no second wheel
set has been registered, no
change will be made when
selecting this function in the
menu.
Only a change between both
registered wheel set is possi-
ble, mixing between these
wheel sets is not supported.
■How to change between
wheel sets
1 Have the vehicle fitted with
the preferred wheel set.
With 4.2-inch display
2 Press or of the meter
control switches on the steer-
ing wheel and select .
3 Press or of the meter
control switches and select
“Vehicle Settings”, and then
press and hold “OK”. 4
Press or of the meter
control switches and select
“TPWS Setting”, and then
press “OK”.
5 Press or of the meter
control switches and select
“Identifying Each Wheel &
Position”. Then press and
hold “OK” until the tire pres-
sure warning light starts
slowly blinking 3 times.
Afterward, the tire pressure
warning light turns on after
flashing for 1 minute.
After 2 minutes, registration of a
second wheel set is being per-
formed. The tire pressure warn-
ing light will turn off and “--” will
be displayed for the inflation
pressure of each tire on the
multi-information display.
6 Initialize the tire pressure
warning system. ( P.427)
If the tire inflation pressure settings
for the installed ti res change, initial-
ization operations are required, but
if the tire inflation pressure settings
are the same, init ialization is not
required.
7 Drive straight (with occa-
sional left and right turns) at
approximately 25 mph (40
km/h) or more for approxi-
mately 10 to 30 minutes.
Registration of a second wheel set
is complete when the tire pressure
warning light turns off and the infla-
tion pressure of each tire is dis-
played on the multi-information
display.