Page 523 of 748

5236-1. Using the air conditioning system and defogger
6
Interior features
Turns the seat heaters and ven-
tilators on/off
Each time the switch is pressed,
the operation condition changes as
follows.
Hi (3 segments lit) Mid (2 seg-
ments lit) Lo (1 segment lit)
Off
1 Turns the seat heater on
The level indicators (yellow)
light up during operation.
2Turns the seat ventilator on
The level indicators (green)
light up during operation.
■Operation condition
The engine switch is in ON.
■Air conditioning system-linked
control mode
When a seat ventilator is set to Hi,
the fan speed of the seat ventilator
may increase according to the fan
speed of the air conditioning sys-
tem.
WARNING
■To prevent causes of over-
heating and minor burn inju-
ries
Observe the following precautions
when using a seat heater:
●Do not cover the seat with a
blanket or cushion when using
the seat heater.
●Do not use seat heater more
than necessary.
Seat heaters and ventila-
tors
A
A
WARNING
■To prevent causes of over-
heating and minor burn inju-
ries
Observe the following precautions
when using a seat heater:
●Do not cover the seat with a
blanket or cushion when using
the seat heater.
●Do not use seat heater more
than necessary.
Page 528 of 748
5286-3. Using the storage features
Unlock with the mechanical
key
Lock with the mechanical key
Open (pull up the lever)
Lift the lid while pushing the but-
ton to release the lock.
■Console box tray (if equipped)
The tray can be removed and stored
in the bottom of the console box.
Front
Rear
Pull the armrest down.
Glove box
WARNING
■Caution while driving
Keep the glove box closed. In the
event of sudden braking or sud-
den swerving, an accident may
occur due to an occupant being
struck by the open glove box or
the items stored inside.
Console box
A
B
C
�:�$�5�1�,�1�*
■Caution while driving
Keep the console box closed.
Injuries may resul t in the event of
an accident or sudden braking.
Cup holders
Page 529 of 748

5296-3. Using the storage features
6
Interior features
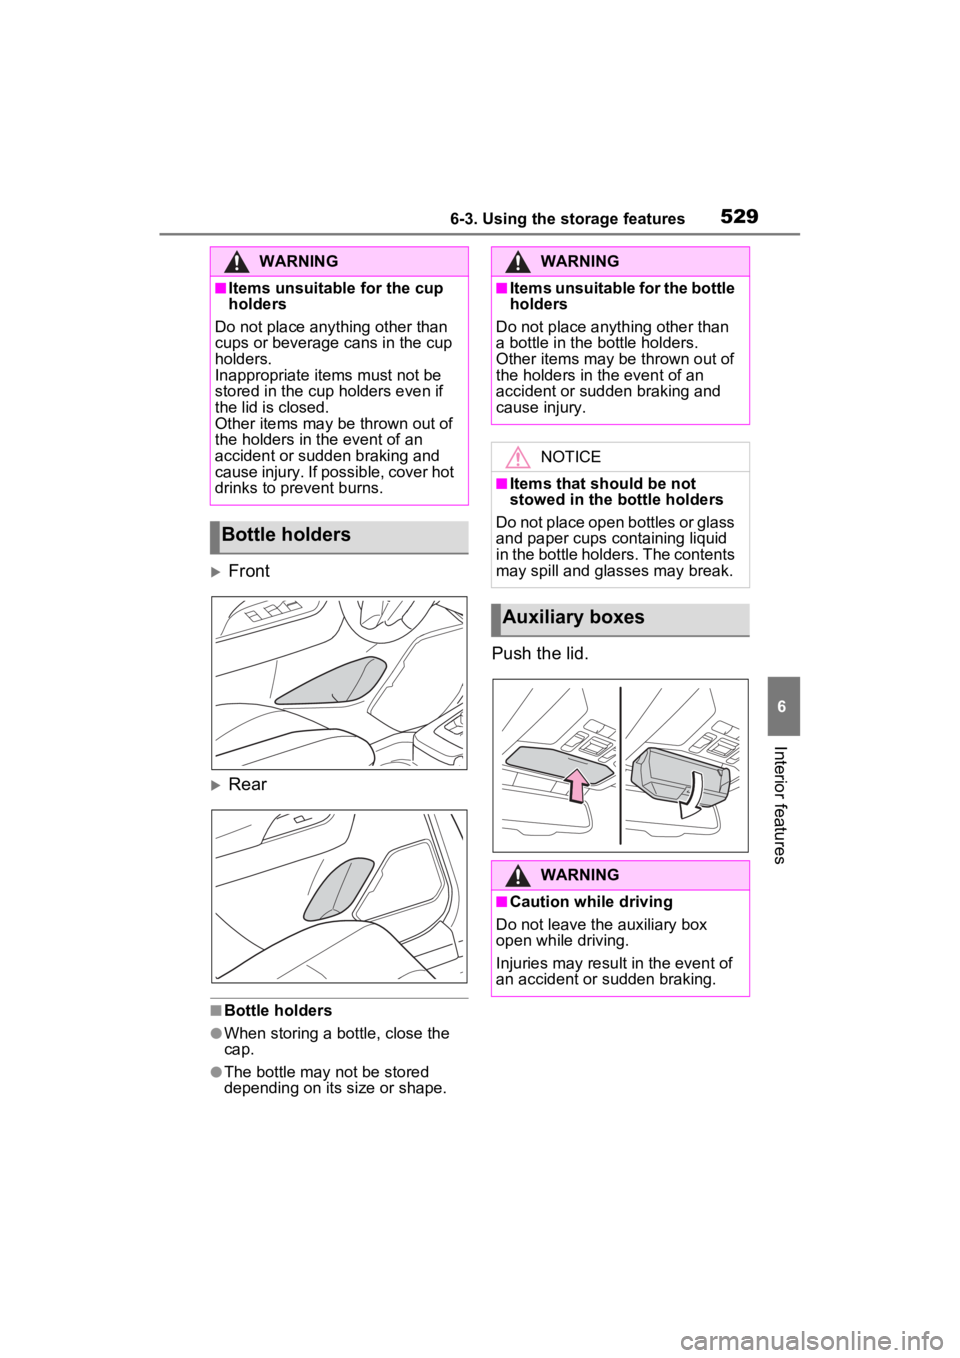
Front
Rear
■Bottle holders
●When storing a bottle, close the
cap.
●The bottle may not be stored
depending on its size or shape.
Push the lid.
WARNING
■Items unsuitable for the cup
holders
Do not place anything other than
cups or beverage cans in the cup
holders.
Inappropriate items must not be
stored in the cup holders even if
the lid is closed.
Other items may be thrown out of
the holders in the event of an
accident or sudden braking and
cause injury. If possible, cover hot
drinks to prevent burns.
Bottle holders
WARNING
■Items unsuitable for the bottle
holders
Do not place anyth ing other than
a bottle in the bottle holders.
Other items may be thrown out of
the holders in the event of an
accident or sudden braking and
cause injury.
NOTICE
■Items that should be not
stowed in the bottle holders
Do not place open bottles or glass
and paper cups containing liquid
in the bottle holders. The contents
may spill and glasses may break.
Auxiliary boxes
WARNING
■Caution while driving
Do not leave the auxiliary box
open while driving.
Injuries may resul t in the event of
an accident or sudden braking.
Page 530 of 748
5306-3. Using the storage features
Driver’s side
Front passenger’s side
Front of console
Vehicles with wireless charger:
P.539
WARNING
■Items unsuitable for storing
Do not store items heavier than
0.4 lb. (0.2 kg).
Doing so may cause the auxiliary
box to open and the items inside
may fall out, resulting in an acci-
dent.
Open trayWARNING
■Items unsuitable for the open
tray
Observe the following precautions
when putting items in the open
tray. Failure to d o so may cause
items to be thrown out of the tray
in the event of s udden braking or
steering. In these cases, the items
may interfere with pedal operation
or cause driver distraction, result-
ing in an accident.
●Do not store ite ms in the tray
that can easily shift or roll out.
●Do not stack items in the tray
higher than the tray’s edge.
●Do not put items in the tray that
may protrude over the tray’s
edge.
Page 531 of 748
5316-3. Using the storage features
6
Interior features
Raise the hook to use.
The cargo hooks are provided for
securing loose items.
■Flipping the deck board
upside down
The deck board can be flipped
upside down (resin side up)
depending on the situation. Original position
Underside (resin side)
■Changing the deck board
positions
Height of the deck board can be
changed by setting the deck
board under the floor.
Upper
Lower
Luggage compart-
ment features
Cargo hooks
WARNING
■When cargo hooks are not in
use
To avoid injury, always return the
hooks to their stowed positions
when not in use.
Deck board
A
B
A
B
Page 532 of 748
5326-3. Using the storage features
1Pull up the tab to raise the
deck board and move it
toward you to remove.
2 Place the deck board through
the groove and move for-
ward.
■Setting the deck board
upright
When taking out the tools, the
deck board can be set upright.
When the back surface (resin sur-
face) of the deck board is facing up,
flip it back to the original position.
1 Pull up the tab to raise the
deck board and fold it for-
ward.
2 Place the edge into the
groove ( ), and with the
deck board in a standing
state, put the edge into the
holes ( ).
WARNING
■When operating the deck
board
Do not place anything on the deck
board when operating the board.
Otherwise, your fingers may be
caught or an accident may result
causing injuries.
A
B
Page 533 of 748
5336-3. Using the storage features
6
Interior features
Type A
Type B
■Removing the partition plate
Disengage the claws
■Installing the luggage cover
1 Compress the both ends of
the luggage cover and insert
into the recess to install.
2 Pull out the luggage cover
and hook it onto the anchors.
WARNING
■Caution while driving
Keep the deck board closed.
In the event of sudden braking, an
accident may occur due to an
occupant being struck by the deck
board or the items stored under
the deck board.
Side auxiliary box
Luggage cover (if
equipped)
Page 534 of 748

5346-3. Using the storage features
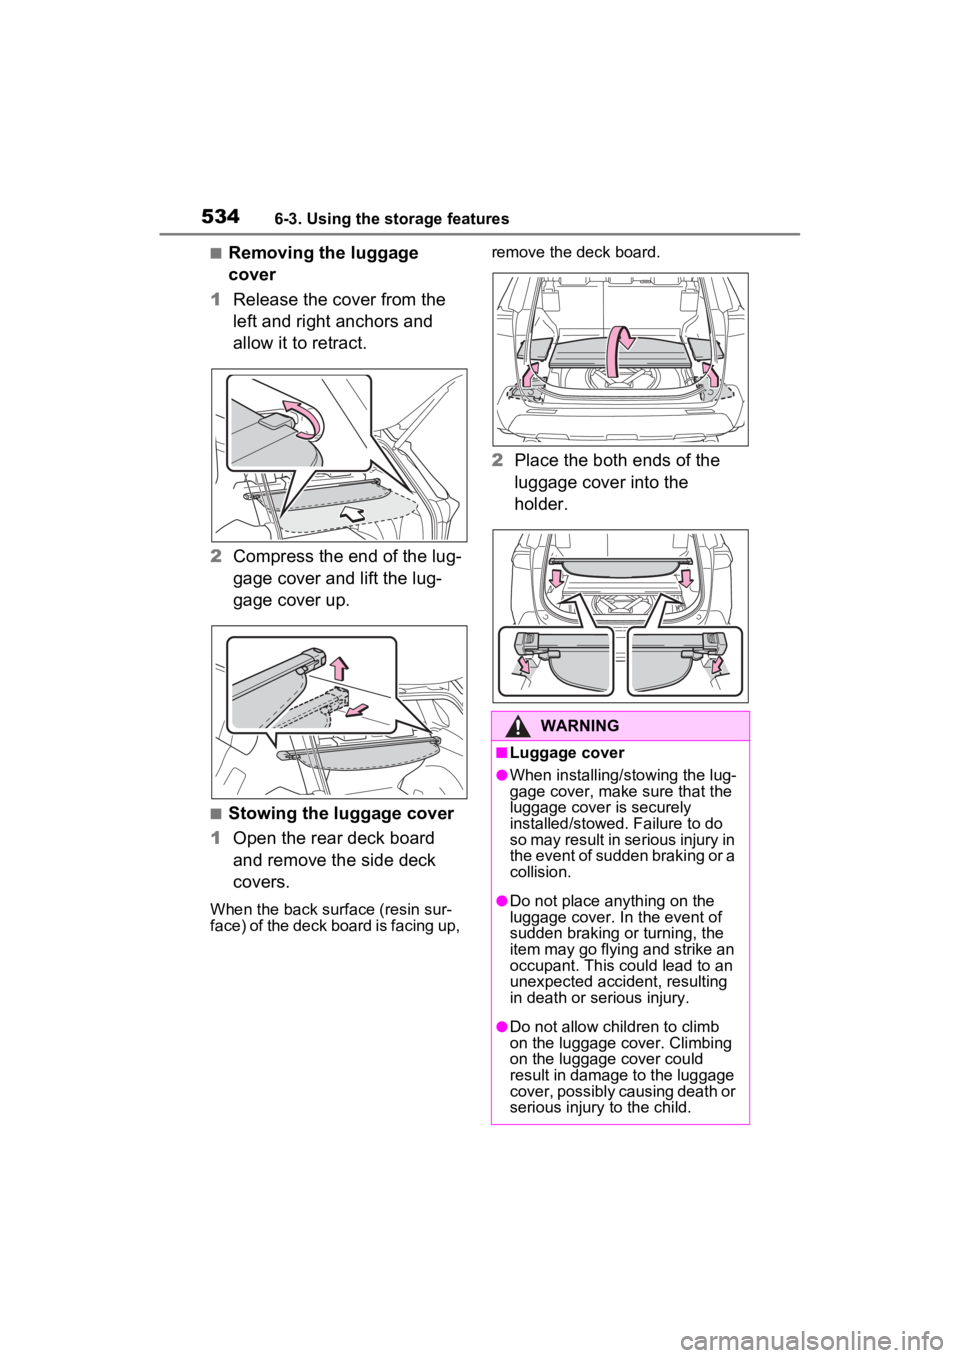
■Removing the luggage
cover
1 Release the cover from the
left and right anchors and
allow it to retract.
2 Compress the end of the lug-
gage cover and lift the lug-
gage cover up.
■Stowing the luggage cover
1 Open the rear deck board
and remove the side deck
covers.
When the back surface (resin sur-
face) of the deck board is facing up, remove the deck board.
2
Place the both ends of the
luggage cover into the
holder.
WARNING
■Luggage cover
●When installing/stowing the lug-
gage cover, make sure that the
luggage cover is securely
installed/stowed. Failure to do
so may result in serious injury in
the event of sudden braking or a
collision.
●Do not place anything on the
luggage cover. In the event of
sudden braking or turning, the
item may go flying and strike an
occupant. This could lead to an
unexpected accident, resulting
in death or serious injury.
●Do not allow children to climb
on the luggage cover. Climbing
on the luggage cover could
result in damage to the luggage
cover, possibly causing death or
serious injury to the child.