2022 TOYOTA PROACE CITY VERSO key
[x] Cancel search: keyPage 135 of 320
135
Driving
6
Special case with Keyless
Entry and Starting
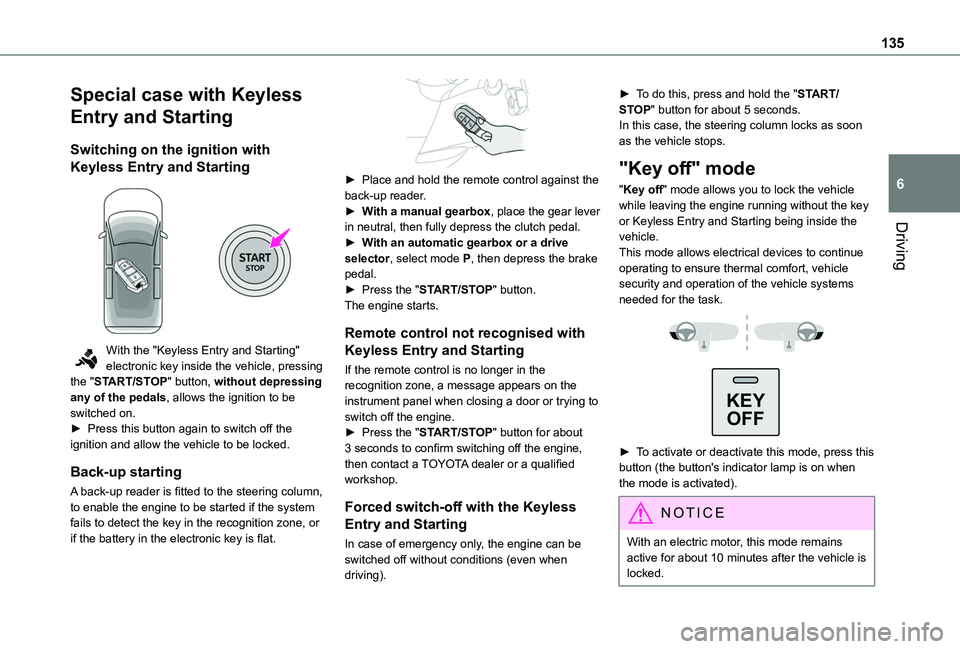
Switching on the ignition with
Keyless Entry and Starting
With the "Keyless Entry and Starting" electronic key inside the vehicle, pressing the "START/STOP" button, without depressing any of the pedals, allows the ignition to be switched on.► Press this button again to switch off the ignition and allow the vehicle to be locked.
Back-up starting
A back-up reader is fitted to the steering column, to enable the engine to be started if the system fails to detect the key in the recognition zone, or if the battery in the electronic key is flat.
► Place and hold the remote control against the back-up reader.► With a manual gearbox, place the gear lever in neutral, then fully depress the clutch pedal.► With an automatic gearbox or a drive selector, select mode P, then depress the brake pedal.► Press the "START/STOP" button.The engine starts.
Remote control not recognised with
Keyless Entry and Starting
If the remote control is no longer in the recognition zone, a message appears on the instrument panel when closing a door or trying to switch off the engine.► Press the "START/STOP" button for about 3 seconds to confirm switching off the engine, then contact a TOYOTA dealer or a qualified workshop.
Forced switch-off with the Keyless
Entry and Starting
In case of emergency only, the engine can be
switched off without conditions (even when driving).
► To do this, press and hold the "START/STOP" button for about 5 seconds.In this case, the steering column locks as soon as the vehicle stops.
"Key off" mode
"Key off" mode allows you to lock the vehicle while leaving the engine running without the key or Keyless Entry and Starting being inside the vehicle.This mode allows electrical devices to continue operating to ensure thermal comfort, vehicle security and operation of the vehicle systems needed for the task.
KEY
OFF
► To activate or deactivate this mode, press this button (the button's indicator lamp is on when the mode is activated).
NOTIC E
With an electric motor, this mode remains
active for about 10 minutes after the vehicle is locked.
Page 142 of 320
142
Moving off
► With your foot on the brake, select position P.► Start the engine.If the conditions are not met, there is an audible signal, accompanied by a message on the instrument panel screen.► Release the parking brake, unless it is set to automatic mode (with electric parking brake).► Select position R, N or D.
WARNI NG
If you are setting off from a steep slope with a loaded vehicle, depress the brake pedal, select position D, release the parking brake, unless it is set to automatic mode (with electric parking brake), then release the brake pedal.
► Gradually release the brake pedal.Or► Accelerate gradually in order to release the electric parking brake (if it is set to automatic mode).The vehicle moves off immediately.
NOTIC E
If P is displayed on the instrument panel but the selector is in another position, place the selector in position P to allow the engine to be started.If position N is selected inadvertently while driving, allow the engine to return to idle, then select position D to accelerate.
WARNI NG
When the engine is running at idle with the brakes released, if position R, D or M is selected, the vehicle moves even without the accelerator being pressed.Never leave children inside the vehicle unsupervised.As a safety measure, never leave the vehicle without taking your key or remote control with you, even for a short time.When carrying out maintenance with the engine running, apply the parking brake and select position P.
WARNI NG
With an automatic gearbox, never try to start
the engine by pushing the vehicle.
Automatic operation
► Select position D for automatic changing of the gears.The gearbox then operates in auto-adaptive mode, without any intervention on the part of the driver. It continuously selects the most suitable gear according to the driving style, the road profile and the load in the vehicle.► For maximum acceleration without touching the selector, fully depress the accelerator pedal (kick-down).The gearbox changes down automatically or holds the gear selected until the maximum engine speed is reached.When braking, the gearbox changes down automatically to provide effective engine braking.If you release the accelerator sharply, the gearbox will not shift to a higher gear for safety reasons.
WARNI NG
Never select position N while the vehicle is moving.Never select positions P or R unless the vehicle is completely stationary.
Page 150 of 320
150
Deactivation/Activation
With button
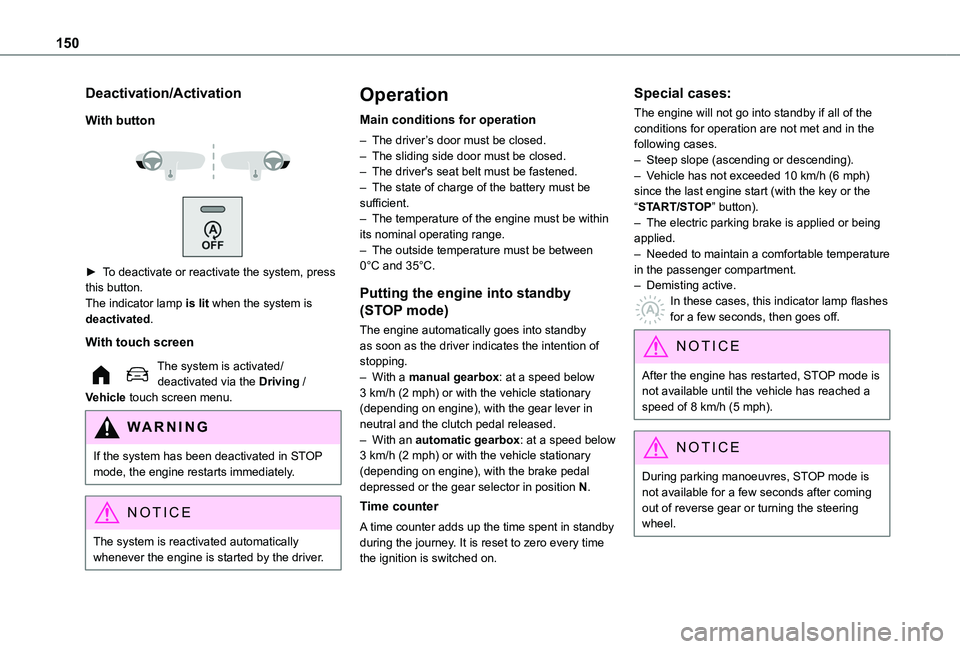
► To deactivate or reactivate the system, press this button.The indicator lamp is lit when the system is deactivated.
With touch screen
The system is activated/deactivated via the Driving / Vehicle touch screen menu.
WARNI NG
If the system has been deactivated in STOP mode, the engine restarts immediately.
NOTIC E
The system is reactivated automatically
whenever the engine is started by the driver.
Operation
Main conditions for operation
– The driver’s door must be closed.– The sliding side door must be closed.– The driver's seat belt must be fastened.– The state of charge of the battery must be sufficient.– The temperature of the engine must be within its nominal operating range.– The outside temperature must be between 0°C and 35°C.
Putting the engine into standby
(STOP mode)
The engine automatically goes into standby as soon as the driver indicates the intention of stopping.– With a manual gearbox: at a speed below 3 km/h (2 mph) or with the vehicle stationary (depending on engine), with the gear lever in neutral and the clutch pedal released.– With an automatic gearbox: at a speed below
3 km/h (2 mph) or with the vehicle stationary (depending on engine), with the brake pedal depressed or the gear selector in position N.
Time counter
A time counter adds up the time spent in standby during the journey. It is reset to zero every time the ignition is switched on.
Special cases:
The engine will not go into standby if all of the conditions for operation are not met and in the following cases.– Steep slope (ascending or descending).– Vehicle has not exceeded 10 km/h (6 mph) since the last engine start (with the key or the “START/STOP” button).– The electric parking brake is applied or being applied.– Needed to maintain a comfortable temperature in the passenger compartment.– Demisting active.In these cases, this indicator lamp flashes for a few seconds, then goes off.
NOTIC E
After the engine has restarted, STOP mode is not available until the vehicle has reached a speed of 8 km/h (5 mph).
NOTIC E
During parking manoeuvres, STOP mode is not available for a few seconds after coming out of reverse gear or turning the steering wheel.
Page 151 of 320
151
Driving
6
Restarting the engine (START mode)
The engine automatically restarts as soon as the driver indicates the intention of moving off again.– With a manual gearbox: with the clutch pedal fully depressed.– With an automatic gearbox:• With the selector in position D or M: with the brake pedal released.• With the selector in position N and the brake pedal released: with the selector at D or M.• With the selector in position P and the brake pedal depressed: with the selector at R, N, D or M.
Special cases
The engine will restart automatically if all conditions for operation are met again and in the following case.– Speed of the vehicle exceeds 3 km/h (2 mph) (depending on the engine).In this case, this indicator lamp flashes for a few seconds, then goes off.
Malfunctions
Depending on the vehicle’s equipment:In the event of a system malfunction, this warning lamp flashes on the instrument panel.The warning lamp in this button flashes and a message appears, accompanied by an audible signal.Have the vehicle checked by a TOYOTA dealer or a qualified workshop.
The vehicle stalls in STOP mode
All of the instrument panel warning lamps come on if there is a fault.Depending on version, a warning message may also be displayed, prompting you to place the gear selector in position N and depress the brake pedal.► Switch off the ignition then start the engine again with the key or the "START/STOP" button.
WARNI NG
12 V batteryThe Stop & Start system requires a 12 V battery of specific technology and specification.All work must be carried out only by any authorized Toyota retailer or Toyota authorized repairer, or any reliable repairer.
Under-inflation detection
This system alerts the driver if one or more tyres suffer a drop in pressure.The alert is raised when the vehicle is moving, not when stationary.It compares the information given by the wheel speed sensors with reference values, which must be reinitialised every time the tyre pressures are adjusted or a wheel changed.It takes into account the last values stored during the reinitialisation request. It is therefore essential that the tyre pressure is correct during the operation. This operation is the driver's responsibility.
WARNI NG
The tyre under-inflation detection cannot, in any circumstances, replace the need for vigilance on the part of the driver.This system does not avoid the need to regularly check the tyre pressures (including the spare wheel), especially before a long journey.Driving with under-inflated tyres, particularly in adverse conditions (heavy load, high speed, long journey):– worsens road-holding.– lengthens braking distances.– causes premature wear of the tyres.– increases energy consumption.
Page 193 of 320
193
Practical information
7
WARNI NG
Stop & StartNever refuel with the engine in STOP mode; you must switch off the ignition.
Refuelling
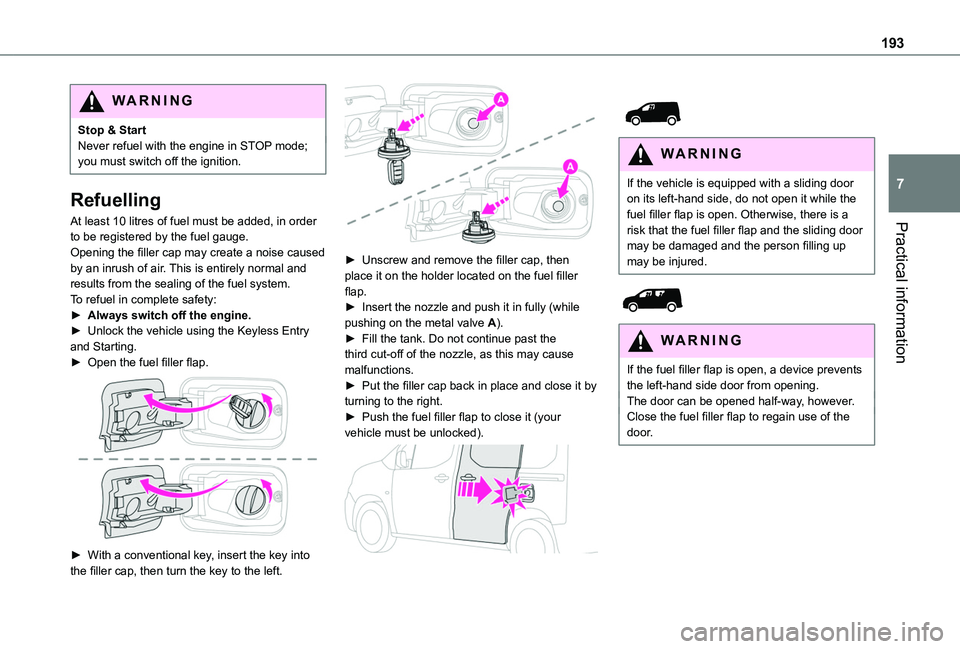
At least 10 litres of fuel must be added, in order to be registered by the fuel gauge.Opening the filler cap may create a noise caused by an inrush of air. This is entirely normal and results from the sealing of the fuel system.To refuel in complete safety:► Always switch off the engine.► Unlock the vehicle using the Keyless Entry and Starting.► Open the fuel filler flap.
► With a conventional key, insert the key into the filler cap, then turn the key to the left.
► Unscrew and remove the filler cap, then place it on the holder located on the fuel filler flap.► Insert the nozzle and push it in fully (while pushing on the metal valve A).► Fill the tank. Do not continue past the third cut-off of the nozzle, as this may cause malfunctions.► Put the filler cap back in place and close it by turning to the right.► Push the fuel filler flap to close it (your vehicle must be unlocked).
WARNI NG
If the vehicle is equipped with a sliding door on its left-hand side, do not open it while the fuel filler flap is open. Otherwise, there is a risk that the fuel filler flap and the sliding door may be damaged and the person filling up may be injured.
WARNI NG
If the fuel filler flap is open, a device prevents the left-hand side door from opening.The door can be opened half-way, however.Close the fuel filler flap to regain use of the door.
Page 197 of 320
197
Practical information
7
State of charging indicator lampMeaning
Fixed whiteGuide lighting on opening the charging flap and disconnecting the charging cable.
Fixed blueDeferred charging.
Flashing greenCharging.
Fixed greenCharging complete.The charging indicator lamp goes off after about 2 minutes as the vehicle's functions go into standby.The indicator lamp comes back on when the vehicle is unlocked using the Keyless Entry and Starting or when a door is opened, to indicate that the battery is fully charged.
Fixed redMalfunction.
WARNI NG
In case of impact, even light, against the charging flap, do not use it.Do not dismantle or modify the charging connector - risk of electrocution and/or fire!Contact any authorized Toyota retailer or Toyota authorized repairer, or any reliable repairer.
Charging cables, sockets
and chargers
The charging cable supplied with the vehicle (depending on version) is compatible with the electrical systems in the country of sale. When travelling abroad, check the compatibility of local electrical systems with the charging cable.A full range of charging cables is available from your dealer.Contact any authorized Toyota retailer or Toyota authorized repairer, or any reliable repairer for
more information and to obtain suitable charging cables.
Identification labels on charging
sockets/connectors
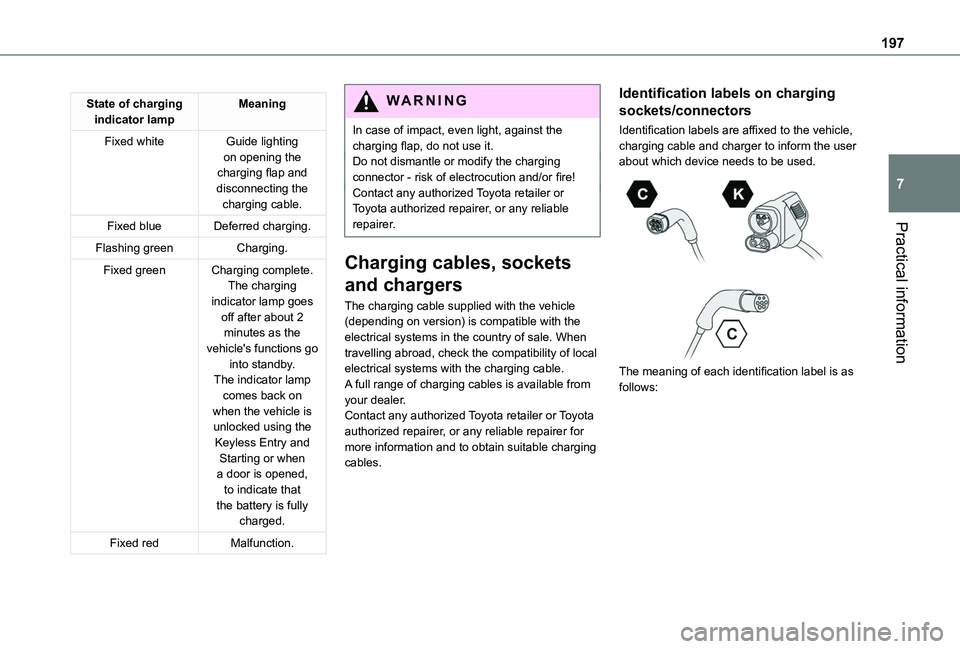
Identification labels are affixed to the vehicle, charging cable and charger to inform the user about which device needs to be used.
The meaning of each identification label is as follows:
Page 199 of 320
199
Practical information
7
Red: fault; charging not permitted or must be stopped immediately. Check that everything is connected correctly and that the electrical system is not faulty.If the indicator lamp does not go off, contact any authorized Toyota retailer or Toyota authorized repairer, or any reliable repairer.Upon plugging the charging cable into a domestic socket, all of the indicator lamps come on briefly.If no indicator lamps come on, check the domestic socket's circuit-breaker:– If the circuit-breaker has tripped, contact a professional to check that the electrical system is compatible and/or carry out any necessary repairs.– If the circuit-breaker has not tripped, stop using the charging cable and contact any authorized Toyota retailer or Toyota authorized repairer, or any reliable repairer.
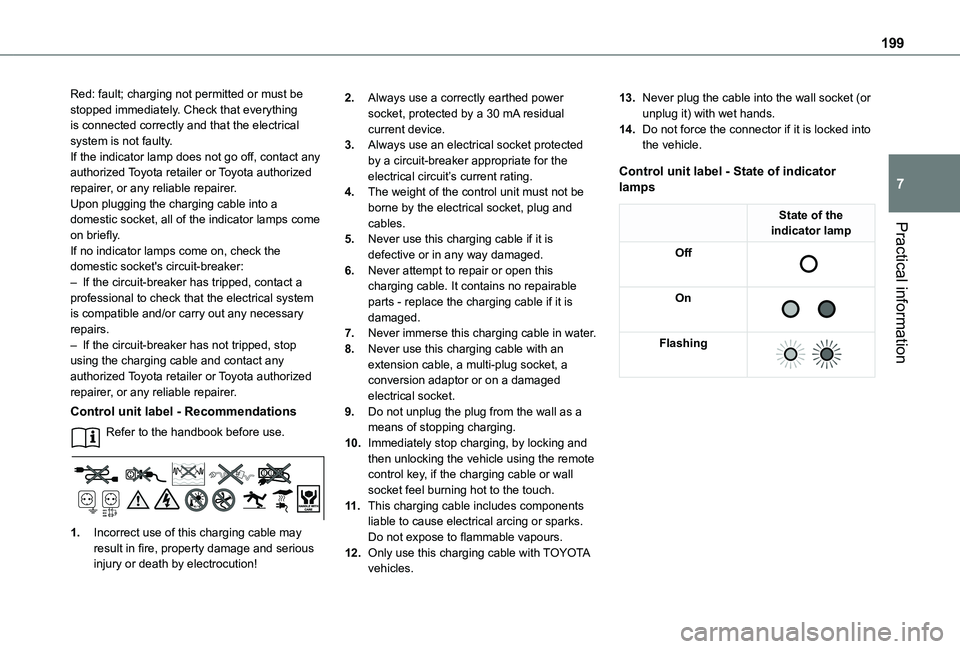
Control unit label - Recommendations
Refer to the handbook before use.
1.Incorrect use of this charging cable may result in fire, property damage and serious injury or death by electrocution!
2.Always use a correctly earthed power socket, protected by a 30 mA residual current device.
3.Always use an electrical socket protected by a circuit-breaker appropriate for the electrical circuit’s current rating.
4.The weight of the control unit must not be borne by the electrical socket, plug and cables.
5.Never use this charging cable if it is defective or in any way damaged.
6.Never attempt to repair or open this charging cable. It contains no repairable parts - replace the charging cable if it is damaged.
7.Never immerse this charging cable in water.
8.Never use this charging cable with an extension cable, a multi-plug socket, a conversion adaptor or on a damaged electrical socket.
9.Do not unplug the plug from the wall as a means of stopping charging.
10.Immediately stop charging, by locking and then unlocking the vehicle using the remote control key, if the charging cable or wall socket feel burning hot to the touch.
11 .This charging cable includes components liable to cause electrical arcing or sparks. Do not expose to flammable vapours.
12.Only use this charging cable with TOYOTA vehicles.
13.Never plug the cable into the wall socket (or unplug it) with wet hands.
14.Do not force the connector if it is locked into the vehicle.
Control unit label - State of indicator lamps
State of the indicator lamp
Off
On
Flashing
Page 219 of 320
219
Practical information
7
If swallowed, immediately wash out the mouth with clean water and then drink plenty of water.In certain conditions (high temperature, for example), the risk of release of ammonia cannot be excluded: do not inhale the fluid. Ammonia vapours have an irritant effect on mucous membranes (eyes, nose and throat).
WARNI NG
Store AdBlue® out of the reach of children, in
its original container.
Precautions for use
AdBlue® is a urea-based solution. This fluid is non-flammable, colourless and odourless (when kept in a cool place).In the event of contact with the skin, wash the affected area with soap and running water. In the event of contact with the eyes, immediately rinse the eyes with large amounts of water or with an eye wash solution for at least 15 minutes. Seek medical attention if you feel a persistent burning sensation or irritation.If swallowed, immediately wash out the mouth with clean water and then drink plenty of water.In certain conditions (high temperature, for example), the risk of release of ammonia cannot be excluded: do not inhale the fluid. Ammonia vapours have an irritant effect on mucous membranes (eyes, nose and throat).
WARNI NG
Store AdBlue® out of the reach of children, in its original container.
Procedure
Before starting the top-up procedure, ensure that the vehicle is parked on a flat and level surface.In wintry conditions, ensure that the temperature of the vehicle is above -11°C. Otherwise the AdBlue® may be frozen and so cannot be poured into the tank. Park the vehicle in a warmer area for a few hours to allow the top-up to be carried out.
WARNI NG
Never pour the AdBlue® into the Diesel fuel tank.
WARNI NG
If any AdBlue® is splashed, or if there are any spillages on the bodywork, rinse immediately with cold water or wipe with a damp cloth.If the fluid has crystallised, clean it off using a sponge and hot water.
WARNI NG
Important: in the event of a top-up after a breakdown because of a lack of AdBlue, it is essential to wait around 5 minutes before switching on the ignition, without opening the driver’s door, unlocking the vehicle, inserting the key into the ignition switch, or bringing the key for the "Keyless Entry and Starting" system into the passenger compartment.Switch on the ignition, then wait for 10 seconds before starting the engine.
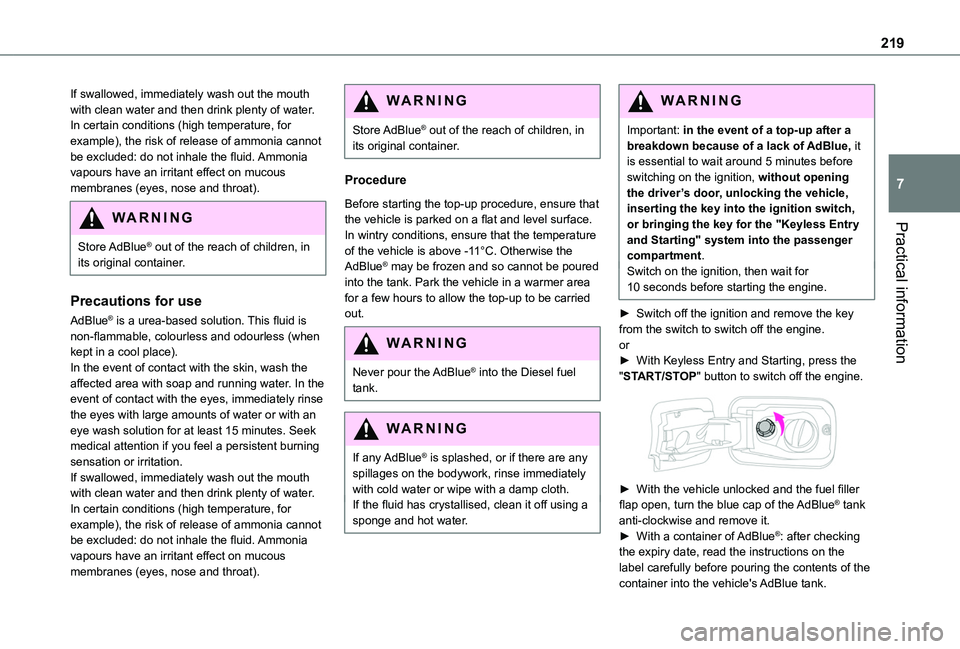
► Switch off the ignition and remove the key from the switch to switch off the engine.or► With Keyless Entry and Starting, press the "START/STOP" button to switch off the engine.
► With the vehicle unlocked and the fuel filler flap open, turn the blue cap of the AdBlue® tank anti-clockwise and remove it.► With a container of AdBlue®: after checking the expiry date, read the instructions on the label carefully before pouring the contents of the container into the vehicle's AdBlue tank.