2022 TOYOTA GR SUPRA radio
[x] Cancel search: radioPage 64 of 356

643-1. CONTROLS
Follow the instructions on the
Control Display.
Via Toyota Supra Command:
1"My Vehicle"
2 "System settings"
3 "Data privacy"
4 Select the desired setting.
Depending on the usage, the
vehicle stores personal data,
such as stored radio stations.
This personal data can be per-
manently deleted using Toyota
Supra Command.
Depending on the equipment
package, the following data can
be deleted:
• Driver profile settings.
• Stored radio stations.
• Stored programmable mem- ory buttons.
• Travel and Onboard Com- puter information.
• Music hard disc.
• Navigation, for instance stored destinations.
• Phone book.
• Online data, for instance Favorites, cookies. • Office data, for instance voice
notes.
• Login accounts.
Altogether, the deletion of the
data can take up to 15 minutes.
Data can only be deleted while
stationary.
Heed and follow the instructions
on the Control Display.
Via Toyota Supra Command:
1 "My Vehicle"
2 "System settings"
3 "Data privacy"
4 "Delete personal data"
5 "Delete personal data"
6 "OK"
7 Exit and lock the vehicle.
The deletion process takes 15
minutes to complete.
If not all of the data was deleted,
repeat the deletion.
Switch on the drive-ready state
to cancel deletion of the data.
Activating/deactivating
Deleting personal data in
the vehicle
Concept
General information
Functional requirement
Deleting data
Canceling deletion
Page 66 of 356

663-1. CONTROLS
The settings for the following
systems and functions are
stored in the active driver profile.
The scope of storable settings
depends on country and equip-
ment.
• Unlocking and locking.
• Lights.
• Climate control.
•Radio.
• Instrument cluster.
• Programmable memory but-tons.
• Volumes, tone.
• Control Display.
•TV.
• Parking Sensors.
• Rearview camera.
• Head-up Display.
• Sport mode switch.
• Seat position, exterior mirror position.
Both the positions saved via the
seat memory and the last position
set are saved.
• Toyota Supra Safety.
Regardless of the remote con-
trol in use, a different driver pro-
file may be activated. This
allows you to call up personal
vehicle settings, even if you did
not unlock the vehicle with your
own remote control. Via Toyota Supra Command:
1
"My Vehicle"
2 "Driver profiles"
3 Select driver profile.
4 "OK"
• All settings stored in the called-up driver profile are
automatically applied.
• The called-up driver profile is assigned to the remote con-
trol being used at the time.
• If the driver profile is already assigned to a different remote
control, this driver profile will
apply to both remote controls.
The guest profile is for individual
settings that are stored in none
of the three personal driver pro-
files.
Via Toyota Supra Command:
1 "My Vehicle"
2 "Driver profiles"
3 "Drive off (guest)"
4 "OK"
The guest profile cannot be
renamed. It is not assigned to
the current remote control.
A personal name can be
assigned to the active driver
profile to avoid confusion
between the driver profiles.
Adjusting
Profile management
Selecting a driver profile
Guest profile
Renaming a driver profile
Page 82 of 356
823-1. CONTROLS
4Insert a type CR 2032 3V
battery with the positive side
facing up.
5 Press the cover closed.
6 Push the integrated key into
the vehicle key until the inte-
grated key engages.
Additional remote controls are
available from your Toyota
dealer.
A lost remote control can be
blocked and replaced by your
Toyota dealer.
If the lost remote control has an
assigned driver profile, refer to
page 65, the connection to this
remote control must be deleted.
A new remote control can then
be assigned to the driver profile.
A vehicle message, refer to
page 134, is displayed.
Remote control detection by the
vehicle may malfunction under the following circumstances:
• The battery of the vehicle key
is discharged. For replacing
the battery, refer to page 81.
• Interference of the radio con- nection from transmission
towers or other equipment
with high transmitting power.
• Shielding of the remote con- trol due to metal objects.
Do not transport the remote control
together with metal objects.
• Interference of the radio con-nection from mobile phones
or other electronic devices in
direct proximity to the remote
control.
Do not transport the remote control
together with electronic devices.
• Interference of radio transmis-sion by a chargi ng process of
mobile devices, for instance
charging of a mobile phone.
• The remote control is in direct proximity of the wireless
charging tray.
Place the remote control down at a
different location.
In the case of interference, the
vehicle can be unlocked and
locked from the outside with the
integrated key, refer to page 83.
Have old batteries dis-
posed of by your Toyota
dealer or take them to a
collection point.
Additional remote controls
Loss of the remote con-
trols
Malfunction
General information
Page 86 of 356

863-1. CONTROLS
after approx. 2 seconds.
The driver should always
carry the remote control on
their person and take it with
them when they leave the
vehicle.
Depending on the location of
the vehicle or the surround-
ing radio wave conditions, the
remote control may not oper-
ate normally. Make sure not to
carry the remote control with
an electronic device, such as
a mobile phone or computer.
Make sure to always take the
remote control with you when
you leave the vehicle, in case
the battery of the remote con-
trol is depleted or the remote
control is malfunctioning.Important pointsSafety notes
WARNING
The vehicle transmits radio waves
whenever the Smart Key System
is used to lock or unlock the
doors, open the trunk lid, or when
the engine switch is operated.
Therefore, this system may affect
the operation of implantable car-
diac pacemakers and implantable
cardioverter defibrillators.
Persons with implantable cardiac
pacemakers or implantable car-
dioverter defibrillato
rs should stay
22 cm or more away from the
vehicle when opening or closing a
door. Also, they should refrain
from leaning on the vehicle or
looking through the windows from
outside when a door is opened or
closed.
Users of any electrical medical
device other than implantable car-
diac pacemakers, cardiac resyn-
chronization therapy-pacemakers
or implantable cardioverter
defibrillators should consult their
doctor or the manufacturer of the
device for information about its
operation under the influence of
radio waves.
Page 87 of 356
873-1. CONTROLS
3
CONTROLS
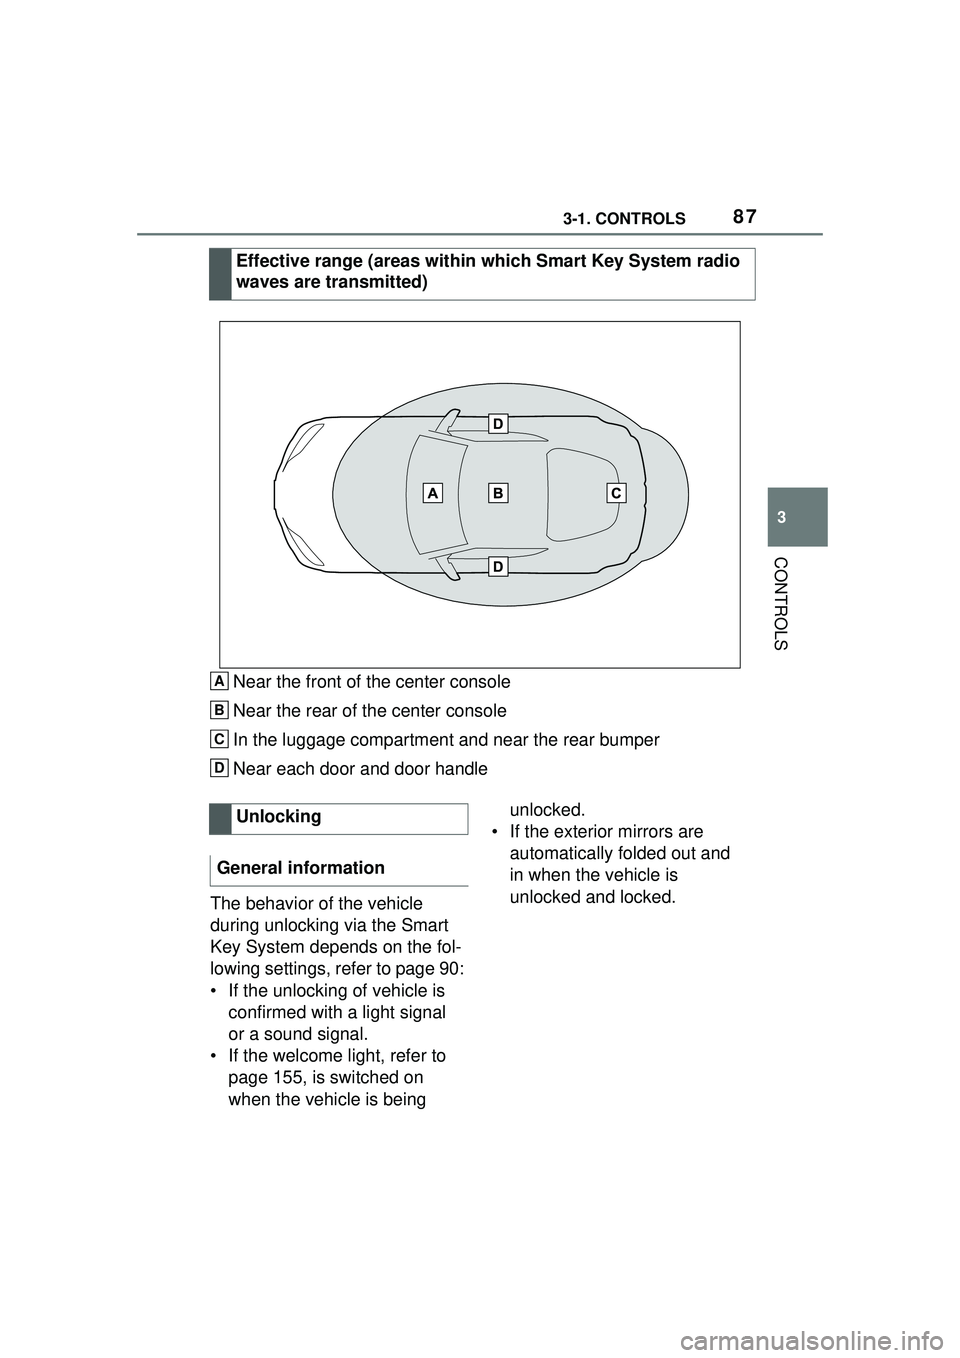
Near the front of the center console
Near the rear of the center console
In the luggage compartment and near the rear bumper
Near each door and door handle
The behavior of the vehicle
during unlocking via the Smart
Key System depends on the fol-
lowing settings, refer to page 90:
• If the unlocking of vehicle is confirmed with a light signal
or a sound signal.
• If the welcome light, refer to page 155, is switched on
when the vehicle is being unlocked.
• If the exterior mirrors are automatically folded out and
in when the vehicle is
unlocked and locked.
Effective range (areas within which Smart Key System radio
waves are transmitted)A
B
C
D
Unlocking
General information
Page 137 of 356
1373-1. CONTROLS
3
CONTROLS
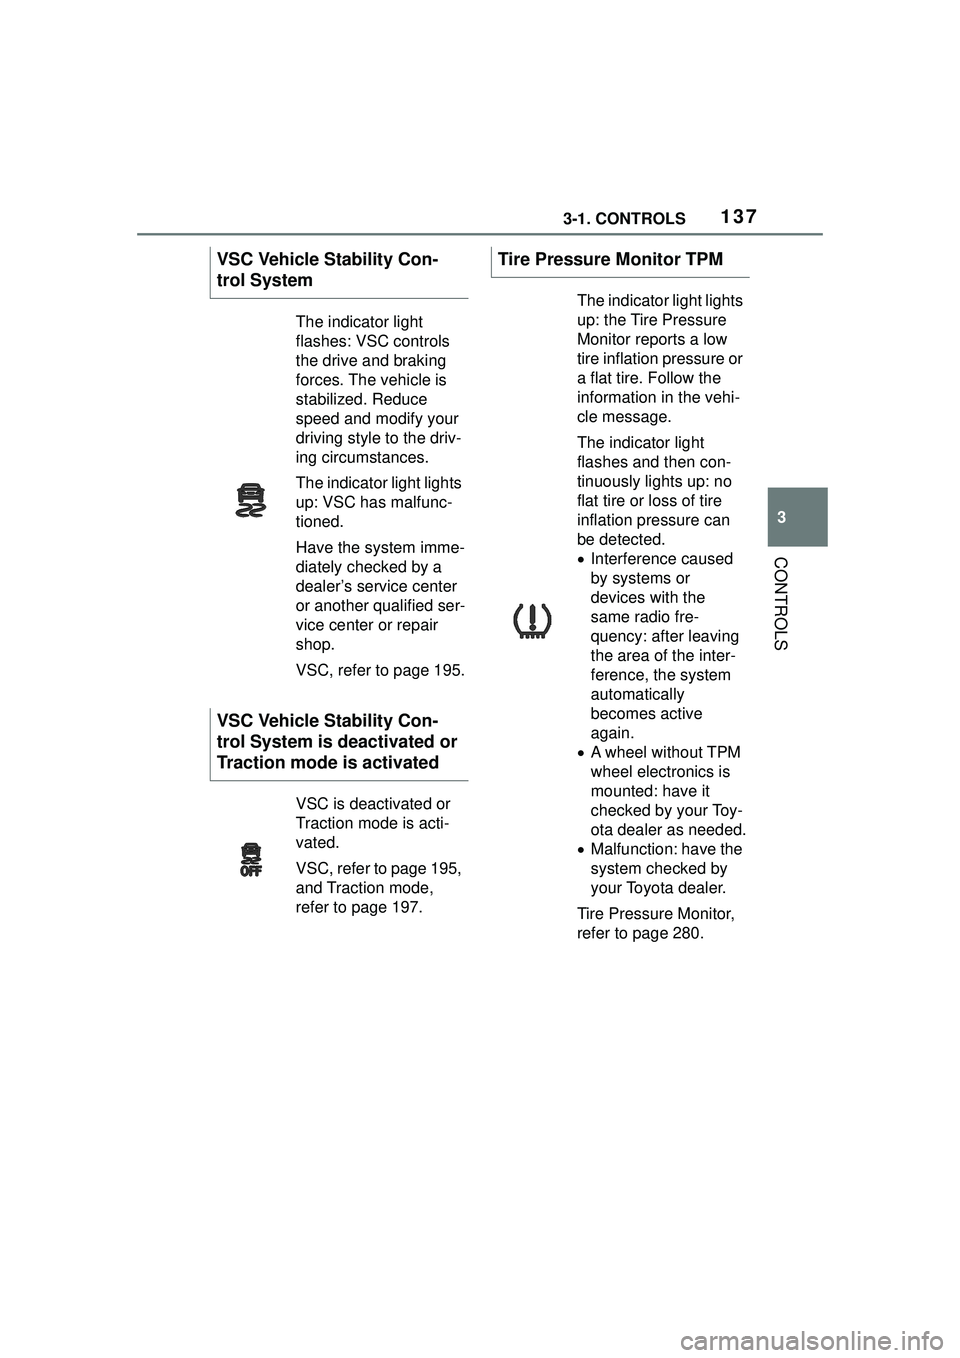
VSC Vehicle Stability Con-
trol System
The indicator light
flashes: VSC controls
the drive and braking
forces. The vehicle is
stabilized. Reduce
speed and modify your
driving style to the driv-
ing circumstances.
The indicator light lights
up: VSC has malfunc-
tioned.
Have the system imme-
diately checked by a
dealer’s service center
or another qualified ser-
vice center or repair
shop.
VSC, refer to page 195.
VSC Vehicle Stability Con-
trol System is deactivated or
Traction mode is activated
VSC is deactivated or
Traction mode is acti-
vated.
VSC, refer to page 195,
and Traction mode,
refer to page 197.
Tire Pressure Monitor TPM
The indicator light lights
up: the Tire Pressure
Monitor reports a low
tire inflation pressure or
a flat tire. Follow the
information in the vehi-
cle message.
The indicator light
flashes and then con-
tinuously lights up: no
flat tire or loss of tire
inflation pressure can
be detected.
Interference caused
by systems or
devices with the
same radio fre-
quency: after leaving
the area of the inter-
ference, the system
automatically
becomes active
again.
A wheel without TPM
wheel electronics is
mounted: have it
checked by your Toy-
ota dealer as needed.
Malfunction: have the
system checked by
your Toyota dealer.
Tire Pressure Monitor,
refer to page 280.
Page 236 of 356
2363-1. CONTROLS
interior mirror simultaneously
for approximately 10 seconds
until the LED flashes green
rapidly. This erases all pro-
gramming of the buttons on
the interior mirror.
3 Press the interior mirror but-
ton to be programmed. The
LED on the interior mirror will
slowly begin flashing orange.
4 Hold the hand-held transmit-
ter for the system to be used
approx. 1 to 12 in/2.5 to 30
cm away from the buttons on
the interior mirror. The
required distance depends
on the hand-held transmitter.
5 Press and hold the button of
the desired function on the
hand-held transmitter.
Canada: if programming with the
hand-held transmitter was inter-
rupted, hold down the interior mirror
button and repeatedly press and
release the hand-held transmitter
button for 2 seconds.
6
The LED lights up green: pro-
gramming completed.
Release the button.
The LED flashes fast: pro-
gramming is not complete.
Press the button on the interior mir-
ror for 2 seconds and release. Per-
form this procedure three times to
complete the programming proce-
dure.
If the integrated universal remote
control remains nonoperational,
continue with the special features for change code wireless systems.
LED does not flash green
after 60 seconds: program-
ming not completed.
Repeat steps 3 to 6.
To program other functions on
other buttons, repeat steps 3 to
5.
If you are unable to operate the
remote-controlled system after
repeated programming, please
check if the system to be con-
trolled features a rolling code
radio system.
Refer to the owner's manual for
the system.
For systems with a rolling code
radio system, the integrated
Universal Remote Control and
the system also have to be syn-
chronized.
Please read the owner's manual
to find out how to synchronize
the system.
Synchronizing is easier with the
aid of a second person.
Synchronizing the universal
remote control with the system:
1 Park the vehicle within range
of the remote-controlled sys-
tem.
2 Program the relevant button
on the interior mirror as
described.
Special feature of the rolling
code wireless system
Page 287 of 356
2875-1. MOBILITY
5
MOBILITY
2Repair the flat tire, e.g., with
a flat tire kit or by changing
the wheel.
Use of sealant, for instance from
the flat tire kit, may damage the
TPM wheel electronics. Have
the electronics replaced at the
next opportunity.
The tire inflation pressure
depends on the tire's tempera-
ture.
Driving or exposure to the sun
will increase the tire's tempera-
ture, thus increasing the tire
inflation pressure.
The tire inflation pressure is
reduced when the tire tempera-
ture falls again.
These circumstances may
cause a warning when tempera-
tures fall very sharply.
Following a temperature-related
warning, the target pressures
are displayed on the Control
Display again after a short dis-
tance.
The system cannot indicate sud-
den serious tire damage caused
by external circumstances. Tires with special approval: the
system will not function correctly
if a reset was not performed, for
example a flat ti
re may be indi-
cated although the tire inflation
pressures are correct.
• A wheel without TPM wheel electronics, such as an emer-
gency wheel, is mounted:
have the wheels checked, if
needed.
• Malfunction: have the system checked.
• Interference caused by sys- tems or devices with the
same radio frequency: after
leaving the area of the inter-
ference, the system automati-
cally becomes active again.
• For tires with special approval: the system was
unable to complete the reset.
System limits
Temperature
Sudden tire pressure lossFailure to perform a reset
Malfunction
Message
The yellow warning
light flashes and is then
illuminated continu-
ously. A vehicle mes-
sage is displayed. It
may not be possible to
identify tire pressure
losses.
Measure