Page 86 of 616

862. Instrument cluster
4RUNNER (U)
*1: These lights turn on when the engine switch is turned to IGNITION ON
mode (vehicles with a smart key system) or the engine switch is turned to
the “ON” position (vehicles without a smart key system) to indi cate that a
system check is being performed. They will turn off after the engine is
started, or after a few seconds. There may be a malfunction in a system if
the lights do not come on, or do not turn off. Have the vehicle inspected by
your Toyota dealer.
*2: This light flashes to indicate a malfunction.
*3: This light flashes rapidly to indicate a malfunction.
*4: This light flashes continuously to indicate a malfunction.
*5: This light illuminates on the multi-information display.
*6: This light flashes or illuminates to indicate a malfunction.
*1
(if equipped)
BSM OFF (Blind Spot
Monitor) indicator
( P. 491)*5
Low engine oil pressure
warning light ( P. 486)
*1
(Flashes)
(if equipped)
RCTA OFF (Rear Cross
Traffic Alert) indicator
(P. 491)
*1
Power steering warning
light ( P. 488)
*1, 6PCS warning light
(P. 490)*1Master warning light
(P. 497)
*5
(Amber)
LDA indicator ( P. 490)
*1Tire pressure warning
light (P. 490)
Open door warning light
(P. 488)
(if equipped)
Unengaged “Park” warn-
ing light ( P. 488)
Low fuel level warning
light (P. 489)*1
(if equipped)
KDSS warning light
(P. 488)
Seat belt reminder light
(P. 489)*1, 2
(if equipped)
Automatic running
boards indicator light
(P. 488)
Page 97 of 616

972. Instrument cluster
2
Instrument cluster
4RUNNER (U)
Items displayed can be switched by pressing or up and down.
■Steering angle
Displays the direction of the front tires.
The tire direction is displayed in 3 stages for both left and right, in accor-
dance with the angle of the tire.
If a battery terminal is disconnected and reconnected, the disp lay may
be disabled temporarily. After driving the vehicle for a while, the display
will be enabled.
■
Tire inflation pressure
Displays inflation pressure of each tire.
The inflation pressure of the spare tire will be displayed. (if equipped)
The settings of some features can be changed by using the meter
control switches.
■Setting procedure
On the setting screen, choose the desired item using or ,
and then press .
• For functions that can be enabled or disabled, the function switches between on and off each time is pressed.
• For functions that allow to select operation contents, display con- tents, etc., the setting screen is displayed.
Select the desired setting by operating or , and then
press .
To stop the selection, press to return to the previous screen.
Vehicle information
Settings display
1
2
Page 102 of 616

1022. Instrument cluster
4RUNNER (U)
WARNING
■Caution for use while driving
For safety, avoid operating the meter control switches while dr iving as much
as possible, and do not look continuously at the multi-informat ion display
while driving. Stop the vehicle and operate the meter control switches. Fail-
ure to do so may cause a steering wheel operation error, resulting in an
unexpected accident.
■ Cautions while setting up the display
As the engine needs to be running during setting up the display , ensure that
the vehicle is parked in a place with adequate ventilation. In a closed area
such as a garage, exhaust gases including harmful carbon monoxi de (CO)
may collect and enter the vehicle. This may lead to death or a serious
health hazard.
■ The multi-information display at low temperatures
Allow the interior of the vehicle to warm up before using the multi-informa-
tion display. At extremely low temperatures, the multi-information display
monitor may respond slowly, and display changes may be delayed.
For example, there is a lag between the driver’s shifting and the new gear
number appearing on the display. This lag could cause the drive r to down-
shift again, causing rapid and excessive engine braking and pos sibly an
accident resulting in death or serious injury.
NOTICE
■ While setting up the display
To prevent battery discharge, ensure that the engine is running while setting
up the display features.
Page 103 of 616
103
Operation of
each component
3
4RUNNER (U) 3-1. Key information
Keys .................................. 104
Side doors ......................... 110
3-2. Opening, closing and locking the doors
Smart key system ............. 119
Automatic running boards ............................. 127
Back door .......................... 130
3-3. Adjusting the seats Front seats ........................ 135
Rear seats......................... 138
Driving position memory ........................... 148
Head restraints.................. 152
3-4. Adjusting the steering wheel and mirrors
Steering wheel .................. 155
Inside rear view mirror ...... 157
Outside rear view mirrors ............................. 159
3-5. Opening, closing the windows and
moon roof
Power windows ................. 161
Power back window .......... 165
Moon roof .......................... 169
Page 151 of 616
1513-3. Adjusting the seats
3
Operation of each component
4RUNNER (U)
WARNING
■Seat adjustment caution
Take care during seat adjustment so that the seat does not stri ke the rear
passenger or squeeze your body against the steering wheel.
Page 155 of 616
155
3
Operation of each component
4RUNNER (U)
3-4. Adjusting the steering wheel and mirrors
Hold the steering wheel and
push the lever down.
Adjust to the ideal position by
moving the steering wheel hori-
zontally and vertically.
After adjustment, pull the lever up
to secure the steering wheel.
To sound the horn, press on or
close to the mark.
Steering wheel
The steering wheel ca n be adjusted to a comfortable position.
Adjustment procedure
1
2
Horn
Page 156 of 616
1563-4. Adjusting the steering wheel and mirrors
4RUNNER (U)
WARNING
■Caution while driving
Do not adjust the steering wheel while driving.
Doing so may cause the driver to mishandle the vehicle and caus e an acci-
dent, resulting in death or serious injury.
■ After adjusting the steering wheel
Make sure that the steering wheel is securely locked.
Otherwise, the steering wheel may move suddenly, possibly causi ng an
accident, and resulting in death or serious injury. Also, the horn may not
sound if the steering wheel is not securely locked.
Page 157 of 616

1573-4. Adjusting the steering wheel and mirrors
3
Operation of each component
4RUNNER (U)
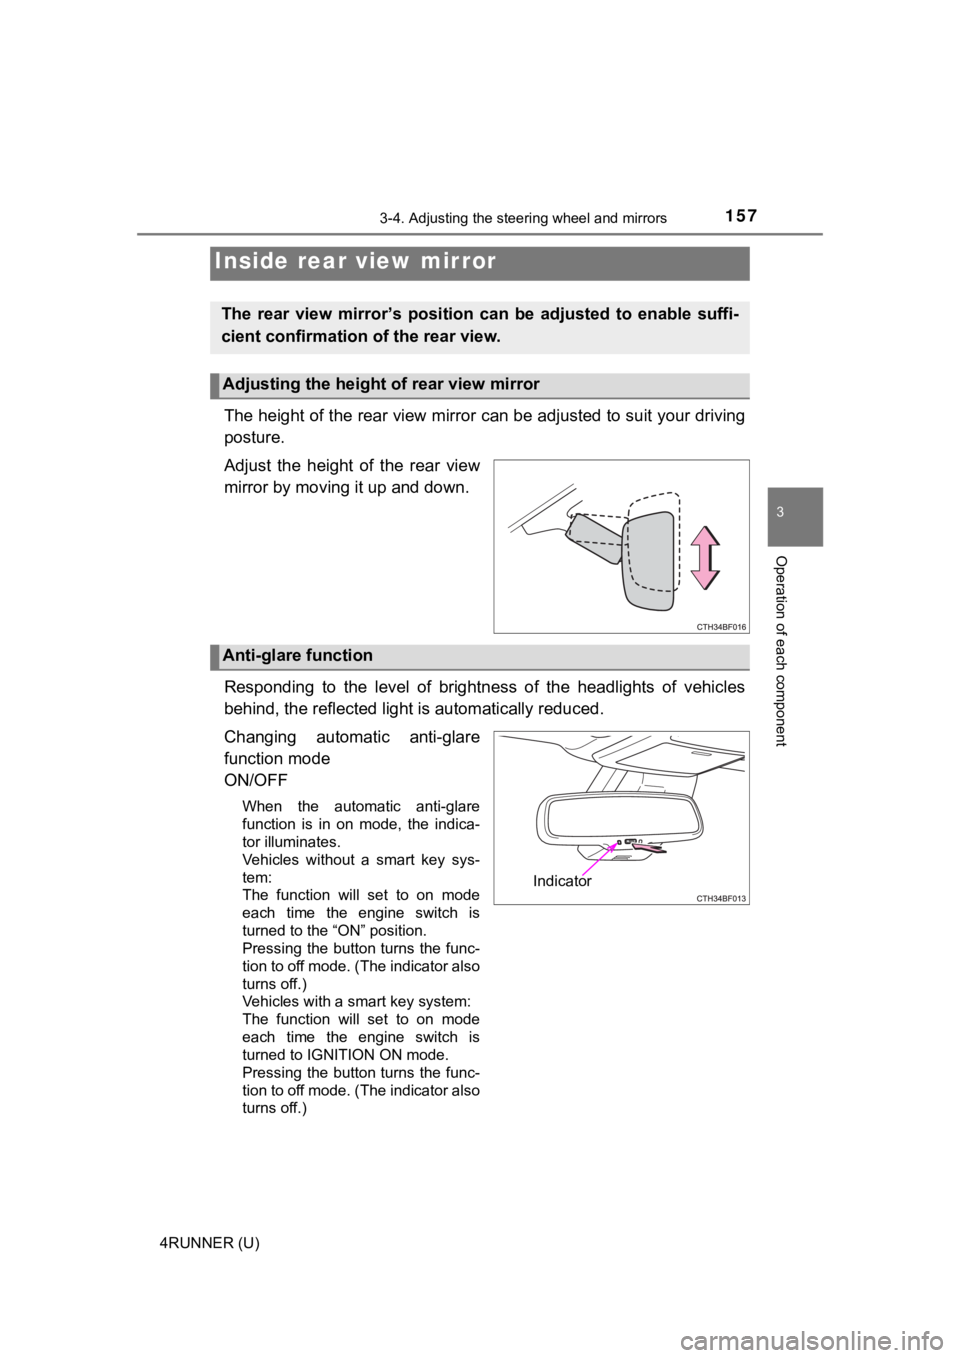
The height of the rear view mirror can be adjusted to suit your driving
posture.
Adjust the height of the rear view
mirror by moving it up and down.
Responding to the level of brightness of the headlights of vehi cles
behind, the reflected light is automatically reduced.
Changing automatic anti-glare
function mode
ON/OFF
When the automatic anti-glare
function is in on mode, the indica-
tor illuminates.
Vehicles without a smart key sys-
tem:
The function will set to on mode
each time the engine switch is
turned to the “ON” position.
Pressing the button turns the func-
tion to off mode. (The indicator also
turns off.)
Vehicles with a smart key system:
The function will set to on mode
each time the engine switch is
turned to IGNITION ON mode.
Pressing the button turns the func-
tion to off mode. (The indicator also
turns off.)
Inside rear view mirror
The rear view mirror’s position ca n be adjusted to enable suffi-
cient confirmation of the rear view.
Adjusting the height of rear view mirror
Anti-glare function
Indicator